What can we say about Chicken Nuggets? Perfectly delightful titbits, enjoyable as finger food or as part of a snack/meal with fries or potato wedges, or even enclosed in a wrap with some salad and sauce. Try this copycat Chicken Nuggets recipe at home, tastes just like store bought.They are tender and juicy on the inside and crispy on the outside. Give it a try!
Photo: Chicken Nuggets Recipe
Bismillah, let’s begin!
Check it out the Chicken Nuggets Recipe and printable version below.
Put your own spin on it. And lemme know how it turns out. Post a photo on Facebook (Recipestable) or on Twitter so I can see how lovely yours turn out.
Happy Cooking!!
Keep remember me in your Dua’s and Stay tuned for new content on the blog 🙂
If you like this post, Please Subscribe to my blog and let me know your feedback by commenting below.. I have lots more recipes to share with you.
Samosas make a great little starter with endless variations on fillings to suit your tastes. So today’ I decided to give a new twist to my samosas and made samosa’s with spicy tikka filing. Yum Yum Truly mouth watering!
Photo:Tikka Samosa Recipe[/caption]
Bismillah, let’s begin!
Check it out the Tikka Samosa Recipe and printable version below.
I have also posted Parcel Samosa Recipe which is another easiest & tastiest version of making samosa. Do check it out as well.
Put your own spin on it. And lemme know how it turns out. Post a photo on Facebook (Recipestable) or on Twitter so I can see how lovely yours turn out.
Happy Cooking!!
If you like this post, Please Subscribe to my blog and let me know your feedback by commenting below.. I have lots more recipes to share with you.
This Pan Fried Fish recipe is melt-in-your-mouth delicious and healthy too! Fish Fillets or Fish steaks are pan-fried, searing in the flavors and omega-3 goodness of the fish.
Photo: Tangy Pan Fried Fish (Clean Eating Version)
It is pretty simple and fast to put together and differs completely from another pan fried fish I have posted earlier. This Tangy Pan Fried Fish relies on warm flavor of ginger, sharp garlic and the grassy heat of green chillies along with a tang from vinegar and chaat masala. I pan fry the fish in virgin olive oil, you need to try fish cooked in it to know how awesome it tastes but canola or other oil will work fine too.
Photo: Tangy Pan Fried Fish (Clean Eating Version)
Check it out the Tangy Pan Fried Fish Recipe and printable version below!!
If you like this Tangy Pan Fried Fish Recipe,Please Subscribe to my blog. I have lots more recipes to share with you. And If you make it then let me know your feedback by commenting below.
Who doesn’t love a hot, fried spring rolls? Making them yourself ensures a maximum freshness of flavour. This chicken vegetable rolls recipe is easy to follow and makes a perfect treat for your toddler.
Photo: Chicken Vegetable Rolls Recipe
Bismillah, let’s begin!
Check it out the Chicken Vegetable Rolls Recipe and printable version below.
Recipe Note’s:
Freeze remaining rolls in an airtight container between sheets of baking paper for up to 1 month.
I have also posted Rainbow Bread Rolls Recipewhich is another easiest & tastiest version of making rolls. Do check it out as well.
Put your own spin on it. And lemme know how it turns out. Post a photo on Facebook (Recipestable) or on Twitter so I can see how lovely yours turn out.
Happy Cooking!!
Keep remember me in your Dua’s and Stay tuned for new content on the blog 🙂
If you like this post, Please Subscribe to my blog and let me know your feedback by commenting below.. I have lots more recipes to share with you.
A very satisfying meal,You can categorize it as an exotic gourmet dish or a very simple homely dish,any which ways its very fulfilling and a treat to your taste buds.
This is my mothers recipe for a simple Mince Curry or aloo keema as us Pakistanis like to call it. It is a really tasty curry especially when you add potatoes and spices like I did! Here’s a classic Aloo Keema – Minced Lamb With PotatoesRecipe that everyone, even the fussy kids, will love. Do try and don’t forget to share your experience with us!!
Photo: Aloo Keema – Minced Lamb With Potatoes
Bismillah, let’s begin!
Check it out the Aloo Keema – Minced Lamb With Potatoes Recipe and printable version below.
Recipe Note’s:
The cooking time will vary if you are using beef or chicken.
Don’t add too much water at the beginning because ground meats leave moisture as they cook.Add water at intervals as per the consistency you want.
At the end of about 20 minutes of cooking you will see that oil separating from and change in color of the ground meat.
I have also postedMinced lamb with Peas which is another easiest & tastiest version of making dinner. Do check it out as well.
Put your own spin on it. And lemme know how it turns out. Post a photo on Facebook (Recipestable) or on Twitter so I can see how lovely yours turn out.
Happy Cooking!!
Keep remember me in your Dua’s and Stay tuned for new content on the blog 🙂
If you like this post, Please Subscribe to my blog and let me know your feedback by commenting below.. I have lots more recipes to share with you.
Who said chicken Parmesan has to be deep-fried and loaded with fatty cheeses to be good? This Clean Eating alternative saves you almost 600 calories. Chicken breasts are breaded with flavorful crumbs, herbs, and Parmesan cheese, then baked for the easiest, quickest chicken dish ever.Serve with a salad and Broccoli or Brown rice for a quick, scrumptious dinner.
Photo: Clean Eating Chicken Parmesan Recipe
Check it out the Clean Eating Chicken Parmesan Recipe here!!
If you like Clean Eating Chicken Parmesan Recipe and make it then let me know your feedback by commenting below.And if you know more innovative ways in which we can utilize this mouth watering Clean Eating Chicken Parmesan, do share with us and we would be glad to give it a try.
There is no limit to stuffed paratha. You can stuff the parathas with almost anything, but I’m sure you have never tried boiled eggs stuffed parathas before.Great recipe for Suhoor!They taste simply superb.
Photo: How to make Egg Paratha
This Egg Paratha recipe is easy, simple and takes less time, especially if you have leftover wheat dough.It’s protein rich, healthy and tasty. You can make it for your kids as a after school snack.
Photo: Egg Paratha Recipe
How to make Egg Paratha
Learn how to make egg Paratha by following the step by step instructions as shown in pictures. The recipe is simple and very easy to follow. You would successfully cook it in first attempt. (InshaAllah)
Bismillah Let’s Begin!
Step 1 : Mix the wheat flour with salt, water and knead to a smooth dough. Keep it aside for 30 minutes.
Step 2: Then make small balls from the dough and keep it aside.
Step 3: Take a mixing bowl, add mashed eggs add salt, pepper, chili powder, coriander and little bit of oil. Mix thoroughly.
Step 3 ~ Egg Paratha
Step 4:Take the dough balls and roll out each ball into a thin disc or a chapati.
Step 4 ~ Egg Paratha
Step 5:In the middle, place the filling mixture on one round chapati and cover with a another round chapati and seal the edges.
Step 5 ~ Egg Paratha
Step 6:Now sprinkle a little dry flour on top, then roll the paratha to a thin round shape chapati. Take care it should not break while rolling it out.
Step 6 ~ Egg Paratha
Step 7:Grease your tava OR griddle with Ghee (clarified butter) and place the paratha over it and when the base turns slightly golden color, apply Ghee (clarified butter) on the top and turn the paratha on the other side.
Step 7 ~ Egg Paratha
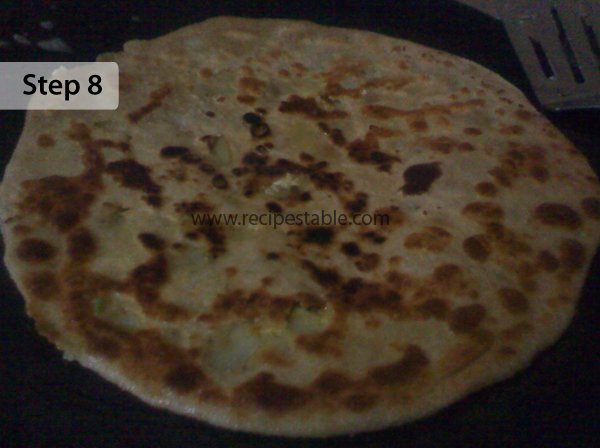
Step 8:Fry these parathas on both sides, pressing gently and keep turning the paratha until it turns golden brown.
Step 8 ~ Egg Paratha
Check it out the Egg Paratha recipe and printable version below:
If you like this Egg Paratha Recipe, Please Subscribe to my blog. I have lots more recipes to share with you. And If you make it then let me know your feedback by commenting below.
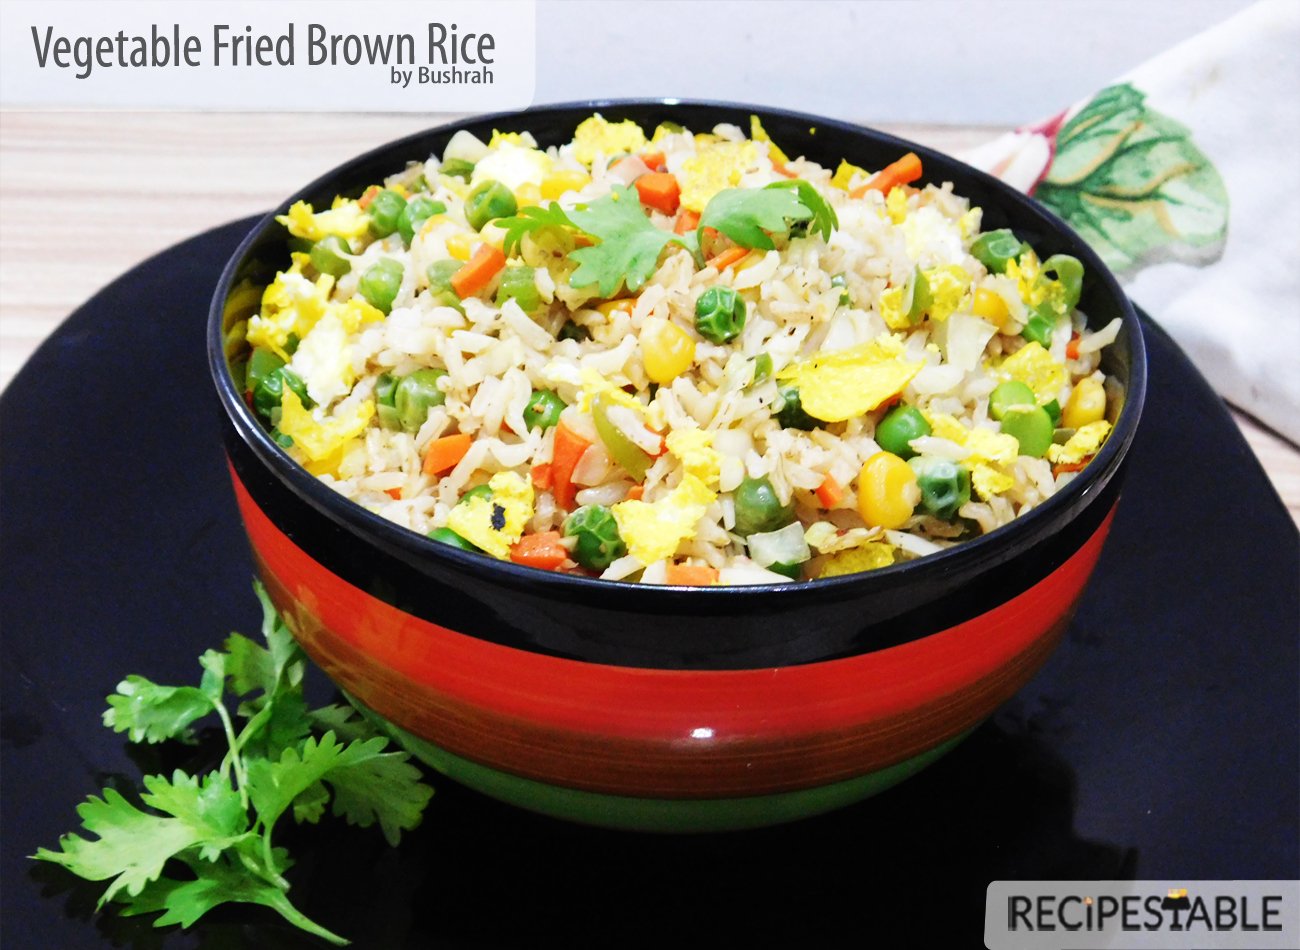
The sky is the limit when it comes to preparing fried rice. Vegetarian Fried Brown Rice is a popular dish to be sure. But the stuff you get in restaurants is a stroke in a bowl. Not very appetizing if you ask me. While this dish will always be a little high on the sodium scale, homemade and clean eating is the only way to go if you just cannot live without it.
Photo: Vegetable Fried Brown Rice (Clean Eating Version)Photo: Vegetable Fried Brown Rice (Clean Eating Version)Photo: Vegetable Fried Brown Rice (Clean Eating Version)
With this Vegetarian Fried Brown Rice Recipe I use brown rice and a little olive oil to make it healthier and six different types of vegetables.The essence of this dish lays in its versatility. This is really a “left-over” dish. So save yourself some work and wait until you have some cold, cooked brown rice and fresh veggies in the fridge that you need to use up. This Vegetarian Fried Brown Rice Recipeis perfect for that occasion. Top with a little Homemade chilli sauce and you’ve got a wonderful dinner!
Photo: Vegetable Fried Brown Rice (Clean Eating Version)
Check it out the Vegetarian Fried Brown Rice Recipe and printable version below!!
If you like this Vegetarian Fried Brown Rice Recipe, Please Subscribe to my blog. I have lots more recipes to share with you. And If you make it then let me know your feedback by commenting below.
Add extra nutrients to your breakfast by stirring in chopped fresh spinach, fresh herbs and shredded cheese into your protein-packed omelet. A carb-cutter’s perfect start for the day. Healthy and Nutritious Omelet made with home grown spinach from My Kitchen Garden.
Photo: Spinach and Cheese Omelet Recipe
Freshly picked home grown spinach leaves turn into mouthwatering Omelet. Yes, this Spinach omelet is better than your omelet. Oragnic Eggs, fresh spinach, and CHEESE!!!! Please no drooling on my photo.
This organic spinach and cheese omelet is full of flavors, it makes a perfect healthy breakfast. Enjoy it!
Photo: Spinach and Cheese Omelette Recipe
Growing your own food isn’t just about saving money, it’s about so much more.I truly believe that as humans we posses an innate desire or need to take a hand-on role in the production of the food we consume. Whether through growing your own, foraging in the wild, hunting or even going to a local farm, knowing exactly where your food comes from provides a deep sense of appreciation for what you eat.
Spinach and Cheese Omelette made with Home grown Spinach
Check it out the Spinach and Cheese Omelette Recipe here!!
Melt butter in a pan over medium heat.Pour the egg mixture it it. As egg mixture starts to cook, gently lift edges of omelet with a spatula and tilt pan so uncooked egg mixture flows underneath.Cook for 2 minute or until almost set.
Sprinkle cheese over the omelet.
Fold omelet in half, allowing cheese to melt.
Slide cooked omelet onto a serving plate. Delicious Spinach and Cheese Omelet is ready to serve.
Notes
Serve with buttered toast and green smoothie.
If you like Spinach and Cheese Omelet Recipe and make it then let me know your feedback by commenting below.And if you know more innovative ways in which we can utilize this mouth watering Spinach and Cheese Omelet, do share with us and we would be glad to give it a try.
Are you looking for a healthy alternative for processed chicken nuggets? This Crunchy Vegetable Nuggets Recipe is sure to be a favorite for your kids.
Photo: Crunchy Vegetable Nuggets Recipe
These Vegetable Nuggets are crispy from the outside and soft from inside comprising of different flavours of many vegetables, cheese and herbs. This is the best way to turn vegetables into tiny kid-friendly nuggets. Making homemade veggie nuggets isn’t hard and beat the store-bought.
Photo: Crunchy Vegetable Nuggets Recipe
You can serve Vegetable Nuggets with tea in the evening or as a starter to your guests. Do try it!! Check it out the Crunchy Vegetable Nuggets Recipe and printable version below!!
Are you looking for a healthy alternative for processed chicken nuggets? This Crunchy Vegetable Nuggets Recipe is sure to be a favorite for your kids.
Prep Time 20 minutesminutes
Cook Time 10 minutesminutes
Total Time 30 minutesminutes
Servings 6
Author Bushrah | Recipestabale
Ingredients
2boiled potatoes
1/2cupgrated carrots
1/4cupsweet corn
1/4cupboiled green peas
1/4cupgreen beanstrimmed and boiled
1/4cupcheesegrated
1/2teaspoonmixed herbsbasil, parsley
2tablespoonchopped coriander leaves
1/2teaspoonblack pepper
Salt To Taste
1egglightly beaten
2tablespoonplain flour
2tablespooncornflour
1/2cupbread crumbs
Oil for deep frying
Instructions
Directions
In a large bowl, combine together the boiled potatoes, grated carrots, beans, green peas and sweet corns.
Season with herbs, salt and pepper.
Add corainder leaves and cheese. Mix until well combined.
Now add add plain flour,cornflour in it.
Shape into nuggets.
Place bread crumbs in a shallow bowl.
Dip vegetable nuggets in egg then coat with bread crumbs.
Heat oil in a deep pan over medium heat.
Deep fry nuggets for 2-3 minutes or until golden brown.
Remove from the oil and absorbent on kitchen paper.Crunchy Vegetable Nuggets are ready to serve. ENJOY!!
Notes
Serving Suggestions: Serve with tomato ketchup or your favorite dipping sauce.
Note: For a healthier version of these nuggets, you can bake them. After you bread them, lay them out on a baking sheet and drizzle with olive oil. They will probably need to bake at 350-400 degrees F. for 15-20 minutes to get nice and crispy.
I have also posted Chicken Nuggets Recipe which is another quick version of making Nuggets. Do check it out as well.
[divider]
If you like this Crunchy Vegetable Nuggets Recipe,Please Subscribe to my blog. I have lots more recipes to share with you. And If you make it then let me know your feedback by commenting below.
Samosa is an important meal of Iftar time. Reshmi Samosa _ Crisp, light and hot and bursting with flavour. This Reshmi Samosa recipe has a special taste of samosa with chicken, mayonnaise, cream and other seasonings. Do try it and make reshmi samosa on next Iftar to feed your friends & family. Goes great with ketchup or imli sauce.
Heat 2 tablespoon oil in a frying pan. Add ginger garlic paste and fry for few minutes.
When the aroma comes out, add chicken strips.
Cover with a lid and cook on low heat for 5-8 minutes or until chicken is no longer pink.
When all water dries up, take it out in a dish.
Allow to cool and shred the cooked chicken.
Now add green chilies, green onion, mint and coriander leaves.
Season with cumin powder, black pepper and salt .
Stir in the mayonnaise and fresh cream.
Place 1 teaspoon of filling onto a samosa sheet ( samosa patti).
Fold samosa sheet around filling into a triangular shape. Seal edges with egg yolks or cold water.
Repeat this method with remaining ingredients.
Heat oil in a deep pan over medium heat.
Fry Reshmi samosa’s in hot oil for 1-2 minutes or until they turn crispy and golden brown.
Drain on absorbent paper. Reshmi Samosa is ready to serve. ENJOY!!
Notes
Serve with imli ki chutney.
If you like Reshmi Samosa Recipe and make it then let me know your feedback by commenting below.And if you know more innovative ways in which we can utilize this mouth watering Reshmi Samosa, do share with us and we would be glad to give it a try.
Achari Aloo Samosa is a special appetizer to give you a combo taste of aloo samosa and achar(pickle).Very easy and quick Achari Aloo Samosa recipe. Don’t wait and must try my Achari Aloo Samosa recipe and don’t forget to share your experience with us!.
Add onion, fresh coriander, mint, green chilies, and lemon juice.
Season with achar masala, dry mango powder, red chili and salt. Mix until well combined.
Place a samosa wrap on a clean, dry surface and put a portion of the potato filling in one corner of the samosa patti and fold into a triangle.
Apply a little water at the edges and seal it.
Repeat with the remaining wraps and stuffing to make more samosas.
Heat the oil in a pan over medium heat.
Deep-fry the samosas in batches till they turn golden brown in colour from all sides.
Drain on absorbent paper. Achari Aloo Samosa is ready to serve. ENJOY!
Notes
Serve with mint chutney.
If you like Achari Aloo Samosa Recipe and make it then let me know your feedback by commenting below.And if you know more innovative ways in which we can utilize this mouth watering Achari Aloo Samosa, do share with us and we would be glad to give it a try.
Pakoras are fried snack found all across Asia and are preferred most during Ramadan. As we all know Ramadan are just around the corner, and it is the time of the year when one can try something new Pakora recipes.
Below is an easy to make, very interesting Potato Pakora Sticks recipe, you can make these pakora sticks with any seasonal veggies of your choice.
Photo: Potato Pakora Sticks Recipe
Check it out the Potato Pakora Sticks Recipe here!!
Bread rolls is one of the favourite Ramadan recipes. There are several recipes of bread rolls different from each other. One recipe is listed below with a distinct taste made with chicken, green chutney and tomato ketchup filling.Thrice coloured Bread Rolls.
Photo: Rainbow Bread Rolls Recipe
All those who are new to cooking and desire to attempt something easy and unproblematic yet lip-smacking then they should go for this Rainbow Bread Rolls recipe. It can be a perfect addition to your Iftar meal and can be less expensive and better tasting than other bread rolls. Rainbow bread rolls take bit more time, but they add a special touch.
Photo: Rainbow Bread Rolls Recipe
Try these scrumptious Rainbow bread rolls, they are great, you can enjoy it as an evening snack or can be prepared on birthday parties, ramadan etc..
Photo: Rainbow Bread Rolls Recipe
Here is the Step by Step Rainbow Bread Rolls Recipe !!
For Rainbow Bread Rolls
6 bread slices
2 eggs, lightly beaten
3 tbsp tomato ketchup
3 tsp butter
3 tsp green chutney
1/2 cup bread crumbs
oil for deep frying
For Chicken Filling
1 cup boiled shredded chicken
2 tbsp mayonnaise
1 tbsp chili garlic sauce
1 tbsp soy sauce
1/2 tsp black pepper
salt to taste
To Make Chicken Filling: In a large bowl, combine together the chicken, mayonnaise, soy sauce, chili garlic, salt and pepper. Set aside.
Step 1 ~ Rainbow Bread Rolls
Step 2
Remove crust from the bread slices.
Step 2 ~ Rainbow Bread Rolls
Step 3
Slightly roll bread slices with a rolling pin.
Step 3 ~ Rainbow Bread Rolls
Step 4
Spread half teaspoon butter on the each bread slices. Place 1 tbsp chicken mixture at the one corner of bread slices.
Step 4 ~ Rainbow Bread Rolls
Step 5
Put 1/2 teaspoon green chutney over it.
Step 5 ~ Rainbow Bread Rolls
Step 6
Apply tomato ketchup on the second corner as shown in the picture.
Step 6 ~ Rainbow Bread Rolls
Step 7
Roll Like Swiss rolls. Carefully seal edges with wet hands. Dip bread rolls in egg.
Step 7 ~ Rainbow Bread Rolls
Step 8
Then coat with breadcrumbs.
Step 8~ Rainbow Bread Rolls
Step 9
Repeat this method with remaining ingredients.
Step 9~ Rainbow Bread Rolls
Step 10
Heat oil in a deep pan over medium heat. Fry bread rolls on each side for 2-3 minutes or until golden.
Step 10 ~ Rainbow Bread Rolls
Step 11
Remove from the oil and drain on an absorbent paper. Rainbow Bread Rolls are ready to serve. ENJOY!!
In a large bowl, combine together the chicken, mayonnaise, soy sauce, chili garlic, salt and pepper. Set aside.
To Make Rainbow Bread Rolls:
Remove crust from the bread slices. Slightly roll bread slices with a rolling pin.
Put 1/2 teaspoon green chutney over it. Spread half teaspoon butter on the each bread slices. Place 1 tbsp chicken mixture at the one corner of bread slices.
Apply tomato ketchup on the second corner as shown in the picture.
Roll Like Swiss rolls. Carefully seal edges with wet hands. Dip bread rolls in egg. Then coat with breadcrumbs.
Repeat this method with remaining ingredients.
Heat oil in a deep pan over medium heat. Fry bread rolls on each side for 2-3 minutes or until golden.
Remove from the oil and drain on an absorbent paper. Rainbow Bread Rolls are ready to serve. ENJOY!!
If you like Rainbow Bread Rolls Recipe and make it then let me know your feedback by commenting below.
When you want to throw together a meal in just a few minutes, this can seem like an impossible task but Bhuna Keema is quick meal but taste just as good as anything you’ve spent hours to create.
So do try my Bhuna Keema recipe and put a hearty smile on your family’s face. Once you have tried it, you will be sure to make it a regular addition to your dining.
Bhuna Keema (Minced Meat With Whole Spices) Recipe
Prep Time 10 minutesminutes
Cook Time 35 minutesminutes
Total Time 45 minutesminutes
Servings 4
Author Bushrah | Recipestable
Ingredients
500gm mincekeema
1/4cupoil
2tspcumin seeds
4onionsgrated
1tbspginger paste
1tbspgarlic paste
1cuptomato puree
1tbspchili powder
1tbspcoriander powder
1tspgaram masala powder
1/4tspturmeric powder
salt to taste
For Garnishing
2-3green chiliesthinly sliced
4tbspfresh coriander leavesfinely chopped
Instructions
Method
Heat oil in a pan over medium heat.
Saute onion in hot oil until translucent.
Now add ginger garlic paste and mince. Cook, uncovered, on high heat for 10 minutes, stirring thrice.
Now stir in the tomato puree, salt, chilli, coriander powder, turmeric powder.
Cook at high heat for 25 minutes or until cooked is thorough.
Transfer into a serving dish.
Sprinkle Garam Masala over it.
Garnish with coriander leaves and green chilies. Bhuna Keema is ready to serve. ENJOY!!
Notes
Serving Suggestions: Serve with boiled rice or roti.
I have also posted Aloo Keema which is another easiest & tastiest version of making dinner. Do check it out as well.
Put your own spin on it. And lemme know how it turns out. Post a photo on Facebook (Recipestable) or on Twitter so I can see how lovely yours turn out.
Happy Cooking!!
Keep remember me in your Dua’s and Stay tuned for new content on the blog 🙂
If you like this post, Please Subscribe to my blog and let me know your feedback by commenting below.. I have lots more recipes to share with you.
A simple fish tikka sandwich that can be made with any white fish fillets. Served on toasted bread slices with boiled egg, lettuce leaves and cabbage coleslaw. YUM YUM YUMMY Treat!!
Photo: Fish Tikka Sandwich Recipe
It was a lazy weekend and I was making plan to go out for Lunch….Italian, Mexican, Chinese were the options that came up…..Ehhh Not really!! Nothing fared in front of the idea of having a Spicy Fish Tikka sandwich…made to perfection at HOME!!
Today, I am so excited to share this Fish Tikka Sandwich Recipe with you guys. I love to eat fish because it’s a key component of a healthy diet and a best source of protein and minerals. And I can get lot of energy with eating fish.
Photo: Fish Tikka Sandwich Recipe
The juicy tender fish marinated in yogurt, lemon juice and tikka spices and the cabbage coleslaw on a crusty bread….a sandwich at its best!!Not only is Fish Tikka delicious the day you make it, if you’re lucky to have some left over the next day, make it into a sandwich.
Photo: Fish Tikka Sandwich Recipe
I love fish sandwiches, but you can always broil or grill the fish if you prefer.A must try recipe!
Check it out the Fish Tikka Sandwich Recipe and printable version below!!
A simple fish tikka sandwich that can be made with any white fish fillets. Served on toasted bread slices with boiled egg, lettuce leaves and cabbage coleslaw. YUM YUM YUMMY!!
Prep Time 20 minutesminutes
Cook Time 15 minutesminutes
Total Time 35 minutesminutes
Servings 6
Author Bushrah | Recipestable
Ingredients
Ingredients
For Fish Tikka
500gm boneless fish fillets
2tablespoonplain yogurt
2tablespoonlemon juice
1teaspoonginger garlic paste
1teaspooncrushed red chili
1/4teaspoongaram masala powder
salt to taste
a pinch of chat masala
few drops of oil
For Fish Tikka Sandwich
fish tikka
12bread slices
1cupcabbage coleslaw
3lettuce leaves
3boiled eggssliced
3teaspoonchili sauce
butter as required
few wooden picks
Instructions
Directions
Wash and clean the fish.
Cut into cubes.Apply salt, red pepper and lemon juice and keep aside.
Now add remaining fish tikka ingredients.
Cover and marinate for at least 20 minutes to blend flavors.
Heat little oil in a grill pan.
Grill fish for 5-8 minutes or until fish flakes easily with a fork.
Toast bread slices with butter.
Divide cabbage coleslaw into three slices.
Cover the second slice of bread and put fish tikka on it.
Cover again and put lettuce leaves and egg slices.
Cover with the 4th slice of bread.
Cut into four triangular pieces.
Secure with wooden picks. Delicious Fish Tikka Sandwich is ready to serve. ENJOY!!
Notes
Serving Suggestions: Serve with creamy veggie salad.
I have also posted Chicken Finger Sandwiches Recipewhich is another easiest & tastiest version of making sandwiches. Do check it out as well.
Put your own spin on it. And lemme know how it turns out. Post a photo on Facebook (Recipestable) or on Twitter so I can see how lovely yours turn out.
Happy Cooking!!
If you like this post, Please Subscribe to my blog and let me know your feedback by commenting below.. I have lots more recipes to share with you.