Tag: Quick and Easy

  • Energy Boost in a Glass: The Delicious Peanut Butter Banana Smoothie Recipe!

    Peanut Butter Banana Smoothie

    The perfect pair _ Bananas, milk, peanut butter, honey, and ice are all you need to make this filling yet refreshing smoothie. Not only will it taste like a treat but you’ll get a good dose of potassium, protein, and fiber to boot. This Peanut Butter Banana Smoothie Recipe might just become your new favorite breakfast recipe!

    Peanut Butter Banana Smoothie Recipe
    Photo: Peanut Butter Banana Smoothie Recipe

    Bismillah, let’s get started!

    Check it out the Peanut Butter Banana Smoothie Recipe and printable version below.

    Peanut Butter Banana Smoothie

    Not only will it taste like a treat but you’ll get a good dose of potassium, protein, and fiber to boot.This Peanut Butter Banana Smoothie Recipe might just become your new favorite breakfast recipe!
    Prep Time 5 minutes
    Total Time 5 minutes
    Servings 4
    Author Bushrah | Recipestable

    Ingredients

    • 4 bananas broken into chunks
    • 2 cups milk
    • 1/2 cup peanut butter
    • 2 tbsp honey or to taste
    • ice cubes as required

    Instructions

    Method

    • Place bananas, milk and peanut butter in a blender jug.
    • Add honey, and ice cubes.
    • Process for 30 seconds or until smooth.
    • Pour into four glasses.
    • Top each glass with a banana slice.Peanut Butter Banana Smoothie is ready to serve.

    Notes

    Recipe Note’s:
    If the smoothies seem too thick, just add another tablespoon or two of milk.
    Serving Suggestions:
    Serve with cookies.

    I have also posted Mango Lime Smoothie Recipe which is another easiest & tastiest version of making Smoothie. Do check it out as well.


    Put your own spin on it. And lemme know how it turns out. Post a photo on Facebook (Recipestable) or  on Twitter so I can see how lovely yours turn out.


    If you like this post, Please Subscribe to my blog and let me know your feedback by commenting below.. I have lots more recipes to share with you.

  • Buffalo Chicken Cheese Balls Recipe

    Buffalo Chicken Cheese Balls

    This modern and Buffalo Chicken Cheese Balls Recipe is full of buffalo chicken, Hot Sauce, mozzarella, and cheddar cheese! Great as an appetizer or light lunch.

    Among all the chicken favorites Chicken Cheese Balls are not only very easy to cook but also flavorful, moist, cheesy and crunchy at the same time. Be it a casual lunch idea for family or a small home party; Buffalo Chicken Cheese Balls are sure to please your family and guests alike. It also makes a delicious lunch box item for the children. Buffalo chicken cheese balls tastes better if served with Garlic Sauce or Tomato ketchup. 

    Buffalo Chicken Cheese Balls Recipe
    Photo: Buffalo Chicken Cheese Balls Recipe

    These Buffalo Chicken Cheese Balls are one of the best foods ever created. They are incredibly easy to make and they taste out of this world delicious! Not to mention my picky eatin.

    I didn’t get a very good shot of the buffalo chicken cheese balls.. I was too eager to get on with it and eat them! Some day I’ll learn to be more patient. (InshaAllah) 🙂

    Buffalo Chicken Cheese Balls Recipe
    Photo: Buffalo Chicken Cheese Balls Recipe

    Here is a really simple, quick yet a better recipe to try this weekend.

    So let us start!! Ready ??

    Check it out the Buffalo Chicken Cheese Balls Recipe and printable version below!!

    Buffalo Chicken Cheese Balls

    This modern and Buffalo Chicken Cheese Balls Recipe is full of buffalo chicken, Hot Sauce, mozzarella, and cheddar cheese! Great as an appetizer or light lunch.
    Prep Time 15 minutes
    Cook Time 5 minutes
    Total Time 20 minutes
    Servings 9
    Author Bushrah | Recipestable

    Ingredients

    • 3 cups boiled & shredded chicken
    • 2 green onions finely chopped
    • 1/2 cup hot pepper sauce
    • 1 cup Cheddar cheese grated
    • 1 cup Mozzarella cheese
    • 1 cup all-purpose flour
    • 3 eggs lightly beaten
    • 1 cup plain bread crumbs
    • oil for frying

    Instructions

    Directions

    • In a large bowl, mix together the chicken, green onions, Cheddar cheese, Mozarella cheese and hot sauce.
    • Now shape the mixture into 1.5 inch balls.
    • Put the flour, eggs and bread crumbs in three separate dishes.
    • Dip and coat each ball in flour, then egg then bread crumbs.
    • Place the breaded chicken balls onto a plate while breading the rest; do not stack.
    • Heat oil in a deep pan over medium heat.
    • Fry the breaded balls in the hot oil for 1-2 minutes or until lightly browned.
    • Remove from the oil and drain on kitchen paper.Buffalo Chicken Cheese Balls are ready to serve. ENJOY!!

    Notes

    Serving Suggestions:
    Serve with Your Favorite Dipping Sauce.


    If you like this Buffalo Chicken Cheese Balls Recipe, Please Subscribe to my blog. I have lots more recipes to share with you. And If you make it then let me know your feedback by commenting below.

  • The BEST Chicken Finger Sandwich Recipe Ever!

    Chicken Finger Sandwiches

    This delicious Chicken Finger Sandwiches recipe is always a favorite sandwich. So easy to make and so delicious. With ketchup and [highlight]herbs seasoning[/highlight] for color and tang, this dressed-up chicken salad is wonderful on bread fingers or served on a lettuce leaf. 

    Finger sandwiches are the easiest and most requested party food. It’s a lovely way to serve sandwiches and a great way to use up leftover chicken, or great to take as lunch as a normal sandwich. Perfect for afternoon tea.

    Chicken Finger Sandwiches Recipe
    Photo: Chicken Finger Sandwiches Recipe

    The weekend was full of foodie experiences. A few days ago, I decided to do a tea party with a my childhood friend and her child’s and made these as one of the finger foods. They were a HUGE hit with her little girls. They are just so dainty and are perfect for little tea parties (or family gathering, birthdays, .. etc..) plus, they are SUPER easy to make.

    The secret of this recipe is fresh herbs. You can make a variety of sandwiches as well, using egg salad, chicken salad, or tuna as layers– just make sure you chop or process the ingredients up enough so it spreads easily.

    Chicken Finger Sandwiches Recipe
    Photo: Chicken Finger Sandwiches Recipe

    Note: These can be served immediately but in my opinion they taste best when refrigerated at least 2 hours– they will easily keep if made a day ahead of time.

    Check it out the Chicken Finger Sandwiches Recipe and printable version below!!

    Chicken Finger Sandwiches

    This delicious Chicken Finger Sandwiches recipe is always a favorite sandwich. It’s a lovely way to serve sandwiches and a great way to use up leftover chicken, or great to take as lunch as a normal sandwich.
    Prep Time 15 minutes
    Cook Time 5 minutes
    Total Time 20 minutes
    Servings 6
    Author Bushrah | Recipestable

    Ingredients

    • 2 cups boiled chicken shredded
    • 1/2 cup mayonnaise
    • 1 tablespoon cream cheese
    • 1 tablespoon tomato ketchup
    • 1 teaspoon fresh herbs chopped
    • 1/2 teaspoon freshly ground black pepper
    • salt according to taste
    • 12 slices white bread crusts removed
    • butter as required

    Instructions

    Directions

    • In a mixing bowl, Combine together the mayonnaise, and cream cheese.
    • Add shredded chicken and mix well.
    • Season with herbs, salt and pepper.
    • Toast bread slices with butter.
    • Spoon the mixture over half the bread slices and cover with the remaining slices.
    • Slice each sandwich into thirds to make three fingers.
    • Transfer into a serving platter. Garnish with lettuce leaves. Chicken Finger Sandwiches are ready to serve. ENJOY!!

    Notes

    Serving Suggestions:
    Serve with French Fries, Ketchup and Coleslaw.


    If you like this Chicken Finger Sandwiches Recipe, Please Subscribe to my blog. I have lots more recipes to share with you. And If you make it then let me know your feedback by commenting below.

  • Chicken Cheese Sandwich Recipe

    Chicken Cheese Sandwich Recipe

    Chicken and Cheese Sandwich

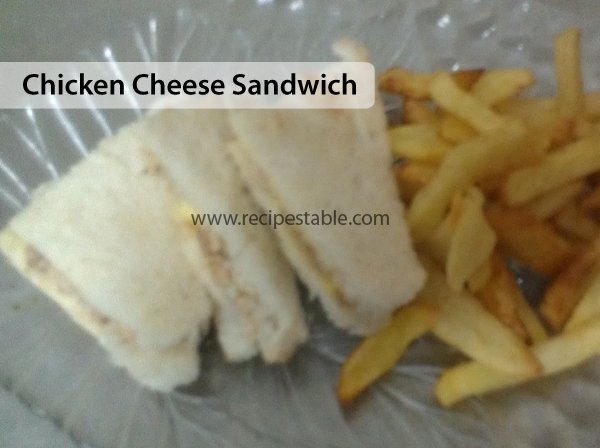
    Chicken Cheese Sandwich is a light meal or snack in slight appetite. Leftover  chicken and cream cheese are turned into a hot and spicy chicken sandwich. When you pack lunch boxes or in game party these super fantastic sandwiches are a great solution of your huger.

    Chicken Cheese Sandwich Recipe
    Photo: Chicken Cheese Sandwich Recipe

    Check it out the Chicken Cheese Sandwich Recipe here!!

    Chicken Cheese Sandwich Recipe

    Course Appetizer, Comfort Food, Snack
    Cuisine American, Indian, Pakistani
    Keyword cheese, cheese sandwiches, Chicken, chicken sandwich, sandwich
    Prep Time 15 minutes
    Cook Time 5 minutes
    Total Time 20 minutes
    Servings 6
    Author Bushra Waheed

    Ingredients

    • 12 bread slices
    • 1 cup boiled & shredded chicken
    • 3 tablespoon Mayonnaise
    • 4 tablespoon shredded Cheese
    • 1 tablespoon cream cheese
    • salt and pepper to taste
    • shredded lettuce as required
    • tomato ketchup as required
    • butter as required

    Instructions

    • In a bowl, mix together the chicken, cheese, cream cheese and mayonnaise.
    • Season with salt and pepper.
    • Add shredded lettuce and mix well.
    • Remove the edges of bread slices.
    • Spread butter and toast on a hot griddle or pan.
    • Spread ketchup on one side of six bread slices.
    • Put some chicken cheese mixture over them. Cover with remaining bread slices and cut into triangles. Secure with wooden pick.
    • Transfer into a serving platter. Garnish with lettuce  leaves.
    • Delicious Chicken Cheese Sandwich is ready to serve. ENJOY!!

    Notes

    Serve with French Fries.

    If you like Chicken Cheese Sandwich Recipe and make it then let me know your feedback by commenting below.And if you know more innovative ways in which we can utilize this mouth watering Chicken Cheese Sandwich , do share with us and we would be glad to give it a try.

  • The Perfect French Toast Recipe: A Breakfast Staple!

    The Perfect French Toast Recipe: A Breakfast Staple!

    French Toast

    I’m a big fan of the weekend. I’m most certainly everyone is as well. I mean what is not to love love about the weekend, whether it be a lazy Sunday morning, or the fact that you simply do not have to rush to get to work, only to repeat that routine Monday through Friday. Weekends are important to me just for the simple fact that I can unwind, figure things out on a slower pace, and cook great food.

    Is there nothing better than French toast for Sunday breakfast? French toast, also known as eggy bread or gypsy toast.

    French Toast Recipe
    Photo: French Toast Recipe

    Today I am sharing a sweet French toast recipe.. Which is my mom’s recipe and I had enjoyed it in my Childhood. This French Toast Recipe uses vanilla extract and cinnamon to bring a richness of flavor. Pick your favorite bread and serve with butter and fresh berries.

    French Toast Recipe
    Photo: French Toast Recipe

    Let’s get started.

    Check it out the French Toast Recipe and printable version below!!

    French Toast

    Prep Time 5 minutes
    Cook Time 10 minutes
    Total Time 15 minutes
    Servings 4
    Author Bushrah | Recipestable

    Ingredients

    • 4 bread slices
    • 2 eggs. lightly beaten
    • 4 tablespoon warm milk
    • 2 tablespoon sugar or to taste
    • 2 teaspoon butter
    • 1/4 teaspoon cinnamon powder
    • few drops of vanilla essence
    • Honey to drizzle
    • banana sliced
    • strawberries sliced

    Instructions

    Directions

    • In a shallow bowl, beat together the egg, milk, sugar, cinnamon powder and vanilla.
    • Keep aside.
    • Heat a lightly oiled griddle over medium-high heat.
    • Dunk each slice of bread in egg mixture, soaking both sides.
    • Place on the hot griddle and cook on both sides until golden.
    • Remove from the heat and take it out in a serving platter.
    • Drizzle with honey.
    • Top with strawberry slices. Delicious French Toast is ready to serve. ENJOY!!

    Recipe Note’s:

    1. When French toast is served as a sweet dish, milk, sugar, vanilla or cinnamon are also commonly added before pan-frying, and then it may be topped with sugar (often powdered sugar), butter, fruit, or syrup.
    2. When it is a savory dish, it is generally fried with a pinch of salt, and can then be served with a sauce such as ketchup or mayonnaise.
    3. Serve with butter and fresh berries.

    If you like French Toast Recipe and make it then let me know your feedback by commenting below.And if you know more innovative ways in which we can utilize this sweet and mouth watering French Toast , do share with us and we would be glad to give it a try.

  • Chatpati Lobia Chaat Recipe (Black Eyed Peas Salad)

    Chatpati Lobia Chaat Recipe (Black Eyed Peas Salad)

    Lobia Chaat

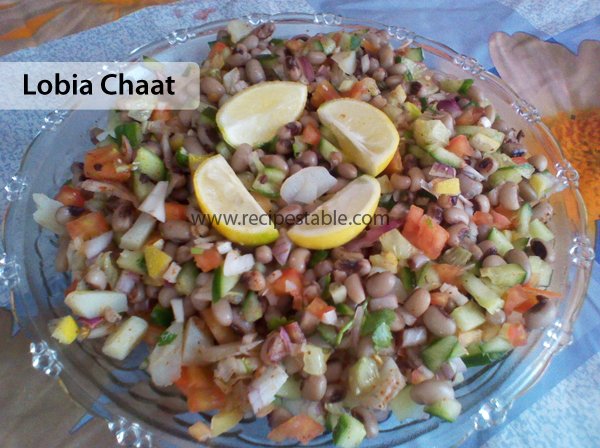
    Beans and spices has a perfect mix in shape of chaat.A relatively different Lobia chaat recipe to enjoy. Give it a try and make something different and healthy for your family.

    Lobia Chaat Recipe
    Photo: Lobia Chaat Recipe

    Check it out the Lobia Chaat Recipe here!!

    Lobia Chaat Recipe

    Course Salad, Side Dish, Snack
    Cuisine Indian, Pakistani
    Keyword black eyed peas, lobia, lobia chaat, salad, spicy
    Prep Time 10 minutes
    Total Time 10 minutes
    Servings 4
    Author Bushra Waheed

    Ingredients

    • 2 cups boiled lobia blacked eye peas
    • 1 small onion finely copped
    • 1 to mato chopped
    • 1 cucumber chopped
    • 1/2 cup tamarind pulp without sugar
    • 1 tablespoon lemon juice
    • 1 teaspoon mint chutney optional
    • 1 teaspoon chaat masala powder
    • 1 teaspoon roasted cumin powder

    For Garnishing:

    • few coriander leaves
    • lemon wedges

    Instructions

    • Place lobia (black eyed peas) in a large mixing bowl.
    • Add onion, tomato, cucumber. Stir in the lemon juice, tamarind pulp and mint chutney.
    • Season with chaat masala and cumin seeds. Mix well.
    • Transfer into a serving platter.
    • Garnish with few coriander leaves and lemon wedges. Lobia Chaat is ready to serve.

    Notes

    Serve with imli ki chutney.

    If you like Lobia Chaat Recipe and make it then let me know your feedback by commenting below.And if you know more innovative ways in which we can utilize this mouth watering Lobia Chaat, do share with us and we would be glad to give it a try.

  • Lahori Nan Khatai Recipe

    Lahori Nan Khatai Recipe

    Lahori Nan Khatai

    Nan Khatai is an Persian /Indo-Pakistani butter cookie that is made with ghee(clarified butter), sugar, all-purpose flour, gram flour, cardamom, and roasted almonds and pistachios. Do try it.

    Lahori Nan Khatai Recipe
    Photo: Lahori Nan Khatai Recipe

    Check it out the  Lahori Nan Khatai Recipe here!!

    Lahori Nan Khatai Recipe

    Course Comfort Food, Dessert, Snack
    Cuisine American, Pakistani
    Keyword Baking, cookies, sweet
    Prep Time 20 minutes
    Cook Time 15 minutes
    Total Time 35 minutes
    Servings 12
    Author Bushra Waheed

    Ingredients

    • 1 cup flour
    • 1 cup ghee
    • 1/3 cup caster sugar
    • 2 ounce gram flour
    • 2 teaspoon baking powder
    • 1 teaspoon cardamom powder
    • 1/2 teaspoon baking soda
    • 2 egg yolks light beaten
    • Roasted almonds and pistachios as required

    Instructions

    • Preheat oven at 190 degree C.
    • Pour ghee in a large bowl.
    • Add sugar and cardamom powder.Beat until light and fluffy.
    • Now take a separate bowl, sift flour, baking powder,gram flour and baking soda.
    • Now fold into ghee mixture.
    • Stir in the roasted almonds and pistachios.
    • Now roll out the dough, cut into rounds with a cookie cutter.
    • Put nan khatai on a greased baking tray.
    • Brush them with egg yolks.
    • Place baking tray in the preheated oven for 12-15 minutes or until done.
    • Remove from the oven and let it cool completely. Lahori Nan Khatai is ready to serve.

    Notes

    Serve with Tea.


    If you like Lahori Nan Khatai Recipe and make it then let me know your feedback by commenting below.And if you know more innovative ways in which we can utilize this sweet and mouth watering Lahori Nan Khatai, do share with us and we would be glad to give it a try.

  • Suji Halwa with Khoya Recipe

    Suji Halwa with Khoya Recipe

    Suji Halwa with Khoya

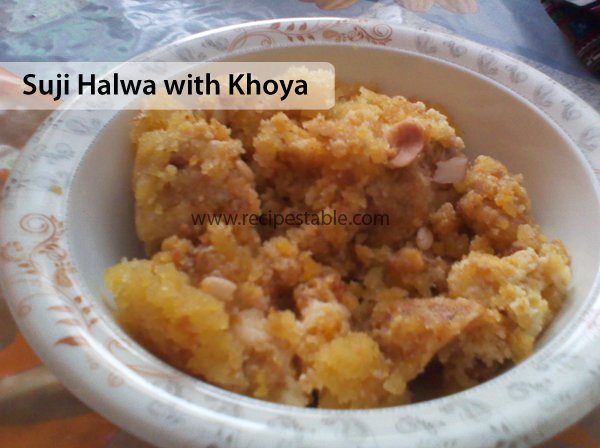
    You don’t need to wait for an occasion to savor the sweet and creamy Suji halwa with Khoya as it can be prepared at home in just few minutes and does not require any expert cooking skills. This Suji Halwa with Khoya Recipe takes its taste and texture to next level as use of khoya and generous amount of dry fruits provide nice creamy texture while ghee and cardamom provides irresistible aroma.

    If you don’t have khoya, then don’t worry, read tips and variations given below to make equally tempting Suji halwa with khoya (mawa). Do try it!!

    Suji Halwa with Khoya Recipe
    Photo: Suji Halwa with Khoya Recipe

    Check it out the Suji Halwa with Khoya Recipe here!!

    Suji Halwa with Khoya Recipe

    Course Dessert
    Cuisine Indian, Pakistani
    Keyword dessert, eid desserts, halwa, Iftar Recipes, khoya, Quick and Easy, Ramadan, sweet
    Prep Time 10 minutes
    Cook Time 20 minutes
    Total Time 30 minutes
    Servings 6
    Author Bushra Waheed

    Ingredients

    • 1 cup semolina suji
    • 1 cup sugar
    • 1/2 cup clarified butter or ghee
    • 2 green cardamoms
    • 2 cups water
    • 1 cup khoya

    For Garnishing:

    • 2 tablespoon chopped peanuts
    • 2 tablespoon chopped almonds
    • 2 tablespoon chopped pistachios

    Instructions

    • Heat ghee in a pan over medium heat.
    • Add cardamom and semolina (suji) and roast it well.
    • Add sugar and water. Stir continuously till sugar is dissolved.
    • Leave it on low flame for 10 minutes to cook perfectly.
    • When ghee comes on top add khoya.Stir well.
    • Dish it out. Garnish with nuts. Suji Halwa with Khoya is ready to eat. ENJOY!!

    Notes

    1. Replace khoya with 4 tablespoons of dry milk powder and increase amount of sugar.
    2. It can be served as a dessert or as a sweet accompaniment to main dish.
    3. Serve it along with puri’s to entertain the guests.


    If you like Suji Halwa with Khoya Recipe and make it then let me know your feedback by commenting below.And if you know more innovative ways in which we can utilize this sweet and mouth watering Suji Halwa with Khoya, do share with us and we would be glad to give it a try.

  • Chips Pakora Recipe (Tasty and Tempting Snack for a Rainy Day)

    Chips Pakora Recipe (Tasty and Tempting Snack for a Rainy Day)

    Chips Pakora

    Nothing feels better than sitting by the window on a cold rainy day, munching on piping hot pakoras and sipping on Tea.Try this Chips Pakora Recipe and enjoy  the chips and Pakora’s  together.

    Chips Pakora Recipe
    Photo: Chips Pakora Recipe

    Crispy Chips Pakora looks soo good and it can impress every one if fried perfectly.

    pakora chips
    Photo: Chips Pakora Recipe

     Check it out the Chips Pakora Recipe here!!

    Chips Pakora Recipe

    Course Appetizer, Snack
    Cuisine Indian, Pakistani
    Keyword 30 minutes meals, chips, fried food, kids friendly, pakora, potato, Ramadan, snack
    Prep Time 20 minutes
    Cook Time 15 minutes
    Total Time 35 minutes
    Servings 6
    Author Bushra Waheed

    Ingredients

    • 500 gm potatoes peeled
    • 2 tablespoon lemon juice
    • 1 teaspoon red pepper
    • 1 teaspoon cumin powder zeera powder
    • 1 teaspoon coriander powder
    • 1 teaspoon chaat masala powder
    • salt to taste
    • 1/2 cup chickpea flour besan
    • oil for deep frying

    Instructions

    • Cut thin slices of potatoes with a peeler.
    • In a large bowl, mix together the chickpea flour, red pepper, chaat masala, cumin , coriander powder, salt and lemon juice.
    • Now add potato slices and a litlle water.
    • Toss to coat evenly.
    • Heat oil in a deep pan over medium heat.
    • Now fry chips for 10 minutes or until crispy and golden brown.
    • Remove from the oil and drain on kitchen paper.Chips Pakora is ready to serve. ENJOY

    Notes

    Serve with your favorite dipping sauce.

    If you like Chips Pakora recipe and make it then let me know your feedback by commenting below.And if you know more innovative ways in which we can utilize this crispy and mouth watering Chips Pakora , do share with us and we would be glad to give it a try.

  • The Best French Bread Pizza Recipe

    French Bread Pizza

    Today I’m sharing one of  super simple, taste bud loving My Favorite French Bread Pizza recipe. I like it more than regular pizza. It’s quick, customizable and there is just something about sinking your teeth into that buttery, garlicky crust and hearing that crunch. So priceless. Do try it!!

    French Bread Pizza Recipe
    Photo: French Bread Pizza Recipe

    Bismillah Let’s get started.

    Check it out the French Bread Pizza Recipe and printable version below.

    French Bread Pizza recipe

    Today I’m sharing one of super simple, taste bud loving My Favorite French Bread Pizza recipe. I like it more than regular pizza. So Priceless. Do try it!
    Prep Time 5 minutes
    Cook Time 15 minutes
    Total Time 20 minutes
    Servings 4
    Author Bushrah | Recipestable

    Ingredients

    • 1 loaf French bread about 18 inches long
    • 2 tablespoon butter melted
    • 1 cup leftover chicken tikka shredded
    • 1/2 cup pizza sauce
    • 1 capsicum cubed
    • 1 to mato seeds removed and cubed
    • 1 small onion cubed
    • 1/2 cup Mozzarella cheese grated
    • 1/2 cup Parmesan cheese grated
    • 1/2 teaspoon dried oregano
    • a pinch of garlic salt
    • a pinch of red pepper flakes

    Instructions

    Method

    • Preheat oven to 180 Degree C.
    • Slice the French bread right down the middle.
    • Flatten out each piece by pressing it firmly with your hands.
    • In a small bowl, combine together the butter, garlic powder, Parmesan cheese.
    • Spread butter mixture evenly on both loaves of bread.
    • Now Place bread on a baking tray and bake for 5 minutes or until lightly toasted.
    • Remove from the oven and spread pizza sauce onto the french bread.
    • Top with onion, chicken, tomato, capsicum and cheese.
    • Sprinkle dried oregano over them.
    • Bake for another 5 minutes or until cheese is melted.
    • Cut into serving slices. Delicious French Bread Pizza is ready to serve.

    Notes

    Serving Suggestions:
    Serve with Chili Garlic Sauce.

    I have also posted Easy Naan Pizza Recipe which is another easiest & tastiest version of making Pizza. Do check it out as well.


    Put your own spin on it. And lemme know how it turns out. Post a photo on Facebook (Recipestable) or  on Twitter so I can see how lovely yours turn out.


    Happy Cooking!!

    If you like this post, Please Subscribe to my blog and let me know your feedback by commenting below.. I have lots more recipes to share with you.


  • Russian Macaroni Salad Recipe

    Russian Macaroni Salad Recipe

    Russian Macaroni Salad

    Russian Macaroni Salad recipe
    Russian Macaroni Salad

    This is a Russian-inspired salad which is an all-time favorite of ours. Its quick and simple to make and most often you will find all the ingredients at home.

    Russian Macaroni Salad recipe
    Russian Macaroni Salad

    Russian Macaroni Salad have become very popular in Pakistan, being even served as starter’s. This simple Macaroni Salad is perfectly creamy, tangy and full of flavor, with a little spicy-sweet kick, where mayonnaise and cream envelopes macaroni, potatoes, peas, carrot, cucumber and eggs together.

    Russian Macaroni Salad recipe
    Russian Macaroni Salad

    My whole family likes it and eat it happily when I make it. It is very expensive to bought from market but I make it at home in only 200 Rs(6 serves) whereas in market a single plate is of Rs 150 rupees. It’s healthy, nutritious and very refreshing.  It Can also eaten served as a complete meal itself.

    Check it out the Russian Macaroni Salad Recipe and printable version below!!

    Russian Macaroni Salad

    A perfectly creamy, tangy and full of flavor, macaroni salad with a little spicy-sweet kick. Do try this Russian Macaroni Salad Recipe, You’ll love it.
    Prep Time 20 minutes
    Cook Time 15 minutes
    Total Time 35 minutes
    Servings 8
    Author Bushrah | Recipestable

    Ingredients

    For Macaroni Salad

    • 1 cup boiled macaroni
    • 1 cup boneless chicken pieces cooked
    • 1 cup boiled potatoes cubed
    • 1/2 cup green peas matar, boiled
    • 1/2 cup boiled carrot cubed
    • 2 boiled eggs cubed
    • 1 cucumber cubed
    • 1 apple peeled and cubed

    For Salad Dressing

    • 1/2 cup mayonnaise
    • 4 tablespoon fresh cream
    • a pinch of salt
    • 2 tablespoon castor sugar
    • 1/2 teaspoon freshly ground black pepper

    Instructions

    Directions

    • In a mixing bowl, stir together the mayonnaise, fresh cream, salt , pepper and sugar.
    • Now add potato, chicken, carrot, macaroni, green peas, egg, cucumber and apple. Stir until well combined.
    • Adjust the seasoning.
    • Transfer into a serving dish.
    • Garnish with salad leaves and egg slices.Russian Macaroni Salad is ready to serve.

    Notes

    Serving Suggestions:
    Serve with any BBQ meal.

    If you like this Russian Macaroni Salad Recipe, Please Subscribe to my blog. I have lots more recipes to share with you. And If you make it then let me know your feedback by commenting below.

    Pin It For Later

    Russian Macaroni Salad Pinterest
    Pin it For Later
  • Garbanzo Beans Chaat Recipe

    Garbanzo Beans Chaat ( Clean Eating Version)

    Garbanzo Beans or Chickpeas are a nutrient-rich food, providing high amounts of protein, fiber, iron, potassium, manganese, copper, zinc, phosphorus, magnesium, vitamin B-6 and thiamine, making them a healthy addition to any diet.

    They may also help you lose weight, especially if you eat them instead of higher-fat sources of protein like beef, or chicken. They are high in dietary fibre which means it’s harder for the body to digest them, in turn making their glyceminc index low.

    Garbanzo Beans Chaat (Black chickpeas) is one of Pakistani’s favorite food made with chickpeas and other spices. Everyone will like it and ask for more when you serve.

    Garbanzo Beans Chaat Recipe
    Photo: Garbanzo Beans Chaat Recipe

    I am beginning a journey of Weight Watchers friendly cooking to keep me and my family active and healthy. Garbanzo Beans or Black chickpeas(kala chanas) are good for weight loss. The recipe I am sharing with you today is an all year, all occasion kind of garbanzo bean chaat (kala chana chaat), that works as a great salad, too.

    Garbanzo Beans Chaat Recipe
    Photo: Garbanzo Beans Chaat Recipe

    There are so many wonderful textures and flavors in every bite you can’t help but like it. It’s filling, satisfying, and healthy. This salad or chaat looks scrumptious!

    Bismillah Let’s get started.

    Check it out the Garbanzo Beans Chaat Recipe and printable version below

    Garbanzo Beans Chaat Recipe

    There are so many wonderful textures and flavors in every bite you can’t help but like it. It’s filling, satisfying, and healthy. This salad or chaat looks scrumptious! Do try it!
    Prep Time 10 minutes
    Total Time 10 minutes
    Servings 4
    Author Bushrah | Recipestable

    Ingredients

    • 2 cups boiled black chickpeas or Garbanzo Beans kala chana
    • 1 potato boiled and cubed
    • 4 lettuce leaves chopped
    • 1 small onion finely chopped
    • 1 to mato finely chopped
    • 1/2 cup tamarind chutney
    • 2 tablespoon lemon juice
    • 1 teaspoon chat masala powder
    • 1/2 teaspoon cumin seeds roasted
    • 2 tablespoon mint chutney

    For Serving

    • papri
    • lemon wedge

    Instructions

    Method

    • Put Garbanzo Beans (kala chana) in a large mixing bowl.
    • Add lemon juice, potatoes, onion and tomatoes.
    • Season with chaat masala powder and cumin seeds.
    • Now stir in the tamarind chutney and mint chutney.Mix until well combined.
    • Transfer into a serving bowl.
    • Top with lettuce leaves.
    • Add papri and Garnish with lemon wedges. Garbanzo Beans Chaat is ready to serve. Kala Chana Chaat is ready to serve.

    Notes

    Serving Suggestions:
    Serve with mint chutney.

     Recipe Note’s

    1. For weightloss purpose, please skip the papri and potatoes as it will increase the calorie and carb rate.
    2. For weightloss, add lots of veggies ( like cucumber, carrot, celery etc)
    3. Actually I add (papri) for my lil brother. I ate this chaat without papri and potato and taste was scrumptious.It was so filling, satisfying and healthy.

    I have also posted Special Chana Chaat Recipe which is another easiest & tastiest version of making Chana Chaat. Do check it out as well.


    Put your own spin on it. And lemme know how it turns out. Post a photo on Facebook (Recipestable) or  on Twitter so I can see how lovely yours turn out.


    Happy Cooking!!

    If you like this post, Please Subscribe to my blog and let me know your feedback by commenting below.. I have lots more recipes to share with you.

  • Quick & Easy Gajar Halwa:

    Instant Gajar Halwa (Carrot Halwa)

    Gajar Halwa is a must have dessert in winter season. Everyone love to eat it. It is unbelievable how the combination of carrots, milk, sugar can end up tasting so divine, khoya is added to give and extra luscious flavor to this halwa.

    Instant Gajar Halwa Recipe
    Photo: Instant Gajar Halwa Recipe

    It’ very simple to make and my family(especially my lil bro)loves it. This Instant gajar halwa recipe is very good especially for those who want to make scrumptious dessert in hurry.

    Instant Gajar Halwa Recipe
    Photo: Instant Gajar Halwa Recipe

    This Instant Gajar Halwa recipe is also good for people of those areas where you cant find khoya (ricotta cheese) immediately. Must try my  recipe, hope you will enjoy and do let me know how it was.

    Check it out the  Instant Gajar Halwa Recipe here!!

    [divider]

    [one_fourth]Prep Time:10 minutes[/one_fourth] [one_fourth]Cook Time:30 minutes[/one_fourth] [one_fourth]Servings: 6[/one_fourth] [one_fourth_last]Difficulty Level: Very Easy[/one_fourth_last]

    [divider]

    [tabs type=”horizontal”] [tabs_head] [tab_title]Ingredients[/tab_title] [tab_title]Nutrition[/tab_title] [/tabs_head] [tab]

    • 2 kg carrots (gajar), peeled and grated
    • 1/2 kg sugar
    • 1 cup desi ghee or clarified butter
    • 1 cup dry milk powder
    • 1/2 cup khoya (ricotta cheese), grated
    • 4 cardamom pods

    For Garnishing

    • 1 boiled egg, cut into slices
    • 4 tablespoon chopped nuts ( pistachio, walnuts or almonds)
    • silver paper.

    [/tab] [tab]Yield: 6 servings

    Nutritional information is not yet available. [/tab] [/tabs]

    Directions:
    [tabs type=”horizontal”] [tabs_head] [tab_title]Step by Step Method[/tab_title] [tab_title]Recipe Note’s[/tab_title][tab_title]Serving Suggestions[/tab_title][/tabs_head] [tab]

    Step 1

    Heat oil in a large skillet or wok over medium heat.

    Step 2

    Add cardamom pods in it. When they crackle, add the grated carrots (gajar) and cook on a medium heat so that the water is evaporated and the color is slightly changed.

    Step 3

    Add sugar and keep stirring once in a while.

    Step 4

    Cook for about 5 more minutes until ghee comes on top.

    Step 5

    Now add dry milk powder and stir well.

    Step 6

    Sprinkle khoya over it.

    Step 7

    Turn the heat off. and dish it out.

    Step 8

    Granish with nuts, silver paper and boiled egg.Instant Gajar Halwa is ready to serve. ENJOY!!

    [/tab] [tab]

    • If you don’t have khoya (ricotta cheese) increase the amount of dry milk powder , it will eventually turn in to khoya or you can also use evaporated milk.

    [/tab][tab]

    • Serve hot as a dessert after any meal or you can enjoy as a tea time snack with kashmiri chai.

    [/tab] [/tabs]
    If you like Instant Gajar Halwa Recipe and make it then let me know your feedback by commenting below.And if you know more innovative ways in which we can utilize this sweet and mouth watering Instant Gajar Halwa , do share with us and we would be glad to give it a try.

  • Aloo Shimla Mirch Recipe

    Aloo Shimla Mirch

    Aloo Shimla Mirch is a tasty vegetarian dish, cooked with capsicum, potato, onion and other ingredients. Try out this very healthy for your family and kids.

    Aloo Shimla Mirch Recipe
    Photo: Aloo Shimla Mirch Recipe

    Check it out the Aloo Shimla Mirch Recipe here!!

    [divider]

    [one_fourth]Prep Time:10 minutes[/one_fourth] [one_fourth]Cook Time:25 minutes[/one_fourth] [one_fourth]Servings:4 [/one_fourth] [one_fourth_last]Difficulty Level: Easy[/one_fourth_last]

    [divider]

    [tabs type=”horizontal”] [tabs_head] [tab_title]Ingredients[/tab_title] [tab_title]Nutrition[/tab_title] [/tabs_head] [tab]

    • 4 potatoes, cubed
    • 2 green bell peppers (shimla mirch), cubed
    • 2 onions, cubed
    • 1/4 cup fried onion paste
    • 2 tomatoes, chopped
    • 4 tablespoon oil or ghee
    • 1 teaspoon ginger garlic paste
    • 1 teaspoon dry red chili powder
    • 1/2 teaspoon cumin powder
    • 1/2 teaspoon coriander powder
    • 1/8 teaspoon turmeric powder
    • 1/4 teaspoon garam masala powder
    • Salt to taste

    [/tab] [tab]Yield: 4 servings

    Nutritional information is not yet available. [/tab] [/tabs]

    Directions:
    [tabs type=”horizontal”] [tabs_head] [tab_title]Step by Step Method[/tab_title] [tab_title]Recipe Note’s[/tab_title][tab_title]Serving Suggestions[/tab_title][/tabs_head] [tab]

    Step 1

    Heat the oil in a wok or karahi over medium heat.

    Step 2

    Once hot add onion paste and ginger garlic paste.

    Step 3

    Cook for 3-4 minutes or until you get the nice fragrant from them.

    Step 4

    Then add tomatoes. And sauté them till they are translucent and soft. It will take about 15 minutes.

    Step 5

    Now add red chili, coriander powder, cumin powder, turmeric powder and salt.

    Step 6

    Cook for 2-3 minutes then add potatoes.

    Step 7

    Add 1 cup water and cook for 10 minutes or until potatoes are tender.

    Step 8

    Add green pepper (shimla mirch) and onion. Mix well.

    Step 9

    Now Cover the pan and cook it till potatoes are done.

    Step 10

    It will take about 10 minutes and all the water will absorbed.

    Step 11

    Sprinkle garam masala over it and stir well. Aloo Shimla Mirch is ready to serve.

    [/tab] [tab]

    • Keep the size of onion, potato and green bell pepper same while cutting.

    [/tab][tab]

    • Serve with chapati or paratha.

    [/tab] [/tabs]
    If you like Aloo Shimla Mirch Recipe and make it then let me know your feedback by commenting below.And if you know more innovative ways in which we can utilize this mouth watering Aloo Shimla Mirch, do share with us and we would be glad to give it a try.

  • Recipe: Salmon Fish Fry (Clean Eating Version)

     Salmon Fish Fry (Clean Eating Version)

    Ah, a good fish fry.  Who doesn’t love that?  That crunch of flaming-hot fish fillets straight from the fryer.

    Clean Eating Salmon Fish Fry
    Photo: Clean Eating Salmon Fish Fry

    I love fried fishWhile it make my tummy rumble in ecstasy, my blood vessels are shuttering with fear of all that cholesterol. 😛

    We usually have the batter made out of white flour, or maybe cornflour (hello, sky-high insulin), and then deep-fried in some vat of polyunsaturated fat that has been used over and over, creating a huge batch of trans-fat laden ooze that your fish is swimming in before it reaches your plate, all to wreck havoc on your health. Okay, so maybe now you don’t love fried fish so much? Sorry to ruin it for ya! But here’s my healthy, and lip-smacking alternative!!

    Clean Eating Salmon Fish Fry
    Photo: Clean Eating Salmon Fish Fry

     This is one of those delicious and clean eating recipes where I often ask myself, “why don’t I make this more often?”It’s an easy way to cook flaky fish like Salmon. It’s simple to put together and packs a good deal of flavor as well.

    Clean Eating Salmon Fish Fry
    Photo: Clean Eating Salmon Fish Fry

    In this Salmon Fish Fry recipe I have used Salmon fish which cook well of the bone. You can experiment with other fish. Meatier fish like tilapia fish, Sole and halibut work very well too.Salmon fish tastes the best when marinated with spices and fried. I had this salmon fish fry with the roasted veggies and such a treat it was…. the perfect delicious clean eating meal.

     Salmon Fish Fry
    Photo: Salmon Fish Fry

    If you like salmon then you will love this Salmon Fish Fry recipe!.

    Check it out the Salmon Fish Fry (Clean Eating) recipe and printable version below!!

    Salmon Fish Fry (Clean Eating Version)

    Ah, a good fish fry. Who doesn’t love that? That crunch of flaming-hot fish fillets straight from the fryer. Here’s my healthy, and lip-smacking alternative of Salmon Fish Fry!!
    Prep Time 15 minutes
    Cook Time 15 minutes
    Total Time 1 hour 30 minutes
    Servings 4
    Author Bushra

    Ingredients

    • 800 gm Salmon Fish

    For Fish Marinade

    • 3 tablespoon chickpea flour besan
    • 1 teaspoon lemon juice
    • 1 teaspoon garlic powder
    • 1 teaspoon ginger paste
    • 1 teaspoon cumin powder
    • 1 teaspoon black pepper (crushed)
    • 1 teaspoon red chili powder
    • 1 teaspoon dried parsley
    • 1/2 teaspoon dry mango powder
    • salt to taste

    For Frying

    • 2 tablespoon olive oil

    For Garnishing

    • lemon wedges

    Instructions

    Method

    • Rinse and pat fish with paper towels. Cut fish into 4 inch thick pieces. and set aside.
    • Now make the marinade. Place the marinade ingredients in a spice grinder with about a tablespoon of water and make a smooth paste.
    • Put the marinade over the fish. Cover and allow to marinade for an hour.
    • Heat oil in a frying pan or griddle over medium heat.
    • When the oil is hot enough to brown a piece of bread in about 20 seconds.
    • Fry your fish fillets in batches.
    • With a slotted spoon, carefully lower the fish fillets into the hot oil and cook until they are light brown – about 4 minutes each side.
    • Now put the lid on for 2 minutes.
    • Fry fish for further 5 minutes until the fish is crusty and golden brown.
    • Remove from the griddle and transfer into a serving plate.
    • Sprinkled dried parsley over it and garnish with lemon wedges.

    Notes

    Serving Suggestions:
    Serve with roasted veggies (broccoli, carrots, beans etc).
     Put your own spin on it. And lemme know how it turns out. Post a photo on Facebook (Recipestable) or  on Twitter so I can see how lovely yours turn out.

    Happy Cooking!

    If you like this Salmon Fish Fry recipe , Please Subscribe to my blog. I have lots more recipes to share with you. And If you make it then let me know your feedback by commenting below.


  • The Best Crumb Fried Fish Recipe: Easy and Delicious

    Crumb Fried Fish

    Breading fish to fry is a delicious way of cooking white fish. There’s nothing better than a crispy, salty, and perfectly-cookedfried fish.It’s flaky and flavorful with a golden crumb coating. Try this Crumb Fried Fish Recipe, and don’t forget to share your experience with us!!

    Crumb Fried Fish
    Photo: Crumb Fried Fish


    Crumb Fried Fish recipe
    Photo: Crumb Fried Fish

    Crumb Fried Fish recipe
    Photo: Crumb Fried Fish

    So let’s get started.

    Check it out the Crumb Fried Fish recipe and printable version below!!

    Crumb Fried Fish

    Author Bushrah | Recipestable

    Ingredients

    • 500 gm any white fish fillets
    • 1 egg lightly beaten
    • 1/2 cup seasoned bread crumbs
    • 1 lemon
    • 1/2 teaspoon garlic powder
    • 1/2 teaspoon dried parsley
    • salt and pepper to taste
    • oil for frying

    Instructions

    Method

    • Sprinkle salt and pepper on both sides of fish fillets.
    • Heat oil in a large frying pan over medium heat.
    • Dip fillets into beaten egg then coat in breadcrumbs.
    • Gently slide fish into hot oil and fry until cruspy and golden brown.
    • Remove from oil and absorb on paper towels.Crumb Fried Fish is ready to serve. ENJOY!!

    Notes

    Serving Suggestions:
    Serve with chips and tartar sauce.
     

    I have also posted Fish Tempura and Popcorn Fish which are another easiest & tastiest version of making Fried Fish. Do check it out as well.


    Put your own spin on it. And lemme know how it turns out. Post a photo on Facebook (Recipestable) or  on Twitter so I can see how lovely yours turn out.Put your own spin on it. And lemme know how it turns out. Post a photo on Facebook (Recipestable) or on Twitter so I can see how lovely yours turn out.


    Happy Cooking!!

    If you like this Crumb Fried Fish recipe, Please Subscribe to my blog. I have lots more recipes to share with you. And If you make it then let me know your feedback by commenting below.