Blog

  • Amazing Homemade Strawberry Lemonade Recipe

    Strawberry Lemonade

    Looking for a drink to quench your thirst all summer long? Add strawberries to lemonade for a fruity twist. This is a tart, tasty lemonade with a sweet kick. There’s nothing more refreshing on a hot afternoon than a glass of strawberry lemonade.

    This homemade strawberry lemonade recipe takes seconds to prepare and is a healthy, wholesome, and easy way to enjoy a summer drink.

    Strawberry Lemonade Recipe
    Photo: Strawberry Lemonade Recipe

    This Strawberry lemonade is easily prepared with fresh strawberries, lemon juice, and sugar for a refreshing summer drink. A must try recipe !!

    Strawberry Lemonade
    Photo: Strawberry Lemonade Recipe

    Check it out the Strawberry Lemonade Recipe here!!

    AMAZING Homemade Strawberry Lemonade Recipe

    Course Drinks
    Prep Time 5 minutes
    Total Time 5 minutes
    Servings 2
    Author Bushra Waheed

    Ingredients

    • 1 cup strawberries halved
    • 2 tablespoons white sugar
    • 8 lemons juiced
    • 6 cups water divided
    • 1 cup white sugar

    For Topping:

    • Lemon slices
    • strawberry slices
    • Ice cubes as required

    Instructions

    • Place strawberries and 2 tablespoon sugar in a blender.
    • Pour 1 cup water over sugared strawberries.
    • Blend until strawberry chunks transform into juice.
    • In a large pitcher or jug, combine the strawberry juice, water, sugar, and lemon juice. Stir until well blended.
    • Add Ice cubes and top serving glasses with strawberry slices. Strawberry Lemonade are ready to serve. ENJOY!!

    Notes

    Serve chilled.

    If you like Strawberry Lemonade Recipe and make it then let me know your feedback by commenting below.And if you know more innovative ways in which we can utilize this sweet and mouth watering Strawberry Lemonade, do share with us and we would be glad to give it a try.

  • Smiley Face Fries Recipe

    Smiley Face Fries

    Making Smiley Face Fries at home is not a big deal. You can easily make smiley faces with a knife or a teaspoon or other sharp instrument on them.Do try this Smiley Face Fries Recipe and put a smile on your kid’s face with these fun-shaped potatoes that have a crispy crunchy flavor.

    Smiley Face Fries Recipe
    Photo: Smiley Face Fries Recipe

    Bismillah, let’s get started!

    Check it out the  Smiley Face Fries Recipe and printable version below!

    Smiley Face Fries Recipe

    Do try this smiley face fries recipe and put a smile on your kid’s face with these fun-shaped potatoes that have a crispy crunchy flavor.
    Prep Time 10 minutes
    Cook Time 15 minutes
    Total Time 25 minutes
    Servings 6
    Author Bushrah @ Recipestable

    Ingredients

    • 6 round potatoes
    • 1 teaspoon herb seasoning
    • 1 teaspoon salt
    • 1/4 teaspoon garlic powder
    • oil for frying
    • chaat masala for sprinkling optional

    Instructions

    Method

    • Wash and peel potatoes.
    • Cut the potatoes in circles, with each circle measuring about 1/4 cm thick.
    • Make smiles on the potatoes by using the edge of a teaspoon.
    • Using an ice-pick, bore two holes in the potatoes for the eyes.
    • Sprinkle the herb seasoning, garlic powder and salt over the potato slices.
    • Stir to coat evenly.
    • Leave it for few minutes to blend flavors.
    • Now heat oil in a pan over medium high heat.
    • Add potatoes and fry for 10-12 minutes or until crispy and golden brown.
    • Remove from the oil and drain on kitchen paper.
    • Sprinkle Chaat masala over it. Smiley Face Fries are ready to serve. ENJOY!!

    Notes

    Serving Suggestions:
    Serve with your favorite dipping sauce.

    I have also posted Curly Fries Recipe which is another easiest & tastiest version of making Crispy Fries at home. Do check it out as well.  It’s finger lickin’ good. You’ll be coming back for more. 


    Put your own spin on it. And lemme know how it turns out. Post a photo on Facebook (Recipestable) or  on Twitter so I can see how lovely yours turn out.


    Happy Cooking!!

  • Spicy Chicken Omelette Recipe

    Spicy Chicken Omelette

    If you’re in a hurry, try this Spicy Chicken Omelette Recipe that can be enjoyed any time of day. Combine chicken and egg for a delightful main dish that’s ready in just 25 minutes!

    Perfect for breakfast, lunch or dinner, be creative with you flavor combinations and add tomato, herbs, mushroom, or even olives!

    Spicy Chicken Omelette Recipe
    Photo: Spicy Chicken Omelette Recipe

    Check it out the Spicy Chicken Omelette Recipe here!!

    Spicy Chicken Omelette Recipe

    Course Breakfast
    Cuisine American, Pakistani
    Keyword breakfast, Chicken, eggs, omelet, spicy
    Prep Time 5 minutes
    Cook Time 8 minutes
    Total Time 13 minutes
    Servings 2
    Author Bushra Waheed

    Ingredients

    • 4 large eggs
    • 4 tablespoon milk
    • 1 cooked chicken breast thinly sliced
    • 1/4 cup chopped green onion
    • 2 green chilies finely chopped
    • 1/4 cup grated cheese
    • 1/4 teaspoon cayenne pepper
    • salt to taste
    • 1 tablespoon butter

    Instructions

    • In a small bowl, whisk together the eggs and milk.
    • Season with salt and pepper. Mix well.
    • Melt butter in a non-stick pan over medium heat. Add chicken, green onion and green chili. Cook and stir for 1-2 minutes then pour egg mixture over it.
    • As eggs set at the edges, with spatula, gently lift cooked portion to allow uncooked egg to flow underneath.
    • Cook on low flame for 2 minutes or until almost set.
    • Sprinkle cheese on half of the omelette.
    • Fold other half over cheese.
    • Remove from the heat and transfer into a platter.
    • Cut omelette in half. Spicy Chicken Omelette is ready to serve. ENJOY!!

    Notes

    Serve with salad, bread or paratha.

    If you like Spicy Chicken Omelette Recipe  and make it then let me know your feedback by commenting below.And if you know more innovative ways in which we can utilize this mouth watering Spicy Chicken Omelette, do share with us and we would be glad to give it a try.

  • Homemade Bounty Bars Recipe

    Homemade Bounty Bars

    Do you love Chocolate Bars? Have you ever thought of making your own versions at home? Homemade bounty bars are so easy to make – you only need 3 ingredients!

    Homemade Bounty Bars Recipe
    Photo: Homemade Bounty Bars Recipe

    So these may not be the best looking bounty bars ever, but they taste just like the real thing! Trust me when I say that it doesn’t matter what they look like. But first of all, if you’ve never had a bounty bar before, they are amazing, especially if you like coconut. 

    The sweet coconut filling is not as hard to make as you might think, a simple combination of coconut and condensed milk will recreate the filling of the classic chocolate bar.

     Homemade Bounty Bars Recipe
    Photo: Homemade Bounty Bars Recipe

    Bounty bars are one of my brother favorite chocolates, so I wanted to surprise him with these. When a friend posted a simple recipe for homemade Bounty bars, I had to try it.They are so easy to make, it literally only takes 30 seconds to mix the ingredients together, and then a few minutes to shape the bars and coat them in chocolate.

    When he found them in the fridge and tried them, he had to come and tell me how they tasted just like the real thing. So if a true bounty bar fan can’t tell the difference, well then these must be pretty close to the real thing. Perfect for the holiday season or any occasion!

    Check it out the Homemade Chocolate Bars Recipe and printable version below!!

    Homemade Bounty Bars

    Have you ever thought of making your own versions at home? They are so easy to make – you only need 3 ingredients. Do try my Homemade Bounty Bars Recipe, you’r kids will love it.
    Prep Time 50 minutes
    Cook Time 2 minutes
    Total Time 52 minutes
    Servings 12
    Author Bushrah | Recipestable

    Ingredients

    • 3 cups sweetened shredded coconut
    • 3 cups milk or plain chocolate
    • 1-1/2 can condensed milk

    Instructions

    Directions

    • Place coconut in a large bowl.
    • Pour the condensed milk over the coconut and stir until evenly mixed.
    • Make a thick and sticky paste.
    • Take handfuls of the coconut mixture and shape into bars.
    • Arrange on a lined baking tray and put in the refrigerator for 1 hour to firm up.
    • Meanwhile, melt the chocolate in the microwave.
    • Let it cool.
    • Spoon the chocolate over the coconut bars and leave on a wire rack to harden.
    • Place a plate under the wire rack to catch excess chocolate.
    • Once a little set, put onto some grease proof paper and place in the fridge to set. Your Homemade Chocolate Bars are ready to enjoy!!

    Notes

    Notes:
    You can make them as big or as small as you like.
    The coconut will not go too firm but it will hold it’s shape.
    Serving Suggestions:
    Serve with a glass of milk.

    If you like this Homemade Chocolate Bars Recipe,Please Subscribe to my blog. I have lots more recipes to share with you. And If you make it then let me know your feedback by commenting below.

  • Quick & Easy Picnic Food: Creamy Shell Pasta Salad Recipe for Parties

    Creamy Shell Pasta Salad

    Looking for a Creamy Shell Pasta Salad Recipe? This Creamy Shell Pasta Salad is just the thing for summer. It’s creamy, flavorful and delicious.Hope you try it and love it.

    Creamy Shell Pasta Salad Recipe
    Photo: Creamy Shell Pasta Salad Recipe

    Check it out the Creamy Shell Pasta Salad Recipe here!!

    Creamy Shell Pasta Salad Recipe

    Course Salad, Side Dish
    Cuisine American, Italian
    Keyword 30 minutes meals, Pasta, pasta salad, salad, summer salad, veggie salad
    Prep Time 10 minutes
    Cook Time 10 minutes
    Total Time 20 minutes
    Servings 6
    Author Bushra Waheed

    Ingredients

    • 1 cup small pasta shells uncooked
    • 2 hard-boiled eggs peeled & chopped
    • 1 small carrot cubed
    • 1 large cucumber cubed
    • 1 green bell pepper cubed
    • 1/3 cup process cheese cubed
    • 1/2 cup broccoli florets boiled

    For Salad Dressing:

    • 1/2 cup mayonnaise
    • 1 tablespoon vinegar
    • 1 tablespoon dried minced onion
    • 1/2 teaspoon seasoned salt
    • 1/4 teaspoon garlic powder
    • 1/4 teaspoon dried parsley flakes
    • 1/4 teaspoon pepper
    • 1/4 teaspoon prepared mustard

    Instructions

    • Cook pasta according to package directions; drain and rinse in cold water.
    • Toast carrots and broccoli in a pan for 1-2 minutes.
    • Remove from the heat and let it cool.
    • Place pasta, broccoli, carrot, cheese, cucumber, and egg in a large bowl. Mix well.
    • In a small bowl, whisk the dressing ingredients.
    • Pour dressing over the salad and toss to coat evenly.
    • Creamy Shell Pasta Salad is ready to serve. ENJOY!!


    If you like Creamy Shell Pasta Salad Recipe and make it then let me know your feedback by commenting below.And if you know more innovative ways in which we can utilize this mouth watering Creamy Shell Pasta Salad, do share with us and we would be glad to give it a try.

  • Mango Pineapple Smoothie Recipe

    Mango Pineapple Smoothie

    I invented this Mango Pineapple Smoothie recipe one day, when I had leftover mangoes and pineapple chunks. A spoonful of pineapple ice cream added the sweetness and special flavor with a tropical flare. You may use frozen pineapple juice ice cubes instead for more of a slush drink.

    Do try This Mango Pineapple Smoothie recipe and make the vitamin-rich fruit smoothie for a quick breakfast or an afternoon snack.

    Mango Pineapple Smoothie Recipe
    Photo: Mango Pineapple Smoothie Recipe

    Check it out the Mango Pineapple Smoothie Recipe here!!

    Mango Pineapple Smoothie Recipe

    Course Breakfast, Drinks
    Cuisine American
    Keyword breakfast, cold beverages, drinks, fruit, mango, pineapple, smoothie
    Prep Time 5 minutes
    Total Time 5 minutes
    Servings 4
    Author Bushra Waheed

    Ingredients

    • 1 cup pineapple chunks
    • 1 large mango – peeled seeded, and chopped
    • 1 cup yogurt
    • 1 cup pineapple juice unsweetened
    • 1/2 cup non-fat milk
    • 2 tablespoon pineapple ice cream
    • honey to taste

    Instructions

    • Place yogurt, pineapple juice, pineapple chunks mango, milk and Ice cream in a blender. Blend until smooth.
    • Pour into 4 glasses.
    • Drizzle with honey. Mango Pineapple Smoothie is ready to drink. ENJOY!! 🙂

    Notes

    You can add any flavor of ice cream.
    Serve Immediately.


    If you like Mango Pineapple Smoothie Recipe and make it then let me know your feedback by commenting below.And if you know more innovative ways in which we can utilize this sweet and mouth watering Mango Pineapple Smoothie, do share with us and we would be glad to give it a try.

  • Energy Boost in a Glass: The Delicious Peanut Butter Banana Smoothie Recipe!

    Peanut Butter Banana Smoothie

    The perfect pair _ Bananas, milk, peanut butter, honey, and ice are all you need to make this filling yet refreshing smoothie. Not only will it taste like a treat but you’ll get a good dose of potassium, protein, and fiber to boot. This Peanut Butter Banana Smoothie Recipe might just become your new favorite breakfast recipe!

    Peanut Butter Banana Smoothie Recipe
    Photo: Peanut Butter Banana Smoothie Recipe

    Bismillah, let’s get started!

    Check it out the Peanut Butter Banana Smoothie Recipe and printable version below.

    Peanut Butter Banana Smoothie

    Not only will it taste like a treat but you’ll get a good dose of potassium, protein, and fiber to boot.This Peanut Butter Banana Smoothie Recipe might just become your new favorite breakfast recipe!
    Prep Time 5 minutes
    Total Time 5 minutes
    Servings 4
    Author Bushrah | Recipestable

    Ingredients

    • 4 bananas broken into chunks
    • 2 cups milk
    • 1/2 cup peanut butter
    • 2 tbsp honey or to taste
    • ice cubes as required

    Instructions

    Method

    • Place bananas, milk and peanut butter in a blender jug.
    • Add honey, and ice cubes.
    • Process for 30 seconds or until smooth.
    • Pour into four glasses.
    • Top each glass with a banana slice.Peanut Butter Banana Smoothie is ready to serve.

    Notes

    Recipe Note’s:
    If the smoothies seem too thick, just add another tablespoon or two of milk.
    Serving Suggestions:
    Serve with cookies.

    I have also posted Mango Lime Smoothie Recipe which is another easiest & tastiest version of making Smoothie. Do check it out as well.


    Put your own spin on it. And lemme know how it turns out. Post a photo on Facebook (Recipestable) or  on Twitter so I can see how lovely yours turn out.


    If you like this post, Please Subscribe to my blog and let me know your feedback by commenting below.. I have lots more recipes to share with you.

  • Buffalo Chicken Cheese Balls Recipe

    Buffalo Chicken Cheese Balls

    This modern and Buffalo Chicken Cheese Balls Recipe is full of buffalo chicken, Hot Sauce, mozzarella, and cheddar cheese! Great as an appetizer or light lunch.

    Among all the chicken favorites Chicken Cheese Balls are not only very easy to cook but also flavorful, moist, cheesy and crunchy at the same time. Be it a casual lunch idea for family or a small home party; Buffalo Chicken Cheese Balls are sure to please your family and guests alike. It also makes a delicious lunch box item for the children. Buffalo chicken cheese balls tastes better if served with Garlic Sauce or Tomato ketchup. 

    Buffalo Chicken Cheese Balls Recipe
    Photo: Buffalo Chicken Cheese Balls Recipe

    These Buffalo Chicken Cheese Balls are one of the best foods ever created. They are incredibly easy to make and they taste out of this world delicious! Not to mention my picky eatin.

    I didn’t get a very good shot of the buffalo chicken cheese balls.. I was too eager to get on with it and eat them! Some day I’ll learn to be more patient. (InshaAllah) 🙂

    Buffalo Chicken Cheese Balls Recipe
    Photo: Buffalo Chicken Cheese Balls Recipe

    Here is a really simple, quick yet a better recipe to try this weekend.

    So let us start!! Ready ??

    Check it out the Buffalo Chicken Cheese Balls Recipe and printable version below!!

    Buffalo Chicken Cheese Balls

    This modern and Buffalo Chicken Cheese Balls Recipe is full of buffalo chicken, Hot Sauce, mozzarella, and cheddar cheese! Great as an appetizer or light lunch.
    Prep Time 15 minutes
    Cook Time 5 minutes
    Total Time 20 minutes
    Servings 9
    Author Bushrah | Recipestable

    Ingredients

    • 3 cups boiled & shredded chicken
    • 2 green onions finely chopped
    • 1/2 cup hot pepper sauce
    • 1 cup Cheddar cheese grated
    • 1 cup Mozzarella cheese
    • 1 cup all-purpose flour
    • 3 eggs lightly beaten
    • 1 cup plain bread crumbs
    • oil for frying

    Instructions

    Directions

    • In a large bowl, mix together the chicken, green onions, Cheddar cheese, Mozarella cheese and hot sauce.
    • Now shape the mixture into 1.5 inch balls.
    • Put the flour, eggs and bread crumbs in three separate dishes.
    • Dip and coat each ball in flour, then egg then bread crumbs.
    • Place the breaded chicken balls onto a plate while breading the rest; do not stack.
    • Heat oil in a deep pan over medium heat.
    • Fry the breaded balls in the hot oil for 1-2 minutes or until lightly browned.
    • Remove from the oil and drain on kitchen paper.Buffalo Chicken Cheese Balls are ready to serve. ENJOY!!

    Notes

    Serving Suggestions:
    Serve with Your Favorite Dipping Sauce.


    If you like this Buffalo Chicken Cheese Balls Recipe, Please Subscribe to my blog. I have lots more recipes to share with you. And If you make it then let me know your feedback by commenting below.

  • The BEST Chicken Finger Sandwich Recipe Ever!

    Chicken Finger Sandwiches

    This delicious Chicken Finger Sandwiches recipe is always a favorite sandwich. So easy to make and so delicious. With ketchup and [highlight]herbs seasoning[/highlight] for color and tang, this dressed-up chicken salad is wonderful on bread fingers or served on a lettuce leaf. 

    Finger sandwiches are the easiest and most requested party food. It’s a lovely way to serve sandwiches and a great way to use up leftover chicken, or great to take as lunch as a normal sandwich. Perfect for afternoon tea.

    Chicken Finger Sandwiches Recipe
    Photo: Chicken Finger Sandwiches Recipe

    The weekend was full of foodie experiences. A few days ago, I decided to do a tea party with a my childhood friend and her child’s and made these as one of the finger foods. They were a HUGE hit with her little girls. They are just so dainty and are perfect for little tea parties (or family gathering, birthdays, .. etc..) plus, they are SUPER easy to make.

    The secret of this recipe is fresh herbs. You can make a variety of sandwiches as well, using egg salad, chicken salad, or tuna as layers– just make sure you chop or process the ingredients up enough so it spreads easily.

    Chicken Finger Sandwiches Recipe
    Photo: Chicken Finger Sandwiches Recipe

    Note: These can be served immediately but in my opinion they taste best when refrigerated at least 2 hours– they will easily keep if made a day ahead of time.

    Check it out the Chicken Finger Sandwiches Recipe and printable version below!!

    Chicken Finger Sandwiches

    This delicious Chicken Finger Sandwiches recipe is always a favorite sandwich. It’s a lovely way to serve sandwiches and a great way to use up leftover chicken, or great to take as lunch as a normal sandwich.
    Prep Time 15 minutes
    Cook Time 5 minutes
    Total Time 20 minutes
    Servings 6
    Author Bushrah | Recipestable

    Ingredients

    • 2 cups boiled chicken shredded
    • 1/2 cup mayonnaise
    • 1 tablespoon cream cheese
    • 1 tablespoon tomato ketchup
    • 1 teaspoon fresh herbs chopped
    • 1/2 teaspoon freshly ground black pepper
    • salt according to taste
    • 12 slices white bread crusts removed
    • butter as required

    Instructions

    Directions

    • In a mixing bowl, Combine together the mayonnaise, and cream cheese.
    • Add shredded chicken and mix well.
    • Season with herbs, salt and pepper.
    • Toast bread slices with butter.
    • Spoon the mixture over half the bread slices and cover with the remaining slices.
    • Slice each sandwich into thirds to make three fingers.
    • Transfer into a serving platter. Garnish with lettuce leaves. Chicken Finger Sandwiches are ready to serve. ENJOY!!

    Notes

    Serving Suggestions:
    Serve with French Fries, Ketchup and Coleslaw.


    If you like this Chicken Finger Sandwiches Recipe, Please Subscribe to my blog. I have lots more recipes to share with you. And If you make it then let me know your feedback by commenting below.

  • Crispy Homemade Jalebi Recipe

    Crispy Homemade Jalebi Recipe

    Jalebi

    It’s fun to prepare traditional methai at home. Jalebi needs little practice for a perfect thin shaped. It must be thin if you like crispy jalebi. Try out this Jalebi Recipe and amaze your family and yourself.

    Jalebi Recipe
    Photo: Jalebi Recipe

    Check it out the Jalebi Recipe here!!

    Crispy Homemade Jalebi Recipe

    Course Dessert, Snack
    Cuisine Indian, Pakistani
    Keyword jalebi, Riwayati Mithaiyan, sweet
    Prep Time 20 minutes
    Cook Time 20 minutes
    Rising Time 8 hours
    Total Time 8 hours 40 minutes
    Servings 12
    Author Bushra Waheed

    Ingredients

    For Jalebi:

    • 1 cup Plain Flour
    • 2 teaspoon cornflour
    • 1 teaspoon instant yeast
    • 1 teaspoon oil
    • 1/8 teaspoon cardamom Powder
    • 1 tablespoon plain yogurt
    • a pinch of orange food color
    • 3/4 cup Warm Water

    For Sugar Syrup:

    • 1-1/4 cups Sugar
    • 1 cup Water
    • 1 teaspoon lemon juice
    • 1/4 teaspoon cardamom powder
    • few strand of saffron

    Instructions

    • In a bowl, mix together the plain flour, cardamom powder, instant yeast and cornflour.
    • Add yogurt, oil, and Water to the dry ingredients.
    • Mix well until there are no lumps.
    • When done, cover the jalebi batter.
    • Place it in a warm place for 24 hours or overnight, till it is fermented (the batter will rise on fermentation).
    • Once the batter is fermented stir the batter in a cut and fold motion to combine it once again.

    To Make Sugar Syrup:

    • Take a saucepan, add Water, sugar and saffron. Cook for 15 minutes on medium heat.
    • Reduce flame to a low simmer and add Cardamom Powder and Lemon Juice.
    • Stir well.
    • When the sugar becomes thick and stringy of one string consistency.Turn off the heat and keep aside.

    To Make The Jalebi:

    • Preheat oil for frying the jalebi’s.
    • Mix the fermented jalebi batter well and put it in a ketchup or mustard bottle with a spout (zipper bag or piping bag can be used).
    • Squeeze out the batter into the hot oil in approximately 8 small circular motions.
    • Jalebi should about 2-3 inches in diameter.
    • Fry until the bottom side looks golden and flip once to cook the other side.
    • With tongs, remove jalebi, shake off excess oil and place directly into sugar syrup.
    • Allow jalebi to remain in the syrup for just a minute (flipping to coat both sides), shake off excess sugar syrup and place onto a plate. Jalebi is ready to serve. ENJOY!!

    Notes

    • The consistency of the batter should be thick and not watery, similar to the butter cream batter. You should be able to make a shape when piped in a piping bag.
    • Don’t over stir you want the air pockets in the batter to remain. This will help in the jalebi being crisp and also in turn help it absorb the sugar syrup.
    • The oil for frying should be medium hot. If it is too hot, the jalebis will end up burnt.
    • Also make sure you keep the heat on low when you pipe the jalebis into the oil, this will ensure you can see the circles you are piping and also the jalebis will rise up slowly.
    • You can store in an air-tight container. They will remain fresh for 4-5 days un refrigerated.
    • Serve as a dessert after any meal or as a tea time snack.


    If you like Jalebi Recipe and make it then let me know your feedback by commenting below.And if you know more innovative ways in which we can utilize this sweet and mouth watering Jalebi, do share with us and we would be glad to give it a try.

  • Chicken Cheese Sandwich Recipe

    Chicken Cheese Sandwich Recipe

    Chicken and Cheese Sandwich

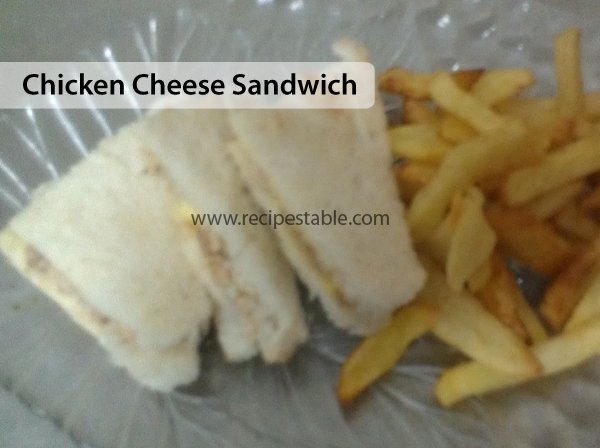
    Chicken Cheese Sandwich is a light meal or snack in slight appetite. Leftover  chicken and cream cheese are turned into a hot and spicy chicken sandwich. When you pack lunch boxes or in game party these super fantastic sandwiches are a great solution of your huger.

    Chicken Cheese Sandwich Recipe
    Photo: Chicken Cheese Sandwich Recipe

    Check it out the Chicken Cheese Sandwich Recipe here!!

    Chicken Cheese Sandwich Recipe

    Course Appetizer, Comfort Food, Snack
    Cuisine American, Indian, Pakistani
    Keyword cheese, cheese sandwiches, Chicken, chicken sandwich, sandwich
    Prep Time 15 minutes
    Cook Time 5 minutes
    Total Time 20 minutes
    Servings 6
    Author Bushra Waheed

    Ingredients

    • 12 bread slices
    • 1 cup boiled & shredded chicken
    • 3 tablespoon Mayonnaise
    • 4 tablespoon shredded Cheese
    • 1 tablespoon cream cheese
    • salt and pepper to taste
    • shredded lettuce as required
    • tomato ketchup as required
    • butter as required

    Instructions

    • In a bowl, mix together the chicken, cheese, cream cheese and mayonnaise.
    • Season with salt and pepper.
    • Add shredded lettuce and mix well.
    • Remove the edges of bread slices.
    • Spread butter and toast on a hot griddle or pan.
    • Spread ketchup on one side of six bread slices.
    • Put some chicken cheese mixture over them. Cover with remaining bread slices and cut into triangles. Secure with wooden pick.
    • Transfer into a serving platter. Garnish with lettuce  leaves.
    • Delicious Chicken Cheese Sandwich is ready to serve. ENJOY!!

    Notes

    Serve with French Fries.

    If you like Chicken Cheese Sandwich Recipe and make it then let me know your feedback by commenting below.And if you know more innovative ways in which we can utilize this mouth watering Chicken Cheese Sandwich , do share with us and we would be glad to give it a try.

  • The Perfect French Toast Recipe: A Breakfast Staple!

    The Perfect French Toast Recipe: A Breakfast Staple!

    French Toast

    I’m a big fan of the weekend. I’m most certainly everyone is as well. I mean what is not to love love about the weekend, whether it be a lazy Sunday morning, or the fact that you simply do not have to rush to get to work, only to repeat that routine Monday through Friday. Weekends are important to me just for the simple fact that I can unwind, figure things out on a slower pace, and cook great food.

    Is there nothing better than French toast for Sunday breakfast? French toast, also known as eggy bread or gypsy toast.

    French Toast Recipe
    Photo: French Toast Recipe

    Today I am sharing a sweet French toast recipe.. Which is my mom’s recipe and I had enjoyed it in my Childhood. This French Toast Recipe uses vanilla extract and cinnamon to bring a richness of flavor. Pick your favorite bread and serve with butter and fresh berries.

    French Toast Recipe
    Photo: French Toast Recipe

    Let’s get started.

    Check it out the French Toast Recipe and printable version below!!

    French Toast

    Prep Time 5 minutes
    Cook Time 10 minutes
    Total Time 15 minutes
    Servings 4
    Author Bushrah | Recipestable

    Ingredients

    • 4 bread slices
    • 2 eggs. lightly beaten
    • 4 tablespoon warm milk
    • 2 tablespoon sugar or to taste
    • 2 teaspoon butter
    • 1/4 teaspoon cinnamon powder
    • few drops of vanilla essence
    • Honey to drizzle
    • banana sliced
    • strawberries sliced

    Instructions

    Directions

    • In a shallow bowl, beat together the egg, milk, sugar, cinnamon powder and vanilla.
    • Keep aside.
    • Heat a lightly oiled griddle over medium-high heat.
    • Dunk each slice of bread in egg mixture, soaking both sides.
    • Place on the hot griddle and cook on both sides until golden.
    • Remove from the heat and take it out in a serving platter.
    • Drizzle with honey.
    • Top with strawberry slices. Delicious French Toast is ready to serve. ENJOY!!

    Recipe Note’s:

    1. When French toast is served as a sweet dish, milk, sugar, vanilla or cinnamon are also commonly added before pan-frying, and then it may be topped with sugar (often powdered sugar), butter, fruit, or syrup.
    2. When it is a savory dish, it is generally fried with a pinch of salt, and can then be served with a sauce such as ketchup or mayonnaise.
    3. Serve with butter and fresh berries.

    If you like French Toast Recipe and make it then let me know your feedback by commenting below.And if you know more innovative ways in which we can utilize this sweet and mouth watering French Toast , do share with us and we would be glad to give it a try.

  • Chatpati Lobia Chaat Recipe (Black Eyed Peas Salad)

    Chatpati Lobia Chaat Recipe (Black Eyed Peas Salad)

    Lobia Chaat

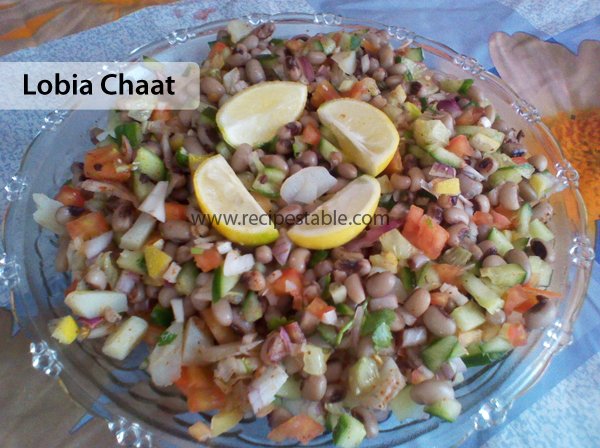
    Beans and spices has a perfect mix in shape of chaat.A relatively different Lobia chaat recipe to enjoy. Give it a try and make something different and healthy for your family.

    Lobia Chaat Recipe
    Photo: Lobia Chaat Recipe

    Check it out the Lobia Chaat Recipe here!!

    Lobia Chaat Recipe

    Course Salad, Side Dish, Snack
    Cuisine Indian, Pakistani
    Keyword black eyed peas, lobia, lobia chaat, salad, spicy
    Prep Time 10 minutes
    Total Time 10 minutes
    Servings 4
    Author Bushra Waheed

    Ingredients

    • 2 cups boiled lobia blacked eye peas
    • 1 small onion finely copped
    • 1 to mato chopped
    • 1 cucumber chopped
    • 1/2 cup tamarind pulp without sugar
    • 1 tablespoon lemon juice
    • 1 teaspoon mint chutney optional
    • 1 teaspoon chaat masala powder
    • 1 teaspoon roasted cumin powder

    For Garnishing:

    • few coriander leaves
    • lemon wedges

    Instructions

    • Place lobia (black eyed peas) in a large mixing bowl.
    • Add onion, tomato, cucumber. Stir in the lemon juice, tamarind pulp and mint chutney.
    • Season with chaat masala and cumin seeds. Mix well.
    • Transfer into a serving platter.
    • Garnish with few coriander leaves and lemon wedges. Lobia Chaat is ready to serve.

    Notes

    Serve with imli ki chutney.

    If you like Lobia Chaat Recipe and make it then let me know your feedback by commenting below.And if you know more innovative ways in which we can utilize this mouth watering Lobia Chaat, do share with us and we would be glad to give it a try.

  • Lahori Nan Khatai Recipe

    Lahori Nan Khatai Recipe

    Lahori Nan Khatai

    Nan Khatai is an Persian /Indo-Pakistani butter cookie that is made with ghee(clarified butter), sugar, all-purpose flour, gram flour, cardamom, and roasted almonds and pistachios. Do try it.

    Lahori Nan Khatai Recipe
    Photo: Lahori Nan Khatai Recipe

    Check it out the  Lahori Nan Khatai Recipe here!!

    Lahori Nan Khatai Recipe

    Course Comfort Food, Dessert, Snack
    Cuisine American, Pakistani
    Keyword Baking, cookies, sweet
    Prep Time 20 minutes
    Cook Time 15 minutes
    Total Time 35 minutes
    Servings 12
    Author Bushra Waheed

    Ingredients

    • 1 cup flour
    • 1 cup ghee
    • 1/3 cup caster sugar
    • 2 ounce gram flour
    • 2 teaspoon baking powder
    • 1 teaspoon cardamom powder
    • 1/2 teaspoon baking soda
    • 2 egg yolks light beaten
    • Roasted almonds and pistachios as required

    Instructions

    • Preheat oven at 190 degree C.
    • Pour ghee in a large bowl.
    • Add sugar and cardamom powder.Beat until light and fluffy.
    • Now take a separate bowl, sift flour, baking powder,gram flour and baking soda.
    • Now fold into ghee mixture.
    • Stir in the roasted almonds and pistachios.
    • Now roll out the dough, cut into rounds with a cookie cutter.
    • Put nan khatai on a greased baking tray.
    • Brush them with egg yolks.
    • Place baking tray in the preheated oven for 12-15 minutes or until done.
    • Remove from the oven and let it cool completely. Lahori Nan Khatai is ready to serve.

    Notes

    Serve with Tea.


    If you like Lahori Nan Khatai Recipe and make it then let me know your feedback by commenting below.And if you know more innovative ways in which we can utilize this sweet and mouth watering Lahori Nan Khatai, do share with us and we would be glad to give it a try.

  • Suji Halwa with Khoya Recipe

    Suji Halwa with Khoya Recipe

    Suji Halwa with Khoya

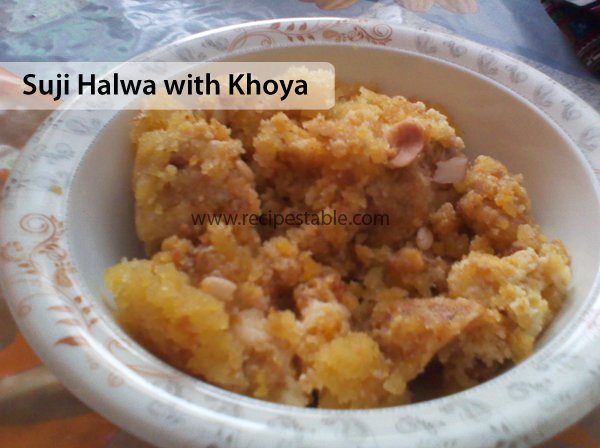
    You don’t need to wait for an occasion to savor the sweet and creamy Suji halwa with Khoya as it can be prepared at home in just few minutes and does not require any expert cooking skills. This Suji Halwa with Khoya Recipe takes its taste and texture to next level as use of khoya and generous amount of dry fruits provide nice creamy texture while ghee and cardamom provides irresistible aroma.

    If you don’t have khoya, then don’t worry, read tips and variations given below to make equally tempting Suji halwa with khoya (mawa). Do try it!!

    Suji Halwa with Khoya Recipe
    Photo: Suji Halwa with Khoya Recipe

    Check it out the Suji Halwa with Khoya Recipe here!!

    Suji Halwa with Khoya Recipe

    Course Dessert
    Cuisine Indian, Pakistani
    Keyword dessert, eid desserts, halwa, Iftar Recipes, khoya, Quick and Easy, Ramadan, sweet
    Prep Time 10 minutes
    Cook Time 20 minutes
    Total Time 30 minutes
    Servings 6
    Author Bushra Waheed

    Ingredients

    • 1 cup semolina suji
    • 1 cup sugar
    • 1/2 cup clarified butter or ghee
    • 2 green cardamoms
    • 2 cups water
    • 1 cup khoya

    For Garnishing:

    • 2 tablespoon chopped peanuts
    • 2 tablespoon chopped almonds
    • 2 tablespoon chopped pistachios

    Instructions

    • Heat ghee in a pan over medium heat.
    • Add cardamom and semolina (suji) and roast it well.
    • Add sugar and water. Stir continuously till sugar is dissolved.
    • Leave it on low flame for 10 minutes to cook perfectly.
    • When ghee comes on top add khoya.Stir well.
    • Dish it out. Garnish with nuts. Suji Halwa with Khoya is ready to eat. ENJOY!!

    Notes

    1. Replace khoya with 4 tablespoons of dry milk powder and increase amount of sugar.
    2. It can be served as a dessert or as a sweet accompaniment to main dish.
    3. Serve it along with puri’s to entertain the guests.


    If you like Suji Halwa with Khoya Recipe and make it then let me know your feedback by commenting below.And if you know more innovative ways in which we can utilize this sweet and mouth watering Suji Halwa with Khoya, do share with us and we would be glad to give it a try.

  • Food Blogger Interview with Quratulain Noor from Ainy Cooks

    Welcome to another edition of Food Blogger Interview series. Today we’re chatting with Quraitlain Noor , the sweet lady behind the great blog Ainy’sCook. I love Ainy’s blog because she shares easy to follow recipes. Most of them are quick too and perfect for busy weeknights. Her blog is a great place to find meal ideas you and your family will love!

    Interview with Quratulain Noor from Ainy Cooks

    Bushrah:  Aslam-o-Alakaum, “How are you?.”

    Quratulain Noor: Walakum salam, I am well, please, call me Ainy, as all my friends do.:).


    Bushrah: Thank you Ainy for joining us today now first we would love to know about you.  _ tell us a bit you and Your Blog _A lady behind “AINY’SCOOK”?

    Quratulain Noor: I am an enthusiastic home cook.Cooking should be a fear less combat, never disappoint from your failure ,this Ii have learned from my 8 years cooking experiences. Interesting thing is I have started proper cooking after marriage. I was not a kitchen person before marriage. I was doing just SHOQIA cooking and helping my mother in making salads and vegetable cutting ,that’s it. Like all other girls I also grew up watching my mother cooking different dishes. Though I’m Masters in Science but I quit my job for my kids, Ali and Zain. I love to cook different and interesting dishes for my family. I cannot hide myself from me; I can see what others can never see;I know what others can never know, I cannot fool myself, and so Whatever happens, I want to be Self-respecting and conscience free.


    Bushrah: What is the story behind your blog’s name, Ainycooks?
    Quratulain Noor: The title of my blog took a while to come up with. When my husband designed my blog he asked me to select a short and unique name. According to my hubby, blog’s name play an important role ,It is the first thing people see. Think of what you want your readers to think when they see blog’s name. After taking his advice I jotted down few names , finally we selected “Mirch Masala” as my blog’s name. But after few days my husband changed the name to “AINYCOOKS”, because he thought not to limit blog to one topic or cuisine related to spices . 🙂


    Bushrah: When and why did you start blogging?

    Quratulain Noor: I wanted to share my knowledge , basically I just wanted a place to post recipes, pics and share my experience with friends and family. I started proper blogging 2 years ago.


    Bushra: Did you ever think that you would be so successful at blogging when you started?

    Quratulain Noor: No, never 🙂 AINYCOOKS has become so much more than I imagined and brings creativity and joy into my life and my kitchen.


    Bushra: The photos of your recipes are one of the highlights of your blog. What are the elements that go into each photo?

    Quratulain Noor: When I started my website I usually took photos with my I pad or mobile phone. But after few months i realized that besides easy and no fail recipes, food photos are also very important. “A picture is worth a thousand words” is very much true. So I started using Canon D500. I am still in learning process and learning techniques of taking perfect photos.


    Bushra: Do you promote your blog? How important is traffic to you?

    Quratulain Noor: Yes, because making blog is easy but to build a successful blog with significant traffic is hard job. I am using Facebook, Google, Twitter, Instagram and Pinterest to share my posts and to get more traffic.


    Bushra:Are your blog posts impromptu or does a certain amount of planning go into them?

    Quratulain Noor: I never plan anything for my posts 🙂


    Bushrah: Do you try out interesting dishes that you come across in restaurants when you go for reviews?

    Quratulain Noor: I always opt for home cooked foods. The reasons are generally that home cooked foods are much more nutritious and healthier, Hotel food is definitely tasty and a good change of taste for tired tongues , a number of dishes i have tried and posted on my website which i have tasted in different hotels.


    Bushrah: Have there been any mistakes along the way that you have learnt from?

    Quratulain Noor: Lol, a lot of mistakes .You can make a long list. But don’t let fear of mistakes stop you from cooking .  You simply need to be brave.
    I did mistakes in Baking but with time and experience Ii have learnt a lot. One thing i always mention:”Never Give up” .


    Bushrah: You share a lot of basic cooking tips and recipes on your blog. Are there any special secrets that are still hidden from the public eye?

    Quratulain Noor: I am trying to share as many tips as i can, but I never hide any thing from my readers. In future i will follow the same exercise 🙂


    Bushrah: Out of all the methods of cooking, which is your personal favorite? Tell us about an instance when you surprised your family with a really well turned out dish.

    Quratulain Noor: I love to bake. Baking is my favorite method thou i love Barbeque also but baking is top of all. Baked Mutton leg was a big success for me i made it first time and it came out so well. My family and my brother’s family appreciated a lot.


    Bushra: You are living in Attock after Marriage. How much influence did that have on your cooking?

    Quratulain Noor: A lot of, you will see a number of recipes which are basically from this region on my website. Attock city is a last city of Punjab , KPK is just adjacent to Attock.I saw a lot of Pashton families also living here (Afghan too) I am considering myself very fortunate that I have got a chance to learn recipes from Punjabi, Pathan and Afghan families. With time i will add more recipes which are authentic and family recipes from this region.


    Bushra: What do you do when you are not cooking or blogging?

    Quratulain Noor: Thinking about cooking for next day..lolzz. What a busy mother can do , looking after her kids, husband ,home and relatives and much more 🙂


    Bushra: Which other blogs do you follow?

    Quratulain Noor: A number of blogs are in my favorite list.

    Martha stewert
    David Lebovitz
    Recipe Passion
    Haffa kitchen adventure.
    All Pakistani Blogs and of course Yours too 🙂


    Bushra: What advice would you like to give to people who want to start blogging?

    Quratulain Noor: “You were born an original. Don’t die a copy”

    Though I am also not an expert blogger but i will advice what i have learnt in these 2 years, Be original… you do not have to be a super writer and photographer you just need to focus on our own interests. Do what you like most. Be patient because audience building is a slow process. Always visit other blogs and communicate with them and ask their advice like my 2 advisers are Monu Teena and Bushra Waheed.


    Bushra: hahha __thanks ainy for your compliments 🙂 What are your cooking inspirations? A famous chef, your mom, a cookbook, a blog…?

    Quratulain Noor: Defiantly my biggest inspiration is my Mother after her, every single person who is involved in guiding and telling me different recipes is my inspiration.


    Bushra: What can we expect from Ainy Cooks  in the future?

    Quratulain Noor:”Never let the future disturb you. You will meet it, if you have to, with the same weapons of reason which today arm you against the present.” –Marcus Aurelius Antoninus

    I never planned future but i have one thing in my mind to bring more interesting recipes and Introduce Pakistani culture to my readers.


    Bushra: What’s your favorite recipes from your blog. How have you found the public’s reaction to your recipes and writing? blog?

    Quratulain Noor: Singaporean rice, Basan ke parathe with green chutney and Chocolate Marquise. These recipes are my favorite and i have got an excellent response when i shared on my website and Facebook page.


    Bushra: Your Favorite savory ingredient to cook with.

    Quratulain Noor: Black pepper, I love to add this ingredient in every dish. The aroma and taste of freshly crushed pepper we can’t compare with any other ingredient.


    Bushra:  Favorite sweet ingredient to cook with.

    Quratulain Noor: Sugar 😀 in fact i like to add condense milk in my sweet dishes most.


    Bushra: When You feel lazy You cook.

    Quratulain Noor: You will get a big YES from all house wives, If we will not cook then who will feed our families. In Pakistani Culture only a wife is the one who has to fulfill this responsibility.


    Bushra: What’s Your pick me up dish?

    Quratulain Noor: Biryani of all kinds and types.


    Bushra: Favorite dish That not cooked by you?

    Quratulain Noor: I have tried all my favorites at home but one dish which i want to try is Mantu ( a Afghan dish) , Inshallah i will try and post the recipe soon.


    Bushra: For a romantic meal what would you want to eat?

    Quratulain Noor: Barbeque food is my all time favorite, I would like to order BBq dishes first. Then a rich Chocolate Mousse.


    Bushra: Your Favorite time of the day? 

    Quratulain Noor: Early morning after Fajar. I feel a deep down calmness in my heart after hearing chirping sounds and tranquility.


    Bushra: Your Favorite Cooking Magazine

    Quratulain Noor: Dalda ka Dastarkwan. But i have a huge collection of cookery books also.


    Bushra: Your Favorite Book?

    Quratulain Noor: Divine Chocolate Book is my favorite.


    Bushra: Your Favorite Tv show

    Quratulain Noor: I usually follow Chef Zakir and Shireen Anwer’s cooking shows.


    Bushra: Your Favorite Color

    Quratulain Noor: Blue , pink and all shades of brown.


    Bushra: One recipe you want to pass on ?

    Quratulain Noor: My mother’s recipe of Fried Chops.


    Bushra: One Cuisine you can live on?

    Quratulain Noor: Pakistani Cuisine is the best.


    Bushra: One a winter evening what you would like to cook or eat?

    Quratulain Noor: As I have mentioned I love BBQ food and in winter i like to cook  Chicken tikka and Malai Boti once in a week.


    Bushra: One a hot summer day what would you like to cook?

    Quratulain Noor: Rice of any type along with Raita’s.


    To stay updated with Ainy’s and find more of her delicious recipes make sure to check out her blog and follow her  here:

    AinyCooks 

    Thank you Ainy for sharing your views with us 🙂