Tag: Dinner Recipes

  • Restaurant Style Lahori Mutton Karahi Recipe

    Restaurant Style Lahori Mutton Karahi Recipe

    Isn’t the Title Interesting?Look down at the Picture just scrumptious and believe me the recipe is so simple.

    Restaurant Style Lahori Mutton Karahi Recipe
    Photo: Restaurant Style Lahori Mutton Karahi

    Restaurant Style Lahori Mutton Karahi

    Today, I come up with a new recipe: “Restaurant Style Lahori Mutton Karahi “. It is one of most popular Pakistani dish that you will come across almost every Pakistani restaurant menu anywhere in the world.

    Lahore is famous for its culturally enriched food items.. impossible to be on diet there 😛 lol. People here in Lahore are known as food lover, which is why many new restaurants are constantly opening.

    As all of you know, I always tempted to try popular dishes at home, and perfecting it as possible as I could. One among them was this “Restaurant Style Lahori Mutton Karahi”.

    Restaurant Style Lahori Mutton Karahi Recipe
    Photo: Restaurant Style Lahori Mutton Karahi

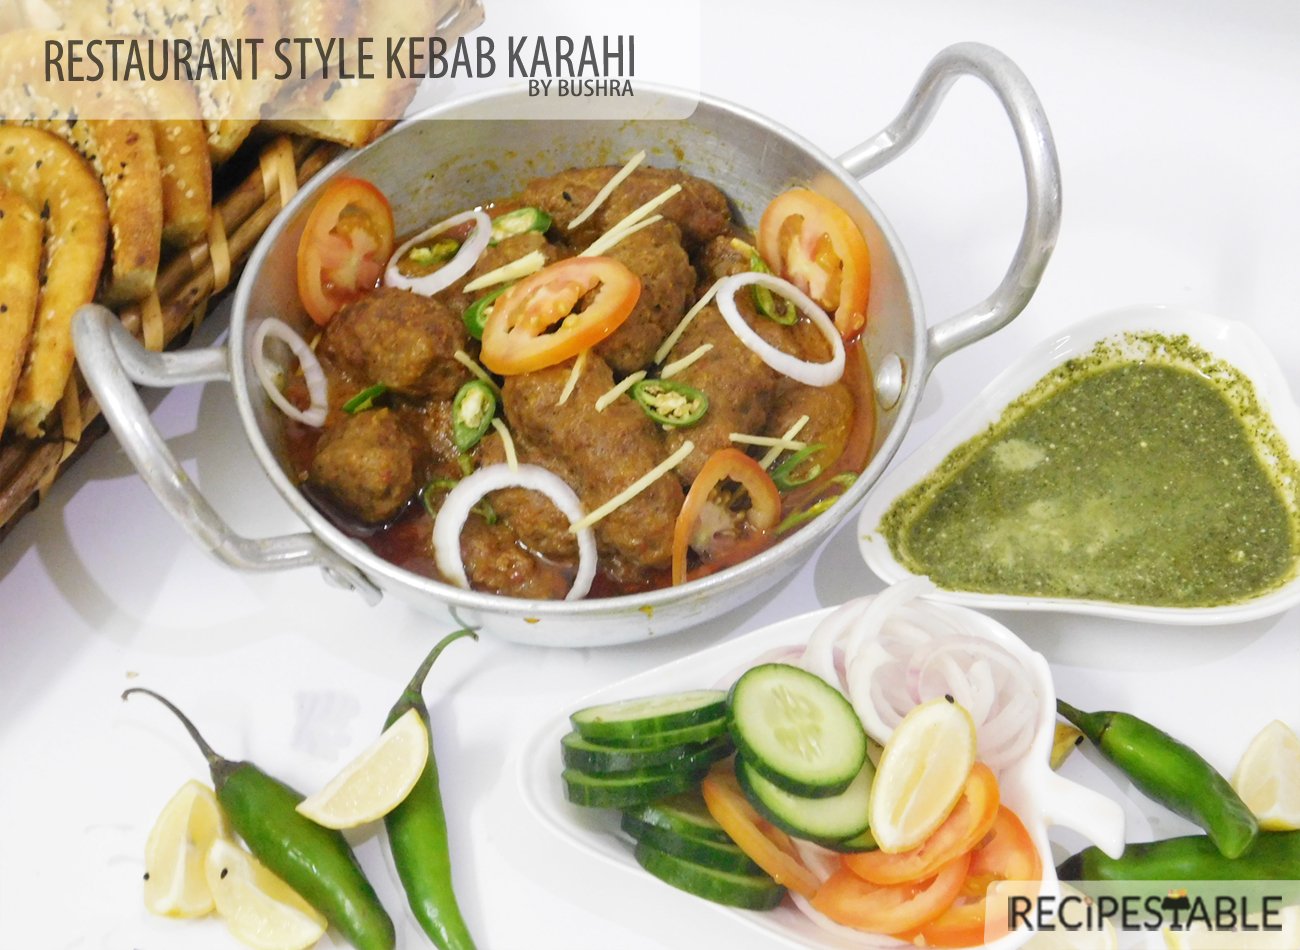
    Mutton Karahi is a specialty of Lahori food, this dish is made by stir-frying small cubes of lamb or mutton with tomatoes, green chilies, ginger, and garlic in a karahi, the wok-like pan that gives the dish its name.I made it with a less fat. But taste was so good and excellent. Meat was so tender, juicy, deeply marinated in the masala (gravy) and uniformly cooked.

    Photo: Restaurant Style Lahori Mutton Karahi recipe
    Photo: Restaurant Style Lahori Mutton Karahi

    Very simple and lip smacking dish for anyone who love to have spicy treat occasionally. Its so simple that if you have ingredients in hand then Ready get set go.

    Restaurant Style Lahori Mutton Karahi
    Photo: Restaurant Style Lahori Mutton Karahi

    It pairs the best with butter naan, or simply plain naan and may be served along with rice, tandoor roti and even homemade chapati’s along with zeera or mint raita and onion rings.

    Let the meat eating begin!

    Check it out the Restaurant Style Lahori Mutton Karahi recipe and printable version below!!

    Restaurant Style Lahori Mutton Karahi

    I always tempted to try popular dishes at home, and perfecting it as possible as I could. One among them was this “Restaurant Style Lahori Mutton Karahi”.It is one of most popular Pakistani dish that you will come across almost every Pakistani restaurant menu anywhere in the world.

    • 1-1/2 kg lamb or mutton
    • 1/2 cup pure butter
    • 1/2 cup plain yogurt
    • 3 to matoes (cut into four pieces)
    • 3 onions (thinly sliced)
    • 4 green chilies (chopped)
    • 2 tablespoon ginger garlic paste
    • 1/2 cup garlic water (mix 1 tsp garlic paste with 1 tsp lemon juice in 1/2 cup of water)
    • 1-1/2 teaspoon red chili pepper (crushed)
    • 1/2 teaspoon turmeric powder
    • 1 teaspoon dried fenugreek leaves (optional)
    • 2 tablespoon cumin seeds (roasted & crushed)
    • 2 tablespoon coriander seeds (roasted & crushed)
    • 1/4 teaspoon black pepper
    • 1-1/2 teaspoon salt or to taste

    For Garnishing

    • 1/2 teaspoon garam masala powder (for sprinkling)
    • fresh coriander leaves (chopped)
    • ginger (cut in julienne)
    • lemon (thinly sliced)
    • tomato (thinly sliced)

    For Serving

    • naan or butter naan

    Method

    1. Melt butter in a deep wok or pan over medium heat.
    2. Fry onions for 3-4 minutes or until transculent.
    3. Add ginger garlic paste and meat. Cook for 5-8 minutes or until meat change its color.
    4. Mix well and don’t add any water.
    5. Meat cooked in its own juice
    6. Cover with lid and cook for 45 minutes on medium heat.
    7. Now add tomatoes, cover it again and cook for another 10 minutes.
    8. Add all spices excpet black pepper, mix well.
    9. Cook on high heat for 4-5 minutes then add yogurt, green chilies and black pepper.
    10. Cook for another 15 minutes or until oil comes on top.
    11. Now add garlic water and cook for 10 more minutes or until meat is tender and gravy is thickened.
    12. Sprinkle garam masala over it.
    13. Garnish with coriander leaves, green chilies, lemon slices, and ginger.
    14. Restaurant Style Lahori Mutton Karahi is ready to serve. ENJOY!!

    Serving Suggestions:
    Serve with butter naan along with raita and ring onions.

    I have also posted Chicken Karahi and Kebab Karahi which are another easiest & tastiest version of making karahi. Do check it out as well.


    Put your own spin on it. And lemme know how it turns out. Post a photo on Facebook (Recipestable) or  on Twitter so I can see how lovely yours turn out.


    Happy Cooking!!

    If you like this Restaurant Style Lahori Mutton Karahi, Please Subscribe to my blog. I have lots more recipes to share with you. And If you make it then let me know your feedback by commenting below.

  • Mutton Nihari Recipe

    Mutton Nihari Recipe

    Aslam-o-Alakaum My Lovelies !!

     In the Name of Allah, Most Gracious, Most Merciful

    Mutton Nihari 

    Nihari is one of most favorite and traditional dishes of every Muslim home. Be it mutton, chicken or beef nihari, it can be relished with any kind of meat. Traditionally nihari made with the bone marrow meat. It’s a deliciously smooth flour based stew with slow cooked mutton and a myriad of spices.  Mutton Nihari takes a long time to cook but is easy to put together.

    mutton-nihari

    There are lot of ready made Nihari spices available in the market. But I would not Never Never recommend. As they are full of artificial colors and preservative agents. Not a healthy approach. 🙁 You can make the Nihari powder at home by following my Nihari Masala Mix and store it in airtight container for many days.

    This is a must try recipe from my Mommy.  We normally make Nihari with small pieces of mutton as we prefer it over the bone-in mutton.

     Mutton Nihari Recipe
    Photo: Mutton Nihari

    Note:

    Preferably it must be cook on low flame, but those of you who would rather prefer a faster process can cook it in a pressure cooker though the Nihari taste wont be the same as cooked on a low flame.

    So about this Mutton Nihari recipe. As you can see, there’s no layer of fat floating on top of the nihari, As many of you know, when we go out to eat it, we want the brain, marrow and floating oil on top, not a very healthy option. My mommy tried to make it just a little healthy by adding as little butter as possible without compromising on the flavor. Less fat and believe me, just as good. Or if you do like a little oil on top, when you are ready it dish it out, leave it covered on very low heat for about 5-7 minutes. Voila, the ‘little’ amount of oil will rise to the top! 

    Mutton Nihari with ginger and fried onion
    Mutton Nihari with ginger and fried onion

    Traditionally Nihari  served with ginger, fried onion, green chilies and the hottest crisp khameeri roti or naan.

    mutton nihari recipe
    Nihari goes great with ginger, green chilies, fried onion, lemon and Khamiri Roti.

    Let’s get started!

    Mutton  Nihari with Step by Step Picture

    Step 1

    Check it out the Mutton Nihari recipe and printable version below!!

    Mutton Nihari Recipe

    Nihari is one of most favorite and traditional dishes of every Muslim home. Be it mutton, chicken or beef nihari, it can be relished with any kind of meat. Traditionally nihari made with the bone marrow meat. It’s a deliciously smooth flour based stew with slow cooked mutton and a myriad of spices. This Mutton Nihari recipe takes a long time to cook but is easy to put together.

    • 1-1/2 kg mutton (shank portion, cut into 8 pieces)
    • 1/4 cup clarified butter or desi ghee
    • 3 medium onions (thinly sliced)
    • 1 tablspeoon ginger paste
    • 1 tablespoon garlic paste
    • 2 teaspoon coriander powder
    • 1/2 teaspoon turmeric powder
    • salt to taste
    • 4 tablebspoon wheat flour
    • 4 tablespoon nihari masala Mix

    Nihari Masala Mix

    • 1 tablespoon cumin seeds
    • 2 teaspoon fennel seeds
    • 1 teaspoon soonth (dry ginger)
    • 1/4 teaspoon nutmeg powder
    • 5-6 green cardamoms
    • 2 black cardamoms
    • 5 cloves
    • 1 bay leaf
    • 1 inch cinnamon stick
    • 10 black peppercorns

    For Garnishing

    • 1/2 cup crispy fried onion
    • 1 inch ginger (cut into this strips)
    • 1 lime (cut into wedges)
    • 2 green chilies (thinly sliced)
    • few fresh coriander leaves (chopped)
    • Juice of 1 lime

    Niahri Masala Mix Method

    1. To make your own Nihari masala from scratch, dry roast all the whole spices for the masala and grind them to a fine powder.

    Mutton Nihari Method

    1. Melt butter or ghee (you can use oil as well but ghee makes it tastier) in a heavy bottom pot.
    2. saute onion slices and fry till they start to turn brown(about4-5 minutes).
    3. Now add mutton pieces, ginger paste and garlic paste.
    4. Stir and cook for 5-8 minutes or until meat is no longer pink and all juices run clear.
    5. Now add coriander powder, turmeric powder and salt.
    6. Sauté for 5 minutes.
    7. Add the nihari masala and 8 cups of water.
    8. Stir well.
    9. Cover the pot and cook on very low flame for about 4 hours until the meat is tender.
    10. Keep checking in between. The way to know that the meat is cooked is when it breaks easily with a wooden spoon.
    11. Remove the lid and increase the flame.
    12. Dissolve wheat flour in half cup of water such that there are no lumps.
    13. Slowly pour wheat mixture into the gravy.
    14. Stir to mix well.
    15. Let it simmer for another 15 minutes or until the gravy is thickened.
    16. Drizzle some lime juice over it.
    17. Garnish with fried onion, ginger slices, green chilies and fresh coriander leaves.
    18. Delicious Mutton Nihari is ready to serve. Enjoy!!

    Serving Suggestions:
    Serve with Khameeri Roti or Naan. At time of serving, add chop fresh coriander, green chilies, Julienne cut ginger and fry onions.. and also lemon…. these things will improve the taste of nihari.


    Put your own spin on it. And lemme know how it turns out. Post a photo on Facebook (Recipestable) or  on Twitter so I can see how lovely yours turn out.

    Happy Cooking!!

    If you like this Mutton Nihari recipe, Please Subscribe to my blog. I have lots more recipes to share with you. And If you make it then let me know your feedback by commenting below.

  • Chicken Tikka Masala Macaroni Recipe

    Chicken Tikka Masala Macaroni Recipe

    Aslam-o-Alakaum My Lovelies !!

     In the Name of Allah, Most Gracious, Most Merciful

    Happy Spring Season!

    Spring seems to be here, which is just amazing – I honestly just want to run around outside all day everyday and enjoy the beautiful sunshine! I love how the world changes when the sun comes out, everyone is so much happier and life just seems brighter and more awesome. It’s one of my favorite season of the year because of it’s colors, flowers,  birds cheering. What a great blessing of Allah (SWT). Alhumdulillah. 

    One of the most important things about this season is the positive impact you can make for your health and well being! So, Today I am sharing a SUPER yummy healthy, nutritious pasta recipe that has become a new family favorite around here (jus 237 calories)!!

    Chicken Tikka Masala Macaroni (Clean Eating Version)

     Chicken tikka Masala works well with macaroni. Who knew?

    Clean Eating Chicken Tikka Masala Macaroni
    Photo: Chicken Tikka Masala Macaroni (Clean Eating Version)

    Normally I’m not a huge pasta lover. But this Chicken Tikka Masala Macaroni is exactly how I like to eat macaroni when I want to follow my clean eating diet and don’t wish to work with many ingredients and want to cook dinner easily! This macaroni is in  Pakistani Style, tossed with chicken, tikka marinade, and fresh veggies.

    Pretty nutritious isn’t it? Honestly, it’s a dish which will satisfy your taste buds and same time will give you a proper nutritious lunch or dinner.

    Clean Eating Chicken Tikka Masala Macaroni
    Photo: Chicken Tikka Masala Macaroni (Clean Eating Version)

    Yeah, I know you will say’hey, Macaroni is surely not so Asian’, not in clean eating and will give me a doubtful look. But trust me that you will never be disappointed if you will give that Asian twist to any of your dishes.

    This Chicken Tikka Masala Macaroni is so easy and will be made with such ingredients, which you can find at your kitchen any time. So surely, it will be a time save too. For clean eating purpose, please make sure you are using whole grain pasta and Organic chicken. 

    This may not be the more traditional version you’re thinking of, but it’s close enough to get the job done and it definitely qualifies as comfort food. 

    Clean Eating Chicken Tikka Masala Macaroni
    Photo: Chicken Tikka Masala Macaroni (Clean Eating Version)

    Serve this decadent dish with a fresh green salad or some lightly steamed broccoli with a squeeze of lemon. By the way, this dish could just as easily be vegetable tikka mac and cheese if you substitute the chicken with some veggies such as cauliflower, zucchini or eggplant instead. Give this unusual recipe a try and let me know what you think! This is sure to be a winner with all the family.

    Check it out the Chicken Tikka Masala Macaroni (Clean Eating Version) recipe and printable version below!!

    Chicken Tikka Macaroni (Clean Eating Version)

    Chicken tikka Masala works well with macaroni. Who knew?This Chicken Tikka Masala Macaroni(Clean Eating Version) is exactly how I like to eat macaroni when I don’t wish to work with many ingredients and I want to cook easily!

    • 1 packet whole wheat macaroni
    • 500 gm boneless Organic chicken (cubed)
    • 1 onion (cubed)
    • 1 medium size capsicum (cubed)
    • 1 tablespoon butter or olive oil

    Chicken Tikka Marinade

    • 2 tablespoon fresh yogurt
    • 1 teaspoon ginger garlic powder
    • 1 teaspoon red chilli powder
    • 1 teaspoon cumin powder
    • 1 teaspoon coriander powder
    • 1 teaspoon dry mango powder
    • 1/2 teaspoon garam masala powder
    • 1/4 teaspoon red pepper flakes
    • 1 lemon (juice)
    • few drops of hot sauce (optional)
    • salt to taste

    For Garnishing

    • few green chilies (thinly sliced)
    • few coriander leaves (chopped)

    Method

    1. Put marinade ingredients over the chicken cubes. Mix to coat evenly.
    2. Cover and marinade for 20-30 minutes to blend flavors.
    3. Meanwhile,boil macaroni to al dente according to instructions on the package. Keep aside.
    4. Now melt butter in a deep pan or skillet over medium heat.
    5. Stir fry tikka chunks until they start releasing thier juices.
    6. Mix well.
    7. Cover and let it simmer on medium heat for 3-4 minutes or until chicken is tender.
    8. Add green chilies, capsicum, onion and saute for 3-4 minutes.
    9. Add macaroni and stir well to coat evenly.
    10. Turn the heat off and take it out in a serving dish.
    11. Garnish with green chilies, coriander leaves.
    12. Your Chicken Tikka Macaroni is ready.

    Serve with steamed veggies


    Put your own spin on it. And lemme know how it turns out. Post a photo on Facebook (Recipestable) or  on Twitter so I can see how lovely yours turn out.

    Happy Clean Eating!!

    If you like this Chicken Tikka Masala Macaroni (Clean Eating Version), Please Subscribe to my blog. I have lots more recipes to share with you. And If you make it then let me know your feedback by commenting below.

  • Hearty Mince Lettuce Cups Recipe

    Hearty Mince Lettuce Cups Recipe

    Aslam-o-Alakaum My Lovelies !!

     In the Name of Allah, Most Gracious, Most Merciful

    Good Morning all, I hope you are all having a fantastic Winter so far & enjoying the same great weather we’re having here! A little wintery spring chill. Brrrrrrrrr!! Finally we are getting proper winter feeling. I’m doing good too! Haha, I’ve been trying to warm my toes up too, so cold here! 😛

    If you read my blog with any regularity, you probably know that I’ve started my journey towards a healthier lifestyle.
    Glad to have started my journey towards healthy eating and a healthy lifestyle. Already seeing results ♥ This new way of eating has been quite the adventure for me.

    So many people think healthy and clean eating is boring & bland? …hmm… I think not. Just Follow my journey, I will make it interesting for you.

    Clean Eating Mince Lettuce Cups 

    Clean eating is great. Healthy eating is giving your body what it needs! Nothing else.No one needs to be hungry or bored. Today I have come up with a very interesting recipe: Clean Eating Mince Lettuce Cups!! 

    clean eating Mince Lettuce Cups
    Photo: Clean Eating Mince Lettuce Cups

    Well don’t droll on my pic of my lettuce cups. lol

    It’s quick, easy to make, cheap and low in fat and carbs– the perfect combo!These clean eating mince lettuce cups are absolutely delicious with some amazing Asian flavours.This is one of those meals that will make you forget you’re eating healthy. Dinner on the table in just over 30 minutes that is loaded with fragrance, a hit of spice and full of freshness.

     Clean Eating Mince Lettuce Cups
    Photo: Clean Eating Mince Lettuce Cups

    This is the easiest, quickest meal you could ever make. And if you’re quick in the kitchen, you could even get this on the dinner table in less than 30 minutes. Plus, it’s budget-friendly and you can easily double or triple the recipe as needed. What more could you ask for?

     Clean Eating Mince Lettuce Cups
    Photo: Clean Eating Mince Lettuce Cups

    So Let’s get started!!

    Ingredients You will Need:

    1. mince 
    2. ginger _ garlic 
    3. lettuce leaves
    4. herb Seasoning 
    5. few veggies (green pepper, green onion)
    6. hot sauce 
    7. tomato paste
    8. lemon
    9. olive oil

    Tools You needed to make this recipe are:

    1. A pan
    2. A wooden spoon
    3. A plate to serve
    4. A knife to cut veggies
    5. Cutting board 

    Check it out the Clean Eating Mince Lettuce Cups recipe and printable version below!!

    Clean Eating Mince Lettuce Cups

    This is the easiest, quickest meal you could ever make. And if you’re quick in the kitchen, you could even get this on the dinner table in less than 30 minutes. Plus, it’s budget-friendly and you can easily double or triple the recipe as needed. What more could you ask for?

    • 250 gm fat free mince meat
    • 1 green onion (finely chopped)
    • 1 small green pepper (thinly sliced)
    • 2 garlic cloves (minced)
    • 1 teaspooon chopped ginger
    • 1 teaspoon extra virgin olive oil
    • 2 drops of lemon juice
    • 1 tablespoon tomato paste
    • 1/2 teaspoon hot sauce
    • 1/2 teaspoon black pepper (freshly ground)
    • salt to taste
    • herb seasoning (optional)
    • 4 large lettuces (in cup shape, I used iceberg)
    • For Garnishing
    • mint leaves
    • lemon slices

    Method

    1. Heat olive oil in a saucepan over medium high heat.
    2. Saute ginger and garlic. Cook, stirring frequently with a wooden spatula. Cook the garlic pieces until they are glazed and golden brown in color.
    3. Add ground meat and cook for 15 minutes or until well browned.
    4. Now stir in the hot sauce and tomato paste.
    5. Stir in the green onions and green pepper until tender, about 1-2 minutes.
    6. Season with salt and pepper, to taste.
    7. Cook for 10 minutes or until mince is cooked thorough.
    8. Remove from the heat and sprinkle herb seasoning.
    9. Spoon into lettuce cups and serve.
    10. Garnish with extra mint or coriander leaves, if using.
    11. Alternatively, serve the mince in bowls with the lettuce cups on the side so people can help themselves.

    Recipe Note’s 

     Eat it with your hands like a wrap (I do!) or be more civil and eat witha a spoon!

    Put your own spin on it. And lemme know how it turns out. Post a photo on Facebook (Recipestable) or  on Twitter so I can see how lovely yours turn out.

    Happy Clean Eating!!

    If you like this Clean Eating Mince Lettuce Cups recipe, Please Subscribe to my blog. I have lots more recipes to share with you. And If you make it then let me know your feedback by commenting below.

  • Broccoli Spaghetti Soup Recipe

    Broccoli Spaghetti Soup Recipe

    Aslam-o-Alakaum My Lovelies !!

     In the Name of Allah, Most Gracious, Most Merciful

    Broccoli Spaghetti Soup ( Clean Eating Version)

    I have slacked off a little on my health and I am working to reclaim it. This month, I am working on my diet and working on improving my all round health and fitness levels. I will NOT let this chronic illness get the best of me. InshaAllah.

    During the winter months, I find myself craving soup time and time again. So Today, I’m sharing an easy and healthy recipe for Broccoli Spaghetti Soup (Clean Eating Version). A simple soup that nourishes the body and soul. 

     Broccoli Spaghetti Soup Recipe
    Photo: Broccoli Spaghetti Soup (Clean Eating Version)

    I Picked these beauties from my Kitchen Garden yesterday. Not bad for the last day of the year and unseasonably cold weather!  Wishing you all Happy Harvesting ♥

    Beatuies from my garden
    Beatuies from my garden

    Oh ya, this is the good stuff. I mean,  spaghetti and broccoli are such a wonderful, comforting combination anyway. But turn that into soup and you’ve got a wonderful meal for a cold winter night! 

    Broccoli Spaghetti Soup (Clean Eating Version)
    Broccoli Spaghetti Soup (Clean Eating Version)

    In the last week, I seriously made four different types of soups. This Broccoli Spaghetti Soup was my favorite of the four, and surprisingly, the healthiest as well!

    The recipe starts with crisp stalks of organic broccoli. I am making the organic distinction here, because the main flavor of this soup comes from the broccoli, so it’s got to be top notch.  That means organic and preferably local.First tossed broccoli with olive oil until tender, caramelized and aromatic.  Then stir in born broth and cooked spaghetti. It’s chunky, brothy savory, and just the right balance of pasta and green veggie. I love the aroma of parsley and chunky broccoli in this soup.

    Broccoli Spaghetti Soup (Clean Eating Version)
    Broccoli Spaghetti Soup (Clean Eating Version)
    Do try it, Great for a busy weeknight too. It cooks up in jus 15 minutes (pretty quick). The ingredients are very basic, you probably have most of them on hand already, and if not, a quick trip to any grocery store will quickly get you what you need.

    Ingredients You will Need:

    1. Organic Broccoli Florets 
    2. Born Broth
    3. Seasoning 
    4. Spaghetti 

    Tools You needed to make this recipe are:

    1. A deep soup pot
    2. A wooden spoon
    3. A Strainer 
    4. Soup Bowls

    Check it out the Broccoli Spaghetti Soup (Clean Eating) recipe and printable version below!!

    Broccoli Spaghetti Soup (Clean Eating Version)

    During the winter months, I find myself craving soup time and time again. So Today, I’m sharing an easy and healthy recipe for Broccoli Spaghetti Soup (Clean Eating Version). A simple soup that nourishes the body and soul.

    • 1 8 ounce package whole wheat spaghetti
    • 1 head Organic broccoli (chopped)
    • 1 teaspoon olive oil
    • 6 cups bone broth
    • 1/4 teaspoon black pepper
    • 1/4 teaspoon garlic powder (optional)
    • 1/4 teaspoon dried parsley
    • a pinch of salt

    Method

    1. Heat 1 teaspoon olive oil in a medium soup pot.
    2. Saute broccoli for 30 seconds. ( Don’t over cook the broccoli).
    3. Add born broth and warm over low to medium low heat.
    4. Break up spaghetti. Place into another pot and cook for 10 minutes or until pasta is al dente. Drain and rinse in cold water.
    5. Now add spaghetti into broth. Season with garlic powder, dried parsley, salt and pepper.
    6. Stir well and cook for 2 minutes.
    7. Ladle soup into bowls. Delicious Broccoli Spaghetti Soup is ready to serve.ENJOY!!

    Serving Suggestions:
    Serve with garlic bread or bran bread-sticks.


    Put your own spin on it. And lemme know how it turns out. Post a photo on Facebook (Recipestable) or  on Twitter so I can see how lovely yours turn out.

    Happy Soup making!

    If you like this Broccoli Spaghetti Soup, Please Subscribe to my blog. I have lots more recipes to share with you. And If you make it then let me know your feedback by commenting below.


  • Chicken Pita Sandwiches Recipe

    Chicken Pita Sandwiches Recipe

    Chicken Pita Sandwiches 

    Need a quick and delicious lunch option? or If you’re looking for fast, easy dishes to bring to a picnic, an Asian twist. Then this Pita Chicken Sandwiches recipe is sure to please you and your family.

    Chicken Pita Sandwiches Recipe
    Photo: Chicken Pita Sandwiches Recipe

    Say goodbye to your boring sandwiches. This Chicken Pita Sandwiches recipe is so easy to make and sure to spice up your lunch routine. Twenty minutes is all you need to whip up these simple yet satisfying Chicken Pita Sandwiches. Perfect to pack for school or work!!

    Chicken Pita Sandwiches Recipe
    Photo: Chicken Pita Sandwiches Recipe

    This mouthwatering sandwiches stuffed with a delicious chicken veggie filling will make mealtime exciting.Ah ___Sounds delish !! This simple Chicken Pita Sandwiches packs a lot of flavor and nutrition, which makes it ideal for an easy weekday meal. They may be tiny in size, but made this way, the lunch or dinner favorite is big on flavor!

    Chicken Pita Sandwiches Recipe
    Photo: Chicken Pita Sandwiches Recipe

    These Pita Chicken Sandwiches will help you enjoy every minute of these glorious warm days. When the weather is beautiful there is nothing better than a picnic. It’s the best appetizer recipe to bring to a picnic that are sure to be a hit!  I put Different veggies with roasted chicken, olives and cheese.You Can also stuff Pita Sandwiches with leftover ingredients from previous meals. Simple, fast and satisfying. Who has time for much more? The options truly are endless. Must try it,  I hope you enjoy it as much as I did!

    Check it out the Chicken Pita Sandwiches Recipe and printable version below!!

    Chicken Pita Sandwiches

    Say goodbye to your boring sandwiches. This Chicken Pita Sandwiches recipe is so easy to make and sure to spice up your lunch routine. Twenty minutes is all you need to whip up these simple yet satisfying Chicken Pita Sandwiches. Perfect to pack for school or work!!

    • 4 Pita breads
    • 2 boneless chicken breasts (cut into thin strips)
    • 1 small green bell pepper (thinly sliced)
    • 1 small yellow bell pepper (thinly sliced)
    • 1 small onion
    • 1 cucumber (thinly sliced)
    • 4 olives (thinly sliced)
    • 1 jalapeño pepper (thinly sliced)
    • 4 tablespoon tomato ketchup
    • 2 tablespoon mayonnaise
    • 2 tablespoon olive oil
    • 1 teaspoon garlic powder
    • 1 teaspoon black pepper
    • salt to taste
    • 1/2 cup grated mozzarella cheese
    • lettuce leaves

    Directions

    1. Heat oil in a frying pan.
    2. Stir fry chicken in hot oil for 4-5 minutes or until no longer pink.
    3. season with salt, garlic powder, black pepper and crushed chili.
    4. Cover the pan and let it cook in its own water for 10 minutes or until chicken is tender.
    5. Now add onion and stir fry for 30 seconds.
    6. Now add green pepper, yellow pepper, jalapeno pepper.
    7. Stir fry for 1-2 minutes then stir in the
    8. tomato ketchup.
    9. Turn the heat off.
    10. Now add olives, cheese and mayonnaise.
    11. Adjust seasoning to taste.
    12. Slightly roast pita bread on hot griddle from both sides.
    13. Put some lettuce leaves and cucumber on a pita bread.
    14. Top with chicken mixture.
    15. Generously cover with another pita bread.
    16. Cut each bread into four pieces.
    17. Transfer into a serving platter. Delicious Chicken Pita Sandwiches are ready to serve. ENJOY!!

    If you like this Chicken Pita Sandwiches Recipe, Please Subscribe to my blog. I have lots more recipes to share with you. And If you make it then let me know your feedback by commenting below.

  • Chicken Shorba Recipe (Desi Chicken Stew)

    Chicken Shorba Recipe (Desi Chicken Stew)

    Chicken Shorba

    Looking for a simple meal? Then try this Chicken Shorba Recipe , you will like the taste of Chicken Shorba._ perfect for week days. It’s a good change in your lunch or dinner. This lip smacking Chicken Shorba Recipe is one of my favorite. It’s prepared in chicken stock with addition of traditional Pakistani ingredients, texture and consistency of an Pakistani Stew and the aroma of Oriental spices.

    chicken shorba

    After a weekend of delicious excesses, I’m ready for a healthy alternative. This weekend I’ve eaten like a queen –fried food, buttery paratha’s, creamy curries, biryani’s, naan, and more units of chocolates than I really care to count. So today I’decide to make light and nutritious meal. Weather is quite rainy so relaxing with this warming and nutritiousChicken Shorba –Chicken Curry– will be something to look forward to when I get home back from Uni.
    I made this Chicken Shorba last night and it only took 1 hour to prepare and cook. It’s in the fridge now and can be warmed up in few minutes. Normally I would serve this tangy and satisfying Chicken Shorba (chicken soup) with steamed rice but to make it easy, I served it with tandoori roti.

    Chicken Shorba Recipe
    Photo: Chicken Shorba Recipe

    Almost every country has their own version of chicken soup. I hope you like and enjoy this version as much as I do!
    If you like this Chicken Shorba Recipe, Please Subscribe to my blog. I have lots more recipes to share with you.

    Check it out the Chicken Shorba Recipe and printable version below!!

    Chicken Shorba

    Perfect for week days. It’s a good change in your lunch or dinner. This lip smacking Chicken Shorba Recipe is one of my favorite. It’s prepared in chicken stock with addition of traditional Pakistani ingredients, texture and consistency of an Pakistani Stew and the aroma of Oriental spices.

    • 2 lbs organic chicken (desi murgh)
    • 2 medium onion (finely chopped)
    • 2 tablespoon butter
    • 2 tablespoon cooking oil
    • 4 cloves garlic (minced)
    • 1 tablespoon fresh ginger; grated
    • 1/2 cup tomato puree
    • 1/2 cup plain yogurt
    • 1 inch piece of cinnamon stick
    • 4 cloves
    • 7 peppercons
    • 1 teaspoon paprika powder
    • 1/2 teaspoon cardamom powder
    • 1/2 teaspoon coriander powder
    • 1/2 teaspoon turmeric powder
    • 1/2 teaspoon garam masala
    • 1/2 teaspoon cayenne powder
    • 4 cups chicken stock
    • salt according to taste

    For Garnishing

    • few coriander leaves

    Directions

    1. Take a large pot, melt the butter over medium heat.
    2. Now add oil and chopped onions, cinnamon stick, peppercorns, and cloves.
    3. Stir and fry until the onion turns translucent and lightly browned.
    4. Stir in the garlic and ginger and the dry masala, blending well.
    5. The aroma coming from your kitchen will be amazing.
    6. Add chicken. Stir and cook for 15 minutes or until chicken is no longer pink.
    7. Now add tomato puree and yogurt.
    8. Cover with a lid and let it simmer on low heat for 40 minutes or until chicken is almost tender and all water dries up.
    9. Remove the lid and cook on hight heat for few minutes or until oil come on top.
    10. Now add the chicken stock.
    11. Bring to the boil, then lower heat and simmer 10 minutes.
    12. If you’re not in a hurry or for a more intense flavour, let the soup simmer for longer.
    13. Transfer into a serving bowl.
    14. Garnish with fresh coriander leaves. Delicious Chicken Shorba is ready to serve. ENJOY!!

    Make sure always to buy fresh chicken & which is hormone free.

    Serving Suggestions:
    Serve with Tandoori Roti.

    Put your own spin on it. And lemme know how it turns out. Post a photo on Facebook (Recipestable) or  on Twitter so I can see how lovely yours turn out.


    Happy Cooking!!

    If you like this post, Please Subscribe to my blog and let me know your feedback by commenting below.. I have lots more recipes to share with you.

  • Restaurant Style Kebab Karahi Recipe

    Restaurant Style Kebab Karahi Recipe

    Who said you can’t make restaurant style Kebab Karahi at home ?? and Who said, you need ready made brand karahi Masala to get the authentic flavor ?? They are wrong !! Try this Kebab Karahi recipe and find on your own.

    Restaurant Style Kebab Karahi Recipe
    Restaurant Style Kebab Karahi Recipe

    Kebab Karahi

    Restaurant Style Kebab Karahi Recipe
    Restaurant Style Kebab Karahi Recipe

    This Kebab Karahi recipe is so easy to make but so tasty to eat. I have made quite a few Kebab recipes you can check them all here.This Kebab karahi has a creamy gravy (curry) which makes it more tasty and flavourful. I made this for a family get together, this dish tastes divine and it is always a big hit among my guests.So hope you will try this out and let me know how it turned out for you.

    Restaurant Style Kebab Karahi Recipe
    Restaurant Style Kebab Karahi Recipe
    Restaurant Style Kebab Karahi Recipe
    Restaurant Style Kebab Karahi Recipe
    Restaurant Style Kebab Karahi Recipe
    Restaurant Style Kebab Karahi Recipe

    This is a simplest kebab curry you can imagine. It can be made in a jiffy and taste great with either rice or roti. So good.

    Don’t skip the papaya paste . That’s the one of two ingredients that make the kabab so melt in mouth . The other ingredient is lamb fat . In authentic recipe kebab is used for this kabab , but beef would do too . If you can’t find the mutton or beef fat , don’t worry substitute it with ghee .

    Check it out the Kebab Karahi Recipe and printable version below!!

    Restaurant Style Kebab Karahi Recipe

    Who said you can’t make Restaurant Style Kebab Karahi Recipe at home ?? and Who said, you need ready made brand karahi Masala to get the authentic flavor ?? They are wrong !!Try this Kebab Karahi recipe and find on your own.

    Ingredients

    For kebab

    • 500 gm lamb mince (keema)
    • 200 gm lamb fat
    • 1 large red onion (finely chopped)
    • 4 cloves garlic (finely chopped)
    • 5 green chillies
    • 2 tablespoon grated ginger
    • 2 tablespoon chopped coriander
    • 1 tablespoon papaya paste
    • 1/2 teaspoon red chili powder or to taste
    • 1/2 teaspoon cumin powder
    • 1/2 teaspoon coriander powder
    • 1/2 teaspoon garam masala powder
    • 1/2 teaspoon black pepper (freshly ground)
    • salt to taste
    • 2 tablespoon oil or melted butter

    For Gravy

    • 1/2 cup oil or ghee
    • 2 medium red onions (finely chopped)
    • 2 to matoes (finely chopped)
    • 1/2 cup plain yogurt
    • 1 teaspoon ginger garlic paste
    • 2 green chillies
    • 1 teaspoon red chili powder
    • 1/4 teaspoon coriander powder
    • 1/4 teaspoon turmeric powder
    • salt to taste

    For Garnishing

    • few coriander leaves
    • 1 inch piece of ginger (cut into julienne)
    • 2 green chillies (thinly sliced)

    Directions

    To Make Kebabs

    1. Place mince(keema) and fat in a food processor or chopper. Add red onion, papaya paste, garlic, green chillies, ginger, coriander, red chili powder, cumin powder, coriander powder, garam masala powder, black pepper and salt.
    2. Process until well combined.
    3. Take it out in a bowl and make kebab’s from the mixture.
    4. Lightly greased a pan with some oil and place the kebeabs on it.
    5. Cook on medium heat for 15 minutes or until they are done.
    6. Set aside.

    To Make Gravy

    1. Heat oil in a wok or pan over medium heat.
    2. Saute onion and ginger garlic paste for3-4 minutes or until the onions turn light brown.
    3. Add spices, yogurt and tomatoes and cook on high heat with constant stirring until the tomatoes are cooked.
    4. Add a splash of water if necessary.
    5. Now add all the spices and adjust the seasoning according to your taste.
    6. Add 1/2 cup water and stir well.
    7. Bring to a boil and add your kebabs and cover the wok.
    8. Cook on very low heat for 20 minutes or until gravy is well done.
    9. Take it out in a serving dish.
    10. Garnish with coriander, green chillies and ginger julienne.
    11. Delicious Kebab Karahi is ready to serve. ENJOY!!

    You can also make these kebabs from chicken or beef mince.

    I have also posted Namak Mandi Karahi Gosht which is another easiest & tastiest version of making Karahi. Do check it out as well.


    Put your own spin on it. And lemme know how it turns out. Post a photo on Facebook (Recipestable) or  on Twitter so I can see how lovely yours turn out.


    Happy Cooking!!

    If you like this post, Please Subscribe to my blog and let me know your feedback by commenting below.. I have lots more recipes to share with you.

  • Heart-Healthy Pan Fried Fish Recipe

    Pan Fried Fish

    This Pan Fried Fish recipe is melt-in-your-mouth delicious and healthy too! Fish Fillets or Fish steaks are pan-fried, searing in the flavors and omega-3 goodness of the fish.

    Tangy Pan Fried Fish (Clean Eating Version)
    Photo: Tangy Pan Fried Fish (Clean Eating Version)

    It is pretty simple and fast to put together and differs completely from another pan fried fish I have posted earlier. This Tangy Pan Fried Fish relies on warm flavor of ginger, sharp garlic and the grassy heat of green chillies along with a tang from vinegar and chaat masala. I pan fry the fish in virgin olive oil, you need to try fish cooked in it to know how awesome it tastes but canola or other oil will work fine too.

    Photo: Tangy Pan Fried Fish (Clean Eating Version)
    Photo: Tangy Pan Fried Fish (Clean Eating Version)

     Check it out the Tangy Pan Fried Fish Recipe and printable version below!!

    Tangy Pan Fried Fish

    This Tangy Pan Fried Fish recipe is melt-in-your-mouth delicious and healthy too! Fish Fillets or Fish steaks are pan-fried, searing in the flavors and omega-3 goodness of the fish.

    • 1 pound thick fish fillets (cleaned (I use mahi mahi fish))
    • scant pinch turmeric powder
    • 1 tablespoon ginger garlic paste
    • 1 teaspoon green chilli paste
    • 1 tablespoon olive oil
    • 1 tablespoon white vinegar
    • 1 tablespoon lemon juice
    • 1 teaspoon red chilli flakes
    • 1/2 teaspoon Dijon mustard
    • 1/4 teaspoon roasted cumin powder
    • 1/2 teaspoon chaat masala powder
    • 1/2 teaspoon garam masala powder
    • salt to taste
    • 2 tablespoon rice flour

    To Serve

    • lemon wedges
    • grated white radish (add pinch of salt and cayenne pepper)

    Directions

    1. Clean fish properly and pat dry on paper towel or kitchen towels.
    2. Sprinkle turmeric over the fish fillets and set aside.
    3. Meanwhile, In a medium bowl, mix together the green chili paste, ginger garlic paste, vinegar, lemon juice, red chili, Dijon mustard, cumin, chaat masala, garam masala powder and salt.
    4. Rub this marination over the fish fillets.
    5. Refrigerate for at least 30 minutes to blend flavors.
    6. When ready to cook, set the fish out of the refrigerator.
    7. Heat up 1 tablespoon olive oil in a heavy bottomed pan over medium heat.
    8. Sprinkle rice flour over the marinated fish.
    9. Mix until well combined. The liquid in the marinade and from the fish should be enough to moisten the rice flour.
    10. Pan fry the fish on medium low heat in a single layer, flipping midway to brown on both sides. It took me about 4 minutes per sides.
    11. Remove from the pan and transfer into a serving platter. Tangy Pan Fried Fish is ready to serve.

    Serving Suggestions:
    Serve immediately with lime wedges and steamed vegetables, brown rice pilaf or lentils.

    I have also posted Restaurant Style Tawa Fish Recipe which is another quick version of making Fried Fish. Do check it out as well.

    If you like this Tangy Pan Fried Fish Recipe,Please Subscribe to my blog. I have lots more recipes to share with you. And If you make it then let me know your feedback by commenting below.

  • Aloo Keema Recipe (Minced Lamb With Potatoes)

    Aloo Keema (Minced Lamb With Potatoes)

    A very satisfying meal,You can categorize it as an exotic gourmet dish or a very simple homely dish,any which ways its very fulfilling and a treat to your taste buds.

    This is my mothers recipe for a simple Mince Curry or aloo keema as us Pakistanis like to call it. It is a really tasty curry especially when you add potatoes and spices like I did! Here’s a classic Aloo Keema – Minced Lamb With Potatoes Recipe that everyone, even the fussy kids, will love. Do try and don’t forget to share your experience with us!!

    Minced Lamb With Potatoes Recipe
    Photo: Aloo Keema – Minced Lamb With Potatoes

    Bismillah, let’s begin!

    Check it out the Aloo Keema – Minced Lamb With Potatoes Recipe and printable version below.

    Minced Lamb With Potatoes (Aloo Keema)

    • 500 gm lamb minced (keema)
    • 2 onions (finely chopped)
    • 2 to matoes (finely chopped)
    • 1 tablespoon ginger garlic paste
    • 3 medium potatoes (peeled & cubed)
    • 4 tablespoon sunflower oil
    • 1 teaspoon cumin powder
    • 1 teaspoon coriander powder
    • 1 teaspoon red chili powder
    • 1/2 teaspoon cayenne powder
    • 1/4 teaspoon turmeric powder
    • salt to taste
    • 2 tablespoon plain yogurt
    • 4 green chilies (thinly sliced)
    • few coriander leaves

    Method

    1. Heat oil in a deep pot or wok over medium high heat. Add the onions and cook for 3-4 minutes or until they turn light brown.
    2. Add the garlic and ginger paste. and saute for about 1 minute till you smell the aroma.
    3. Now add the chopped tomatoes next along with cumin powder, turmeric, cayenne, coriander and red chilli powder.
    4. Stir and cook for 5 minutes or until oil comes on top.
    5. Add minced. Turn heat to high and stir it with a spoon for 20 minutes on medium high heat.
    6. The meat will start separating,changing color, sweating and becoming watery. Do not worry, everything is going as per plan.
    7. Now add yogurt, 1/4 cup water and salt. Stir well.
    8. Turn the heat to the lowest possible on your burner.
    9. Cover the pot with a lid and let it simmer on low heat for about 20 minutes or until minc is cooked thorough. Note; {You ll need to stir and check periodically to ensure that lamb is not sticking to the bottom. Add more water if needed.}
    10. Now add the potatoes and again cover the pot.
    11. Cook covered for 10 minutes or until the potatoes are almost cooked.
    12. Remove the lid. Check the seasoning and cook on high again for 5 minutes till everything comes together.
    13. Garnish with chopped coriander and green chilies.
    14. Dish it out. Minced Lamb With Potatoes are ready to serve. ENJOY!!

    Serving Suggestions:
    Serve with chapati or brown rice along with green salad.

    Recipe Note’s:

    1. The cooking time will vary if you are using beef or chicken.
    2. Don’t add too much water at the beginning because ground meats leave moisture as they cook.Add water at intervals as per the consistency you want.
    3. At the end of about 20 minutes of cooking you will see that oil separating from and change in color of the ground meat.

    I have also posted Minced lamb with Peas which is another easiest & tastiest version of making dinner. Do check it out as well.


    Put your own spin on it. And lemme know how it turns out. Post a photo on Facebook (Recipestable) or  on Twitter so I can see how lovely yours turn out.


    Happy Cooking!!

    Keep remember me in your Dua’s and Stay tuned for new content on the blog 🙂

    If you like this post, Please Subscribe to my blog and let me know your feedback by commenting below.. I have lots more recipes to share with you.

  • Best Healthy Chicken Parmesan Recipe

    Best Healthy Chicken Parmesan

    Who said chicken Parmesan has to be deep-fried and loaded with fatty cheeses to be good? This Clean Eating  alternative saves you almost 600 calories.  Chicken breasts are breaded with flavorful crumbs, herbs, and Parmesan cheese, then baked for the easiest, quickest chicken dish ever.Serve with a salad and Broccoli or Brown rice for a quick, scrumptious dinner. 

    Clean Eating Chicken Parmesan Recipe
    Photo: Clean Eating Chicken Parmesan Recipe

    Check it out the Clean Eating Chicken Parmesan Recipe here!!

    Clean Eating Chicken Parmesan

    This chicken Parmesan dish is made with all fresh ingredients so it is a great healthy and low-calorie dish with lots of flavor. I am trying to incorporate a more balanced and healthy diet into my life.

    • 4 skinless & boneless chicken breasts

    For Sauce

    • 1 small onion (chopped)
    • 1 small green bell pepper (seeded and chopped)
    • 2 garlic cloves (finely chopped)
    • 1 jar organic crushed tomatoes (( about 28 ounce))
    • 1 tablespoon sun dried tomato paste
    • 1 teaspoon dried oregano
    • 1 teaspoon dried basil
    • 2 teaspoon olive oil

    For Chicken Coating

    • 1/2 cup whole wheat panko bread crumbs
    • 1/2 cup low fat mozzarella cheese (shredded)
    • 2 tablespoon low fat Parmesan cheese (grated)
    • 1/2 teaspoon dried thyme
    • 1/2 teaspoon dried oregano
    • 1 tablespoon Dijon Mustard
    • salt and pepper to taste
    • Olive oil cooking spray

    For Serving

    • broccoli florets (steamed or roasted)
    1. Flatten chicken to 1-inch thickness with meat mallet or rolling pin.
    2. Preheat oven to 180ºC or 400ºF. Lightly coat a baking tray with olive oil cooking spray.
    3. Now heat oil in a saucepan over medium heat. Sauté onion, garlic and bell pepper in hot oil for 3-5 minutes or until crisp-tender. Now add oregano and basil. Cook and stir for 30 seconds or until oregano is fragrant.
    4. Stir in the tomatoes and tomato paste. Bring to a boil. Reduce heat to low, Cover the pan and let it simmer for 25 minutes or until done.
    5. Meanwhile, In a shallow bowl, combine together the panko bread crumbs, Parmesan, oregano, thyme, salt and black pepper.
    6. Now brush both sides of each chicken breast with Dijon Mustard. Roll each breast into panko mixture then turn to coat evenly.
    7. Place chicken on the prepared baking tray. Coat surface of chicken with cooking spray. Bake, in the preheated oven, for 20 minutes or until half-done.
    8. Now top each chicken breast with 2 tablespoon tomato sauce and 2 tablespoon mozzarella cheese. Return chicken to oven and bake 10 minutes more, until cheese is melted and bubbly and crust is golden brown.
    9. Arrange roasted broccoli on a serving plate and top with remaining tomato sauce and Parmesan Chicken.

    Make your chicken Parmesan a bit more golden in color by toasting the panko in a skillet over medium heat first.

     If you like Clean Eating Chicken Parmesan Recipe and make it then let me know your feedback by commenting below.And if you know more innovative ways in which we can utilize this mouth watering Clean Eating Chicken Parmesan, do share with us and we would be glad to give it a try.

  • Healthy Vegetable Fried Brown Rice Recipe

    Healthy Vegetable Fried Brown Rice Recipe

     Vegetable Fried Brown Rice Recipe
    Photo: Vegetable Fried Brown Rice

    The sky is the limit when it comes to preparing fried rice.  Vegetarian Fried Brown Rice  is a popular dish to be sure. But the stuff you get in restaurants is a stroke in a bowl. Not very appetizing if you ask me. While this dish will always be a little high on the sodium scale, homemade and clean eating is the only way to go if you just cannot live without it.

    Vegetable Fried Brown Rice (Clean Eating Version)
    Photo: Vegetable Fried Brown Rice (Clean Eating Version)
     Vegetable Fried Brown Rice (Clean Eating Version)
    Photo: Vegetable Fried Brown Rice (Clean Eating Version)
     Vegetable Fried Brown Rice (Clean Eating Version)
    Photo: Vegetable Fried Brown Rice (Clean Eating Version)

    With this Vegetarian Fried Brown Rice Recipe I use brown rice and a little olive oil to make it healthier and six different types of vegetables.The essence of this dish lays in its versatility. This is really a “left-over” dish. So save yourself some work and wait until you have some cold, cooked  brown rice and fresh veggies in the fridge that you need to use up. This Vegetarian Fried Brown Rice Recipe is perfect for that occasion.  Top with a little Homemade chilli sauce and you’ve got a wonderful dinner!

     Vegetable Fried Brown Rice (Clean Eating Version)
    Photo: Vegetable Fried Brown Rice (Clean Eating Version)

    Check it out the Vegetarian Fried Brown Rice Recipe and printable version below!!

    Clean Eating – Vegetarian Fried Brown Rice

    Nothing could be easier than this light version of fried brown rice. With this Vegetarian Fried Brown Rice Recipe I use brown rice and a little olive oil to make it healthier and six different types of vegetables.

    • 2 cups brown rice (cooked)
    • 2 organic eggs (lightly beaten)
    • 2 tsp olive oil
    • 1 garlic clove (minced)
    • 1 green onion (thinly sliced)
    • 1/2 cup boiled green peas
    • 1/2 cup sweet corns (boiled)
    • 1/2 cup shredded cabbage
    • 1/2 cup grated carrots
    • 1/4 cup chopped green bell pepper
    • 1 teaspoon crushed red chilli
    • salt to taste

    Directions

    1. In a small bowl, beat eggs until small bubbles appear.
    2. Heat 1 teaspoon olive oil in a wok over medium-high heat.
    3. Add eggs and swirl around wok to form a thin omelette.Cook for 1 minute. Turn and cook a further minute.
    4. Remove to a board and thinly sliced.
    5. Now add remaining oil, sauté garlic in hot oil for few minutes.
    6. Now increase heat to high.Add green peas, sweet corns, carrot and cabbage.
    7. Stir-fry for 2 minutes or until crisp-tender.
    8. Add green pepper and green onion. Stir fry for few seconds.
    9. Then add brown rice.
    10. Season with salt and pepper.
    11. Stir fry 2-3 minutes or until heated through.
    12. Add egg and stir to combine.
    13. Dish it out.Vegetarian Fried Brown Rice is ready to serve. ENJOY!!

    Serving Suggestions:
    You can serve it with Fish Manchurian.

    If you like this Vegetarian Fried Brown Rice Recipe, Please Subscribe to my blog. I have lots more recipes to share with you. And If you make it then let me know your feedback by commenting below.


  • Bhuna Keema Recipe (Minced Meat With Whole Spices)

    When you want to throw together a meal in just a few minutes, this can seem like an impossible task but Bhuna Keema is quick meal but taste just as good as anything you’ve spent hours to create.

    So do try my Bhuna Keema recipe and put a hearty smile on your family’s face. Once you have tried it, you will be sure to make it a regular addition to your dining.

    Bhuna Keema recipe
    Bhuna Keema recipe

    Check it out the Bhuna Keema Recipe here!!

    Bhuna Keema (Minced Meat With Whole Spices) Recipe

    • 500 gm mince (keema)
    • 1/4 cup oil
    • 2 tsp cumin seeds
    • 4 onions (grated)
    • 1 tbsp ginger paste
    • 1 tbsp garlic paste
    • 1 cup tomato puree
    • 1 tbsp chili powder
    • 1 tbsp coriander powder
    • 1 tsp garam masala powder
    • 1/4 tsp turmeric powder
    • salt to taste

    For Garnishing

    • 2-3 green chilies (thinly sliced)
    • 4 tbsp fresh coriander leaves (finely chopped)

    Method

    1. Heat oil in a pan over medium heat.
    2. Saute onion in hot oil until translucent.
    3. Now add ginger garlic paste and mince. Cook, uncovered, on high heat for 10 minutes, stirring thrice.
    4. Now stir in the tomato puree, salt, chilli, coriander powder, turmeric powder.
    5. Cook at high heat for 25 minutes or until cooked is thorough.
    6. Transfer into a serving dish.
    7. Sprinkle Garam Masala over it.
    8. Garnish with coriander leaves and green chilies. Bhuna Keema is ready to serve. ENJOY!!

    Serving Suggestions:
    Serve with boiled rice or roti.

    I have also posted Aloo Keema which is another easiest & tastiest version of making dinner. Do check it out as well.


    Put your own spin on it. And lemme know how it turns out. Post a photo on Facebook (Recipestable) or  on Twitter so I can see how lovely yours turn out.


    Happy Cooking!!

    Keep remember me in your Dua’s and Stay tuned for new content on the blog 🙂

    If you like this post, Please Subscribe to my blog and let me know your feedback by commenting below.. I have lots more recipes to share with you.

  • Easy Spicy Mutton Pulao Recipe: Perfect for Weeknight Dinners

    Spicy Mutton Pulao

    Ramadan is a delicious time of the year in the Muslim world: Since people fast from sunrise to sunset, meals take on a special meaning. This month is associated with many delicacies with which the day long fast is broken. Spicy Mutton Pulao is one such dish.

    Spicy Mutton Pulao Recipe
    Photo: Spicy Mutton Pulao Recipe

    Spicy Mutton Pulao is a filling rice dish that can provide you with a heavy dinner after an entire day of fasting. That is why it is great Ramadan Recipes.

    Spicy Mutton Pulao Recipe
    Photo: Spicy Mutton Pulao

    Spicy mutton pulao is made out of red meat which is very popular for most Ramadan recipes. You need the proteins and energy from red meat when you are fasting. This Spicy Mutton Pulao recipe is quite similar to the biryani with minor differences in the cooking style. All the spices used in Mughlai mutton pulao make it a rich food item. Do try it!!

    Spicy Mutton Pulao Recipe
    Photo: Spicy Mutton Pulao

    Check it out the Spicy Mutton Pulao Recipe and printable version below!!

    Spicy Mutton Pulao

    This Spicy Mutton Pulao recipe is quite similar to the biryani with minor differences in the cooking style. All the spices used in Mughlai mutton pulao make it a rich food item. Do try it!!

    • 500 gm mutton
    • 2 cups basmati rice
    • 3-1/2 cup mutton stock (yakhni)
    • 2 onions (thinly sliced)
    • 4 tablespoon desi ghee
    • 1/2 cup plain yogurt
    • 2 tablespoon ginger garlic paste
    • 4 green chilies (thinly sliced)
    • 1 teaspoon red chilli powder
    • 1 teaspoon cumin seeds (roasted)
    • 1 inch piece of Cinnamon stick
    • 6 Peppercorns
    • 4 cloves
    • 4 cardamom
    • 1 bay leaf
    • a pinch of saffron (soaked in milk)
    • salt according to taste
    1. Marinate the mutton pieces with salt, red chilli, cumin, and ginger garlic paste for 40 minutes.
    2. Heat desi ghee in a heavy bottom skillet over medium heat.
    3. Saute the onions in it for 5 minutes on a low flame until lightly browned.
    4. Now add green chillies and cook for a minute on a low flame.
    5. Add the marinated mutton. Stir for 2 minutes until the spices are mixed uniformly.
    6. Add 2 cup water and Cover the skillet. Cook on a low flame for 40 minutes or meat is almost tender.
    7. Now add bay leaf, peppercorns, cinnamon, cardamom and cloves. Let the flavours bleed for 1 minute.
    8. Add yogurt and cook meat on high flame for few minutes or until oil comes on top.
    9. Add rice and yakhni. Lightly stir to mix.
    10. Adjust the seasoning.Cover and cook for 18-20 minutes on low flame.
    11. When the rice is cooked, pour the saffron on top the pulao.
    12. Put on dum for 10 minutes or until full done.
    13. Fluff rice with a fork and transfer into a dish. Spicy Mutton Pulao is ready to serve.

    Serving Suggestions:
    Serve with raita and onion rings.

    I have also posted Champ Pulao which is another easiest & tastiest version of making pulao at home. Do check it out as well.  It’s finger lickin’ good. You’ll be coming back for more. 


    Put your own spin on it. And lemme know how it turns out. Post a photo on Facebook (Recipestable) or  on Twitter so I can see how lovely yours turn out.


    Happy Lunch Making!!

    If you like this post, Please Subscribe to my blog and let me know your feedback by commenting below.. I have lots more recipes to share with you.


  • Healthy & Flavorful: Tawa Fish Recipe with a Light & Crispy Coating

    Tawa Fish

    A quick Tawa Fish recipe that requires little effort and tastes wonderful. Fish fillets cooked on a tawa (iron griddle) and does really impact on the flavor, with simple spices. A must try recipe!

    Tawa Fish Recipe
    Photo: Tawa Fish Recipe

    Check it out the Tawa Fish Recipe and printable version below!!

    Tawa Fish Recipe

    • 700 gm fish fillets (without fat)
    • 2 tablespoon garlic paste
    • 1 tablespoon ginger paste
    • 2 tablespoon lemon juice
    • 2 tablespoon Vinegar
    • 2 teaspoon crushed red chili
    • 1 teaspoon coriander powder
    • 1 teaspoon cumin powder
    • 1 teaspoon garam masala powder
    • 1/4 teaspoon turmeric powder
    • salt to taste
    • oil for shallow frying
    • chaat masala

    For Garnishing

    • lemon wedges
    • salad leaves

    Method

    1. Sprinkle salt on fish pieces.
    2. Leave aside for 10 minutes then wash and strain excess water.
    3. Now pour vinegar and lemon juice in a bowl.Add turmeric, chilli powder, coriander powder, garam masala, black pepper, cumin powder, garlic paste and salt in it.
    4. Mix well.
    5. Put this mixture on the fish fillets. Cover and marinate for at least 30 minutes.
    6. Heat oil in a shallow pan for frying fish.
    7. Fry fish for 4-5 minutes on each side or until fish flakes easily with a fork.
    8. Transfer into a platter. Sprinkle chaat masala over it.
    9. Garnish with salad leaves and lemon wedges. Tawa Fish is ready to serve. ENJOY!!

    Serving Suggestions:
    Serve with date chutney.

    I have also posted Crumb Fried Fish which is another easiest & tastiest version of making pulao at home. Do check it out as well.  It’s finger lickin’ good. You’ll be coming back for more. 


    Put your own spin on it. And lemme know how it turns out. Post a photo on Facebook (Recipestable) or  on Twitter so I can see how lovely yours turn out.


    Happy Lunch Making!!

    If you like this post, Please Subscribe to my blog and let me know your feedback by commenting below.. I have lots more recipes to share with you.

  • Family Favorite: Easy Chicken Keema Handi Recipe (Ready in Under 30 Minutes!)

    Chicken Keema Handi

    A delicious and simple Chicken Keema Handi Recipe to follow in week days. Chicken Keema Handi is a distinct taste then normal mince cooking.Goes great with Garlic Rice or Chapati.

    Chicken Keema Handi recipe
    Photo: Chicken Keema Handi

    Check it out the Chicken Keema Handi Recipe here!!

    Chicken Keema Handi Recipe

    • 500 gm chicken mince
    • 1/4 cup cooking oil
    • 2 onions (finely chopped)
    • 1 tablespoon ginger garlic paste
    • 1 tablespoon lemon juice
    • 2 to matoes (finely chopped)
    • 1 teaspoon red chili powder
    • 1 teaspoon coriander powder
    • 1 teaspoon cumin powder
    • 1/2 teaspoon black pepper (freshly crushed)
    • 1/2 teaspoon garam masala powder
    • salt to taste

    For Garnishing:

    • Few coriander leaves
    • few green chilies (thinly sliced)
    1. Heat oil in a clay pot over medium heat.
    2. Saute onion in hot oil until they turn to light pink in color.
    3. Add ginger garlic paste and cook for 30 seconds. Now add tomatoes, red chili, coriander powder, cumin powder, turmeric powder and salt.
    4. Cook for 4-5 minutes or until all water dries up.
    5. Now add chicken mince (keema) and cook well for 15-20 minutes or until chicken is no longer pink.
    6. Now add lemon juice and put on dum for 5 minutes or until well done.
    7. Garnish with coriander leaves and green chilies. Chicken Keema Handi is ready to serve. ENJOY!!

    Serve with Garlic Rice or Chapati.

    Main Course
    Indian, Pakistani
    30 minutes meals, Chicken, chicken mince, Dinner, keema, mince, Quick and Easy

    If you like Chicken Keema Handi recipe and make it then let me know your feedback by commenting below.And if you know more innovative ways in which we can utilize this  mouth watering Chicken Keema Handi, do share with us and we would be glad to give it a try.