An essential part of the culinary heritage of Pakistan is the celebration of food with family and friends embedded in the concept of ‘dawat’ (feast). And anyone who hosts a ‘dawat’ (feast) knows that there’s always leftovers to deal with. As delicious as Pakistani Dawats (feast) are, you can only have so much roasted meat and stuffing for a meal. Instead of having the same food for the next day, transform the dishes into new ones!
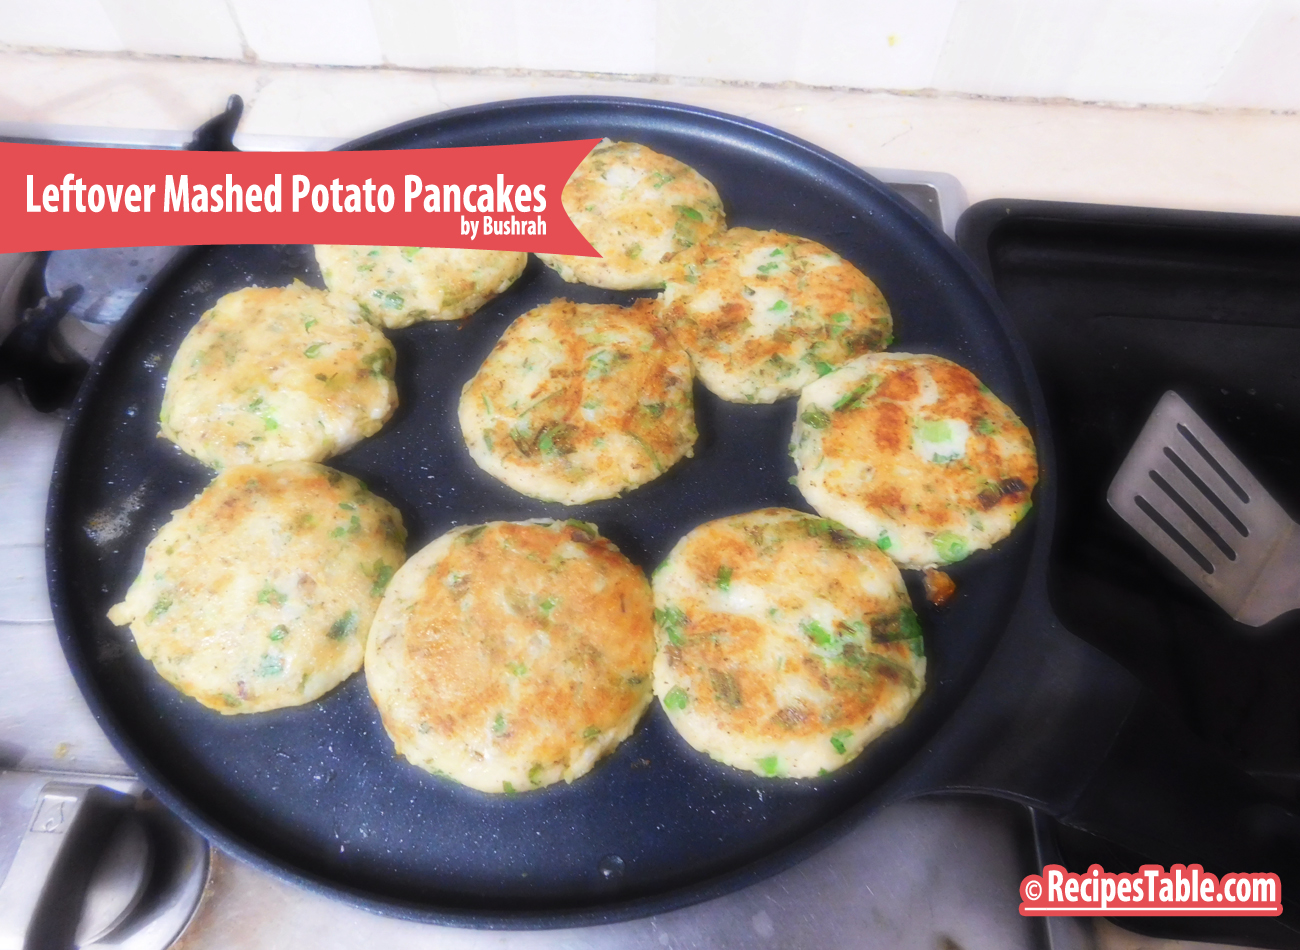
Leftover Mashed Potato Pancakes
Last week, we hosted a ‘Family Dinner’ and made the ‘Roasted Chicken with Mashed Potatoes. We usually use leftover roasted meat for a sandwich or rolls with the apricot or mint chutney (sauce), gravy and stuffing, but what about the mashed potatoes? Add some flour, egg and cheese and turn them into mashed potato pancakes! Great for breakfast, lunch, or as a side dish or light dinner . A Perfect way to enjoy leftover potatoes and the flavor combinations are endless!
A Perfect way to enjoy leftover potatoes and the flavor combinations are endless!
I love making these Potato Pancakes whenever I have leftover mashed potatoes so I don’t feel like I’m eating the same thing the next day. Serving size will change depending on how much mashed potatoes you have leftover. This works best with cold mashed potatoes.
Photo: Leftover Mashed Potato Pancakes
These are as easy to make as normal pancakes – just mix together the mashed potatoes, flour, eggs, cheese, green onions and seasoning. Then cook the batter in a large pan until golden brown.
Leftover Mashed Potato Pancakes
With their crispy exterior and creamy, cheesy center, there’s not much to dislike here. I recommend topping these with a sour cream or garlic mayo.
Leftover Mashed Potato Pancakes
You can really get creative with the seasonings and add ins in this easy recipe! Pretty much anything in your fridge is game… add some spices & herbs, a little bit of meat/protein and whatever veggies you have on hand!
Remember to revel in your own amazingness for reducing food waste, saving time and making the best breakfast ever 🙂
Check it out the Leftover Mashed Potato Pancakes recipe and printable version here!!
If you make this recipe, be sure to snap a photo and hashtag it #Recipestable. I’d love to see what you cook!
What are your holiday traditions guys? I would love to hear some from you all. Are there recipes passed down to you from your grand mom? Or the one from many generations? Share them all in comments below.
How are you all doing? Did anything exciting happen lately? I am sorry for my absence, life has kept me, but I have a free few days a head of me to be around more.
Let’s Start Today’s Post with some Food for the Soul
“Expectation is the root of all heartache”. _William Shakespeare
I guess I need not say much about the quote I am sharing with all of you today. I am a person of high expectations – despite trying to develop myself into a better person and having reduced my level of expectation from all around me, I have not reached the level where I would have zero expectation.
I guess it is not human to reach that kind of a stage, but still I would love to reach a stage where my expectations are so low that it does not guarantee any heartbreaks if things don’t happen just like how I want it to be. I really don’t know whether I will ever reach that situation but yes, I am trying…
It’s Getting Cold . Now Let’s Have Some Food Talk To Warm & Nourish Our Soul!!
Today’s Recipe: Spaghetti Meatballs
What’s better than a warm fire and a big bowl of comfort food on a cold winter night? Today I want to share a recipe that feels, to me, like the closest you can get to “comfort food” during Whole 30.
Can’t stop, won’t stop with the Comfort Food recipes this winter. ♡
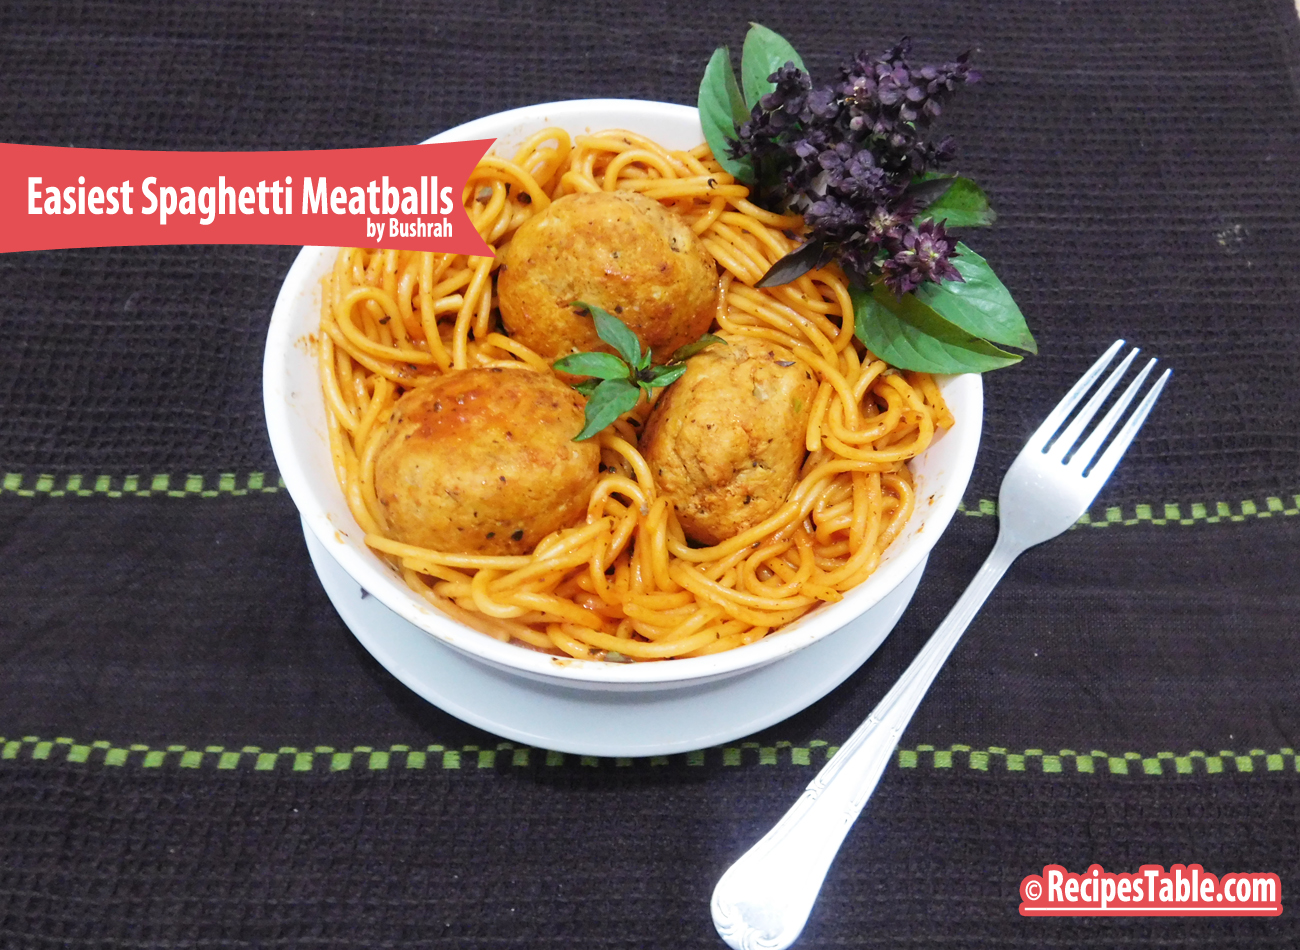
For a bowl of Italian comfort, Make my best & Easiest Spaghetti Meatballs! It only takes 35 minutes to make this delicious family favorite, all from scratch, and I promise you will never have leftovers. While the spaghetti sauce cooks, you’ll make the meatballs and while the meatballs cook, you’ll boil your pasta. Makes 16 meatballs, two per person. I made these meatballs with chicken mince , but you can use whatever ground meat you’d like to use, actually(beef, lamb, turkey). They are super soft, tender and juicy because they cook right in the sauce and I used fresh bread crumbs and not dried ones.The sauce is my Homemade Italian Tomato Sauce and I just add the meatballs (& spaghetti) to make this a complete meal… but don’t forget the salad.
The Best and Easiest Spaghetti Meatballs
This is really a quick and easy recipe because the sauce takes 5 minutes of prep and the meatballs take 10 minutes to put together. Then it all cooks in one pot and you have the most delicious spaghetti dinner.
The Best and Easiest Spaghetti Meatballs
Whether you’re having company or a family dinner, you can’t go wrong with Easiest Spaghetti Meatballs. Try my easy recipe and you’ll see why they call it comfort food. They really just melt in your mouth.
Here’s your go-to, foolproof, The Easiest Spaghetti Meatballs recipe you’ll never want to be without.
I have also posted Mince Macaroniwhich is another easiest & tastiest version of making Pasta home. Do check it out as well. It’s finger lickin’ good. You’ll be coming back for more.
Put your own spin on it. And lemme know how it turns out. Post a photo on Facebook (Recipestable) or on Twitter so I can see how lovely yours turn out.
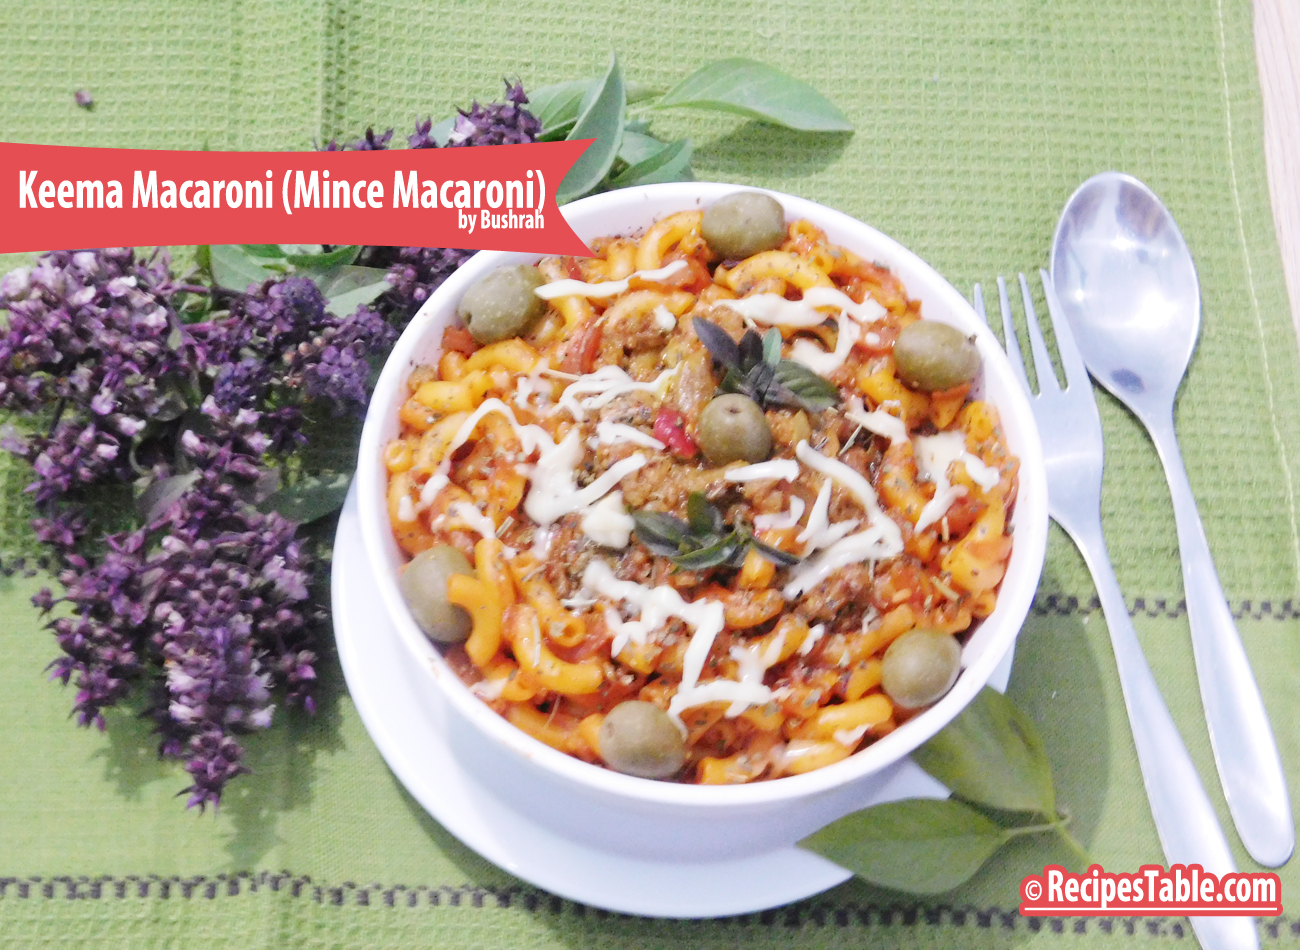
Pasta, for me, is the ultimate comfort food. I love anything to do with pasta or macaroni, as they are my go-to on my lazy days. Today i am sharing a super easy Keema Macaroni recipe for busy weeknight Meals. One dish I make quite frequently when I have some mince is this one. Nice and simple, full of flavors.
Photo: Keema Macaroni ( Mince Macaroni)
This ain’t your ordinary pasta. With flavors bursting out from every corner, this one is delicious! To make it more unique and give a distinct flavor, I have used my ever favorite Italian Pasta Sauce.
Photo: Keema Macaroni ( Mince Macaroni)
You can use any macaroni for this recipe, but I totally recommend trying elbow or something that can help hold all of those tiny pieces of mince. I used my favorite whole wheat pasta. Cook it al dente according to package instructions.
While the pasta is cooking, saute up an onion and mince until cooked. Then add in some garlic, herb seasoning and pasta sauce. And once the pasta is cooked, drain and add it to the saute pan. I would add a dollop cheese or mayonnaise to make it more moist and gulp it down!
Isn’t that to easy?? Easy enough even for a weekday night? Of Course Yes!!
Photo: Keema Macaroni ( Mince Macaroni)
This is a really delicious pasta dish and the taste of the basil really comes through beautifully. The minced meat balances out the starch of the macaroni really well. A perfect dance of herb and spice ensues in your mouth…That you have to experience!
As you can see, the recipe is just as good and vibrant and delicious as ever. 🙂
Photo: Keema Macaroni ( Mince Macaroni)
Some Tips for the Perfectly Cooked Keema Macaroni:
Never cook your macaroni in boiling hot water, it destroys the outer layer of the macaroni however you may not realize it. So, always throw in your macaroni or whatsoever in simmering water, a stage before boiling for best results.
Always add a reasonable amount of salt to water, in which you will be cooking your macaroni.
Once your macaroni has been boiled, strain it, take it out of the hot water and quickly rinse them in cold or regular tap water and the set aside. This stops the macaroni from further cooking, which results in soggy, dull and bland macaroni.
Once you throw macaroni into your dish, let it cook and absorb the wonderful flavours of the dish, by letting it sit in the pan for 2-3 minutes with the lid closed and on slowest flame. Macaroni is bland, has no particular flavour so this step is very critical as well as rewarding.
Check it out the Keema Macaroni (Mince Macaroni) recipe and printable version here!!
Recipe Note’s:
You can use any pasta of choice , i like the taste of brown rice pasta compared to others.
You can add veggies e.g. carrots, capsicum, green peas if you like. Everything in this recipe is optional. Go as you please. Play with flavours.
If you make this recipe, be sure to snap a photo and hashtag it #Recipestable. I’d love to see what you cook!
What are your holiday traditions guys? I would love to hear some from you all. Are there recipes passed down to you from your grand mom? Or the one from many generations? Share them all in comments below.
Assalam-o-Alaikum, how are you? Yep, it’s been almost a month since we met. First things first…I had my mid-term exams, so I was lil busy with studying and the other stuff in my life.
However this gap between us wasn’t planned. I was hoping to catch up with you in between, but it didn’t work out.
My celebration “yay, exam is over!”
Finally exams are over I’m finally free to do whatever I want (blogging, eating yummy food, spending time with my plants)😌
Anyways, the first thing I wanted to do was to just pop in here & say a quick hi to you. I hope you roll into the weekend in a joyous mood! May your day be as fantastic as you are!
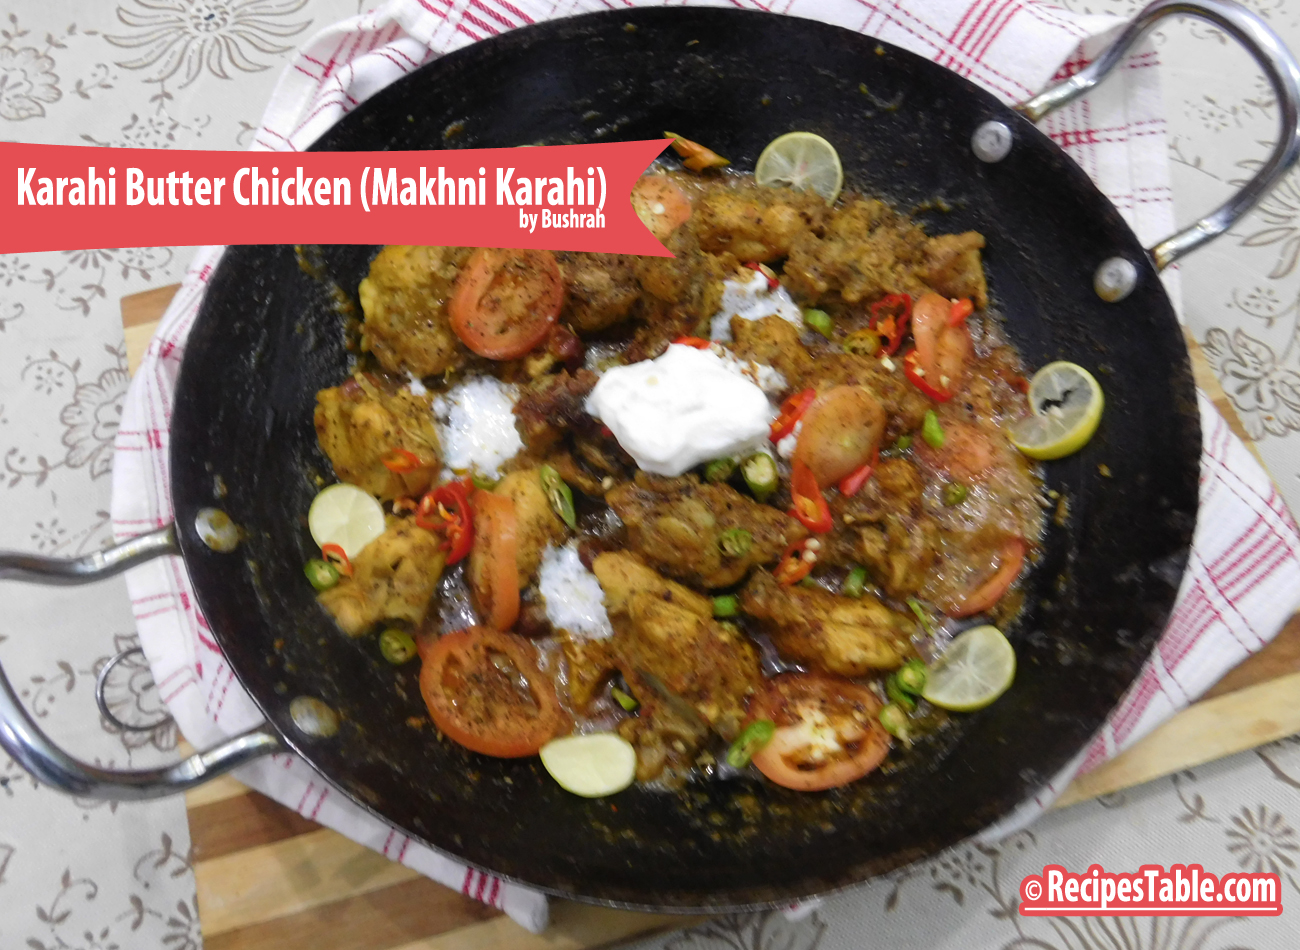
Karahi Butter Chicken (Makhni Karahi)
To release some exams stress, I made this butter karahi by twisting my Father’s recipe…delicious goodness. Can’t wait to share it with you. He used to make the best food. He was an expert on how to make a really good Butter Chicken. Saying that, I’m not too sure how He would feel about this Karahi Butter Chicken version that I’m currently loving.
Karahi Butter Chicken (Makhni Karahi)
Name me one thing that doesn’t taste better with a few dollops of cream, a knob or so of butter, a splash of milk, lashings of ghee.
I’ll bet you’re having a hard time thinking up something. It’s a truth of the culinary world that these things all enhance the eating experience of many foods, sweet and savory foods alike and curries are no exception to this.
Karahi Butter Chicken (Makhni Karahi)
Take this Karahi Butter Chicken ( Makhni Karahi), for example. I’ve taken the traditional Chicken Karahi dish and made it the way we all love, with the very flavours we all adore and then finished it up with a hearty amount of butter. What does this do? This fills every bite with the very same flavours we desire, along with a moreish, rich bite to it. Every bite tastes like a buttery dream, I tell you. This creamy and velvety gravy will melt in your mouth.
Karahi Butter Chicken (Makhni Karahi)
Bismillah, let’s begin!
Check it out the Karahi Butter Chicken (Makhni Karahi) recipe and printable version here!!
Recipe Note’s
My final words before I give you the recipe – my Father was an expert at Karahi’s and he always told me what with chicken Karahis, you must work fast. Have all the ingredients chopped up beforehand if you can, and cook the entire thing on high heat. Stirring constantly is imperative, otherwise you risk burning the curry or having it stick to the pan. Skimp on half the oil or butter if you must, but I wouldn’t recommend it as a Karahi dish isn’t truly a Karahi dish without its butter or oil.
I have also posted Restaurant Style Lahori Mutton Karahi andKebab Karahiwhich are another easiest & tastiest version of making Karahi at home. Do check it out as well. It’s finger lickin’ good. You’ll be coming back for more.
Put your own spin on it. And lemme know how it turns out. Post a photo on Facebook (Recipestable) or on Twitter so I can see how lovely yours turn out.
Happy Karahi Making!!
If you like this post, Please Subscribe to my blog and let me know your feedback by commenting below.. I have lots more recipes to share with you.
Give pizza night a new twist by making spicy Chapli Kebab Pizza (Heavenly Double TREAT)!!
Monday nights are for creativity. Or maybe, you’re like me and just have leftover Chapli Kebab’s wasting away in your fridge. Pinterest gave me the inspiration I needed to take dinner from a boring pizza night to an Italian-Pakistani Twist.
This Chapli Kebab Pizza is my Pakistanized pizza makeover…..you could say that this is an Pakistani-Italian delight….hey, fusion food is the latest fad. A delicious and easy to make pizza with crispy, juicy chapli kebab’s and melty mozzarella cheese! It is sure to be a hit!
Photo: Chapli Kebab Pizza
Chapli Kebab Pizza
This pizza is so easy to make with left over Chapli Kebab’s with the cheesy topping….nobody could resist. I added dried Italian herbs to the pizza base and that gave a subtle Italian flavor with the Pakistani flavored topping. And just followed my heart to a logical conclusion. I took the shortcut and used the Chili Garlic sauce in place of pizza sauce and lessen cheese to keep it healthy and low fat( you can add more cheese). Well… I needn’t explain what the result was. The recipe finding its place in this blog itself says it all….. Right???
So why go to pizza hut…when you can make healthy homemade ones?? This pizza was a huge hit with my family try it…you will love me more, honestly 🙂
Photo: Chapli Kebab Pizza
Bismillah, Let’s get started!
Check it out the Chapli Kebab Pizza recipe and printable version below.
Recipe Note’s:
I am a firm believer that every oven is different and you should check on your food periodically to make sure it is cooking properly.
Put your own spin on it. And lemme know how it turns out by sharing a picture on Instagram, Facebook (Recipestable) or Twitter with this hashtag #Recipestable so I can see how lovely yours turn out.
Happy Baking!!
If you like this post, Please Subscribe to my blog and let me know your feedback by commenting below.. I have lots more recipes to share with you.
I’m back with another post on Light Meal On Thursday. Last Thursday happened to be my brother’s birthday so there was definitely no light eating on that day, hence did not post a light meal.
Quick & Light Neal – 25 Minute Chicken and Noodles
Today’s recipe is 25 Minute Chicken and Noodles. It’s an ideal meal on lazy days or when one wants a light meal. Just make this and one is sorted.
Photo: 25 Minute Chicken and Noodles
I really hesitated on adding this recipe to the blog. It’s really very simple and seems like something everyone already makes. Then I remembered that my blog is not just for my readers, but also a record of recipes I make frequently. This is one of family favorites(especially my nano _grandma)!
I’m not going to lie. But when I made this Chicken and Noodles for the family and grandma… they devoured it. I’m NOT KIDDING. I was SHOCKED. They were begging for me. I ended up with NO leftovers. HUH?
And the best part? The entire recipe took 25 minutes to make. Enough yapping…Hope you enjoy!
Photo: 25 Minute Chicken and Noodles
A quick and delicious one pot recipe with chicken broth, chicken, noodles and healthy vegetables. This quick and easy skillet dish features all your favorite ingredients from chicken noodle soup, but without the soup. It’s a hearty meal perfect for a busy day. You can make a delicious, family-friendly dinner in just 25 minutes.
Bismillah, Let’s get started!!
Check it out the 25 minute Chicken and Noodles recipe and printable version here!!
Put your own spin on it. And lemme know how it turns out by sharing a picture on Instagram, Facebook (Recipestable) or Twitter with this hashtag #Recipestable so I can see how lovely yours turn out.
Happy Baking!!
If you like this post, Please Subscribe to my blog and let me know your feedback by commenting below.. I have lots more recipes to share with you.
We’ve entered the season of warm comfort food. Soups, Stews, roast meat, etc. And sometimes all that heavy food seems . . . well . . . heavy.
Homemade Veggie Pizza
Just about everyone loves pizza, myself included. However, traditional restaurant pizza is generally made with refined (white) flour, and loaded with saturated fat and sodium – things that can quickly lead to weight gain and harm your health. To make pizza something I can feel good about eating regularly, I’ve found ways to make my own healthier versions. The key is using whole grains, less cheese and loading up on lots of healthy veggies and herbs. Also eating produce that’s in season helps you save money and also ensures you are getting a good variety of foods and nutrients.
This pizza included some of my favorite veggies and herbs: carrots, red onion, broccoli, corn, green or red pepper, olives and fresh basil. The ingredients only required about 20 minutes of prep time, starting with chopping the veggies and tossing them in a little olive oil for roasting. Adding a fresh herbs to the veggies adds nice flavor (and makes your kitchen smell amazing during cooking!).
In addition to its great taste, winter veggies especially broccoli is the good sources of dietary fiber and rich in magnesium. Broccoli is loaded with antioxidants, fiber, and numerous vitamins and minerals including magnesium, fol-ate and fiber which are good for health.
While my super-food veggies were roasting I gathered and prepped my other ingredients. The dough only required a thin spread of pizza sauce and cheese to provide creamy texture and cheesy flavor.
The veggies were done once they were slightly crisped and fork-tender, and I spooned them over the dough. I finished the pizzas off by topping them with the Mozzarella cheese, olives and a sprinkle of herbs.
Photo: Homemade Veggie Pizza
The last step involves popping the pizzas in the oven – I chose to make veggie pizzas in individual mini pizza pans. They only needed about 15 minutes to cooked the dough and for the cheese to melt. I loved the contrast of the cheese, olives and herbs with the crunch from the veggies on this flavorful pizza!
Photo: Homemade Veggie Pizza.. Yum
If you need a lighter dish, that doesn’t skimp on flavor, try this Homemade Veggie Pizza recipe. It’s fresh, full of flavor, and won’t weigh you down like the winter comfort food can. Pizzas like this can be enjoyed as a quick and easy lunch or dinner, and make a tasty addition to a healthy diet. Enjoy!
Photo: Pizza loaded with cheese and veggies ♥
Recipe Tip’s:
Feel free to play around a bit with the ingredients in this recipe if you make it yourself.
Add nuts (walnuts, pumpkin seeds), more veggies, would be great, and you could also skip the cheese all-together and instead use the ricotta cheese as the sauce/base.
Bismillah, Let’s get started!
Check it out the Homemade Veggie Pizza Recipe and printable version below.
What other winter-veggies would you try on a pizza?
Put your own spin on it. And lemme know how it turns out. Post a photo on Facebook (Recipestable) or on Twitter so I can see how lovely yours turn out.
Happy Cooking!!
If you like this post, Please Subscribe to my blog and let me know your feedback by commenting below.. I have lots more recipes to share with you.
If I ask what my brother wants for dinner, more than likely he will say “sandwiches/burgers.” This recipe is a twist on the usual burgers and packs a big taste punch with the pulled chicken, cheese and barbecue sauce. If you’re anything like me then a burger needs to be covered in cheese, ice-berg leaves, and many slices of olives and tomatoes.
Photo: Pulled Chicken Sandwiches
Next time you’re craving a burger or sandwich, give this recipe a shot. It will become your new favorite! Your Dinner guests are guaranteed to be impressed with this deceptively easy Pulled Chicken Sandwich recipe, which includes a few-ingredient rub and a simple 15-minute sauce that comes together while the chicken oven baked.
Did I mention these sandwiches are braised in a special sweet and tangy sauce? Yep! It gives the chicken a deep, rich flavor that intensifies with age, so you can make the chicken a day ahead and your sandwiches will taste even better! Perfection!
Photo: Pulled Chicken Sandwiches
You can serve this chicken in many ways, but I made them in sandwich form because, honestly, what man can resist a toasty bun piled high with tender, juicy pulled chicken, oodles of caramelized onions, tangy barbecue sauce and melty cheese? I can’t think of one! You can serve this on a sandwich as I did, or you can serve on tacos, nachos and burritos, Ole! I’m already thinking of the delicious ways I plan to use this in the future.
Photo: Pulled Chicken Sandwiches
Bismillah, Let’s get started!
Check it out the Pulled Chicken Sandwiches recipe and printable version below.
Pin it For Later
Put your own spin on it. And lemme know how it turns out. Post a photo on Facebook (Recipestable) or on Twitter so I can see how lovely yours turn out.
Happy Cooking!!
If you like this post, Please Subscribe to my blog and let me know your feedback by commenting below.. I have lots more recipes to share with you.
An easy and delicious weeknight meal loaded with healthy ingredients. A one-pan, 30 minute chicken stir fry recipe.This quick and easy sweet and sour chicken with noodles will be ready to eat in less than 30 minutes.
Sweet and sour Chicken is one of the most popular Chinese dishes and My family is a big fan of sweet and sour chicken so I thought I would try this recipe with noodles. It was a huge hit in our house and even they ate tons of it! Definitely a keeper for a easy go to dinner meal.
This Sweet and Sour Chicken recipe is super easy to make. All you will need is one wok or a skillet, and all of the ingredients listed below. It takes about 30 minutes to make this mouthwatering dish. Delicious dinner made in no time!
Tender, juicy pieces of chicken in a tangy sweet and sour sauce with pineapple chunks, onion and peppers, served on a Bed of Noodles.
Bismillah, Let’s get started!
Check it out the Sweet and Sour Chicken with Noodles recipe and printable version below.
If you make this recipe, I’d love to see pics of your creations on Instagram, Facebook and Twitter! Hashtag them #recipestable.
Put your own spin on it. And lemme know how it turns out. Post a photo on Facebook (Recipestable) or on Twitter so I can see how lovely yours turn out.
Happy Cooking!!
If you like this post, Please Subscribe to my blog and let me know your feedback by commenting below.. I have lots more recipes to share with you.
Bitter gourd, aka Karela In Urdu, is relished for its benefits and despised for its bitter taste – not many people like this veggie, but I die for it.
Benefits of Bitter Gourd (Karela)
Here are some Benefits of Mr. Bitter Gourd (Aka karela)
Bitter gourds have many nutritional and health benefits and one of them is they are good for diabetes. It is an excellent source of vitamins B1, B2, and B3, C, magnesium, folate, zinc, phosphorus, manganese, and has high dietary fiber. It is rich in iron, contains twice the beta-carotene of broccoli, twice the calcium of spinach, and twice the potassium of a banana.
As my Chronic illness forces me to transform eating habits, I’ m always on the hunt for natural antioxidants ingredients and Bitter Gourd (Karela) is one of them. I try to eat bitter gourd at least twice in a month because of its antioxidant benefits. It is very good for you, specially if you are diabetic. This reduces your blood sugar level a lot than you can imagine..So try to include it in your everyday diet.
Bitter Gourd aka ‘Karela’
The people who have never had bitter gourd, I still know what you all must be thinking.
Doesn’t it taste bitter??
How can one eat it??
Actually it is very much edible and likable. Truth is that there are numerous ways in which Bitter gourd is prepared in Pakistan. It can be stuffed with tasty spice mix, it tastes delicious when deep fried with mince stuffing( Bharwan Karela ), it can be used to make a dry curry and my mommy makes amazing curry of bitter gourd (Karela Gosht) which doesn’t taste bitter at all. It just depends how it is prepared. So at times it depends on which ingredients and technique you use and also on individual preferences.
Karela Gosht (Meat with Bitter Gourd)
Karela Gosht (Bitter gourd cooked with meat) is a traditional Pakistani dish.Yet, there are many Pakistani’s who flee from the very name of Karela. 😛
Today, I am presenting one of the tried recipes that gained appreciation among random people. Signature style of using minimum ingredients to make a mouth-watering dish is again used. I am using mutton meat in this recipe, but if you like you can use beef or chicken too.
Photo: ‘Karela Gosht'{Bitter Gourd Cooked with Meat and Saute Onion}
In my home, everyone loves bitter gourd and its diverse dishes. It tastes savory, tangy, wonderfully spicy and slightly bitter at the same time. Karela Gosht is my all time favourite. As I mention above, I make them quite often and each time they turn out great.(Alhumdulillah)!
Photo: Karela Gosht with Chapati
It tastes great with roti / hot chapati or with tandoori roti along with zeera raita.
Photo: Karela Gosht
How to make Karela Gosht
Learn how to make easy and simple Karela Gosht by following the step by step instructions as shown in pictures. The recipe is simple and very easy to follow. You would successfully cook it in first attempt. (InshaAllah)
Bismillah Let’s Begin!
Ingredients you will need:
1 kg bitter gourd/ karela (peeled, cleaned and sliced)
1 teaspoon salt, for sprinkling
750 gm mutton or lamb meat
1/2 cup cooking oil
4 medium onion, thinly sliced, (divided into two parts)
3 medium tomatoes, thinly sliced
1 inch piece of ginger, thinly sliced
1 garlic bulb, peeled & minced
4 green chilies
2 teaspoon red chili powder
1 teaspoon cumin powder
1 teaspoon coriander powder
1/2 teaspoon turmeric powder
1 teaspoon garam masala powder (all spice powder)
salt to taste
4 cups water for meat tenderness
Step 1:
First wash bitter gourds thoroughly in cold running water. Now Scrape the outer peel of the bitter melon with a sharp peeler or paring knife to remove a thin layer of peel.
Peel or Scrape skin of bitter gourd (Karela)
Step: 2
Cut the bitter gourd in half length-wise. Slit from one side to remove seeds and fibrous core using a teaspoon or a paring knife.
Cut the bitter gourd and remove the seeds.
Step 3:
Sprinkle 1 teaspoon salt over the peeled bitter gourds, toss together to mix evenly and keep it in sunlight for an hour, it will help to reduce its bitterness.
Sprinkle Salt and keep it in sunlight
Step 4:
After one hour, You would see salt and sunlight is doing its magic and bitter gourd has started perspirating. Now rinse thoroughly with tap water and keep aside for 10 minutes in a strainer to dry access water.
Rinse thoroughly with tap water
Step 5:
Now take the bitter gourd and squeeze it in your hands, the juices will come out and try to remove as much bitter juice out of it as possible. Squeeze and Squeeze…. don’t give up!!!
Squeeze and Squeeze…. don’t give up!!!
Step 6:
Cut the bitter gourd into cubes, thin slices, rings or lengthwise. (any desired shape or sizes).
Cut into your desired shape
Step 7:
Heat some oil and fry the bitter gourd (in batches) on medium heat for few minutes or until golden brown. Remove from the oil, drain and set aside.
Fry Bitter Gourd
Step 8:
Heat 1/2 cup oil in a large pot over medium heat. Saute onion until transculant. Add garlic and ginger and cook for 30 seconds or the garlic aroma to hit its peak.
Saute Onions and Ginger & Garlic
Step 9:
When onion starts getting golden add meat and cook on high flame until meat change its color and turned brown, continuously stir.
Brown the meat
Step 10:
Now add chopped tomatoes and spices (turmeric, red chili, coriander, etc). Stir and cook on low flame until tomatoes soften.
Add Tomatoes and Seasoning
Step 11:
Add 4 cups of water. Heat to boiling, covered with a lid and simmer for 1 hour on low flame or until meat become tender and juicy.
Cook Covered on low flame
Step 12:
When meat gets cooked properly at this stage increase the flame and cook on high flame for 5 to 7 minutes or until oil comes on top and meat is tender fully. Now add leftover 2 onions and fried bitter gourd. Stir and cook on medium flame for 10-15 minutes or until onion turned caramelized and oil separates.
Add fried bitter gourd and onions
Step 13
Sprinkle garam masala and add green chillies and adjust seasoning to taste.. Its ready to serve. Take it out in a serving dish. Serve hot with Homemade Chapati or Roti.
Serve with garm garm (hot) chapati… ENJOY!
Tip to First timers: Tasting is important before the final dish is served so that you can adjust the flavour. ENJOY 🙂
Check it out the Karela Gosht (Meat with Bitter Gourd) recipe and printable version below.
Do try the recipe, and let me know how you find bitter gourd. Also there are many varieties and I will keep posting new recipes of bitter gourd in future. Till then see ya all!!!
Put your own spin on it. And lemme know how it turns out. Post a photo on Facebook (Recipestable) or on Twitter so I can see how lovely yours turn out.
Happy Cooking!!
If you like this post, Please Subscribe to my blog and let me know your feedback by commenting below.. I have lots more recipes to share with you.
Every day the same question pops up “What to make for Lunch today?” and when the same question is asked on a weekend the response has to be something that’s not the usual and really delicious.
What better way to spice up the weekend lunch than with a Kebab Paratha Rolls stuffed with flavorful hot and spicy sauces and bright colorful vegetables pickles.
Hot and Spicy Kebab Paratha Rolls recipe
It’s the age of one pot meal and who says one pot meal has to be a rice dish. It can be bread based dish as well. I believe wraps or rolls loaded with meat, kebabs and veggies also come in the genre of one pot meal and why not, bread gives us starch while veggies help bring a balance diet while meat gives us protein.
The best thing about it is, that its a wholesome meal and can be prepared with leftover kebab’s too. Its as simple as assembling it all together (if that makes sense).
Hot and Spicy Kebab Paratha Rolls
Ingredients in Hot and Spicy Kebab Paratha Rolls
The ingredients you need to make this Hot and Spicy Kebab Paratha Rolls are:
For Kebabs: meat, onion, ginger, green chilies, fresh coriander, red chili powder, cumin powder, coriander powder, all spices powder, salt, butter for busting For Parathas: whole wheat flour, white flour, Salt, clarified butter, water for kneading and black seeds (optional) For Topping & Stuffing: mayo garlic sauce, mint chutney, pickle cucumber, onion, carrot, green chili, few salad leaves, red chili flakes (optional)
Hot and Spicy Kebab Paratha Rolls recipe
How to make Hot and Spicy Kebab Paratha Rollso:
Hot and Spicy Kebab Paratha Rolls are straight forward to make. Prepared kebabs then make paratha’s and stuff with kebabs, sauce and topping. Pretty simple!!
For this recipe, I’ve prepared the homemade Paratha’s but you can use store bought frozen paratha in case you don’t feel like making your own and keeping it all quick and simple.
Hot and Spicy Kebab Paratha Rolls recipe
You can pack them and stuff your lunch box too making it a totally mess free meal for yourself. As with all wraps, you can use filling of your choice. For me it had to be this kebab paratha rolls, with some garlic sauce, minty yogurt chutney and colorful pickle that were wrapped in the paratha rolls and gave those hot, zingy and spicy flavors that were sure to tickle those taste buds!
Do try this recipe, these Hot and Spicy Kebab Paratha Rolls can become your ultimate comfort and nutritious food.
Bismillah, Let’s get started!
Check it out the Hot and Spicy Kebab Paratha Rolls recipe and printable version below.
Pin it For Later:
Pin it for Later ~ Hot and Spicy Kebab Paratha Rolls
I have also posted Shami Kabab Paratha Rolls and Chicken Paratha Rolls which are another easiest & tastiest version of making Paratha Rolls at home. Do check it out as well. It’s finger lickin’ good. You’ll be coming back for more.
Put your own spin on it. And lemme know how it turns out. Post a photo on Facebook (Recipestable) or on Twitter so I can see how lovely yours turn out.
Happy Lunch Making!!
If you like this post, Please Subscribe to my blog and let me know your feedback by commenting below.. I have lots more recipes to share with you.
Well, when I am sad and tired and overall cranky, I likes to eat the food prepared by my mothers hand, the flavorful easy to make food I grew up eating and these Tandoori Spiced Baked Chicken in Yogurt Masala hit the spot. Neither World’s most expensive dish Nor World’s best restaurant can compete Home Cooked Food by Mothers Hand 🙂
On to today’s recipe!
Tandoori Spiced Baked Chicken
Today’s recipe is a favorite of me and my family. It’s a revamped version of this tandoori Roast Chicken Recipe which is one of my popular recipes on the blog! Why is it revamped? Well, because this recipe is more of tastiest than the old one and this is my favorite version: the chicken is deliciously spiced with yogurt marination, and the mango chutney served alongside adds fruity, tangy flavor.
Recipe Photo: Tandoori Spiced Baked Chicken In Yogurt Masala
To pair with the creamy yogurt, and spices, instead of using bone-in chicken or pieces of chicken breast, My mom used chicken thigh and wings. Chicken thigh is fattier, juicer and much more tender than chicken breast – I’m actually not a fan of chicken breast at all due to how tough and rubbery it is.Chicken thigh releases its juices during the cooking process, which leads to a deeply, beautifully flavored tandoori chicken which literally melts in your mouth – something chicken breast can’t do without extended marination times and slow cooking.
Recipe Photo: Tandoori Spiced Baked Chicken In Yogurt Masala
This Tandoori Spiced Baked Chicken is very popular in Pakistani restaurants and is usually served with naan bread and chutney. This dish is a great recipes to cook for your house parties and is loved by one and all.
Recipe Photo: Tandoori Spiced Baked Chicken In Yogurt Masala
If you have the ingredients on hand and a micro-plane or grater, tandoori chicken wings are so easy to make! Goes great served with Zeera Raita(cumin yogurt dip) or mango chutney, lemon wedges and some onion rings.
Recipe Photo: Tandoori Spiced Baked Chicken In Yogurt Masala
Bismillah, let’s get started!
Check it out the Tandoori Spiced Baked Chicken In Yogurt Masala recipe and printable version below.
Tandoori Spiced Baked Chicken In Yogurt Masala Recipe
This Tandoori Spiced Baked Chicken is very popular in Pakistani restaurants and is usually served with naan bread and chutney. This dish is a great recipes to cook for your house parties and is loved by one and all.
Prep Time 10 minutesminutes
Cook Time 1 hourhour
Total Time 1 hourhour10 minutesminutes
Servings 6
Author Bushra Waheed
Ingredients
2poundschicken pieces
For marination
1-1/2cupsplain yogurt
2tablespoonbutter
2tablespoonginger garlic paste
2tablespoonlemon juice
2tablespoonsground cumin
2tablespoonssmoked paprika
1tablespooncoriander powder
1teaspoongaram masala powder
1/2teaspoonturmeric powder
1/2teaspooncayenne pepper
salt to taste
For Garnishing
4limesquartered
onion rings
Instructions
Method
Make two deep slits crossways on the meaty parts of chicken piece.
Sprinkle the salt over the chicken and squeeze over some of the lemon juice.
In a large bowl, add the yogurt, lemon juice, ginger and garlic, plus all of the spices. Mix well and remove any lumps in the yogurt.
Put the chicken into the yogurt mixture and toss to coat evenly.
Cover and place in the refrigerator to marinate for about 4 hours to overnight, which is ideal.
Preheat an oven to 200 degree C.
Put the marinated chicken into a deep heat-proof dish. Cover with a lid or foil with holes poked in the top.
Bake for 30 minutes then move the meat around with a spoon.
Bake for an additional 30 minutes, uncovering the dish for the last 15 minutes of baking only.
Use tongs to remove the meat from the dish and the yogurt sauce and place on a separate tray to broil or use the broil setting on your oven to sear the meat, about 5 minutes each side.Tandoori Spiced Baked Chicken is ready to serve. Enjoy!!
Notes
Note: If you prefer the chicken to be a bright red colour, and a few drops of red coloring into the marinade.Serving Suggestions: Serve with fresh naan bread, onion rings, lemon wedges and a yogurt sauce on the side for dipping.
I have also posted Tandoori Moti Tikka Recipewhich is another easiest & tastiest version of making Tandoori Chicken. Do check it out as well. It’s finger lickin’ good. You’ll be coming back for more.
Put your own spin on it. And lemme know how it turns out. Post a photo on Facebook (Recipestable) or on Twitter so I can see how lovely yours turn out.
Happy Cooking!!
If you like this post, Please Subscribe to my blog and let me know your feedback by commenting below.. I have lots more recipes to share with you.
I was chilling with my grandparents, stuffing my tummy with yummy food, filling up my body with awesomeness. Nice relaxing day. I spent a quality time with my grandparents, did lots of cooking for them and made a full use of everything in the fridge, make them laugh, smile and collected their countless dua’s. My grandparents were happy to see me with them. I Love both of them. They puts a smile on my face and giggle in my heart.
As much as I adore my grandparents, they do treat me like I’m still 6 years old.🤔🤔 I love staying with my grandparents they treat me like I’m royalty, but in reality they are my King & Queen😍
The King and Queen of my Heart (My Grandparents)
Grandma’s Favorite Chicken Stir Fried Noodles
My Grandma’s Favorite Chicken Stir Fried Noodles
Stop and wait a minute. This post is special.
Because today I’ m sharing a family favorite recipe.{Especially, my grandma’s(nano)}. I’ve made these noodles countless times; in exchange of favors, to impress certain people. My GrandMa Loves to eat Chinese Food. Just this weekend, I cooked it on my nano’s request. Nana abu loved it so much and he rewarded me with cash. $_$ 💰 💰
Cooking is an art ! I believe it- My favorite moments are the looks of appreciation my family and loved ones give me when they tastes my food.
Chicken Stir Fried Noodles
A simple to make Chicken Stir Fried Noodles recipe, but big on flavors. The perfect balance of spiciness, tanginess and saltiness. The vibrant mix of fresh vegetables paired with the saltiness of the stir fry noodles, the tanginess of soy sauce, and the heat from the sesame oil and the acclaimed chili sauce; all worked out so well. These Grandma’s favorite Chicken Stir Fried Noodles will be a hit with the whole family.
Vibrant mix of fresh vegetables paired with the saltiness of stir fry noodles
Bismillah, let’s begin!
Check it out the Chicken Stir Fried Noodles recipe and printable version below.
A simple to make Chicken Stir Fried Noodles recipe, but big on flavors. The perfect balance of spiciness, tanginess and saltiness. The vibrant mix of fresh vegetables paired with the saltiness of the stir fry noodles, the tanginess of soy sauce, and the heat from the sesame oil and the acclaimed chili sauce; all worked out so well.
Prep Time 10 minutesminutes
Cook Time 20 minutesminutes
Total Time 30 minutesminutes
Servings 6
Author Bushra Waheed
Ingredients
2boneless chicken breastcut into cubes
2tablespoonsesame Oil
2tablespoonvegetable oil
2clovegarlicminced
2green onionscut into strips
2carrotspeeled and cut into strips
1/2red bell peppercut into strips
1/2green bell peppercut into strips
1/4cupdark soy sauce
1/4cupchili garlic sauce
1packet spaghetti noodles or egg noodles
salt and pepper to taste
Instructions
Method
Cook the noodles in a large pan of boiling water for 2-3 minutes until Soft.
Once the noodles are cooked.
Drain and return to the saucepan.
Toss well in vegetable oil and set aside. Cover with a tea towel.
Heat a wok until very hot, then add remianing vegetable and sesame oil. Add 1 chopped garlic clove after 30 seconds.
Add the chicken and stir-fry for 3 minutes or until it loses its colour.
When the chicken is ready add the vegetables and stir-fry for another 30 seconds.
Add a splash of Soy sauce and stir fry for 1-2 minute.
Stir in the Soy sauce and chili garlic sauce.
Add noodles and cook for 30 seconds, stirring constantly and serve immediately.
Enjoy!
Recipe Note’s:
You can also add lamb, beef to this stir fry noodles, or just filled up with colorful veggies like I loved to eat. Either way, it’s finger lickin’ good. You’ll be coming back for more :’)
I had made many yummy dishes there and in upcoming posts I’d love to share those recipes with you. So Stay tuned.
I have also posted Keema Noodles Recipewhich is another easiest & tastiest version of making noodles. Do check it out as well.
Put your own spin on it. And lemme know how it turns out. Post a photo on Facebook (Recipestable) or on Twitter so I can see how lovely yours turn out.
Happy Cooking!!
If you like this post, Please Subscribe to my blog and let me know your feedback by commenting below.. I have lots more recipes to share with you.
In the Name of Allah, Most Gracious, Most Merciful
When you’re home alone and nobody has made dinner, what do you usually make for yourself to eat? To me dining alone, at home means you can really break all the rules. You Make Fish and Chips And go a bit overboard and make pasta salad. Cooking is my therapy and my cure all. Whipping up ingredients, the aroma of food, that first bite, the feeling that it has all come together just right is a balm like no other.
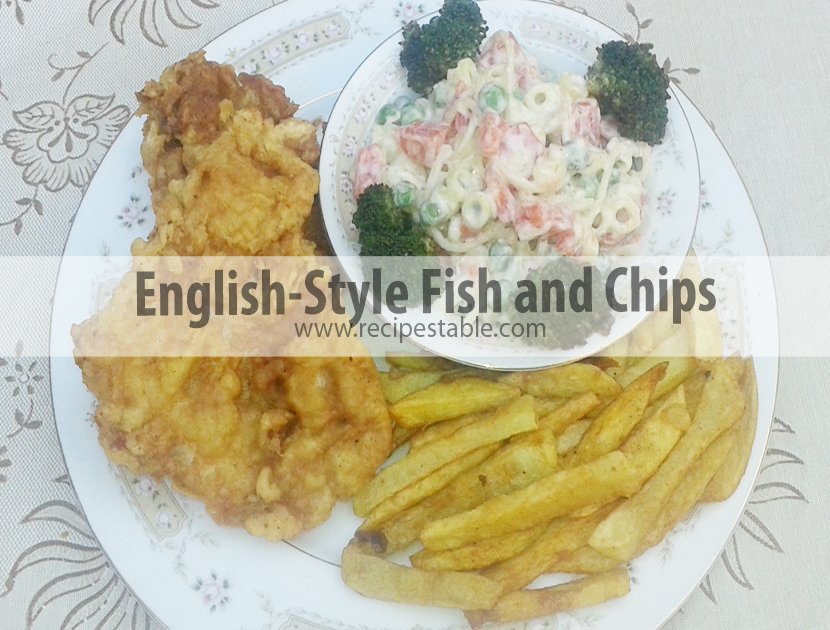
Photo: English-Style Fish and Chips
English-Style Fish and Chips
Fish n chips is the most popular English fast food. Traditionally battered fried fish is served with delicious potato chips, tartar sauce, mushy peas and lemon quarter to spice up the meal.
Photo: English-Style Fish and Chips
That fateful day, I craved some kind of fast foodwith all my being. I opened my freezer and was looking around for inspiration when some fish fillets caught my eye and I knew what was coming next. So, I decided to make Fish and Chips, and they turned out awesome! This English-Style Fish and Chips is gloriously indulgent. It is so good on it’s own, but I suspect it would be even better paired with some kind of salad. Super filling; a complete balanced meal all in one platter. Save yourself some time and money, and try this English-Style Fish and Chips, and quell those cravings!
Photo: English-Style Fish and Chips
The condiments are all up to you. You can serve it with any sort of sauce, however much you like.But I enjoyed it with veggie pasta salad.
If you want, I can put up a detailed post on this Veggie Pasta Salad next. Just let me know in the comments box below.
Super filling; a complete balanced meal all in one platter.
Bismillah, let’s begin!
Check it out the English-Style Fish and Chips recipe and printable version below.
I have also posted Crumb Fried Fish Recipewhich is another easiest & tastiest version of making Fried Fish. Do check it out as well.
Put your own spin on it. And lemme know how it turns out. Post a photo on Facebook (Recipestable) or on Twitter so I can see how lovely yours turn out.
Happy Cooking!!
If you like this post, Please Subscribe to my blog and let me know your feedback by commenting below.. I have lots more recipes to share with you.
In the Name of Allah, Most Gracious, Most Merciful
Good Afternoon
It is the middle of March and spring is here and in full bloom, budding flowers, chirping birds, and plenty of new activities to do.
With spring here in full bloom, I try to get out for daily walks, which is a joy. With the earth greening, trees budding, flowers blossoming and songbirds chirping, hope and renewal fill every living thing. (inshaAllah)
The days are getting much warmer now and my family always looks forward for light and comforting food. Dinner is the only time when everybody gets to gather around and have meal as a family. So I always plan to cook something simple and most importantly light and healthy.
The Best Meatballs You’ll Ever Have
The Best Meatballs You’ll Ever Have
Last week, I made the world’s most amazing Meatballs in a tomato sauce with garlic bread on the side – where’s my invitation to go on Masterchef?? 💁🏻 lol 😛
I like to cook meatballs in sauce! These Italian flavored meatballs in tomato sauce are my new favorite! 😀 ☺
These meatballs are light, tender, and bursting with juicy flavor.You can just mix all the ingredients together, roll them and cook them and the best part of all, you can have these on your dinner table in less than 45 minutes.
The Best Meatballs You’ll Ever Have
They would be great over pasta, mixed with tomato sauce as an appetizer or on their own, But I served these meatballs over some veggie noodles tossed in olive oil along with garlic bread. A recipe must try! The BestMeatballsYou’llEverHave!
I have also posted Meatball and Pea Pulaowhich is another easiest & tastiest version of making Dinner. Do check it out as well.
Put your own spin on it. And lemme know how it turns out. Post a photo on Facebook (Recipestable) or on Twitter so I can see how lovely yours turn out.
Happy Meatballs Making!!
Keep remember me in your Dua’s and Stay tuned for new content on the blog 😉
If you like this post, Please Subscribe to my blog. I have lots more recipes to share with you. And If you make it then let me know your feedback by commenting below.
Hope all of you are doing well and are leading happy, healthy lives. It seems such a long time since I’ve updated the blog. Well, ’seems’ is probably not the correct word to use, and I am promptly changing it to ‘has really been’! But thanks for being patient and still showering the blog with love during my absence. Sorry for that as I haven’t been feeling good these days.
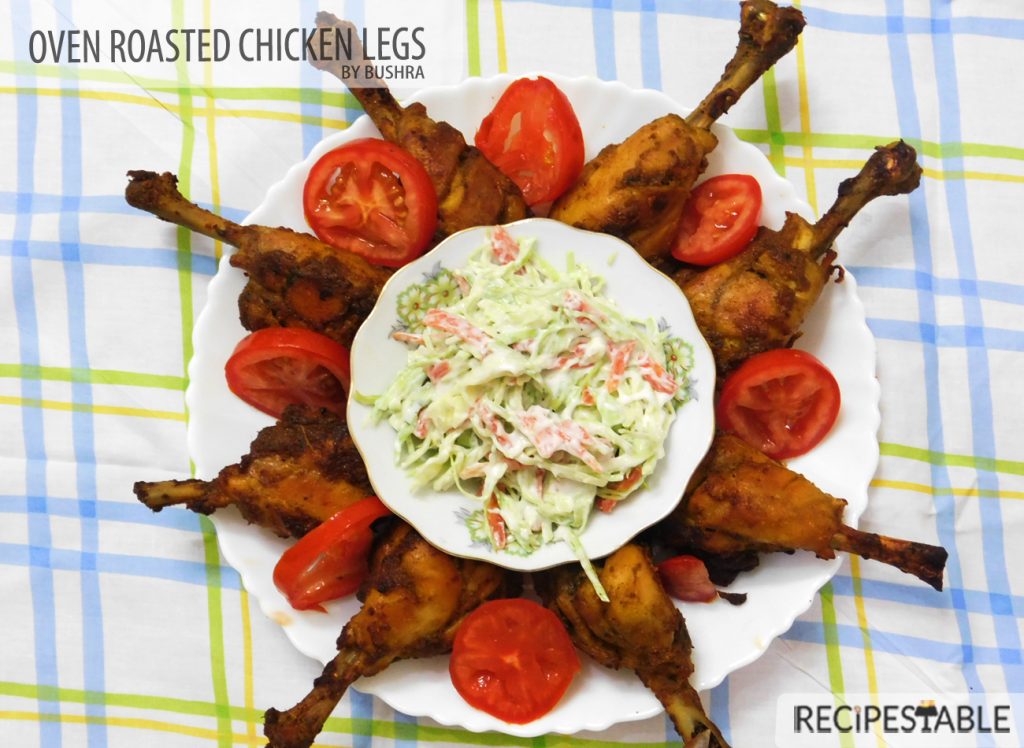
Oven Roasted Chicken Legs Recipe
A few weeks ago, We had a party on home. And I made Oven Roasted Chicken Legs on my brother request. He’s a Drumsticks Lover. It was a great evening, with plenty of food and some great company. That evening also made me realize how many more wonderful dishes I have yet to celebrate on this blog.
Photo: Oven Roasted Chicken Legs
So, today I come up with a new recipe of Oven Roasted Chicken. Sounds YUM YUM!!
Oven Roasted Chicken Legs Recipe Oven Roasted Chicken Legs Recipe
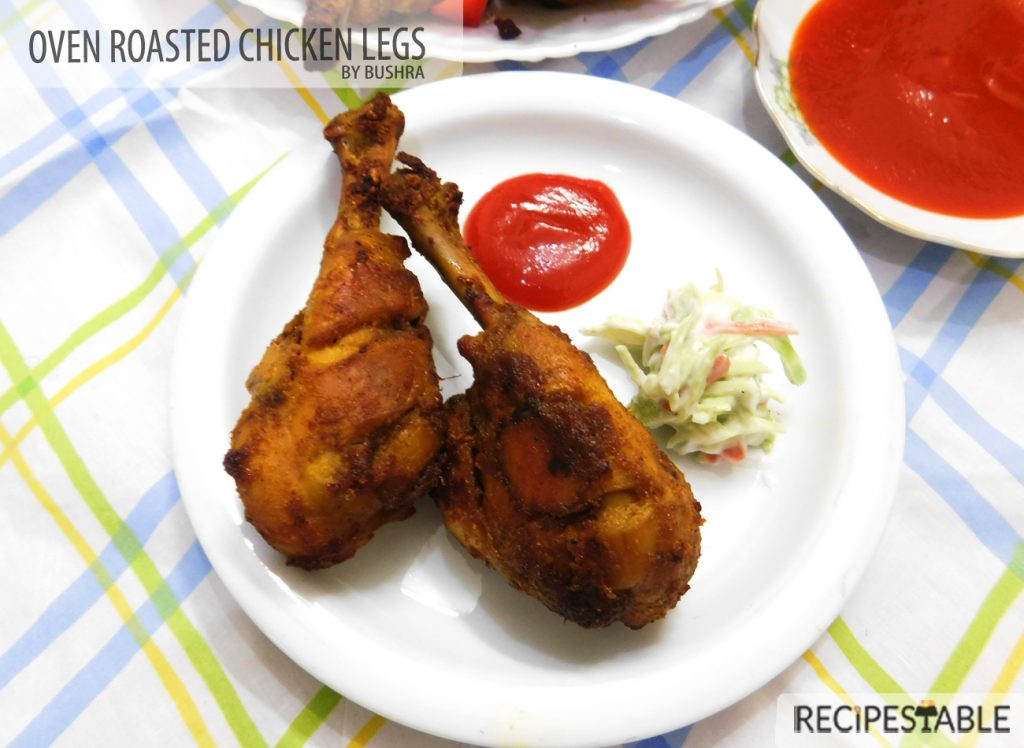
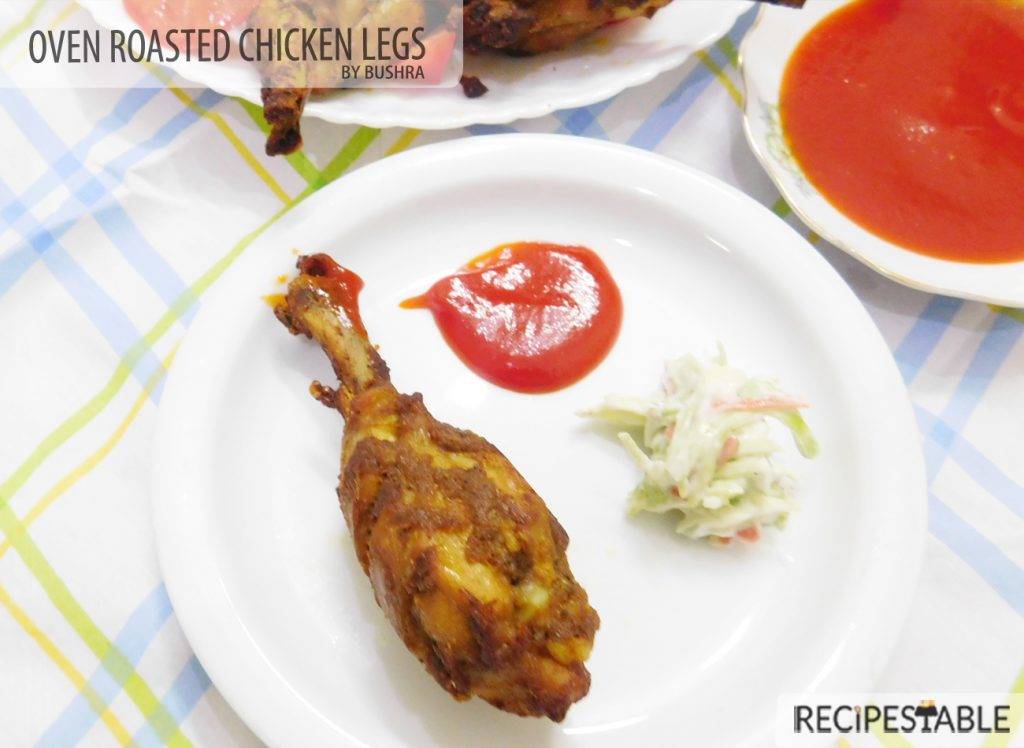
Oven Roasted Chicken Legs
If you’re obsessed with bakedchicken drumsticks? Or If you love eating crispy chicken legs and you love easy meals. This one checks all the boxes. Make these Oven Roasted Chicken Legs for dinner soon, you won’t be disappointed.
Oven Roasted Chicken Legs Recipe
Crispy and juicy oven roasted chicken legs that will satisfy even the most die-hard fried chicken fan. For a simple, yet delicious evening meal, serve this chicken alongside ovenroasted veggies or green salad.
So Let’s begin!
Check it out the Oven Roasted Chicken Legs recipe and printable version below!!
Recipe Note’s:
Do not place the seasoned chicken pieces directly on the baking sheet. Instead, place a wire cooling rack on top of the cookie sheet and place the chicken pieces on the rack, this will allow air to circulate around the chicken, resulting in perfectly crispy chicken without the soggy bottoms.
If you like the chicken drumsticks nice and browned, place them under the broiler for few minutes after they are baked.
If you prefer cheese, you can sprinkle 1/4 cup of freshly grated Parmesan cheese over them.
I have also posted Chili Chicken Legswhich is another easiest & tastiest version of making Drumsticks. Do check it out as well.
Put your own spin on it. And lemme know how it turns out. Post a photo on Facebook (Recipestable) or on Twitter so I can see how lovely yours turn out.
Happy Cooking!!
Keep remember me in your Prayers and Stay tuned for new content on the blog 😉
If you like this Oven Roasted Chicken Legs, Please Subscribe to my blog. I have lots more recipes to share with you. And If you make it then let me know your feedback by commenting below.