Category: Kids Friendly Recipes

  • Upgrade Your Tea Time: Make Bakery-Style Cake Rusks!

    Cake Rusk

    A delicious double baked cake bar for breakfast or teatime. Cake Rusk are light golden brown and crispy in taste and texture. A quick but perfect breakfast with Cake Rusk, goes well with tea or coffee. Follow my Cake rusk recipe to make these cake rusk at home. Enjoy!!

    Check it out the Cake Rusk recipe here!!

    Cake Rusk recipe
    Photo: Cake Rusk Recipe

    [divider]

    [one_fourth]Prep Time: 2 hours[/one_fourth] [one_fourth]Cook Time: 30 minutes[/one_fourth] [one_fourth]Servings: 20  [/one_fourth] [one_fourth_last]Difficulty Level: Difficult [/one_fourth_last]

    [divider]

    [tabs type=”horizontal”] [tabs_head] [tab_title]Ingredients[/tab_title] [tab_title]Nutrition[/tab_title] [/tabs_head] [tab]

    • 1 cup all-purpose flour (120gm)
      1 tsp. baking powder
      pinch of salt
      1/2 cup butter or margarine, at room temperature (113gm)
      3 eggs, at room temperature
      3/4 cup finely grinded or caster sugar (150gm)
      1 tsp. vanilla essence
      a few drops of yellow color
       

    [/tab] [tab]Yield: 6 dozen

    Nutritional information is not yet available. [/tab] [/tabs]

    Directions:
    [tabs type=”horizontal”] [tabs_head] [tab_title]Step by Step Method[/tab_title] [tab_title] Expert Tip’s[/tab_title][tab_title]Serving Suggestions[/tab_title][/tabs_head] [tab]

    Step 1

    Take a glass bowl, dissolve yeast in the lukewarm water.

    Step 2

    Add 1 teaspoon of sugar in the yeast and keep aside.

    Step 3

    In another glass bowl, mix together the flour salt and cardamom seeds

    Step 4

    Then add the oil. Add the 3/4 cup sugar.

    Step 5

    Stir in the eggs. Add 1 cup of warm water

    Note: You may add a little first and then add as per need later.

    Step 6

    Add the dissolved yeast which you prepared in step 2.

    Step 7

    Knead this mixture thoroughly

    Note: Add warm water as needed to adjust the consistency of the dough)

    Step 8

    Smear the dough with some oil and keep aside in a warm place.

    Step 9

    The dough will rise in about 2 hours.

    Step 10

    Spread the dough in and cut 1 inch long , 1/2 inch wide and 1/2 inch thick pieces.

    Step 11

    Take a greased oven tray and set the pieces in the tray.

    Step 12

    Preheat an oven to 200 degree C.

    Step 13

    Bake in the preheated oven for 25-30 minutes or and until dry and light brown. Delicious Cake Rusk is ready to serve. ENJOY!!

    [/tab]

    [tab]

    1. If they still don’t feel as crispy as you would want, after they have cooled completely, turn the oven on.
    2. Let it heat to 180 degree C.
    3. Then turn it off and put the rusks on a baking sheet and put it back into the oven.
    4. Close the oven door and let them stay in there for about half an hour with the oven off.

    [/tab] [tab]

    • Serve with tea or a glass of milk.

    [/tab] [/tabs]

    If you like  Cake Rusk recipe and make it then let me know your feedback by commenting below.

  • A Feast for the Eyes & Taste Buds: Rainbow Tikka Rice Recipe

    Rainbow Tikka Rice

    Rainbow Tikka rice is a layered rice dish in which different colour of rice layered with chicken tikka, eggs, green peas, tomato ketchup and spicy green chutney. This is an excellent rice dish to entertain and impress your guests and children. Its really yummy, healthy and rather cheap to make. My family always love this Rainbow Tikka rice recipe.
    For variety, substitute chicken with shrimp, ground beef, any type of veggies. Must try this Rainbow Tikka Rice recipe and don’t forget to share your experience with us!!

    Prep Time: 30 minutes

    Cook Time: 40 minutes

    Servings: 5

    Difficulty Level: Medium

    Ingredients

    For Chicken Tikka

    • 500 gm boneless chicken, cut into small pieces
    • 1/2 cup plain yogurt
    • 1 onion, finely chopped
    • 2 tomatoes, make a smooth paste
    • 4 tablespoon tikka masala
    • 2 tablespoon cooking oil
    • salt to taste
    • a piece of coal to give dum

    For Green Chutney

    • 1 cup fresh coriander leaves
    • 1/2 cup mint leaves
    • 1 teaspoon ginger paste
    • 1 tomato
    • 3 green chillies
    • 2 tablespoon lemon juice
    • 2 tablespoon plain yogurt
    • 1/2 teaspoon cumin seeds, roasted and crushed
    • salt according to taste

    For Tikka Rice:

    • 500 gm long grain rice
    • 2 eggs,boiled and sliced
    • 3/4 cup chicken stock or as required
    • 2 tablespoon cooking

    For Yellow Rice Layer

    • 2 boiled eggs,chopped
    • yellow food color

    For Green Rice Layer

    • 1/2 cup green peas, boiled
    • green chutney as required
    • green food color

    For Red Rice Layer

    • 1 cup tomato ketchup
    • red food color, optional

    Directions:

    Step 1

    Soaked rice in water for 30 minutes. Then boiled in salted water.

    Step 2

    Strained. Divided into 3 parts and keep aside.

    Step 3

    Heat oil in a pan over medium high heat. Add onion and cook for 5 minutes or until lightly browned.

    Step 4

    Add ginger garlic paste. Saute for 1 minute then add chicken.

    Step 5

    Cook and stir chicken on high heat for 15 minutes or until no longer pink.

    Step 6

    Add tikka masala and salt. Cook and stir well.

    Step 7

    Now add tomatoes cook for 10 minutes or until oil separates.

    Step 8

    Add yogurt. Cook more 5 minutes or until all water dries and oil comes on top.

    Step 9

    Remove from the heat and give coal dum.

    Step 10

    Place green chutney ingredients in a blender or food processor. Process until smooth. Take it out in a small bowl and keep aside.

    Step 11

    In a bowl, mix together the one portion of boiled rice, chopped eggs and yellow food color. Keep aside.

    Step 12

    In another bowl, mix together the second portion of rice, green chutney, green peas and green food color (optional).

    Step 13

    In another bowl, mix together the 3rd part of rice, tomato ketchup and red food color (optional).

    Step 14

    Take a large bowl, greased with oil. Then put egg slices on the bottom of the bowl. Cover with yellow rice.

    Step 15

    Drizzle small amount of chicken stock over it. Press well and layer with chicken.

    Step 16

    Then cover with red rice. Again press well.

    Step 17

    Layer with green rice. Sprinkle remaining stock and press well.

    Step 18

    Cover with an aluminium foil.

    Step 19

    Bake at 180 degree C, in the preheated oven for 15 minutes or until done.

    Step 20

    Let it cool for 15 minutes.

    Step 21

    Carefully, invert on a flat dish. Delicious Rainbow Tikka Rice is ready to serve. ENJOY!!

    Serving Suggestions: 

    • Serve hot with raita or any chutney.

    If you like Rainbow Tikka Rice recipe and make it then let me know your feedback by commenting below.

  • Orange Fiesta Recipe

    Orange Fiesta

    Orange Fiesta is a cool, refreshing drink to serve at Parties. This drink is made with orange juice, soda water, mint, and lemon juice. A fresh fruity treat for everyone. Enjoy.

    Orange Fiesta Recipe
    Photo: Orange Fiesta Recipe

    Check it out the Orange Fiesta recipe here!!

    [divider]

    [one_fourth]Prep Time: 5 minutes[/one_fourth] [one_fourth]Cook Time: 0 minutes[/one_fourth] [one_fourth]Servings: 2[/one_fourth] [one_fourth_last]Difficulty Level: Easy[/one_fourth_last]

    [divider]

    [tabs type=”horizontal”] [tabs_head] [tab_title]Ingredients[/tab_title] [tab_title]Nutrition[/tab_title] [/tabs_head] [tab]

    • 1 glass orange juice
    • 1 cup ice cubes
    • 1 cup soda water
    • 2 tbsp lemon juice
    • 2 tsp mint leaves (optional)
    • 1/2 tsp black salt
    • a pinch of black pepper

    [/tab] [tab]Yield: 2 servings

    Nutritional information is not yet available. [/tab] [/tabs]

    Directions:
    [tabs type=”horizontal”] [tabs_head] [tab_title]Step by Step Method[/tab_title] [tab_title]Serving Suggestions[/tab_title][/tabs_head] [tab]

    Step 1

    Place all ingredients in a blender. Process until well combined.

    Step 2

    Pour into two serving glasses. Top each glass with lemon slice. Orange fiesta is ready to serve. Enjoy!!

    [/tab] [tab]

    • Serve with any meal or as a refreshing drink.

    [/tab] [/tabs]

    If you like Orange fiesta recipe and make it then let me know your feedback by commenting below.

  • The Ultimate Fusion Food: Pizza Paratha Recipe (Quick & Easy!)

    Pizza Paratha

    Here, I came up with the pizza paratha recipe which is a stuffed paratha but with some of the pizza ingredients added. Check it out the Pizza Paratha recipe here!!

    pizza paratha recipe
    Photo: pizza paratha recipe

    [divider]

    [one_fourth]Prep Time: 30 minutes[/one_fourth] [one_fourth]Cook Time: 10 minutes[/one_fourth] [one_fourth]Servings: 6[/one_fourth] [one_fourth_last]Difficulty Level: Medium[/one_fourth_last]

    [divider]

    [tabs type=”horizontal”] [tabs_head] [tab_title]Ingredients[/tab_title] [tab_title]Nutrition[/tab_title] [/tabs_head] [tab]

    For Dough:

    • 500 gm all-purpose flour
    • 250 ml water
    • 1 tsp salt
    • clarified butter or Cooking Oil

    For Filling:

    • 1 Green Chilli, chopped
    • few Basil Leaves
    • 2 tbsp Tomato puree
    • 1/2 tsp cumin powder
    • 1/2tsp salt
    • 1 tbsp olive oil

    [/tab] [tab]Yield: 6 servings

    Nutritional information is not yet available. [/tab] [/tabs]

    Directions:
    [tabs type=”horizontal”] [tabs_head] [tab_title]Step by Step Method[/tab_title] [tab_title]Serving Suggestions[/tab_title][/tabs_head] [tab]

    Step 1

    Mix first three ingredients and knead well into a soft dough.

    Step 2

    Put dough into a bowl and cover the bowl with a damp cloth and set aside for 1 hour.

    Step 3

    Mix together the ingredients for the filling and set aside.

    Step 4

    Take the flour dough and pat some dry flour on it and knead again for a few minutes.

    Step 5

    Make small lemon sized balls out of the complete dough.

    Step 6

    Take a ball and flatten it using a roller.

    Step 7

    Spread tomato paste all over leaving a 2/3 cm border.

    Step 8

    Fold into a semi circle and roll it out again.

    Step 9

    Fold again into a quarter of a circle. Roll it out into a triangle pizza shape.

    Step 10

    Heat a non stick pan and spread clarified butter or on it.

    Step 11

    Cook the pizza paratha on one side until it puffs up and is brown on one side.

    Step 12

    Spread some clarified butter or oil on raw side and flip it over and cook other side well. Pizza Paratha is ready to serve.

    [/tab] [tab]

    • Serve with Chili Garlic Sauce.

    [/tab] [/tabs]

    If you like Pizza Paratha  recipe and make it then let me know your feedback by commenting below.

  • Spicy & Aromatic: The Perfect Egg Biryani Recipe for Spice Lovers!

     Egg Biryani

    An easy biryani with simple ingredients. This egg biryani recipe prepared with boiled eggs, spices and basmati rice that is cooked on dum and garnished with mint and coriander leaves.

    Egg Biryani Recipe
    Photo: Egg Biryani

    It makes a perfect Sunday meal with raita and curry. This is the most easy and best Egg Biryani recipe i have tried.

     Egg Biryani recipe
    Photo: Egg Biryani

    Egg Biryani is prepared with eggs, fragrant rice and spices. A delicious and flavorful rice affair, and unlike other biryani preparations, it doesn’t take longer time to cook. Its a once pot meal with a good source of protein from eggs. Try this Indian Egg Biryani Recipe and share you experience with us!!

    Check it out the Egg Biryani Recipe here!!

    Prep Time: 20 minutes

    Cook Time: 35 minutes

    Servings: 6

    Difficulty Level: Easy

    Ingredients


    • 1 kg rice
    • 12 hard boiled eggs
    • 2 small onions
    • 1 cup yogurt
    • 4 tomatoes
    • 6-8 green chilies
    • 2 bay leaves
    • 1 tbsp red chili powder
    • 1 tsp coriander powder
    • 1 tsp turmeric powder
    • 5 cloves
    • 5 cardamom
    • 3 green cardamom
    • 8-10 black pepper
    • 1 tsp cumin seeds
    • 1 inch cinnamon stick
    • 1 tsp gram masala powder
    • 1 tsp ginger paste
    • 1 tsp garlic paste
    • 1 tbsp lemon juice
    • Salt to taste

    Directions

    Step 1

    Wash rice and soak at least 30-40 minutes.

    Step 2

    Fry onions until golden brown. Remove all the onions and place on absorbent paper.

    Step 3

    Shell the boil eggs and give for long cuts on the white portion of each egg without separating it.

    Step 4

    Heat oil in a pot, add bay leaves, cardamom, cinnamon stick, cumin seeds, cloves, black pepper, red chili powder, coriander powder, turmeric powder, ginger paste, garlic paste, salt, lemon juice, green chilies, green cardamon, yogurt, and sliced tomatoes.

    Step 5

    Cook until done and oil start to separate.

    Step 6

    Now add boiled eggs into gravy and mix well until the eggs get coated with the spices.

    Step 7

    Remove the eggs and set aside.

    Step 8

    1 liter water add into gravy and boil the gravy now add soak rice and cook over a medium heat until the rice is tender and water is absorbed.

    Step 9

    Sprinkle gram masala powder over it. Add eggs and mix well. Delicious Egg biryani is ready to serve.


    • Serve hot with raita, green salad, and thinly sliced onions.


    If you like egg Biryani Recipe  and make it then let me know your feedback by commenting below.And if you know more innovative ways in which we can utilize this mouth watering Indian Egg Biryani, do share with us and we would be glad to give it a try.

  • The Perfect Anytime Meal: Easy Keema Noodles Recipe for Busy Weeknights!

    A hearty smile comes from a delicious happy dinner with family and  a delicious happy dinner with family comes from a perfect recipe. This Keema Noodles recipe is one of my family favorite recipe and specially my younger brother love it. Its a very quick Keema Noodles Recipe. Give it a try, hope you like it.

    Prep Time:10 minutes
    Cook Time: 30 minutes
     Servings: 5
    Difficulty Level: Easy

    • 1 pack spaghetti
    • 500 gm chicken mince (you can use ground beef as well)
    • 1 small onion, thinly sliced
    • 1 cup cabbage, shredded
    • 1/2 cup carrots, shredded
    • 1/2 cup boiled peas
    • 1/4 cup black olives
    • 2 tablespoon olive oil
    • 1 tablespoon vinegar
    • 1 tablespoon soy sauce
    • 1 teaspoon salt
    • 1/2 teaspoon freshly ground black pepper
    • 1/2 teaspoon red pepper, crushed

    [/tab] [tab]Yield: 5 servings

    Directions:

    Step 1

    Boil the Spaghetti in a large sauce pan. Follow directions on box for cooking.

    Step 2

    When spaghetti is cooked, rinse with cold water. Set aside.

    Step 3

    Put oil in a large fry pan and cook the chicken mince. Cook on medium to high heat, till the meat is well done.

    Step 4

    Now add the carrots, olives and green peas. Cook for a few minutes.

    Step 5

    Add the rest of the ingredients, and stir fry.

    Step 6

    Keep stirring for a few minutes, now add the spaghetti and mix well.

    Step 7

    When the spaghetti and vegetables are mixed well, add the vinegar and soy sauce. Cook for another 2 minutes.

    Step 8

    Dish it out. Keema Noodles is ready to serve. Serve immediately.

    • Serve with Chili Garlic Sauce.
  • Burger with a Kick! Make a Delicious Chatpata Aloo Tikki Burger!

    Chatpata Aloo Tikki Burger

    Love burger ? OR Want to try some new veggie burgers? Today, I’m sharing an easy to make chatpata aloo tikki burger recipe with you.
    If you’re craving a tangy or chatpata veggie burger — one that you can really sink your teeth into — then you’ve come to the right place, my friend. No dull and tasteless burger here. There are so many famous street foods in Lahore that are amazingly delicious, mouthwatering, but they are mostly unhealthy. I love eating healthy, but burgers is one of my guilty pleasures. So you know I’m going to take advantage of this lol 😛

    Chatpata Aloo Tikki Burger Recipe
    Photo: Chatpata Aloo Tikki Burger Recipe

    This is a very [highlight]healthy and nutritious burger[/highlight] recipe, ideal for the vegetarians or for those who want to create a quick lunch meal as just takes your 25-30 minutes. It is popular in both elders and young one’s enjoy it with any type of dip which gives you a perfect taste.

    Let’s start making this amazing burger!. Ready ?

    Chatpata Aloo Tikki Burger Recipe
    Photo: Chatpata Aloo Tikki Burger Recipe

    Check it out the Chatpata Aloo Tikki Burger Recipe and printable version below!!

    Chatpata Aloo Tikki Burger

    Love burger ? Today, I’m sharing an easy to make chatpata aloo tikki burger recipe with you. Ideal for the vegetarians or for those who want to create a quick lunch meal as just takes your 25-30 minutes.
    Prep Time 20 minutes
    Cook Time 10 minutes
    Total Time 30 minutes
    Servings 10
    Author Bushrah | Recipestable

    Ingredients

    For Aloo Tikki

    • 4 boiled potatoes peeled and mashed
    • 2 eggs lightly beaten
    • 1/2 cup bread crumbs
    • 1/2 cup cheddar cheese grated
    • 2 tablespoon mint leaves
    • 2 tablespoon fresh coriander
    • 1 teaspoon dry mango powder
    • 1 teaspoon chopped green chili
    • 1 teaspoon red chili flakes
    • 1 teaspoon cumin powder
    • salt to taste
    • Oil for frying
    • For Aloo Tikki Burger
    • 10 burger buns
    • 5 tsp butter
    • 1 cup tomato ketchup
    • 1/2 cup green chutney
    • 1/2 cup shredded cabbage
    • 2 small onions cut into rings.
    • 2 cucumber thinly sliced
    • 2 to matoes thinly sliced

    Instructions

    Directions

    • Put mashed potatoes in a large bowl. Add dry mango powder, cumin seeds, red chili, salt, green chili, mint and coriander leaves. Mix until well combined.
    • Make 10 balls out of the aloo mixture. Now stuff 1 teaspoon cheese on each potato ball and shape into a flat Patty(tikki).
    • Beat eggs in a small bowl and place bread crumbs in another shallow bowl. First dip each aloo tikki in the egg then coat with crumb mixture.
    • Heat oil in a nonstick pan over medium heat. Shallow fry aloo tikki for 1-2 minutes on each side or until golden brown. Transfer into a plate and keep warm.
    • Cut the buns from the center. Toast them with the little butter.
    • Put one teaspoon ketchup on one side of the burger bun and one teaspoon of green chutney on the other side.
    • Put a aloo tikki on it some sliced onions, cucumber, tomatoes and shredded cabbage. Cover it with the second part of the bun.
    • Press it down softly and insert a toothpick through the bun. Repeat this procedure with remaining buns and make all the burgers.Chatpata aloo Tikki Burger is ready to eat.

    Notes

    Serve with green chutney, ketchup and french fries.

    I have also posted Chicken Roast Burger Recipe which is another quick version of making burgers. Do check it out as well.

    [divider]

    If you like this Chatpata Aloo Tikki Burger Recipe,Please Subscribe to my blog. I have lots more recipes to share with you. And If you make it then let me know your feedback by commenting below.

  • Super Easy Naan Roll Recipe (A Satisfying Meal Ready in 10 Mins)

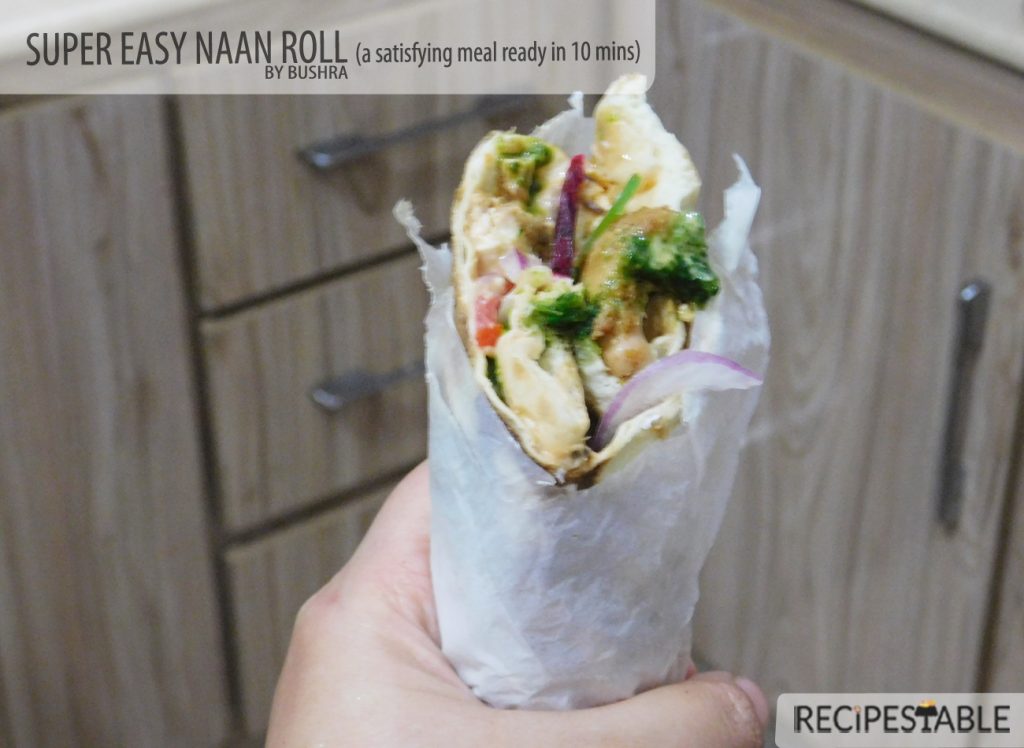
    Super Easy Naan Roll Recipe (A Satisfying Meal Ready in 10 Mins)

    Super Easy Naan Roll Recipe
    Super Easy Naan Roll (A Satisfying Meal Ready in 10 Mins)

    I am finally here with this mouthwatering Naan Roll recipe. This is a simple recipe that’s low in saturated fat and cholesterol,and still big on taste. Leftover naan can be use in delicious naan roll. Its filled with cooked chicken, cucumber and ketchup then brushed with mango and green chutney. You can use any leftover meat or fish mince filling also.

    Super Easy Naan Roll Recipe
    Super Easy Naan Roll (A Satisfying Meal Ready in 10 Mins)
    Super Easy Naan Roll (A Satisfying Meal Ready in 10 Mins)
    Super Easy Naan Roll (A Satisfying Meal Ready in 10 Mins)

    If you have leftovers from a Sunday roast chicken, you’ll be set for lunches or suppers for days afterwards. Check out the website for my two other chicken wrap recipes, perfect for kid’s school lunchboxes but tasty enough for a packed lunch for the office too. Why not make a different wrap on each day to keep things interesting?

    This is one of my favourite quick meals; delicious chicken, a tangle of onions and tomatoes and tangy herb chutney are wrapped in lovely soft breads. I have been eating variations of this dish since my childhood; you substitute the chicken for lamb or even paneer or stir-fried chickpeas. I have added some seasoned Greek yoghurt here but that is optional.

    Bismillah let’s get started. 

    Ingredients in Super Easy Naan Roll ?

    Super Easy Naan Roll (A Satisfying Meal Ready in 10 Mins)
    Ingredients You’ll need to prepare the Naan Roll
    Prepare Salad for Naan Rolls
    Prepare Salad for Naan Rolls
    Sauces for  for Naan Rolls
    Sauces for for Naan Rolls

    How to make the Super Easy Naan Roll (step by step instructions):

    [tabs type=”horizontal”] [tabs_head] [tab_title]Ingredients[/tab_title] [tab_title]Nutrition[/tab_title] [/tabs_head] [tab]

    • 1 plain naan
    • 1 boneless chicken breast, cooked
    • 1/2 cucumber, thinly sliced
    • 1 tbsp mango chutney
    • 1 tbsp green chutney
    • 1 tbsp ketchup
    • 1 tsp oil

    [/tab] [tab]Yield: 1 servings

    Nutritional information is not yet available. [/tab] [/tabs]

    Directions:

    [tabs type=”horizontal”] [tabs_head] [tab_title]Step by Step Method[/tab_title] [tab_title]Serving Suggestions[/tab_title][/tabs_head] [tab]

    Step 1

    Cut cooked chicken into thin strips.

    Step 2

    Heat oil on a griddle or a non-stick pan.

    Step 3

    Put naan on griddle and toast it from both sides.

    Step 4

    Place chicken strips on it.

    Step 5

    Spread mango chutney, ketchup, and green chutney over it.

    Step 6

    Add cucumber then again put on hot griddle and roll with butter paper.

    Step 7

    Place in oven for 10 seconds. Delicious Naan Roll is ready to serve.
    [/tab] [tab]

    • Serve with green mango chutney.

    [/tab] [/tabs]

    Consider serving with these Salad’s & Chutney:

    Want more Wraps Inspiration? 

    Here are some other salad recipes on my blog:

    Put your own spin on it. And lemme know how it turns out and do take a few seconds to rate it! I would love to see your recreations so tag me on instagram @recipestable or Facebook (Recipestable) or on Twitter so I can see how lovely yours turn out.

  • Crispy & Delicious: The Perfect Fish Biscuits Recipe!

    Fish Biscuits 

    Among so many fish recipes,  Fish Biscuits is one of delicious recipe. Must try a Fish biscuits recipe !!

    Prep Time: 20 minutes

    Cook Time: 5 minutes

     Servings:4 

    Ingredients

    • 300 gm fish fillets
    • 1/2 cup plain flour, for dusting
    • 1 egg
    • 4 tbsp oil
    • 2 tbsp plain flour, for batter
    • 2 tbsp cornflour
    • 1 tbsp garlic paste
    • 1/2 tsp black pepper
    • salt to taste


    Directions:

    1. Cut fish fillets into square pieces.
    2. In a small bowl, combine together plain flour, corn flour and beaten egg.
    3. Season with salt and black pepper.
    4. Mix well and make a smooth batter.
    5. Place remaining plain flour in a shallow dish.
    6. Coat fish pieces in flour then dip in the batter.
    7. Heat oil in a deep wok.
    8. Fry fish pieces for 5 minutes or until golden brown.
    9. Remove from the oil and drain on paper towel.
    10. Fish Biscuits are ready to serve.
    • Serve with Tartar Sauce.
  • Recipe: Spaghetti Balls

    Recipe: Spaghetti Balls

    Spaghetti Balls are easy and delicious. These balls are an interesting way to eat spaghetti and your little one won’t mess his or her clothes too! sweet corn make it more nutritious, while the cheese adds a rich, pleasing flavor. A Great snack for lunch and picnic. Enjoy with Chili Garlic Sauce or Tomato Ketchup. Try this Mouthwatering Spaghetti Balls  recipe.

    [one_third] Prep Time: 15 minutes[/one_third] [one_third]Cook Time: 5 minutes[/one_third] [one_third_last] Servings: 6 [/one_third_last]

    [review]

    [tabs type=”horizontal”] [tabs_head] [tab_title]Ingredients[/tab_title] [tab_title]Nutrition[/tab_title] [/tabs_head] [tab]

    For Spaghetti Balls:

    • 1-1/2 cups spaghetti, boiled
    • 1 cup thick white sauce
    • 1/2 cup sweet corn
    • 1 egg, lightly beaten
    • 3 tbsp grated cheese
    • 2 tbsp fresh coriander leaves, chopped
    • 3 green chilies, chopped
    • 1/2 tsp black pepper
    • 1/2 tsp salt
    • bread crumbs as required
    • oil for frying

    For White Sauce:

    • 1 cup milk
    • 2 tbsp butter
    • 1 tbsp plain flour, heaped
    • 1/2 tsp pepper
    • 1/2 tsp mustard powder
    • 1/2 tsp salt

    [/tab] [tab]Yield: 6 servings

    Nutritional information is not yet available. [/tab] [/tabs]

    Directions:
    [tabs type=”horizontal”] [tabs_head] [tab_title]Step by Step Method[/tab_title] [tab_title]Serving Suggestions[/tab_title][/tabs_head] [tab]

    1. Place boiled spaghetti and sweet corn in a large bowl.
    2. Also add white sauce, cheese, coriander leaves, green chilies, salt and pepper.
    3. Mix until well combined.
    4. Make small balls of the mixture.
    5. Dip spaghetti balls in beaten egg then roll in bread crumbs.
    6. Deep fry for 4-5 minutes or until golden brown.
    7. Remove from the oil and drain on an absorbent paper.
    8. Spaghetti Balls are ready to serve.
    9. ENJOY!!

    [/tab] [tab]

    • Serve hot with Chili Garlic Sauce.

    [/tab] [/tabs]

  • Rainbow on a Skewer: Try This Colorful Fish Tikka Shashlik Recipe Today!

    Fish Tikka Shashlik

    Fish tikka shashlik is quite popular among all fish lovers in the world. Here, I’m providing you an easy recipe for preparing delicious, healthy  fish tikka Shashlik at home. And make quick and easy BBQ sauce using items from your refrigerator and spice rack. It’s a simple mixture you can modify and experiment with until you’ve created your own secret sauce. 

    Bismillah, let’s get started!

    Check it out the Fish Tikka Shashlik Recipe and printable version below!

    Fish Tikka Shashlik Recipe

    Prep Time 30 minutes
    Cook Time 15 minutes
    Total Time 45 minutes
    Servings 4
    Author Bushrah @ Recipestable

    Ingredients

    • 1/2 kg fish fillets
    • 1/4 cup oil
    • 2 to matoes cut into cubes
    • 2 onions cut into cubes
    • 2 capsicums cut into cubes
    • 2 tbsp yogurt
    • 2 tbsp fresh cream
    • 1 tbsp vinegar
    • 1 tbsp ginger garlic paste
    • 1 tbsp cornflour
    • 1 tsp red chili powder
    • 1 tsp cumin powder
    • 1/2 tsp chat masala
    • 1-1/2 tsp salt
    • a pinch of orange food color
    • coriander leaves for garnishing

    Instructions

    Method

    • Cut fish fillets into 1 inch cubes.
    • Marinate fish pieces with ginger garlic paste, red Chilli powder, cumin powder, salt, yogurt, vinegar, cornflour, cream and food coloring.
    • Keep aside for 20 minutes.
    • Thread fish pieces, tomato, capsicum and onion on a shashlik stick.
    • Repeat this procedure with all remaining ingredients and prepare other sticks in the same manner.
    • Heat a little oil in a shallow pan.
    • Fry shashlik sticks in it or grill them for 10-15 minutes.
    • Fish Tikka Shashlik is ready to serve. ENJOY!!

    Notes

    Serving Suggestions:
    Serve with Fried Rice.
     I have also posted Chicken Shashlik which is another easiest & tastiest version of making Shashlik. Do check it out as well.


    Put your own spin on it. And lemme know how it turns out. Post a photo on Facebook (Recipestable) or  on Twitter so I can see how lovely yours turn out.


    Happy Cooking!!

  • Chocolate Paratha Recipe

    Chocolate Paratha 

    Today afternoon for Lunch, I was getting [highlight]chocolate cravings[/highlight]. So, I decided to make stuffed Chocolate Paratha…. sounds yummy. This Chocolate Paratha is healthy, yummy and delicious.

    Chocolate Paratha Recipe
    Photo: Chocolate Paratha Recipe

    I have used dark melted chocolate and walnuts (to add some crunch) as I am a Walnut’s lover. You could use grated chocolate for this recipe.You can have this chocolate treat whenever you like; remember to have it in moderation as part of a healthy diet.

    Chocolate Paratha Recipe
    Photo: Chocolate Paratha Recipe

    Do try this recipe, You’s kids will just love them. This [highlight]Chocolate Paratha[/highlight] can be great as snack, quick meals and lunch box. It’s easy to make and you can make them any time of the day.[highlight]Chocoholics [/highlight]will love this sweet treat.

    Chocolate Paratha Recipe
    Photo: Chocolate Paratha Recipe

    Treat your family with this yummy Chocolate Paratha. Better than store bought junk. All you need to make this tasty paratha is chocolate, flour, milk, and some walnuts. Really that’s it… ok a little bit of butter too 🙂 Goes great with a cup of coffee and some peanut butter. 

    Check it out the Chocolate Paratha recipe and printable version below:

    Chocolate Paratha

    Treat your family with this yummy Chocolate Paratha. Better than store bought junk. All you need to make this tasty paratha is chocolate, flour, milk, and some walnuts.
    Prep Time 20 minutes
    Cook Time 20 minutes
    Total Time 40 minutes
    Servings 6
    Author Bushrah | Recipestable

    Ingredients

    • 500 gm Wheat flour
    • 1 cup Chocolate
    • 1/2 cup walnuts crushed
    • Milk for kneading
    • Ghee or oil for cooking
    • 1/4 cup peanut butter Optional

    Instructions

    Directions

    • Place flour in a large bowl. Knead a soft dough with milk.
    • Keep aside.
    • Melt chocolate in a double boiler.
    • Stir in the walnuts.
    • Make 12 small balls from the dough.
    • Roll out into round shape chapati.
    • Spread chocolate mixture over a chapati.
    • Cover with second chapati.
    • Seal edges.
    • Heat a griddle or tawa.
    • Put paratha on the griddle, apply ghee over it.
    • Cook on low flame for 2 minutes or until lightly browned.
    • Take it out in a serving plate.
    • Drizzle with chocolate syrup. Delicious Chocolate Paratha is ready to serve.ENJOY!!

    Notes

    Serving Suggestions:
    Serve with Jam or jellies or Peanut butter.

    If you like this Chocolate Paratha Recipe, Please Subscribe to my blog. I have lots more recipes to share with you. And If you make it then let me know your feedback by commenting below.

  • The Easiest Strawberry Trifle Recipe

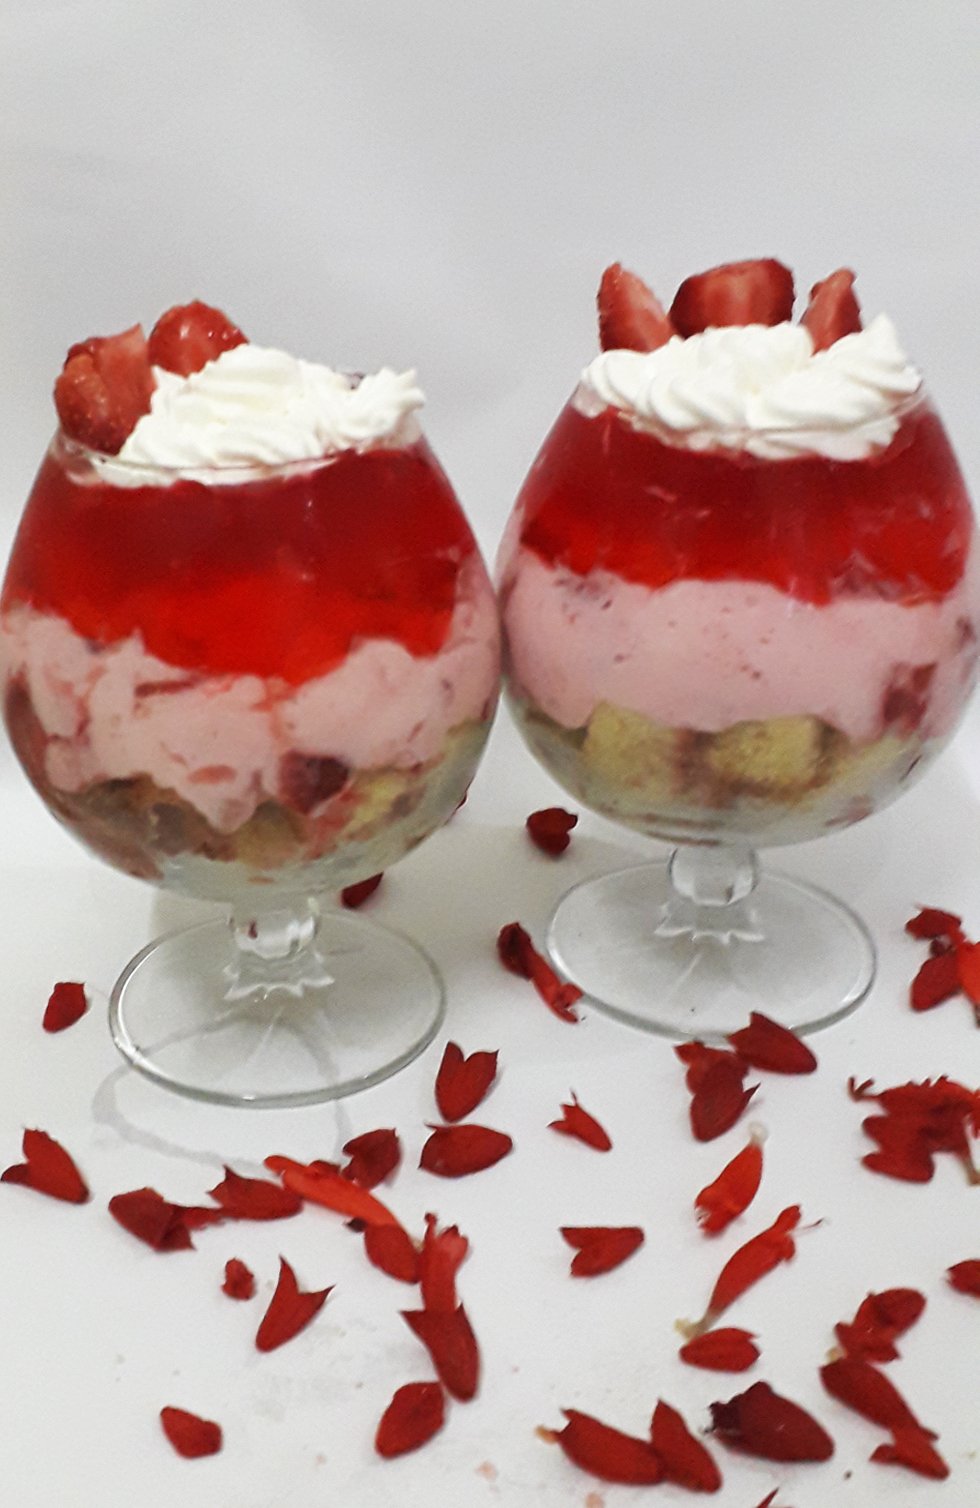
    The Easiest Strawberry Trifle Recipe

    Jump to Recipe
    The Easiest Strawberry Trifle Recipe
    The Easiest Strawberry Trifle Recipe
    The Easiest Strawberry Trifle Recipe
    The Easiest Strawberry Trifle Recipe
    The Easiest Strawberry Trifle Recipe

    Ingredients in Strawberry Trifle:

    If you’re heading to the store, these are the ingredients to add to your list:

    • 350 gm plain cake or pound cake
    • good quality strawberry jam
    • 400 gm strawberries , sliced
    • 1 tbsp caster sugar
    • 500 gm pot of good quality strawberry custard
    • 1 cup strawberry flavored jelly
    • 1 cup fresh cream, lightly whipped
    • 250 ml whipped cream, (approximately 1 cup)
    • strawberry sauce, optional (for topping)

    Can Trifle be Frozen?

    No, I wouldn’t recommend it.

    How Long will Trifle will Keep?

    My trifle keeps well for 3-4 days. Always keep it refrigerated.

    How many does this trifle feed?

    It depends, but my guess is it would feed approximately 6-8 people.

    Strawberry Trifle Recipe

    Course Dessert
    Prep Time 15 minutes
    Servings 6
    Author Bushra Waheed
    Cost 5 dollar

    Ingredients

    • 350 gm plain cake
    • good quality strawberry jam
    • 400 gm strawberries sliced
    • 1 tbsp caster sugar
    • 500 gm pot of good quality strawberry custard
    • 1 cup strawberry flavored jelly
    • 1 cup fresh cream lightly whipped
    • 250 ml whipped cream (approximately 1 cup)
    • strawberry sauce optional (for topping)

    Instructions

    • Make your strawberry jelly in advance according to packet instructions. Pour it into a small rectangle or square baking tin, so it’s roughly 1 inch high. Leave it in the fridge to set.
    • Begin by prepping everything. Chop your strawberries in half and sprinkle the sugar over the strawberries.
    • Slice the cake and sandwich the slices together with jam. Cut into 1 inch squares.
    • In a bowl, mix together the chilled custard and fresh cream. Fold into strawberries.
    • To assemble, divide the cake between 6 glasses and sprinkle a little strawberry sauce over each.
    • Spoon over the creamy strawberry custard then top each with a layer of jelly and a layer of whipped cream.
    • Decorate with strawberries.Enjoy!

    Notes

    1. You can use any plain store bought cake (that’s not frosted) like sponge cake, pound cake etc.
    2. You can use strawberry juice or another liquid if you like.

    Still have Strawberry Leftovers? 

    Here are a bunch more strawberry dessert recipes using fresh strawberries that you might also like to try:

    Want more Sweet Tooth Inspiration? 

    Here are some other dessert recipes on my blog:

    Put your own spin on it. And lemme know how it turns out and do take a few seconds to rate it! I would love to see your recreations so tag me on instagram @recipestable or Facebook (Recipestable) or on Twitter so I can see how lovely yours turn out.

  • The Tastiest Zinger Burger Recipe to Try at Home

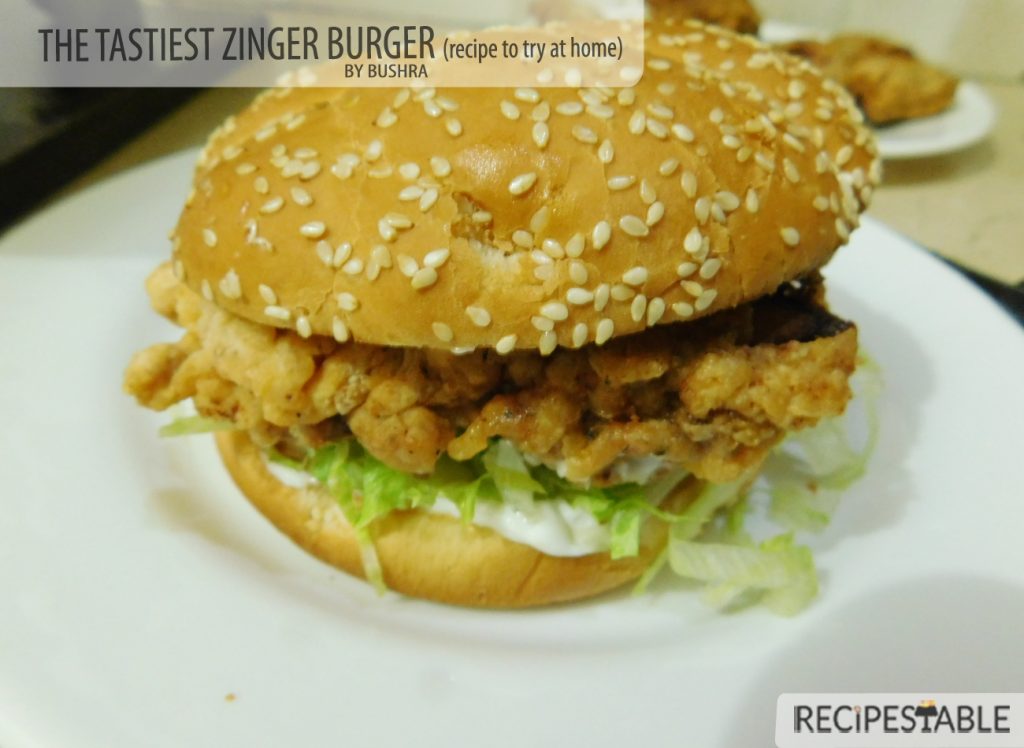
    The Tastiest Zinger Burger Recipe to Try at Home

    Can you resist a tempting, crispy, juicy burger? Well I can’t, for sure. May it be chicken, veggie or fish, bring it on baby. 

    Homemade Tastiest Zinger Burger Recipe
    The Tastiest Zinger Burger Recipe to Try at Home

    Zinger Burger

    Zinger Burger is a heart favorite fast food of all ages people especially kids love it. Oh yes, that zinger that makes us drool ..How the HELL do they make it ? Well, here’s the solution mates. Now you can make this versatile burger at home with this easy zinger burger recipe. Just follow My recipe to make these delicious all time favorite burgers.

    A thing of beauty, joy forever! This is pure joy, alhumdulillah!

    The Tastiest Zinger Burger Recipe to Try at Home
    The Tastiest Zinger Burger Recipe to Try at Home
    The Tastiest Zinger Burger Recipe to Try at Home
    The Tastiest Zinger Burger Recipe to Try at Home

     I have given a lot of zinger burger recipes a try but this one seemed to click. Because, it was quick, easy and oh-so perfect! Enough said, let’s make some burgers.

    The Tastiest Zinger Burger Recipe
    The Tastiest Zinger Burger Recipe to Try at Home
    The Tastiest Zinger Burger Recipe to Try at Home
    The Tastiest Zinger Burger Recipe to Try at Home
    The Tastiest Zinger Burger Recipe to Try at Home
    The Tastiest Zinger Burger Recipe to Try at Home

    Please your family with homemade Zinger Burger. You may enjoy this crispy zinger burger with Coleslaw salad any time of the day especially at evening.

    Bismillah Let’s get started!

    Ingredients in Zinger Burger?

    How to make The Tastiest Zinger Burger at Home (step by step instructions):

    The Tastiest Zinger Burger Recipe to Try at Home
    Ingredients You need to make the Tastiest Zinger Burger at Home

    Check it out the Zinger Burger recipe and printable version below!!

    Zinger Burger Recipe

    Prep Time 30 minutes
    Cook Time 15 minutes
    Total Time 45 minutes
    Servings 4
    Author Bushra Waheed

    Ingredients

    For Chicken Marination

    • 4 boneless skinless chicken breast flattened
    • 3 tablespoon white vinegar
    • 2 tablespon mustard paste
    • 1 teaspoon red chili crushed
    • 1 teaspoon garlic powder
    • Salt to taste

    For Coating

    • 3 eggs lightly beaten
    • 1 cup rice flour
    • 1 cup corn flour
    • 1/2 cup white plain flour
    • 2 tablespoon chicken powder
    • 1 teaspoon black pepper
    • 1/4 teaspoon white pepper
    • 1/2 teaspoon baking powder
    • oil for frying

    Other ingredients

    • 1 cup mayonnaise
    • 4 burger buns
    • salad leaves as required

    Instructions

    Method

    • Flatten chicken breast with a kitchen hammer.
    • Put them in a large mixing bowl.
    • Add mustard paste, white vinegar, salt, red chilli and garlic powder. Turn to coat evenly.
    • Cover and marinate for 30 minutes to blend flavors.
    • In a small bowl, Mix together the mayonnaise and mustard paste. Set aside.
    • Meanwhile, Take a large bowl, combine together the rice flour, corn flour, white flour, black pepper, white pepper, chicken powder, baking powder, garlic powder and salt. Keep aside.
    • Beat eggs in a small bowl.
    • First, coat the marinated chicken with flour mixture. Then dip in eggs and again repeat this process.
    • Heat oil in a large pan or skillet over medium heat. Deep fry Chicken for 5 minutes then put the lid on and cook anoher 5-8 minutes or until chicken is cooked thorough and turn golden brown.
    • Remove from oil and keep warm.
    • Cut the burger buns in half. Hot a non-stick griddle over medium heat. Toast or warm the burger buns on it.
    • Spread mayo sauce on the burger bun then put fried chicken on it. Again spread mayo sauce on it. Top with lettuce or salad leaves. Cover with the other half of the bun. Delicious Zinger Burger is ready to serve.

    Notes

    Serving Suggestions:
    Serve hot with french fries or coleslaw salad.

    Put your own spin on it. And lemme know how it turns out. Post a photo on Facebook (Recipestable) or  on Twitter so I can see how lovely yours turn out.

    Happy Cooking!!

    [divide icon=”circle”]

    If you like this Zinger Burger recipe, Please Subscribe to my blog. I have lots more recipes to share with you. And If you make it then let me know your feedback by commenting below.

    [divide icon=”circle”]

  • Classic French Fries Recipe: Crispy on the Outside, Fluffy on the Inside

    Aslam-o-Alakaum My Lovelies !!

     In the Name of Allah, Most Gracious, Most Merciful

    French Fries 


    There are a rare people who do not like french fries. In this recipe, I gives French Fries a spicy flavor by adding some seasoning. No more soggy fries at home!

    Learn the secret to make crispy fries each and every time with this French Fries recipe. Complement all your burgers with these fries or just serve with a variety of dips.

     French Fries recipe
    Recipe Photo: French Fries

    French Fries recipe
    Recipe Photo: French Fries

    French Fries recipe
    Recipe Photo: French Fries

    Bismillah, let’s begin!

    Check it out the French Fries Recipe and printable version below!

    French Fries Recipe

    There are a rare people who do not like french fries. In this recipe, I gives French Fries a spicy flavor by adding some seasoning. No more soggy fries at home!
    Prep Time 20 minutes
    Cook Time 20 minutes
    Total Time 40 minutes
    Servings 6
    Author Bushrah | Recipestable

    Ingredients

    • 6 large potatoes
    • 1/2 cup cornflour
    • 1 teaspoon red pepper
    • 1 teaspoon herb seasoning
    • 1 teaspoon garlic powder optional
    • 1 teaspoon salt
    • chaat masala powder for sprinkling
    • Oil for deep Frying

    Instructions

    Method

    • Wash potatoes then peel.Cut potatoes in shape of fries and soak them in salted cold water for 30 minutes.
    • Remove from the water and drain. Lay the potato sticks on two baking sheets lined with paper towel. Blot with paper towels to dry them properly.
    • In a shallow dish, combine together cornflour, herb seasoning, garlic powder,red pepper and salt.
    • Place dry potato sticks in it and coat them evenly.
    • Heat a few inches of oil in a heavy bottom pan over medium heat.
    • In 3 or 4 batches, fry the potatoes for 15-20 minutes or until crispy and golden.
    • Remove the potatoes from the oil and drain on paper towel. French Fries are ready to ENJOY!!

    Notes

    Serving Suggestions:
    Serve with Chilli Garlic Sauce or Tomato Ketchup.
     

    I have also posted Smiley Face Fries  which is another easiest & tastiest version of making French Fries. Do check it out as well.

    [divide icon=”circle”]

    Put your own spin on it. And lemme know how it turns out. Post a photo on Facebook (Recipestable) or  on Twitter so I can see how lovely yours turn out.

    [divide icon=”circle”]

    Happy Cooking!!

    If you like this post, Please Subscribe to my blog and let me know your feedback by commenting below.. I have lots more recipes to share with you.

    [divide icon=”circle”]

  • Easy & Crispy: The Perfect Finger Fish Recipe for Everyone

    Finger Fish

    Simple and fun to make, these fish sticks are bound to become one of your family’s favorite quick dinners.
    Kids will love this homemade version of finger fish, and they can even help make them too, from Recipestable.com.

    Finger Fish Recipe
    Photo: Finger Fish Recipe

    Bismillah, let’s get started!

    Check it out the Finger Fish Recipe and printable version below!

    Finger Fish Recipe

    Prep Time 10 minutes
    Cook Time 10 minutes
    Total Time 20 minutes
    Servings 12
    Author Bushrah @ Recipestable

    Ingredients

    • 1 kg fish fillets
    • 2 tbsp lemon juice
    • 1 tbsp soy sauce
    • 1 tsp red chili powder
    • 1 tsp mustard powder
    • 1/2 tsp white pepper
    • 2 eggs lightly beaten
    • 1 cup plain flour
    • 1 cup breadcrumbs
    • salt to taste
    • oil for frying

    Instructions

    Method

    • Rinse and drained fish fillets then cut the fish into finger shaped pieces.
    • Place the fish in a bowl, add soy sauce, lemon juice, mustard powder, red chili, salt and pepper.
    • Marinate fish for at least 2 hours.
    • Place the flour, eggs and bread crumbs in 3 separate bowl.
    • Roll each fish finger in flour, then dip in egg and again roll in breadcrumbs properly. Place them in a single layer on flat dish.
    • Heat oil in a frying pan over a medium heat. Deep fry the finger fish for 8-10 minutes or until they turn golden brown.
    • Drain on paper towel. Finger fish is ready to serve.

    Notes

    Serving Suggestions:
    Serve with tartar Sauce.

    I have also posted Fish Biscuits Recipe which is another easiest & tastiest version of making Finger Fish  at home. Do check it out as well.  It’s finger lickin’ good. You’ll be coming back for more.


    Put your own spin on it. And lemme know how it turns out. Post a photo on Facebook (Recipestable) or  on Twitter so I can see how lovely yours turn out.


    Happy Dinner Making!!