Blog

  • A Flavorful Fusion: Juicy Pineapple Chicken Tenders Recipe

    Pineapple Chicken Tenders

    Delicious little bites for an appetizer or a light meal with a salad. Skewered chicken tenders are brushed with a tropical mixture of pineapple juice, brown sugar, soy sauce and pepper, then grilled.

    Must try out this Pineapple Chicken tenders recipe. This Pineapple Chicken tenders recipe will help you to make a great food and save time, money, and your sanity doing it. Goes great with rice and steamed vegetables for a light meal.

    Pineapple Chicken Tenders recipe
    Photo: Pineapple Chicken Tenders Recipe

    Check it out the Pineapple Chicken Tenders recipe here!!

    [divider]

    [one_fourth]Prep Time: 10 minutes + marination[/one_fourth] [one_fourth]Cook Time: 10 minutes[/one_fourth] [one_fourth]Servings: 10 [/one_fourth] [one_fourth_last]Difficulty Level: Easy[/one_fourth_last]

    [divider]

    [tabs type=”horizontal”] [tabs_head] [tab_title]Ingredients[/tab_title] [tab_title]Nutrition[/tab_title] [/tabs_head] [tab]

    • 2 pounds skinless boneless chicken breast, cut into strips
    • 1 cup pineapple chunks
    • 1 cup pineapple juice
    • 1/2 cup packed brown sugar
    • 1/3 cup light soy sauce
    • 1 teaspoon white pepper
    • salt to taste
    • skewers as required

    [/tab] [tab]

    Yield: 10 appetizer servings

    Amount Per Serving

    • Calories:160 kcal
    • Carbohydrates:14.7 g
    • Cholesterol: 52 mg
    • Fat: 2.2 g
    • Fiber: 0.1 g
    • Protein: 19.4 g
    • Sodium: 332 mg

    [/tab] [/tabs]

    Directions:
    [tabs type=”horizontal”] [tabs_head] [tab_title]Step by Step Method[/tab_title] [tab_title] Expert Tip’s[/tab_title][tab_title]Serving Suggestions[/tab_title][/tabs_head] [tab]

    Step 1

    Pour pineapple juice and soy sauce in a small saucepan. Stir in the brown sugar, salt and pepper.

    Step 2

    Cook and stir for 2 minutes or until well combined. Remove from the heat before the mixture comes to a boil.

    Step 3

    Place chicken tenders and pineapple chunks in a resealable plastic bag.

    Step 4

    Pour the pineapple marination over the chicken tenders. Shake to coat evenly.

    Step 5

    Place in the refrigerate for at least 30 minutes.

    Step 6

    Preheat grill for medium heat. Lightly oil the grill grate.

    Step 7

    Thread chicken and pineapple chunks onto the wooden skewers.

    Step 8

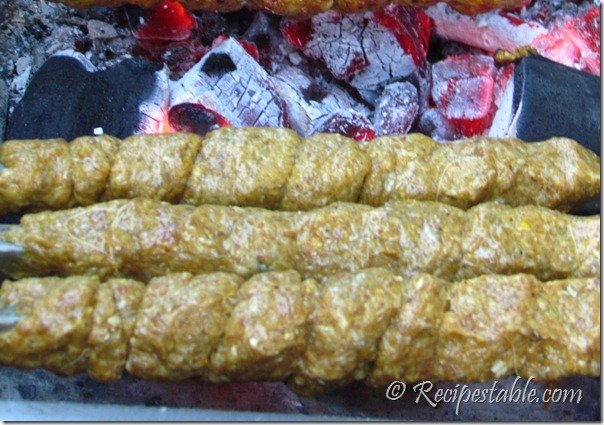
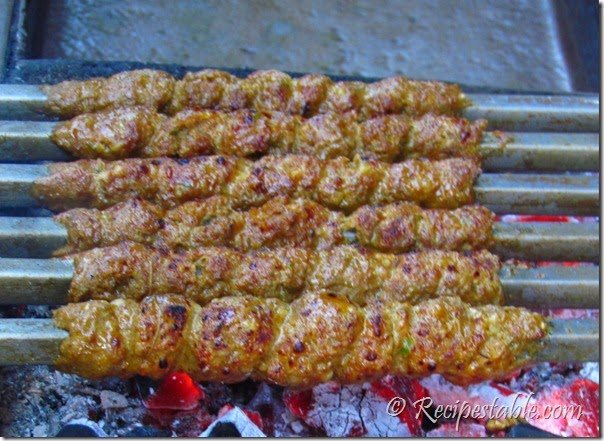
    Put skewers on the preheated gril. Grill chicken tenders about 5 minutes on each side or until all juices run clear.

    Step 9

    Transfer into a serving platter. Delicious Pineapple Chicken Tenders are ready to serve. ENJOY!!

    [/tab]

    [tab]

    1. Chicken Tenders cook quickly, so watch them closely.
    2. Do not overcook them.

    [/tab]

    [tab]

    • Serve with Pineapple Coleslaw.

    [/tab] [/tabs]
    If you like Pineapple Chicken Tenders recipe and make it then let me know your feedback by commenting below.

  • Honey Glazed Chicken Kabobs: A Simple and Delicious Recipe!

    Yummy Honey Chicken Kabobs

    Honey chicken kabobs with veggies …Yum Yum Yummy!! This is a quick and easy grilled entree recipe made with honey, lemon juice, soy sauce and garlic for a fabulous marinade.

    For these Honey Chicken Kabobs, the key ingredient in the kabob marinade is honey and it adds the perfect, subtle sweetness. Do try this Yummy Honey Chicken Kabobs recipe, hope you will like it.

    Check it out the Yummy Honey Chicken Kabobs recipe here

    [divider]

    [one_fourth]Prep Time: 15 minutes + marination[/one_fourth] [one_fourth]Cook Time: 15 minutes[/one_fourth] [one_fourth]Servings: 12[/one_fourth] [one_fourth_last]Difficulty Level: Easy [/one_fourth_last]

    [divider]

    [tabs type=”horizontal”] [tabs_head] [tab_title]Ingredients[/tab_title] [tab_title]Nutrition[/tab_title] [/tabs_head] [tab]

    • 8 boneless skinless chicken breast halves, cubed
    • 5 small onions, cut into 2 inch pieces
    • 2 red or green bell peppers, cut into 2 inch pieces
    • 2 clove garlic, minced
    • 1/4 cup vegetable oil
    • 1/3 cup soy sauce
    • 1/3 cup honey
    • 1/4 tsp ground black pepper
    • salt to taste
    • skewers as required

    [/tab] [tab]

    Yield: 12 servings

    Amount Per Serving

    • Calories 178 kcal
    • Carbohydrates: 12.4 g
    • Cholesterol: 45 mg
    • Fat: 6.6 g
    • Fiber: 1 g
    • Protein: 17.4 g
    • Sodium: 442 mg

    [/tab] [/tabs]

    Directions:
    [tabs type=”horizontal”] [tabs_head] [tab_title]Step by Step Method[/tab_title][tab_title]Recipe Note’s[/tab_title] [tab_title]Serving Suggestions[/tab_title][/tabs_head] [tab]

    Step 1

    Take a large bowl, whisk together vegetable oil, soy sauce, honey, salt and pepper.

    Step 2

    Now reserve a 1/4 cup of marinade to brush onto kabobs while cooking.

    Step 3

    Place the chicken, garlic, onions and peppers in the bowl. Toss to coat.

    Step 4

    Cover and marinate in the refrigerator at least 2 hours or overnight.

    Step 5

    Preheat the grill for high heat. Grease the grill grate with non stick cooking spray.

    Step 6

    Discard marinade.

    Step 7

    Thread chicken and vegetables alternately onto the wooden or metal skewers.

    Step 8

    Put the skewers on the grill. Cook for 12-15 minutes or until all juices run clear and chicken is no longer pink inside.

    Step 9

    Turn the skewers and brush with reserved marinade frequently.

    Step 10

    Remove from the grill and transfer into a serving platter. Yummy Honey Chicken Kabobs are ready to serve. ENJOY!!

    [/tab] [tab]

    1.  Fresh mushrooms and cherry tomatoes can also be used.
    2. You can marinate overnight and make these kabobs for an outdoor barbecue as a tasty alternative to the usual barbecue fare!
    3. The nutrition data for this recipe includes information for the full amount of the marinade ingredients. Depending on marinating time, ingredients, cooking method, etc., the actual amount of the marinade consumed will vary.

    [/tab][tab]

    • Serve with steamed rice.

    [/tab] [/tabs]
    If you like Yummy Honey Chicken Kabobs recipe and make it then let me know your feedback by commenting below.

  • Basil Shrimp Recipe

    Basil Shrimp

    Easy, versatile, and quick to cook, shrimp is a high-protein, low-calorie alternative to other meats and fish.
    Nothing can beat this incredibly easy, enjoyable Basil Shrimp Recipe. You can double the recipe when entertaining.

    basil Shrimp recipe
    Photo: basil Shrimp Recipe


    Check it out the Basil Shrimp recipe here!!

    [divider]

    [one_fourth]Prep Time: 10 minutes + marination[/one_fourth] [one_fourth]Cook Time: 5 minutes[/one_fourth] [one_fourth]Servings:8 [/one_fourth] [one_fourth_last]Difficulty Level: Easy[/one_fourth_last]

    [divider]

    [tabs type=”horizontal”] [tabs_head] [tab_title]Ingredients[/tab_title] [tab_title]Nutrition[/tab_title] [/tabs_head] [tab]

    • 3 pounds fresh shrimp, peeled and deveined
    • 3 cloves garlic, minced
    • 1/2 cup minced fresh basil leaves
    • 1/4 cup melted butter
    • 2 tbsp olive oil
    • 1-1/2 lemons, juiced
    • 1 teaspoon white pepper
    • salt to taste
    • skewers as required

    [/tab] [tab]Yield: 8 servings

    Nutritional information is not yet available. [/tab] [/tabs]

    Directions:
    [tabs type=”horizontal”] [tabs_head] [tab_title]Step by Step Method[/tab_title] [tab_title]Serving Suggestions[/tab_title][/tabs_head] [tab]

    Step 1

    Pour melted butter and oil in a shallow dish. Mix until well blended.

    Step 2

    Stir in the mustard basil, lemon juice and garlic.

    Step 3

    Season with salt and white pepper.

    Step 4

    Adjust the seasoning.

    Step 5

    Put shrimp into the butter mixture. Toss to coat evenly.

    Step 6

    Cover and refrigerate for 1 hour to blend flavors.

    Step 7

    Preheat grill to high heat and lightly oil grill grate.

    Step 8

    Discard marinade.

    Step 9

    Thread shrimp onto the metal or wooden skewers.

    Step 10

    Put skewers on the preheated grill.

    Step 11

    Cook for 4-5 minutes, turning once, or until opaque. Basil Shrimp are ready to serve. ENJOY!!

    [/tab] [tab]

    • Serve with your favorite dip.

    [/tab] [/tabs]

    If you like Basil Shrimp recipe and make it then let me know your feedback by commenting below.

  • Potato Salmon Patties Recipe

    Potato Salmon Patties

    Fish Patties are one of my favorite ways to eat seafood.  Today I am sharing Potato salmon Patties recipe that can be made into large patties for a main dish or small for an appetizer. Flaked salmon is blended with herbs, bread crumbs, and dry potato flakes to form tasty and versatile.

    I make these salmon patties with dry potato flakes instead of the mashed potatoes and used canned salmon. As canned salmon is a convenient, economical and nutritious alternative to fresh.
    These Potato Salmon Patties are sensational, light and healthy. It make a delicious meal with French fries or roasted potatoes. I like to have these patties with horseradish dip. Do try this Potato Salmon Patties recipe, hop you like it.

     Potato Salmon Patties Recipe
    Photo: Potato Salmon Patties Recipe

    Check it out the  Potato Salmon Patties Recipe here!!

    [divider]

    [one_fourth]Prep Time: 15 minutes[/one_fourth] [one_fourth]Cook Time: 10 minutes[/one_fourth] [one_fourth]Servings: 10  [/one_fourth] [one_fourth_last]Difficulty Level: Easy[/one_fourth_last]

    [divider]

    [tabs type=”horizontal”] [tabs_head] [tab_title]Ingredients[/tab_title] [tab_title]Nutrition[/tab_title] [/tabs_head] [tab]

    • 1 can salmon, (about 14.75 oz)
    • 2 eggs, lightly beaten
    • 1 onion, minced
    • 2 clove garlic, minced
    • 1/4 cup dry potato flakes
    • 1/4 cup garlic herb seasoned dry bread crumbs
    • 2 tablespoon olive oil
    • 1/4 tsp dried dill weed
    • 1/4 tsp red pepper flakes
    • salt to taste

    [/tab] [tab]Yield: 5 servings

    Amount Per Serving

    • Calories: 252 kcal
    • Carbohydrates: 8 g
    • Cholesterol: 121 mg
    • Fat: 13.8 g
    • Fiber: 0.8 g
    • Protein: 23.1 g
    • Sodium: 509 mg

    [/tab] [/tabs]

    Directions:
    [tabs type=”horizontal”] [tabs_head] [tab_title]Step by Step Method[/tab_title] [tab_title]Serving Suggestions[/tab_title][/tabs_head] [tab]

    Step 1

    Drain the fish and flake with a fork.

    Step 2

    Place salmon fish in a mixing bowl. Add dry potato flakes, eggs, bread crumbs, onion, garlic and dill weed.

    Step 3

    Season with salt and pepper.

    Step 4

    Mix until well combined. Divide mixture into 10 round balls then flatten into patties about 1/2-in thick.

    Step 5

    Heat oil in a medium skillet over medium heat.

    Step 6

    Put patties on the skillet. Cook about 5 minutes on each side or until lightly browned.

    Step 7

    Take it out in a serving platter. Potato Salmon Patties are ready to serve. ENJOY!!

    [/tab] [tab]

    • Serve them as snacks, sandwiches, or as dinner with rice and a veggie on the side.

    [/tab] [/tabs]

    If you like Potato Salmon Patties recipe and make it then let me know your feedback by commenting below.

  • Oregon Salmon Patties Recipe

    Oregon Salmon Patties

     Here’s a Oregon Salmon Patties recipe that’s tasty and simple to do. If you make the patties big enough, you can also use them as salmon burgers. This is an excellent recipe for canned or fresh salmon patties. Do try this Oregon Salmon Patties recipe, hope you will love it.

    Oregon Salmon Patties recipe
    Photo: Oregon Salmon Patties Recipe

    [divider]

    [one_fourth]Prep Time: 10 minutes[/one_fourth] [one_fourth]Cook Time:10 minutes[/one_fourth] [one_fourth]Servings: 6[/one_fourth] [one_fourth_last]Difficulty Level: Easy[/one_fourth_last]

    [divider]

    [tabs type=”horizontal”] [tabs_head] [tab_title]Ingredients[/tab_title] [tab_title]Nutrition[/tab_title] [/tabs_head] [tab]

    • 1 can salmon fish, (about 14.75 oz)
    • 2 eggs, lightly beaten
    • 1 onion, finely chopped
    • 2 tbsp margarine or butter
    • 1/4 cup chopped fresh parsley
    • 2/3 cup cracker crumbs
    • 1 teaspoon dry mustard
    • salt and pepper to taste
    • sesame oil for frying

    [/tab] [tab]Yield: 6 patties

    Amount Per Serving ( 1 serving = 1 each)

    • Calories: 441 kcal
    • Carbohydrates: 20 g
    • Cholesterol: 133 mg
    • Fat: 29 g
    • Fiber: 1.1 g
    • Protein: 24.2 g
    • Sodium: 634 mg

    [/tab] [/tabs]

    Directions:
    [tabs type=”horizontal”] [tabs_head] [tab_title]Step by Step Method[/tab_title] [tab_title]Serving Suggestions[/tab_title][/tabs_head] [tab]

    Step 1

    Drain the salmon fish, reserving 3/4 cup of the liquid.

    Step 2

    Flake the fish with a fork.

    Step 3

    Melt butter in a pan over medium high heat. Saute onion in it until tender.

    Step 4

    Place the salmon in a medium bowl. Add onions, reserved salmon liquid, eggs, 1/3 of the cracker crumbs and parsley.

    Step 5

    Season with salt and pepper and dry mustard. Mix until well blended.

    Step 6

    Adjust the seasoning.

    Step 7

    Shape into 6 patties.

    Step 8

    Coat patties in remaining cracker crumbs and keep aside.

    Step 9

    Now heat oil in a frying pan over medium high heat. Cook patties for 2 minutes on each side or until browned.

    Step 10

    Remove from the oil and drain on paper towel. Oregon Salmon Patties are ready to serve. ENJOY!!

    [/tab] [tab]

    • Serve on burger buns along with lettuce leaves.

    [/tab] [/tabs]
    If you like Oregon Salmon Patties recipe and make it then let me know your feedback by commenting below.

  • The Juiciest Chicken Seekh Kebabs: Toasted with Sesame Seeds!

    Sesame Chicken Seekh Kababs

    Seekh kebabs are my favorite variety of kebabs. As you know, I love to try new recipes as often as possible. Today, I am sharing an awesome recipe of Sesame Chicken Seekh Kebabs with you all.

    These kebabs are similar to the Seekh kebabs, moist and delicious. It’s a special delight of minced chicken, sesame seeds, nuts and spices. The nice mixture of minced chicken is simply molded onto the skewers, top with sesame seeds and grilled. They are very easy to prepare and gives you unique taste of Seekh Kebabs.

    These delicious, juicy kebabs can be made with any minced meat you like, but I like chicken best. Learn the easiest way to make tastiest sesame chicken seekh kebabs in your own kitchen. These sesame chicken seekh kebabs make a perfect mid-week meal. Goes well with naans, raita and salad

    Do try this sesame seekh kebabs recipe and don’t forget to send your feedback by commenting below.

    Sesame Chicken Seekh Kababs recipe
    Photo: Sesame Chicken Seekh Kebabs Recipe

    Check it out the Sesame Chicken Seekh Kebabs recipe here!!

    [divider]

    [one_fourth]Prep Time: 15 minutes + marination[/one_fourth] [one_fourth]Cook Time: 15 minutes[/one_fourth] [one_fourth]Servings: 6[/one_fourth] [one_fourth_last]Difficulty Level: Easy[/one_fourth_last]

    [divider]

    [tabs type=”horizontal”] [tabs_head] [tab_title]Ingredients[/tab_title] [tab_title]Nutrition[/tab_title] [/tabs_head] [tab]

    • 1 kg chicken mince (keema)
    • 1 cup fried onion, crushed
    • 1 small onion
    • 5 green chillies
    • 12 cashew nuts
    • 12 almonds, blanched
    • 1 teaspoon ginger paste
    • 1 teaspoon garlic paste
    • 2 tablespoon sesame seeds
    • 1 tablespoon poppy seeds
    • 1 tablespoon papaya paste (optional)
    • 1 teaspoon red chilli powder
    • 1 teaspoon coriander powder
    • 1 teaspoon garam masala powder
    • 1 teaspoon chaat masala powder
    • 1/2 teaspoon black pepper
    • salt to taste
    • 1/4 bunch fresh coriander leaves, chopped
    • Oil or ghee for busting

    [/tab] [tab]Yield: 5 servings

    Nutritional information is not yet available. [/tab] [/tabs]

    Directions:
    [tabs type=”horizontal”] [tabs_head] [tab_title]Step by Step Method[/tab_title] [tab_title]Expert Tip’s[/tab_title][tab_title]Serving Suggestions[/tab_title][/tabs_head] [tab]

    Step 1

    Place chicken mince in a food processor. Add all remaining ingredents except oil. Process until well combined.

    Step 2

    Don’t over chop the meat in the food processor, just a few spins. Take it out in a bowl. Cover and keep aside for 30 minutes to blend flavors.

    Step 3

    Put some oil on your hands to prevent meat from sticking to them. Make round small balls and put on skewers. Press firmly and shape into seekh kabab.

    Step 4

    Put the seekh kabab on very low heat of coal fire or in a oven.

    Step 5

    Cook and turn skewer ocassionally, until the kabab are light brown.

    Step 6

    Brush over the remaining oil with the seeds for the last minute of cooking.

    Step 7

    Once done, remove the kebabs from the skewers  (seekhs) with the help of a piece of bread so you don’t burn yourself.

    Step 8

    Garnish with Lemon wedges and ring onions. Sesame Chicken Seekh Kababs are ready to serve. ENJOY!!

    [/tab][tab]

    1. Do not over gril or brown the kabab.
    2. Another way to make chicken seekh kabab is that put the mixture around the satay stick and then place them on a hot tawa or griddle, drizzle oil or butter and cook evenly all around until browned.
    3. If you are making this kabab on the tawa then you need to baste them with butter or oil at regular intervals.
    4. These delicious, juicy kebabs can be made with any minced meat you like, but I like chicken best Minced chicken is easily available in the market, but in case you do not get it then simply buy the boneless chicken, cut into small pieces and chop little bit in the chopper. Your minced chicken will be ready.

    [/tab] [tab]

    [/tab] [/tabs]

    If you like Sesame Chicken Seekh Kababs recipe and make it then let me know your feedback by commenting below.

  • Chicken Breast and Rice Recipe

    Chicken Breast and Rice

    A simple great tasting recipe that makes enough to feed the family. It has a wonderful robust flavor, but not too overpowering. This is a chicken casserole with rice, corn, bell pepper and lemon pepper seasoning. Easy and tasty. Check it out the chicken breast and rice recipe here!!

    chicken breast and rice recipe
    Photo: chicken breast and rice Recipe

    [divider]

    [one_fourth]Prep Time:25 minutes[/one_fourth] [one_fourth]Cook Time: 1 hour[/one_fourth] [one_fourth]Servings: 4[/one_fourth] [one_fourth_last]Difficulty Level: Easy[/one_fourth_last]

    [divider]

    [tabs type=”horizontal”] [tabs_head] [tab_title]Ingredients[/tab_title] [tab_title]Nutrition[/tab_title] [/tabs_head] [tab]

    • 4 boneless & skinless chicken breasts
    • 1-1/2 cup chicken broth, low sodium
    • 1 cup long grain white rice
    • 1/2 cup margarine, melted
    • 1/2 canned whole kernel corn
    • 1 bell pepper, thinly sliced
    • 5 tbsp lemon pepper

    [/tab] [tab]Yield: 4 servings

    Nutritional information is not yet available. [/tab] [/tabs]

    Directions:
    [tabs type=”horizontal”] [tabs_head] [tab_title]Step by Step Method[/tab_title] [tab_title]Serving Suggestions[/tab_title][/tabs_head] [tab]

    Step 1

    Preheat oven to 350 degree F.

    Step 2

    Place chicken breasts in a non-greased 9×13 inch glass baking dish.

    Step 3

    Sprinkle lemon pepper on both sides of them. Keep aside.

    Step 4

    In a small bowl, combine together the melted butter and the chicken broth.

    Step 5

    Pour this mixture over the chicken.

    Step 6

    Bake in the preheated oven for 20 minutes.

    Step 7

    Take it out from the oven. Remove chicken.

    Step 8

    Add rice, bell pepper and corn in the baking dish.

    Step 9

    Arrange chicken breasts back on top. Cover again.

    Step 10

    Put the baking dish back in the oven.

    Step 11

    Bake 40 minutes longer or until cooked thorough.

    Step 12

    Take it out. Delicious chicken breast and rice are ready. YUM YUM!!

    [/tab] [tab]

    • Serve with fresh veggie salad.

    [/tab] [/tabs]
    If you like  chicken breast and rice recipe and make it then let me know your feedback by commenting below.

  • Flavorful Herb Roasted Potatoes with Sour Cream!

    Herb Roasted Potatoes

    Bake in the pre-heated oven for 30 minutes or until lightly browned. Stirring occasionally the tray and turn the potatoes so they are a nice golden brown from both the sides.Try this Herb Roasted Potatoes with Sour Cream from a member of the Recipestable Community.

    Herb Roasted Potatoes with Sour Cream
    Photo: Herb Roasted Potatoes with Sour Cream

    Check it out the Herb Roasted Potatoes with Sour Cream recipe here!!

    [divider]

    [one_fourth]Prep Time: 10 minutes[/one_fourth] [one_fourth]Cook Time: 30 minutes[/one_fourth] [one_fourth]Servings: 4[/one_fourth] [one_fourth_last]Difficulty Level: Easy[/one_fourth_last]

    [divider]

    [tabs type=”horizontal”] [tabs_head] [tab_title]Ingredients[/tab_title] [tab_title]Nutrition[/tab_title] [/tabs_head] [tab]

    • 8 small sized new potatoes
    • 4 tablespoon butter or margarine
    • 1 teaspoon dried oregano, crushed
    • 1 teaspoon dried basil, crushed
    • 1 teaspoon dried rosemary, crushed
    • 1/2 teaspoon paprika
    • 1/2 teaspoon red pepper
    • 1/2 teaspoon garlic powder
    • 1/2 teaspoon onion powder
    • salt to taste

    For Sour Cream:

    • 4 tablespoon fresh cream
    • 1 tablespoon chopped fresh coriander
    • 1 tablespoon chopped mint leaves
    • 2 teaspoon lemon juice
    • a pinch of salt
    • a pinch of paprika

    [/tab] [tab]Yield: 4 servings

    Nutritional information is not yet available. [/tab] [/tabs]

    Directions:
    [tabs type=”horizontal”] [tabs_head] [tab_title]Step by Step Method[/tab_title] [tab_title]Serving Suggestions[/tab_title][/tabs_head] [tab]

    Step 1

    Preheat an oven to 200 degree C.

    Step 2

    Peel the potatoes and boil until half cooked.

    Step 3

    Drain the water.

    Step 4

    Place the potatoes in a large bowl.

    Step 5

    Add herbs, garlic and onion powder. Season with salt and pepper.

    Step 6

    Drizzle melted butter over them. Toss to coat evenly.

    Step 7

    Arrange in a baking pan or tray.

    Step 8

    Bake in the pre-heated oven for 30 minutes or until lightly browned. Stirring occasionally the tray and turn the potatoes so they are a nice golden brown from both the sides.

    Step 9

    To Make Sour Cream: In a bowl, beat cream with lemon juice until light and fluffy.

    Step 10

    Stir in the salt, pepper, mint and coriander. Beat until cream thickened.

    Step 11

    When the potatoes are done, serve with sour cream. Herb Roasted Potatoes with Sour Cream is ready to serve. ENJOY!!

    [/tab] [tab]

    • Serve with sour cream and garlic bread.

    [/tab] [/tabs]

    If you like Herb Roasted Potatoes with Sour Cream and make it then let me know your feedback by commenting below.

  • Aloo Tikki with a Twist: Make Delicious Peshawari Potato Kebabs!

    Peshawari Potato Kebab

    Its the Vegetarian version of chapli kabab; ingredients are of Peshawari kebab but used potatoes instead of meat. I like these crispy Peshawari Potato Kebab (cutlets).Top of all its easy to make and if you want any thing classy in few minutes then you should go for this Peshawari Potato Kebab recipe.

     Peshawari Potato Kebab Recipe
    Photo: Peshawari Potato Kebab Recipe

    Lunch box recipe for kids also i am sure your kids will like it. Must try this Peshawari Potato Kebab recipe in Ramadan.

    Peshawari Potato Kebab Recipe
    Photo: Peshawari Potato Kebab Recipe

    Check it out the Peshawari Potato Kebab recipe here!!

    [divider]

    [one_fourth]Prep Time: 20 minutes[/one_fourth] [one_fourth]Cook Time: 10 minutes[/one_fourth] [one_fourth]Servings: 8[/one_fourth] [one_fourth_last]Difficulty Level: Easy [/one_fourth_last]

    [divider]

    [tabs type=”horizontal”] [tabs_head] [tab_title]Ingredients[/tab_title] [tab_title]Nutrition[/tab_title] [/tabs_head] [tab]

    • 1 kg Potatoes, boiled and mashed
    • 1 small onion, finely chopped
    • 1 small tomato, finely chopped
    • 1 egg
    • 3 green chilies, finely chopped
    • 5 tablespoon dry pomegranate seeds (anardana)
    • 5 tablespoon gramflour (besan)
    • 2 tablespoon chopped fresh coriander
    • 1 teaspoon cumin seeds, roasted and crushed
    • 1 teaspoon coriander seeds, roasted and crushed
    • 1 teaspoon red chilies, crushed
    • 1/2 teaspoon garam masala powder
    • salt to taste
    • oil for shallow frying
    • 2 tomatoes,cut into rounds

    [/tab] [tab]Yield: 8 servings

    Nutritional information is not yet available. [/tab] [/tabs]

    Directions:
    [tabs type=”horizontal”] [tabs_head] [tab_title]Step by Step Method[/tab_title] [tab_title]Serving Suggestions[/tab_title][/tabs_head] [tab]

    Step 1

    Place potatoes in a large bowl. Mash them properly.

    Peshawari Potato Kebab Recipe
    Step 1 

    Step 2

    Add onion, tomato, coriander and green chilies in it.

    Peshawari Potato Kebab Recipe
    Step 2 

     Step 3

    Add all the remaining ingredients except  oil.

    Peshawari Potato Kebab Recipe
    Step 3

    Step 4

    Mix until well combined.

    Peshawari Potato Kebab Recipe
    Step 4 

    Step 5

    Shape into kebabs and put one tomato slice over the each kebab. Lightly press it.

    Peshawari Potato Kebab recipe
    Step 5 

    Step 6

    Heat oil in a frying pan over medium heat. Shallow fry kebabs until crispy and golden brown.

    Peshawari Potato Kebab recipe
    Step 6 

    Step 5

    Take it out in a serving platter. Delicious Peshawari Potato Kebab is ready to serve.

    Peshawari Potato Kebab recipe
    Step 7 ~ Peshawari Potato Kebab ready to eat 🙂

    [/tab] [tab]

    • Serve with tamarind chutney and green chutney.

    [/tab] [/tabs]
    If you like Peshawari Potato Kebab recipe and make it then let me know your feedback by commenting below.

  • 5-Minute Masala Omelette: The Easiest and Most Flavorful Breakfast!

    Masala Omelette

    This Masala Omelette is probably my favorite breakfasts on a weekend morning. Masala Omelette is a nice way to make spicy omelette. Its a spicy version of omelette in which eggs,  tomatoes, onion, green pepper and flavorful spices are used. It is one of the most quickest and tastiest breakfast recipe.

    Needless to say, the omelette has many forms in Pakistan and every household makes it differently. Even I have a few variations of the  omelette depending on my mood. I have given a few options below that I generally rotate through.

    This masala omelette recipe is very versatile and you can choose which way you want to go with it.  Commonly Masala omelette is really very tasty to serve at any time. I love to enjoy this Masala Omelette with paratha and a cup of green tea. Do try this Masala Omelette recipe and share your experience with us!!

     Masala omelette Recipe
    Photo: Masala omelette Recipe

    Check it out the Masala Omelette recipe here!!

    [divider]

    [one_fourth]Prep Time:10 minutes[/one_fourth] [one_fourth]Cook Time:10 minutes[/one_fourth] [one_fourth]Servings: 3 [/one_fourth] [one_fourth_last]Difficulty Level: Easy [/one_fourth_last]

    [divider]

    [tabs type=”horizontal”] [tabs_head] [tab_title]Ingredients[/tab_title][tab_title]Nutrition[/tab_title] [/tabs_head] [tab]

    • 6 large eggs
    • 1 medium onion, finely chopped
    • 1 medium tomato, finely chopped
    • 1 small green pepper, finely chopped
    • 4 green chilies, de-seeded and finely chopped
    • 2 tablespoon chopped coriander
    • 2 tablespoon olive oil
    • 1 tablespoon chopped ginger
    • 1 teaspoon cumin powder
    • 1 teaspoon red pepper
    • 1/2 teaspoon garam masala powder
    • salt according to taste
    • cheese (optional)

    [/tab] [tab]Yield: 3 servings

    Nutritional information is not yet available. [/tab] [/tabs]

    Directions:
    [tabs type=”horizontal”] [tabs_head] [tab_title]Step by Step Method[/tab_title] [tab_title]Recipe Note’s[/tab_title][tab_title]Serving Suggestions[/tab_title][/tabs_head] [tab]

    Step 1

    Break the eggs into a large bowl.

    Step 2

    Beat eggs lightly with a fork.

    Step 3

    Add onion, tomato, green chilies, coriander leaves and green pepper. Mix well.

    Step 4

    Add the seasoning and spices. Mix until well combined.

    Step 5

    Heat oil in a large pan over medium heat.

    Step 6

    Pour half of the egg mixture in the pan and draw the edges into the centre, allowing the uncooked mixture to fill its place.

    Step 7

    Turn the heat down and cook for 2 minutes or until the edges curl over and the center bubbles up.

    Step 8

    Take your spatula and insert under your omelet. Flip the side of the omelet and cook another 2 minutes or until crispy on both sides.

    Step 9

    In the similar way make other omelette as well.

    Step 10

    Garnish with freshly chopped coriander and top wit cheese (optional). Masala Omelette is ready to serve. ENJOY!!

    [/tab][tab]

    1. I deseed the green chillies since biting into them can be very unpleasantly spicy. I like their flavour so I take the trouble to remove the seeds and them in. You can just skip this and add red chilli flakes or only pepper for spice
    2. Add some grated cheese just before removing the omelette from the pan and fold in half. Awesome cheese masala omelette ready. I have used both cheddar cheese and pizza cheese with great results
    3. You can add other vegetables like shredded carrots, mushroom, cabbage, etc.
    4. You can saute the vegetables lightly before adding to the omelette, just takes extra time which I don’t like spending on an omelette
    5. You can also cook the omelette by covering it with a lid after pouring the mixture into the pan. I personally prefer the flipping method

    [/tab] [tab]

    • Serve with paratha, bread or fresh salad.

    [/tab] [/tabs]

    If you like  Masala Omelette recipe and make it then let me know your feedback by commenting below.

  • The Secret to Restaurant-Style Chicken Dhaga Kabab (This Recipe is a Gem!)

    Chicken Dhaga Kabab

    Just about everyone has eaten a kabab at one time or another in their lifetime. Kababs are skewered meats and vegetables cooked over a hot flame, wither on a grill or under a broiler in the oven.

    Kababs can be spelled just as many ways as they can be cooked, from kebab, kabob, kebop or kabab. Even if we have tried the most fascinating and delicious foods from around the globe, we still come back to our authentic classic food. So, today I am sharing my hassle-free way of making Chicken Dhaga Kababs.

    Chicken Dhaga Kabab recipe
    Photo: Chicken Dhaga Kabab recipe

    These chicken kababs are most popular in Pakistan mostly served in Karachi. Chicken Dhaga Kabab often served with green chutney, ring onion and salad.

    Chicken Dhaga Kabab
    Tie the kebabs with a thick thread

    If you want to start your feast dinner with very palatable starter then just note down this Chicken Dhaga kabab recipe in your diary and prepare for your guests. You can also steam, fried or broiled these kababs.

    Grill The Chicken Dhaga Kabab
    Grill The Chicken Dhaga Kabab

    Don’t hold back that eager cook inside you. Just put on that apron and let me teach you how to cook Chicken Dhaga Kabab at home. You will easily learn by following step by step pictures and expertly written instructions.

    Dhaga Kabab
    Pull out the thread of Dhaga Kabab

    Here I am sharing my simple and easy Chicken Dhaga Kabab recipe. Try out this classic Chicken Dhaga Kabab recipe and share you experience with me.

    [divider]

    [one_fourth]Prep Time: 20 minutes + marination[/one_fourth] [one_fourth]Cook Time: 20 minutes[/one_fourth] [one_fourth]Servings: 6 [/one_fourth] [one_fourth_last]Difficulty Level: Medium [/one_fourth_last]

    [divider]

    [tabs type=”horizontal”] [tabs_head] [tab_title]Ingredients[/tab_title] [tab_title]Nutrition[/tab_title] [/tabs_head] [tab]

    • 1 kg chicken mince
    • 1/2 cup fried onion, crushed
    • 2 medium onion
    • 4 green chilies
    • 2 tablespoon papaya paste
    • 2 tablespoon ginger garlic paste
    • 2 tablespoon chickpea flour (besan)
    • 1 teaspoon red chili powder
    • 1 teaspoon red pepper, crushed
    • 1 teaspoon cumin seeds
    • 1 teaspoon coriander seeds, crushed
    • 1 teaspoon garam masala powder
    • salt to taste
    • 1/2 bunch fresh coriander leaves
    • oil or ghee as required

    [/tab] [tab]Yield: 6 servings

    Nutritional information is not yet available. [/tab] [/tabs]

    Directions:
    [tabs type=”horizontal”] [tabs_head] [tab_title]Step by Step Method[/tab_title] [tab_title]Serving Suggestions[/tab_title][/tabs_head] [tab]

    Step 1

    Put chicken mince(keema), onion, green chillies and coriander in a food processor.

    Step 2

    Add ginger garlic paste, papaya paste, crushed onion, salt, red chilli powder, cumin, coriander powder and garam masala. Process until well cmbined.

    Step 3

    Take it out in a mixing bowl. Stir in the chickpea flour(besan).

    Step 4

    Cover and refrigerate for 4 hours or overnight.

    Step 5

    Shape the kebabs onto the wooden or metal skewers.

    Step 6

    Tie the kebabs with a thick thread and grill them until cooked thorough.

    Step 7

    Brush with oil or ghee. Remove from the skewers.

    Step 8

    Pull out the thread. Chicken Dhaga Kabab is ready to serve. ENJOY!!

    [/tab] [tab]

    • Serve with mint chutney, green chillies, onion rings with some hot naan.

    [/tab] [/tabs]

    Step By Step Pictures of Chicken Dhaga Kabab:

    If you like Chicken Dhaga Kabab recipe and make it then let me know your feedback by commenting below.

  • Aloo Daal Kabab: The Easy and Delicious Kabab Recipe!

    Aloo Daal Kabab

    Fed up from meaty dishes? Want some change in week days? Try out this easy and tasty Aloo Daal Kabab recipe. These kababs are very easy to prepare and gives you unique taste. You can also enjoy these kababs  as a tea time snack.. Must try it out this Aloo Daal Kabab Recipe and share your experience with us!!

     Aloo Daal Kabab Recipe
    Photo: Aloo Daal Kabab Recipe

    Check it out the  Aloo Daal Kabab Recipe here!!


    [one_fourth]Prep Time:20 minutes[/one_fourth] [one_fourth]Cook Time:10 minutes[/one_fourth] [one_fourth]Servings: 8[/one_fourth] [one_fourth_last]Difficulty Level: Easy[/one_fourth_last]


    [tabs style=”h1″ ]
    [tab title=”Ingredients” ]

    • 2 boiled potatoes, peeled and mashed
    • 1 cup chana daal, boiled
    • 2 eggs, lightly beaten
    • 1 small onion, finely chopped
    • 2 green chilies, finely chopped
    • 2 tablespoon mint leaves, chopped
    • 2 tablespoon coriander leaves, chopped
    • 1 teaspoon chopped ginger
    • 1 teaspoon cumin seeds, roasted and crushed
    • 1 teaspoon paprika powder
    • 1/2 teaspoon crushed red chilies
    • 1/2 teaspoon garam masala powder
    • salt to taste
    • 1 cup breadcrumbs (optional)
    • oil for shallow frying

    [/tab]
    [tab title=”Nutrition” ]

    Yield: 8 servings

    Nutritional information is not yet available.

    [/tab]
    [/tabs]

    Directions:

    [tabs style=”h1″ ]
    [tab title=”Step By Step Method” ]

    Step 1

    Mash dal with a hand mixer.

    Step 2

    In a large bowl, combine together the potatoes and chana dal.

    Step 3

    Add onion, green chilies, cumin seeds, mint leaves and coriander leaves.

    Step 4

    Season with salt, red pepper, red chili, cumin seeds and garam masala.

    Step 5

    Mix until well combined. Shape into round cutlets or kababs.

    Step 6

    Dip first in egg and then roll in bread crumbs.

    Step 7

    Heat oil in a frying pan over medium heat. Fry kababs until golden brown.

    Step 8

    Remove from the oil and drain on paper towel. Delicious Aloo daal kabab is ready to serve. ENJOY!!
    [/tab]
    [tab title=”Recipe Note’s” ]We have determined the nutritional value of oil for frying based on a retention value of 10% after cooking. The exact amount may vary depending on cook time and temperature, ingredient density, and the specific type of oil used.[/tab]

    [tab title=”Serving Suggestions”]Serve with your favorite chutney .[/tab]
    [/tabs]

    If you like Aloo Daal Kabab Recipe  and make it then let me know your feedback by commenting below.

  • Classic Chocolate Royale Cheesecake Recipe

    Chocolate Royale Cheesecake

    Adorn your table with this stunning show-stopping Royal Chocolate Cheesecake. This chocolate cheesecake gets “royale” status because it’s unbelievably rich and incredibly impressive.

    Adorn your table with this stunning Royal Chocolate Cheesecake. Decadent and creamy with a rich bittersweet chocolate flavor, this elegant dessert is sure to please family and friends alike.
    Decadent! Another great Royal Chocolate Cheesecake recipe. This Royal Chocolate Cheesecake is nicely topped with fresh raspberries and lightly sprinkled with powdered sugar. Enjoy a serving of this rich and indulgent chocolate cheesecake on special occasions.

    Chocolate Royale Cheesecake Recipe
    Photo: Chocolate Royale Cheesecake Recipe

    Image Credit: Karaftrecipes

    Check it out the Chocolate Royale Cheesecake recipe here!!

    [divider]

    [one_fourth]Prep Time: 30 minutes + chilling[/one_fourth] [one_fourth]Cook Time: 1 hour + 5 minutes[/one_fourth] [one_fourth]Servings: 16[/one_fourth] [one_fourth_last]Difficulty Level: Medium[/one_fourth_last]

    [divider]

    [tabs type=”horizontal”] [tabs_head] [tab_title]Ingredients[/tab_title] [tab_title]Nutrition[/tab_title] [/tabs_head] [tab]

    • 4 cups cream cheese, softened
    • 1-1/2 cups crushed Oreo cookies
    • 1 cup granulated sugar
    • 1 cup semi sweet chocolate, melted and cooled slightly
    • 1/3 cup mixed berries
    • 4 eggs
    • 2 tablespoon melted margarine or butter
    • 2 tablespoon flour
    • 1 tablespoon sifted powdered sugar
    • 1 teaspoon vanilla essence
    • Chocolate curls for garnishing

    [/tab] [tab]Yield: 16 servings

    Amount Per Serving

    • Calories: 420
    • Total fat: 29 g ( Saturated fat: 17 g)
    • Cholesterol: 115 mg
    • Sodium: 330 mg
    • Carbohydrate: 33 g
    • Dietary fiber: 2 g
    • Sugars: 26 g
    • Protein: 7 g

    [/tab] [/tabs]

    Directions:
    [tabs type=”horizontal”] [tabs_head] [tab_title]Step by Step Method[/tab_title] [tab_title]Recipe Note’s[/tab_title][tab_title]Serving Suggestions[/tab_title][/tabs_head] [tab]

    Step 1

    Heat an oven to 325°F or 163°C.

    Step 2

    In a large bowl, mix together the cookie crumbs and butter.

    Step 3

    Press crumb mixture onto bottom of 9-in springform pan.

    Step 4

    Bake in the preheated oven for 10 minutes.

    Step 5

    Meanwhile, beat cream cheese and sugar until well blended.

    Step 6

    Stir in the flour until well combined.

    Step 7

    Stir in the melted chocolate and vanilla.

    Step 8

    Add eggs, 1 at a time, mixing on low speed after each just until blended.

    Step 9

    Spread batter over the crust.

    Step 10

    Bake 55 minutes or until center is almost set.

    Step 11

    Run knife around rim of pan to loosen cake and cool before removing rim.

    Step 12

    Refrigerate for 4 hours or until set.

    Step 13

    Before serving, top with powdered sugar and berries. Chocolate Royale Cheesecake is ready to serve. ENJOY!!

    [/tab][tab]

    Tip to Press Crumb Mixture into Pan:

    • To press crumb mixture into the pan to make crust, use bottom of straight-sided glass to evenly press cookie crumb mixture onto bottom of springform pan.

    [/tab] [tab]

    • Enjoy a serving of this rich and indulgent cheesecake on special occasions.

    [/tab] [/tabs]

    If you like Chocolate Royale Cheesecake recipe and make it then let me know your feedback by commenting below.

  • Easy Mughlai Paratha Recipe with Flaky Layers!

    Mughlai Paratha

    This is a simple and basic way of making Mughlai paratha.The main trick to this Mughlai Paratha recipe is the folding of the Paratha. Make a meal of this wholesome and tasty Mughlai style Paratha. Serve it with your favorite chutney or pickle.

     Mughlai Paratha Recipe
    Photo: Mughlai Paratha Recipe

    Check it out the Mughlai Paratha recipe here!!

    [divider]

    [one_fourth]Prep Time: 30 minutes[/one_fourth] [one_fourth]Cook Time: 10 minutes[/one_fourth] [one_fourth]Servings:4 [/one_fourth] [one_fourth_last]Difficulty Level: Medium [/one_fourth_last]

    [divider]

    [tabs type=”horizontal”] [tabs_head] [tab_title]Ingredients[/tab_title] [tab_title]Nutrition[/tab_title] [/tabs_head] [tab]

    • 300 gm all purpose flour
    • 2 eggs
    • 1 tsp Baking powder
    • oil to cook
    • salt to taste

    [/tab] [tab]Yield: 4  servings

    Nutritional information is not yet available. [/tab] [/tabs]

    Directions:
    [tabs type=”horizontal”] [tabs_head] [tab_title]Step by Step Method[/tab_title] [tab_title]Serving Suggestions[/tab_title][/tabs_head] [tab]

    Step 1

    Take a big bowl and mix flour, baking powder and salt.

    Step 2

    Rub the flour with 2 tbsp of oil.

    Step 3

    Add little water at a time and make soft dough.

    Step 4

    Make 8 balls from the dough and roll out into flat thick rounds.

    Step 5

    Apply little oil, sprinkle some flour and fold it into half circle.

    Step 6

    Again apply little oil and flour, fold it lengthwise.

    Step 7

    Now roll it, press down and roll out into square of 8 inches by 8 inches.

    Step 8

    Brush the surface of the paratha with the beaten eggs.

    Step 9

    Turn all four corners towards the middle.

    Step 10

    Heat the girdle and apply oil. Cook the paratha on it, applying oil along the edges.

    Step 11

    Fry on both the sides until brown patches appear. Mughlai Paratha is ready to serve.

    [/tab] [tab]

    • Serve with you favorite chutney or pickle.

    [/tab] [/tabs]

    If you like Mughlai Paratha recipe and make it then let me know your feedback by commenting below.

  • Baked Fish and rice Recipe

    Baked Fish and rice

    White fish fillets baked with veggies, Italian seasoning and rice in this quick and easy dinner. Check it out the baked Fish and Rice recipe here!!

    baked Fish and Rice recipe
    Photo: baked Fish and Rice Recipe

    [divider]

    [one_fourth]Prep Time:5 minutes[/one_fourth] [one_fourth]Cook Time: 35 minutes[/one_fourth] [one_fourth]Servings: 4[/one_fourth] [one_fourth_last]Difficulty Level: Easy[/one_fourth_last]

    [divider]

    [tabs type=”horizontal”] [tabs_head] [tab_title]Ingredients[/tab_title] [tab_title]Nutrition[/tab_title] [/tabs_head] [tab]

    • 1 pound cod fish
    • 3 cups chopped broccoli
    • 1/2 cup long grain rice, uncooked
    • 1-1/2 cups chicken stock
    • 1 can french-fried onions, divided
    • 1/2 cup shredded cheddar cheese
    • 1 tbsp Parmesan cheese, shredded
    • 1/4 tsp Italian seasoning
    • 1/4 tsp garlic powder
    • 1/4 tsp paprika

    [/tab] [tab]Yield: 4 servings

    Amount Per Serving: (1 serving = 1 cup)

    • Calories: 392
    • Fat: 16 g (6 g saturated fat)
    • Cholesterol: 81 mg
    • Sodium: 722 mg
    • Carbohydrate: 31 g
    • Fiber: 2g
    • Protein: 29 g

    [/tab] [/tabs]

    Directions:
    [tabs type=”horizontal”] [tabs_head] [tab_title]Step by Step Method[/tab_title] [tab_title]Serving Suggestions[/tab_title][/tabs_head] [tab]

    Step 1

    Take a large saucepan, add chicken stock and rice to it.

    Step 2

    Bring to a boil.

    Step 3

    Season with Italian seasoning and garlic powder. Mix well.

    Step 4

    Transfer rice to a greased 11×7-inch baking dish.

    Step 5

    Cover the dish and bake at 375 degree F for 10 minutes.

    Step 6

    Now stir in the broccoli, half of the onions and Parmesan cheese.

    Step 7

    Place fish over it.

    Step 8

    Sprinkle with paprika powder.

    Step 9

    Cover again and bake another 20 minutes or until the fish flakes easily with a fork.

    Step 10

    Uncover the dish. Top with cheddar cheese and remaining onions.

    Step 11

    Return to the oven and bake 3 minutes longer or until cheese is melted and bubbly. Baked Fish and rice is ready to serve. ENJOY!

    [/tab] [tab]

    Serve with [/tab] [/tabs]
    If you like Baked Fish and rice recipe and make it then let me know your feedback by commenting below.

  • Easy Chicken and Rice Recipe

    Easy Chicken and Rice

    Chicken tonight? Why not–rely on our all-star round-up of easy chicken and rice recipe for creative twists on familiar favorites. This is very easy to make, with ingredients that you might usually have on hand. It gets its flavor from dry soup mix. Goes well with some fresh, steamed vegetables. Try This easy Chicken and Rice recipe and enjoy a super healthy meal with your friends and family.

    Easy Chicken and Rice recipe
    Photo: Easy Chicken and Rice Recipe

    Check it out the Easy Chicken and Rice recipe here!!

    [divider]

    [one_fourth]Prep Time: 20 minutes[/one_fourth] [one_fourth]Cook Time: 45 minutes[/one_fourth] [one_fourth]Servings: 4[/one_fourth] [one_fourth_last]Difficulty Level: Easy[/one_fourth_last]

    [divider]

    [tabs type=”horizontal”] [tabs_head] [tab_title]Ingredients[/tab_title] [tab_title]Nutrition[/tab_title] [/tabs_head] [tab]

    • 3 pound whole chicken, cut into pieces
    • 2 cups water
    • 3/4 cup instant rice, uncooked
    • 1/8 cup chicken rice soup mix
    • 1 green bell pepper, chopped
    • 2 tbsp butter

    [/tab] [tab]Yield: 4 servings

    Amount Per Serving

    • Calories: 864 kcal
    • Carbohydrates: 16.3 g
    • Cholesterol: 255 mg
    • Fat: 57.9 g
    • Fiber: 0.9 g
    • Protein: 65.1 g
    • Sodium: 272 mg

    [/tab] [/tabs]

    Directions:
    [tabs type=”horizontal”] [tabs_head] [tab_title]Step by Step Method[/tab_title] [tab_title]Serving Suggestions[/tab_title][/tabs_head] [tab]

    Step 1

    In a large skillet, melt butter over medium high heat.

    Step 2

    Place chicken pieces into the skillet. Saute for 3-4 minutes per side or until golden brown.

    Step 3

    Remove chicken from the skillet. Keep aside.

    Step 4

    Add green bell pepper and rice. Cook and stir for 3 minutes or until lightly browned.

    Step 5

    Stir in the soup mix and water.

    Step 6

    Bring to a boil.

    Step 7

    Add chicken.

    Step 8

    Reduce heat to medium low. Cover and simmer for 45 minutes or until rice are cooked.

    Step 9

    Dish it out. Easy Chicken and Rice are ready. YUMMY!

    [/tab] [tab]

    • Serve with fresh steamed vegetables.

    [/tab] [/tabs]

    If you like Easy Chicken and Rice recipe and make it then let me know your feedback by commenting below.