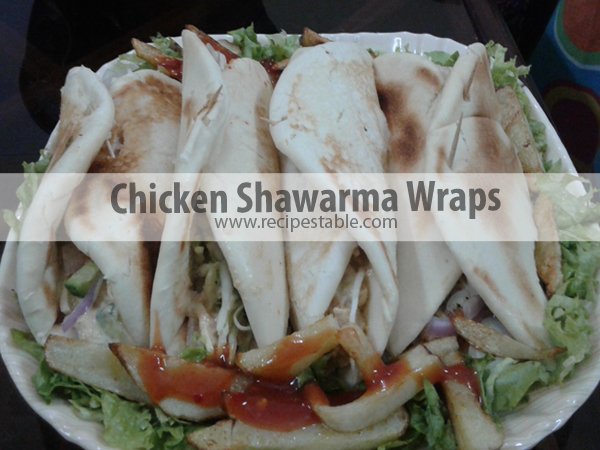
Tag: Picnic Recipes

  • Chapli Kebab Pizza Recipe (An Italian-Pakistani Twist)

    Chapli Kebab Pizza Recipe (An Italian-Pakistani Twist)

    Give pizza night a new twist by making spicy Chapli Kebab Pizza (Heavenly Double TREAT)!!

    Monday nights are for creativity. Or maybe, you’re like me and just have leftover Chapli Kebab’s wasting away in your fridge. Pinterest gave me the inspiration I needed to take dinner from a boring pizza night to an Italian-Pakistani Twist.

    This Chapli Kebab Pizza is my Pakistanized pizza makeover…..you could say that this is an Pakistani-Italian delight….hey, fusion food is the latest fad.  A delicious and easy to make pizza with crispy, juicy chapli kebab’s and  melty mozzarella cheese!  It is sure to be a hit! 

    Chapli Kebab Pizza (Desi Pizza)

    Photo: Chapli Kebab Pizza

    Chapli Kebab Pizza

    This pizza is so easy to make with left over Chapli Kebab’s with the cheesy topping….nobody could resist. I added dried Italian herbs to the pizza base and that gave a subtle Italian flavor with the Pakistani flavored topping. And just followed my heart to a logical conclusion. I took the shortcut and used the Chili Garlic sauce in place of pizza sauce and lessen cheese to keep it healthy and low fat( you can add more cheese). Well… I needn’t explain what the result was. The recipe finding its place in this blog itself says it all….. Right???

    chapli-kebab-pizza3

    So why go to pizza hut…when you can make healthy homemade ones?? This pizza was a huge hit with my family try it…you will love me more, honestly 🙂 

    Chapli Kebab Pizza recipe

    Photo: Chapli Kebab Pizza

    Bismillah, Let’s get started!

    Check it out the Chapli Kebab Pizza recipe and printable version below.

    Chapli Kebab Pizza Recipe

    A delicious and easy to make pizza with crispy, juicy chapli kebab’s and melty mozzarella cheese! It is sure to be a hit!

    For Pizza Dough

    • 2 cups plain flour
    • 1 egg (lightly beaten)
    • 4 tablespoon oil
    • 1-1/2 teaspoon dry instant yeast
    • 1/2 teaspoon salt
    • 1/2 teaspoon sugar
    • 1/2 cup warm milk

    For Pizza Topping

    • 8 leftover chapli kebab’s
    • 1 cup pizza sauce or Chili Garlic Sauce
    • 1/2 cup cheddar cheese (shredded)
    • 1/2 cup Mozzarella Cheese (shredded)
    • 1/2 teaspoon dried basil
    • 1/2 teaspoon dried oregano
    • fresh coriander leaves or parsley (for topping)

    To Make Pizza Dough

    1. In a large bowl, add yeast and sugar.
    2. Pour the lukewarm milk and let it stand for about 10 minutes or more until it becomes frothy.
    3. Place flour and salt in another large bowl.
    4. Add the yeast mixture and mix well until well combined.
    5. Now add the oil and knead well till you get a soft ball of dough.
    6. Cover the bowl with a wet cloth or a plastic wrap and keep in a warm place for 1 hour or until the dough is rise and volume is doubled.

    To Make Pizza

    1. Once it has doubled, turn the dough onto a well floured surface, pat down and divide into eight small balls.
    2. Preheat oven at 180 degree C.
    3. Roll dough into pizza crust’s.
    4. Transfer to a mini Pizza pans or baking sheets.
    5. Spread Pizza sauce or Chili Garlic Sauce evenly.
    6. Arrange chapli kebab’s on top of the sauce.
    7. Sprinkle the dried basil and oregano.
    8. Top with cheddar and Mozzarella cheese.
    9. Sprinkle coriander fresh leaves.
    10. If needed, you can sprinkle a bit more cheese.
    11. Bake, in the preheated oven, for 15 minutes or until the crust turn brown and cheese melts.
    12. Remove the pizza pans from the oven.
    13. Slices each into halves and serve warm. ENJOY!!

    Serving Suggestions:
    Serve alone as an appetizer, or accompany with a light pasta or salad.

     Recipe Note’s:

    I am a firm believer that every oven is different and you should check on your food periodically to make sure it is cooking properly.


    Put your own spin on it. And lemme know how it turns out by sharing a picture  on Instagram, Facebook (Recipestable) or Twitter with this hashtag #Recipestable so I can see how lovely yours turn out.


    Happy Baking!!

    If you like this post, Please Subscribe to my blog and let me know your feedback by commenting below.. I have lots more recipes to share with you.

  • Baby Chicken Bread Recipe

    Baby Chicken Bread Recipe

    The recipe I am sharing today is a Family FAVORITE. All families have certain dishes they love to cook and eat. Mine goes gaga for these baby Chicken Breads! Put 12 dozen in front of them and they’ll still demand more. I am sure you will face the same situation with your siblings, cousins, random guests when you try these magical Baby Chicken Bread. (unless they are gluten intolerant. Oops)

    I thought, I would share this FAMILY FAVORITE with everyone since so many Friends nd ClassFellows have asked for this recipe. Enjoy!

    Baby Chicken Bread
    Photo: Baby Chicken Bread

    Baby Chicken Bread

    Chicken bread is a classic of Pakistani bakeries and we served it at most of the tea parties as a staple here. This simple yet delicious bread is easy to make and full of flavor.

    All you really need is a few basic ingredients: salt, flour, baking soda and yeast etc. The “trick” to achieving a perfect texture is not to over knead the dough and don’t over bake, as this will make it tough & hard, ugh not good! Brush with egg wash. Sprinkle a few sesame seeds. And voila! It’s ready to go in the oven for 25 minutes. 

    Baby Chicken Bread recipe
    Photo: Baby Chicken Bread

    On weekend night, I decided to bake chicken bread from scratch and Just for a twist I made  them in baby sizes.

    Don’t ask me why I do these things. I’m not quite sure myself.

    But you have to admit….they’re pretty darn cute.

     Baby Chicken Bread
    Photo: Baby Chicken Bread

    So now that my kitchen is covered with Baby Chicken Breads, what should I do with them?
    Of course, slathering them with hot pepper sauce and taking a big bite doesn’t count. I already did that. Twice.

    Baby Chicken Bread
    Photo: Baby Chicken Bread

    This recipe is especially handy because it makes A LOT of Baby Chicken Breads (1-1/2 dozen to be exact). So they are the perfect, fuss-free party food. Easy to make, fun to eat.

    Bismillah, Let’s get started!

    Check it out the Baby Chicken Bread recipe and printable version below.


    Baby Chicken Bread Recipe

    Chicken bread is a classic of Pakistani bakeries and we served it at most of the tea parties as a staple here. This simple yet delicious bread is easy to make and full of flavor.

    For Baby Chicken Bread Dough

    • 4 cups plain flour
    • 1 tablespoon instant yeast
    • 2 tablespoon dry powdered milk
    • 1 teaspoon salt
    • 1 teaspoon castor sugar
    • 4 tablespoon oil
    • 1 egg (plus one for glazing)

    For Baby Chicken Bread Filling

    • 2-1/2 cups boiled chicken (shredded)
    • 1 large onion (finely chopped)
    • 1 teaspoon salt
    • 1 teaspoon black pepper
    • 1 teaspoon garam masala powder
    • 1/2 cup coriander leaves
    • 4 green chilies (finely chopped)
    • 1 cup milk
    • 2 tablespoon plain flour
    • 2 tablespoon butter
    • sesame seeds & flax seeds as required

    To Make the Baby Chicken Bread Dough

    1. In a large mixing bowl combine the plain flour, salt, castor sugar, dry milk powder, instant yeast, oil and egg.
    2. Slowly mix in the lukewarm water with your hands till all the ingredients are mixed well and dough starts to form.
    3. Knead the dough for 5-7 minutes on a floured surface till the dough becomes smooth and is no longer sticky.
    4. Bang the dough on the floured surface 7-8 times for elasticity.
    5. Shape the dough in a large ball add place in a greased bowl.
    6. Brush the top lightly with some oil.
    7. Cover with a kitchen cloth and let the dough to rise somewhere warm until doubled in size, around 1 hour.

    To make the Chicken Filling

    1. Meanwhile, Melt butter in a frying pan over medium heat.
    2. Fry onion till soft and translucent.
    3. Now add 2 tablespoon plain flour and stir well.
    4. Season with salt , black pepper and garam masala powder.
    5. Stir in the milk and cook for 2-3 minutes or until thickened.
    6. Stir in the shredded chicken add chopped green chillies and coriander leaves.
    7. Remove from the heat and let it cool completely.
    8. Punch the dough to release air.
    9. Preheat oven at 200 degree C.
    10. Now divide the dough into 14-16 parts depending on how small you want the baby chicken bread to be.
    11. Roll each piece of dough to a rectangular shape.
    12. Snip the sides with a sharp knife and put chicken filling in the center.
    13. Fold each side so they overlap each other (like a braid) the filling will show slightly but that’s ok.
    14. Brush top with beaten egg.
    15. Sprinkle sesame seeds and flex seeds.
    16. Bake, in the preheated oven, for 25-30 minutes or until its turn golden brown.
    17. Right after taking out of the oven apply butter well on whole bread and let it rest covered with a cloth for 2-3 minutes to soften the bread completely.
    18. Delicious Baby Chicken Breads are ready to serve.

    Serving Suggestions:
    Voila! Enjoy your delicious bread with hot tea to the loving and deserving.


     Recipe Tip’s:

    1. I always make big batches of chicken bread at a go and then wrap them well in foil, then put them in some sort of a cellophane bag and tie it up tight and freeze.
    2. They can keep up to 4 weeks! When you need one, you just thaw it out overnight in the fridge or keep it out on the counter until it’s thawed out, then unwrap and then splash a little bit of water using your fingertips on it and put it in the oven for about 5 minutes to freshen it back up. Becomes as good as new! 

    Put your own spin on it. And lemme know how it turns out by sharing a picture  on Instagram, Facebook (Recipestable) or Twitter with this hashtag #Recipestable so I can see how lovely yours turn out.


    Happy Baking!!

    If you like this post, Please Subscribe to my blog and let me know your feedback by commenting below.. I have lots more recipes to share with you.

  • Pulled Chicken Sandwiches Recipe

    Pulled Chicken Sandwiches Recipe

    If I ask what my brother wants for dinner, more than likely he will say “sandwiches/burgers.” This recipe is a twist on the usual burgers and packs a big taste punch with the pulled chicken, cheese and barbecue sauce. If you’re anything like me then a burger needs to be covered in cheese, ice-berg leaves, and many slices of olives and tomatoes.

    Pulled Chicken Sandwiches Recipe
    Photo: Pulled Chicken Sandwiches

    Next time you’re craving a burger or sandwich, give this recipe a shot. It will become your new favorite! Your Dinner guests are guaranteed to be impressed with this deceptively easy Pulled Chicken Sandwich recipe, which includes a few-ingredient rub and a simple 15-minute sauce that comes together while the chicken oven baked. 

    Did I mention these sandwiches are braised in a special sweet and tangy sauce? Yep! It gives the chicken a deep, rich flavor that intensifies with age, so you can make the chicken a day ahead and your sandwiches will taste even better! Perfection!

    pulled Chicken Sandwiches recipe
    Photo: Pulled Chicken Sandwiches

    You can serve this chicken in many ways, but I made them in sandwich form because, honestly, what man can resist a toasty bun piled high with tender, juicy pulled chicken, oodles of caramelized onions, tangy barbecue sauce and melty cheese? I can’t think of one! You can serve this on a sandwich as I did, or you can serve on tacos, nachos and burritos, Ole! I’m already thinking of the delicious ways I plan to use this in the future.

    Photo: Pulled Chicken Sandwiches
    Photo: Pulled Chicken Sandwiches


    Bismillah, Let’s get started!

    Check it out the Pulled Chicken Sandwiches recipe and printable version below.

    Pulled Chicken Sandwiches Recipe

    For Chicken

    • 500 gm boneless chicken thighs
    • 1 teaspoon grated ginger
    • 1 teaspoon garlic (minced)
    • 1 teaspoon hot sauce
    • 1 teaspoon paprika
    • 1 teaspoon cumin powder
    • 1/4 teaspoon freshly ground (black pepper)
    • salt to taste
    • cooking spray

    For Sauce

    • 1 small onion (minced)
    • 2 teaspoons canola oil
    • 1 tablespoon dark brown sugar
    • 1 teaspoon red chili powder
    • 1/2 teaspoon garlic powder
    • 1/2 teaspoon mustard powder
    • 1/4 teaspoon ground allspice
    • 1/8 teaspoon crushed red chili
    • 1/2 cup tomato ketchup
    • 2 tablespoons apple cider vinegar

    Remaining ingredients

    • 4 burger buns (toasted)
    • 4 slices Mozarella cheese
    • 1/4 cup cheddar cheese (grated)
    • ice burg leaves
    • tomato slices
    • olives as required

    To Make Chicken

    1. Preheat oven to 200 degrees C.
    2. Place chicken in a large bowl. Add ginger, garlic, hot sauce, paprika powder, cumin powder, black pepper and salt.
    3. Rub evenly over the chicken.
    4. Place chicken on an oven grill rack coated with cooking spray, and bake 20 minutes or until the chicken is nicely browned.
    5. Let stand for 5 minutes.
    6. Remove chicken from the oven and shred with two forks and set aside.

    To Prepare Sauce

    1. While chicken cooked, heat oil in a small saucepan over medium heat.
    2. Add onion and cook for 5 minutes or until translucent or, stirring occasionally.
    3. Stir in brown sugar, chili powder, garlic powder, mustard powder, allspice and red chili.
    4. Cook for 30 seconds then stir in the apple cider vinegar and tomato ketchup.
    5. Bring to a boil.
    6. Reduce heat to medium low and let it simmer for 10 minutes or until slightly thickened.
    7. Now Stir in chicken and cook 2 more minutes.

    To Make Pulled Chicken Sandwiches

    1. Place iceberg lettuces and mozzarella slices on the bottom half of each bun.
    2. Divide chicken mixture into 4 equal portions and put it on cheese slices.
    3. Top each bun with grated cheese, tomato slices and olives.
    4. Cover with remaining bun. Delicious Pulled Chicken Sandwiches are ready to serve. ENJOY

    Serve on buns, over fresh greens, or on top of a baked potato for a filling dinner. enjoy 🙂

    Pin it For Later

    Pin it for later

    Put your own spin on it. And lemme know how it turns out. Post a photo on Facebook (Recipestable) or  on Twitter so I can see how lovely yours turn out.


    Happy Cooking!!

    If you like this post, Please Subscribe to my blog and let me know your feedback by commenting below.. I have lots more recipes to share with you.

  • Hot and Spicy Kebab Paratha Rolls Recipe

    Hot and Spicy Kebab Paratha Rolls Recipe

    Every day the same question pops up “What to make for Lunch today?” and when the same question is asked on a weekend the response has to be something that’s not the usual and really delicious. 

    What better way to spice up the weekend lunch than with a Kebab Paratha Rolls stuffed with flavorful hot and spicy sauces and bright colorful vegetables pickles.

    Hot and Spicy Kebab Paratha Rolls recipe
    Hot and Spicy Kebab Paratha Rolls recipe

    It’s the age of one pot meal and who says one pot meal has to be a rice dish. It can be bread based dish as well. I believe wraps or rolls loaded with meat, kebabs and veggies also come in the genre of one pot meal and why not, bread gives us starch while veggies help bring a balance diet while meat gives us protein.

    The best thing about it is, that its a wholesome meal and can be prepared with leftover kebab’s too. Its as simple as assembling it all together (if that makes sense). 

    Hot and Spicy Kebab Paratha Rolls recipe
    Hot and Spicy Kebab Paratha Rolls

    Ingredients in Hot and Spicy Kebab Paratha Rolls

    The ingredients you need to make this Hot and Spicy Kebab Paratha Rolls are:

    For Kebabs: meat, onion, ginger, green chilies, fresh coriander, red chili powder, cumin powder, coriander powder, all spices powder, salt, butter for busting
    For Parathas:  whole wheat flour, white flour, Salt, clarified butter, water for kneading and black seeds (optional)
    For Topping & Stuffing: mayo garlic sauce, mint chutney, pickle cucumber, onion, carrot, green chili, few salad leaves, red chili flakes (optional)

    Hot and Spicy Kebab Paratha Rolls recipe
    Hot and Spicy Kebab Paratha Rolls recipe

    How to make Hot and Spicy Kebab Paratha Rollso:

    Hot and Spicy Kebab Paratha Rolls are straight forward to make. Prepared kebabs then make paratha’s and stuff with kebabs, sauce and topping.
    Pretty simple!!

    For this recipe, I’ve prepared the homemade Paratha’s but you can use store bought frozen paratha in case you don’t feel like making your own and keeping it all quick and simple.

    Hot and Spicy Kebab Paratha Rolls recipe
    Hot and Spicy Kebab Paratha Rolls recipe

    You can pack them and stuff your lunch box too making it a totally mess free meal for yourself. As with all wraps, you can use filling of your choice. For me it had to be this kebab paratha rolls, with some garlic sauce, minty yogurt chutney and  colorful pickle that were wrapped in the paratha rolls and gave those hot, zingy and spicy flavors that were sure to tickle those taste buds! 

    Do try this recipe, these Hot and Spicy Kebab Paratha Rolls can become your ultimate comfort and nutritious food.

    Bismillah, Let’s get started!

    Check it out the Hot and Spicy Kebab Paratha Rolls recipe and printable version below.

    Hot and Spicy Kebab Paratha Rolls Recipe

    What better way to spice up the weekend lunch than with a Kebab Paratha Rolls stuffed with flavorful hot and spicy sauces and colorful veggies.

    For Kebabs

    • 300 gm mince meat
    • 1 large onion (minced)
    • 1 inch piece of ginger (crushed)
    • 4 green chilies (chopped)
    • 1/4 bunch fresh coriander
    • 1 teaspoon red chili powder
    • 1 teaspoon cumin powder
    • 1/2 teaspoon coriander powder
    • 1/2 teaspoon all spices powder (garam masala)
    • salt to taste
    • 2 tablespoon oil or butter for busting

    For Parathas

    • 1 cup whole wheat flour
    • 1 cup white flour
    • Salt to taste
    • 2 tablespoon clarified butter (desi ghee)
    • Water as required
    • black seeds as required (optional)

    For Paratha Roll Topping & Stuffing

    • 4 tablespoon mayo garlic sauce
    • 4 tablespoon mint yogurt chutney
    • 1 cup pickle (cucumber, onion, carrot, green chili etc)
    • few salad leaves
    • chili flakes ((optional))

    Method

    To Make Kebab’s

    1. Put mince, onion, green chilies, ginger, coriander, red chili, cumin seeds, salt and all spices in a chopper. Process until well combined.
    2. Now make shape of long seekh kebabs and set aside.
    3. Heat 2 tablespoon oil or butter in a pan over medium heat.
    4. Shallow fry the kebabs covered on low heat for 10-15 minutes or until all the water of mince dries and kebabs are done.

    To Make Parathas

    1. Place flours in a large bowl. Add ghee and salt in it. Knead a soft dough with water.
    2. Let it rest for 1 hour at room temperature.
    3. Preheat the iron griddle or pan over low heat.
    4. Now make round shape parathas with the help of rolling pin.
    5. Sprinkle black seeds over it and press gently.
    6. Cook parathas with butter on medium heat until crispy.
    7. Take it out in a plate and set aside.

    To Assemble kebab Paratha Roll

    1. Now place paratha’s on a clean surface.
    2. Spread mayo garlic sauce over the paratha’s.
    3. Put salad leaves and 2 seekh kebabs over the each paratha.
    4. Pour minty yogurt chutney over it.

    5. Sprinkle pickles and chili flakes (if like it). Roll up tightly and secure with wooden pick.

    6. Now Cut the paratha roll from the center. Hot and Spicy Kebab Paratha Roll is ready to serve. ENJOY!!

    Serving Suggestions:
    Serve hot with sauce and salad of your choice along with Lemonade.

    Comfort Food, Main Course, Snack
    Indian, Pakistani
    30 minutes meals, kebab, kids friendly, paratha, paratha rolls, Quick and Easy, rolls, wraps

    Pin it For Later:

    Pin it for Later ~ Hot and Spicy Kebab Paratha Rolls

    I have also posted Shami Kabab Paratha Rolls and Chicken Paratha Rolls which are another easiest & tastiest version of making Paratha Rolls at home. Do check it out as well.  It’s finger lickin’ good. You’ll be coming back for more. 


    Put your own spin on it. And lemme know how it turns out. Post a photo on Facebook (Recipestable) or  on Twitter so I can see how lovely yours turn out.

    Happy Lunch Making!!

    If you like this post, Please Subscribe to my blog and let me know your feedback by commenting below.. I have lots more recipes to share with you.

  • Chapati Rolls Stuffed with Mince Recipe

    Chapati Rolls Stuffed with Mince Recipe

    Chapati Rolls Stuffed with Mince

    A simple and nutritious snack, chapati (flatbread) stuffed with spicy mince filling, salad and chutney, perfect for busy morning breakfast and also lunch. Plain chapati’s can often come across as boring and many people turn up their noses at the mere mention of them! So Today, I come up with an innovative way to present chapati’s, that’s filling, nutritious and super yummy.

    Chapati Rolls Stuffed with Mince
    Photo: Chapati Rolls Stuffed with Mince

    One of my favorite things to eat is a roll stuffed with goodies.I enjoy food that I can eat with my hands and this dish is no exception. It’s very easy to make and delicious to eat. These chapati rolls is excellent for suhoor meals that can be made quickly with the left over chapati’s.

     Chapati Rolls Stuffed with Mince
    Photo: Chapati Rolls Stuffed with Mince

    Also Perfect to bring on a trip or a picnic as they are easy to wrap and taste just as great when eaten lukewarm or chilled. Give a try and enjoy.

    Bismillah, let’s get started!

    Check it out the Chapati Rolls Stuffed with Mince recipe and printable version below.

    Chapati Rolls Stuffed with Mince Recipe

    A simple and nutritious snack, chapati (flatbread) stuffed with spicy mince filling, salad and chutney, perfect for busy morning breakfast and also lunch.

    For Mince Stuffing

    • 300 gm ground mince
    • 2 medium sized onions (finely chopped)
    • 2 garlic cloves (minced)
    • 1 tablespoon chopped ginger
    • 1 tablespoon cooking oil or butter
    • 2 green chilies (finely chopped)
    • 2 tablespoon chili garlic sauce
    • 1 tablespoon soy sauce
    • 1/2 teaspoon red pepper flakes
    • Salt to taste
    • few mint leaves (finely chopped)
    • few corinader leaves (finely chopped)

    For Chapati Rolls

    • 4 chapati’s {check chapati recipe here}
    • 4 tablespoon Mint Tamarind chutney {check chapati recipe here}
    • 4 tablespoon mayonnaise
    • thinly sliced salad veggies {like cucumber (cabbage,tomato,onion, carrot})
    • french fries

    Method

    1. Heat oil or butter in a large pan over medium high heat.
    2. Saute onion for 2-3 minutes. When the onions have softened up but not yet golden in colour add ginger and garlic, and cook for 1 minute.
    3. Then add mince and let it drain out most of the moisture for about 4-5 minutes.
    4. Add green chilies, red pepper and salt.
    5. Reduce the heat on low and cover the pan. Let it simmer for 25 minutes or until mince is cooked thorough and all water dries up.
    6. Remove the lid and cook on high flame for 3-4 minutes then add chili garlic sauce and soy sauce.
    7. Cook 2 minutes longer then turn the heat off.
    8. Sprinkle mint and coriander leaves.

    To Assemble Chapati Rolls

    1. Reheat chapati’s.
    2. Place chapati on a clean board, spread 1 tablespoon mayonnaise on it. Then add the mince stuffing across the center.
    3. Drizzle some mint chutney.
    4. Sprinkle veggie salad and roll up the chapati.
    5. Secure with toothpick. Don’t worry if it gets a little messy eating that’s just a art of the fun of eating a roll. ENJOY 🙂

    Serving Suggestions:
    Serve with salad, french fries and chutney.
    Or you can serve everything separate and let your guests or family prepare their own stuffed chapati rolls.


    Recipe Note’s:

    1. You can also stuff these chapati rolls with chicken or beef mince, or colorful veggies.
    2. If you prepare the chapatis ahead make sure to store them in an airtight container. If not they will become very hard and dry. 


    I have also posted Shami Kabab Paratha Rolls Recipe which is another easiest & tastiest version of making Paratha Rolls. Do check it out as well.  It’s finger lickin’ good. You’ll be coming back for more. 


    Put your own spin on it. And lemme know how it turns out. Post a photo on Facebook (Recipestable) or  on Twitter so I can see how lovely yours turn out.


    If you like this post, Please Subscribe to my blog and let me know your feedback by commenting below.. I have lots more recipes to share with you.

    Happy Cooking!!

  • Egg and Cucumber Sandwiches Recipe

    Egg and Cucumber Sandwiches Recipe

    ITS SUMMER TIME

    Summer has been kicking into high gear and the temperatures have been climbing here, and everyone wants to keep cool on hot summer days. So today, I have a recipe for a simple, classic and very popular sandwiches: “Egg and Cucumber Sandwiches”.

    Egg and Cucumber Sandwiches recipe
    Photo: Egg and Cucumber Sandwiches

    Egg and Cucumber Sandwiches

    Egg and Cucumber sandwiches are the most delicious, easiest finger foods to make. All you need is sliced white bread, boiled eggs, mayonnaise and of course, cucumbers. To enhance the flavor, I also spread a thin layer of dill with cream cheese spread.

    Egg and Cucumber Sandwiches recipe
    Photo: Egg and Cucumber Sandwiches

    I love adding cucumbers to egg mayonnaise. And sometimes different herbs too (especially dill goes very well with eggs and cucumbers). The cucumber can either be chopped finely and mixed into the egg mayonnaise or sliced thinly , I like the latter since it adds a nice fresh crunch to the sandwich. This can be made in advance and keeps well, so is perfect for tea parties.

    Egg and Cucumber Sandwiches recipe
    Photo: Egg and Cucumber Sandwiches

    What are your favorite foods for a tea time snack or tea party? For me, the food are simple to prepare and easy to eat (and not so messy), preferably something we can eat using our hands or toothpicks.

    Egg and Cucumber Sandwiches recipe
    Photo: Egg and Cucumber Sandwiches

    If you’re looking for an extremely quick and easy recipe for a lunch box, or a tea party, or a picnic, or you just so happen to have an extra cucumber lying around, then give these egg and cucumber sandwiches a try. They’re deliciously light and fresh, and I love the crunch of the cucumber. These delicious, easy-to-assemble sandwiches are great for a quick summer meal.

    Bismillah let’s get started. 

    Check it out the Egg and Cucumber Sandwiches recipe and printable version below!!

    Egg and Cucumber Sandwiches Recipe

    Egg and Cucumber sandwiches are the most delicious, easiest finger foods to make. All you need is sliced white bread, boiled eggs, mayonnaise and of course, cucumbers. To enhance the flavor, I also spread a thin layer of dill with cream cheese spread.

    For Egg Salad

    • 3 hard boiled eggs
    • 1/2 cup mayonnaise (mayo with olive oil is my favorite)
    • 1 tablespoon fresh dill (chopped)
    • 1/4 teaspoon garlic powder (optional)
    • 1/4 teaspoon pepper
    • salt to taste

    For Sandwiches

    • 3 tablespoon cream cheese spread
    • 1 large cucumber (peeled and thinly sliced)
    • 12 sliced white sandwich bread

    Method

    1. In a medium bowl, mix together the eggs and mayonnaise until completely incorporated.
    2. Add garlic powder, salt, pepper and chopped dill. Mix until well combined.
    3. Set aside.
    4. Toss bread slices on both sides.
    5. Spread egg spread mixture on 4 bread slices.
    6. Cover with another four bread slices.
    7. Top with cheese spread and cucumber strips, then close sandwiches with remaining bread slices.
    8. Cut crusts from bread, forming finger sandwiches. Cut each sandwich into three, creating 3 rectangle mini-sandwiches each. Enjoy!

    Serving Suggestions:
    Serve with tea or you can enjoy with finger chips and chili garlic sauce.

    I have also posted Zinger Club Sandwiches which is another easiest & tastiest version of making sandwiches. Do check it out as well.


    Put your own spin on it. And lemme know how it turns out. Post a photo on Facebook (Recipestable) or  on Twitter so I can see how lovely yours turn out.


    Happy Sandwiches Making!!

    If you like this post, Please Subscribe to my blog and let me know your feedback by commenting below.. I have lots more recipes to share with you.

  • Strawberry French Toast Roll Ups Recipe

    Strawberry French Toast Roll Ups Recipe

    Aslam-o-Alakaum My Lovelies !!

     In the Name of Allah, Most Gracious, Most Merciful

    Happy Spring Season!

    Spring is a perfect time to enjoy plump, juicy strawberry. Strawberry is a great fruit in so many ways. They’re sweet. They’re easy to handle and prepare, and they are kid-friendly.

    Celebrate spring with Strawberry!

    Is there a person on this planet that doesn’t like Strawberry and French Toast?  Today I have come up with a  wonderful and very different recipe. Strawberry French Toast Roll Ups – just a handful of ingredients to make these in 15 minutes. These strawberry french toast roll ups are so fun and easy to make.They taste like doughnuts!

    Photo: Strawberry French Toast Roll Ups recipe

    For the rest of us that love the good life, here’s an easy recipe that will transform any bread into sweet, eggy magic.

     Strawberry French Toast Roll Ups recipe
    Photo: Strawberry French Toast Roll Ups 

    A must try recipe, your family will love these french toast roll ups filled with strawberries.

    Let’s begin!!

    Check it out the Strawberry French Toast Roll Ups  recipe and printable version below!!


    There are countless variations on this timeless recipe, so go ahead and get messy. Make up your own and share, there’s so many different ways to make this simple dish. Just about every recipe will have something similar as what i have for a base, feel free to use it as a guide and modify to make your breakfast super tasty.


    I have also posted Almond French Toast Hearts which is another easiest version of making breakfast or lunch box item . Do check it out as well.


    Put your own spin on it. And lemme know how it turns out. Post a photo on Facebook (Recipestable) or  on Twitter so I can see how lovely yours turn out.

    Happy Breakfast making!!

    If you like this Strawberry French Toast Roll Ups, Please Subscribe to my blog. I have lots more recipes to share with you. And If you make it then let me know your feedback by commenting below.

  • Chocolate Chip Pancakes Recipe

    Chocolate Chip Pancakes Recipe

    Aslam-o-Alakaum My Lovelies !!

     In the Name of Allah, Most Gracious, Most Merciful

    Hope, you are doing splendidly and enjoying the season. Well I’m in the middle of work, and anxiety has begun to sink its sharp little claws into my brain. It’s almost the final month of my training and I’m already drowning under a sea of coding assignments and project.

    Ahhh I love to code even though it makes me want to tear my eyes out every 10 minutes. Crying Out Loud ;(  I have constant fears that I’ve forgotten the code, functions, or left something somewhere blah blah blah. Problem is I love it but I have too much code to write though… ugh. This assignment is really doing my nut in! 

    code

    I’ m carving chocolate soo bad while coding up my project and backing up files. Every time I write a code, I delete it again. Almost time for a pancake break 😛  Anyhow before going back to coding, I decided to update you guys with this short post. 

    If there’s one thing you should know about me right up front it’s that I love Chocolate and pancakes, always have. Chocolate chips, Pancakes, foggy weather and coding are the reasons I love life.  Sounds super yummy! 

    chocolate-chips
    Pancakes are probably in my Top 10 favorite foods. But they need chocolate chips. 🙂

    Time for a Chocolate Chip Pancakes Break.

    No matter how difficult  life gets, just remember, there’s always time for a Pancakes break. 😀 These Chocolate Chip Pancakes have been a blessing while trying to write my final coding project. lol. They simple to make, so comforting, and lightened up with a few delicious tweaks. 

    Chocolate Chip Pancakes
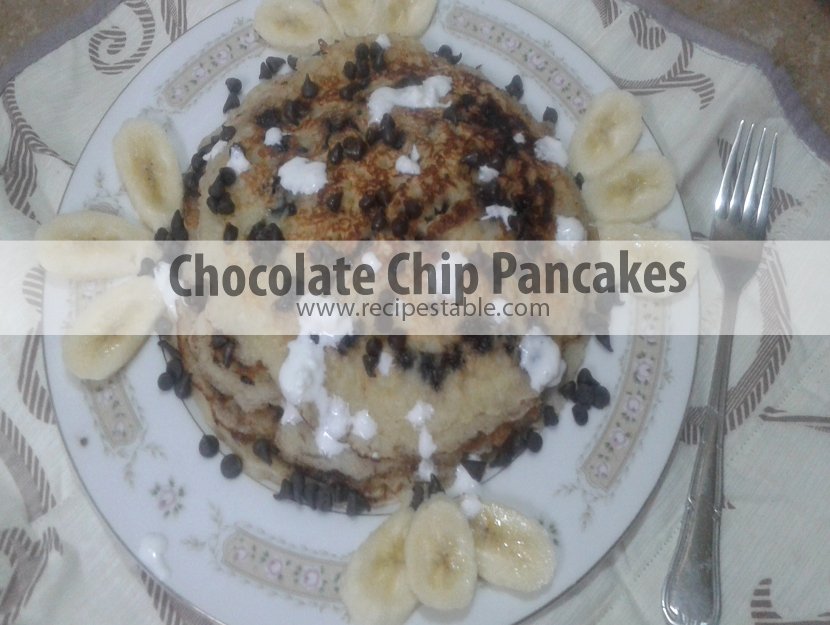
    Photo: Chocolate Chip Pancakes

    This Chocolate Chip Pancakes recipe is a favorite of mine to make for special occasions or holidays. Eat while hot so the chocolate is all gooey. If you want to make it extra special, serve the pancakes with berries and whipped cream

    Chocolate Chip Pancakes Recipe
    Photo: Chocolate Chip Pancakes

    It was love at first bite, I’m telling you. The texture is fluffy but hearty and slightly dense, and plenty moist from the butter. They’re perfectly sweet even without any additional sugar – the chocolate chips provide a touch of decadence.

     Chocolate Chip Pancakes Recipe
    Photo: Chocolate Chip Pancakes

    They’re super tasty, easy to make, and use regular everyday ingredients. 

    Ingredients You will Need to Make These Pancakes
    Ingredients You will Need to Make These Pancakes

    Ingredients You will Need:

    1. Flour
    2. Sugar
    3. Baking Powder
    4. Cinnamon Powder
    5. Salt
    6. Eggs
    7. Milk
    8. Butter
    9. Vanilla Essence
    10. Chocolate Chips

    Tools You needed to make this recipe are:

    1. A pan or griddle
    2. A Spatula
    3. A Mixing Bowl
    4. Hand Beater

    Check it out the Chocolate Chip Pancakes Recipe and printable version below!!

    Chocolate Chip Pancakes

    This Chocolate Chip Pancakes recipe is a favorite of mine to make for special occasions or holidays. Eat while hot so the chocolate is all gooey. If you want to make it extra special, serve the pancakes with berries and whipped cream

    For Pancake Batter

    • 1-1/4 cups all purpose flour
    • 2 tbsp sugar
    • 1 tsp baking powder
    • 1/4 tsp ground cinnamon
    • 1/4 tsp salt
    • 2 large eggs
    • 1 cup milk
    • 4 tbsp melted butter
    • 3/4 tsp vanilla
    • 1 cup chocolate chips

    For Serving

    • 1/2 cup heavy whipping cream
    • 1 tbsp confectioners’ sugar
    • 1/2 tsp vanilla extract

    Method

    To Make the Dipping Sauce

    1. Take a small bowl, add cream cheese, sugar and vanilla to it. Beat until stiff peaks form. Now cover and refrigerate until serving.

    To Make Pancakes

    1. In a large bowl, mix together the flour, sugar, cinnamon, baking powder and salt.
    2. Stir flour mixture into wet ingredients. Beat until smooth.
    3. Fold in chocolate chips.
    4. Pour batter 1/4 cup full onto a lightly greased hot pan or skillet.
    5. Flip when bubbles form on top. Cook a minute more or until second side is golden brown. Chocolate Chip Pancakes are ready to serve. ENJOY!!

    Serving Suggestions:
    Serve with whipped cream.

    Tips For Diet Version Pancakes (Clean Eating):

    1. You can make gluten free Pancakes by using gluten-free oats and flour.
    2. For Sweeting: Add 1 Tablespoons of honey, apple syrup, or nectar is optional for extra sweetening, but I didn’t find it necessary.
    3. Don’t add butter. Mash very ripe banana with baking powder. It gives
    4. them a moist and fluffy texture.
    5. Serve plain or with a small drizzle of honey and a few additional chocolate chips for melting.

    Put your own spin on it. And lemme know how it turns out. Post a photo on Facebook (Recipestable) or  on Twitter so I can see how lovely yours turn out.

    Happy Chocolate Pancakes making!

    If you like this Chocolate Chip Pancakes Recipe, Please Subscribe to my blog. I have lots more recipes to share with you. And If you make it then let me know your feedback by commenting below.

  • Chocolate Date Bars Recipe

    Chocolate Date Bars Recipe

    Assalamu alaikum wa rahmatullahi wa barakatuhu!

    In the Name of Allah, Most Gracious, Most Merciful

    GOOD MORNING MY LOVELY READERS!!

     Good morning my fellow readers
    Good morning my fellow readers

    I hope you are well and happy today. The sun is shining brightly here this morning and the air is crisp. I need a little sun today and wireless signals are surprisingly good :P. So right Now, sitting in my roof top garden with my lappy writing today’s blog post and enjoying my morning tea. And beautiful pairs of sparrows and pigeons are also enjoying the morning sun with me. I love to hear the birds chirping in the morning – sweet songs of nature ♥☺

    Great start to the day.

    Trying to decide what to make for Quick Breakfast or Brunch, OR Snack? No worries, I’ve got you covered in today’s all new post.

    Today’s Recipe: Chocolate Date Bars

    SUPER healthy, naturally sweetened Chocolate Date Bars!! Just 7 ingredients to a snack that tastes more like a candy bar!! YUM YUM. The result is a simple, naturally-sweetened, healthy Date bars that is a little on the decadent side – just the way I like it.

    Chocolate date bars recipe
    Photo: Chocolate Date Bars Recipe

    They taste like Supreme awesomeness. They’re rich, dense, moist, super chocolaty, nutty, slightly crunchy and perfectly sweet and very filling.

    Chocolate Date Bars Recipe
    Photo: Chocolate Date Bars Recipe

    These Chocolate Date Bars DO indeed taste like a raw brownie. 😛

    1. They require just 7 ingredients.
    2. They’re no bake, aside from toasting your nuts (an optional step).
    3. They’re loaded with antioxidants, protein and healthy fats.
    4. They’re incredibly satisfying.
    5. They’re perfect for breakfast, dessert or a quick snack.
    6. They’re freezer-friendly.
    7. They’re uber chocolatey.
    8. They’re really just kind of perfect.

    I did have one for breakfast and found it quite filling. But for the most part I ate these as a healthy dessert. I’d go to the freezer, break off 1/3 and snack. Then repeat for the next 30 minutes until it was gone. Self control comes in waves, people, especially with these bars. 😛 ☺

    Really I should stop praising and tell you the recipe. So Let’s get started !

    Tools You needed to make this recipe are:

    1. A cookie sheet
    2. A frying pan
    3. A Spatula

    Check it out the Chocolate Date Bars Recipe and printable version below!!

    Chocolate Date Bars

    SUPER healthy, naturally sweetened Chocolate Date Bars!! Just 7 ingredients to a snack that tastes more like a candy bar!! YUM YUM. The result is a simple, naturally-sweetened, healthy Date bars that is a little on the decadent side – just the way I like it.

    • 1 cup deseeded dates (chopped)
    • 2 tablespoon roasted almonds (crushed)
    • 2 tablespoon roasted peanuts (crushed)
    • 2 tablespoon roasted walnuts (crushed)
    • 1/2 cup nutella chocolate
    • 1 tablespoon butter
    • 1 tablespoon sesame seeds (optional)
    • a few drops of vanila essence

    Method

    1. Lightly greased a cookie tray with butter or oil.
    2. Melt butter in a pan over medium heat.
    3. Add dates and nuts in it. Cook on low flame for 5-7 minutes or until smooth.
    4. Stir in the vanilla essence.
    5. Turn the heat off and add nutella and sesame seeds.
    6. Mix until well combined.
    7. Transfer into a greased tray and spread evenly.
    8. Allow to cool.
    9. Then put in refrigerator for 2 hours pr until set.
    10. Cut into small bars. Chocolate Date Bars are ready to eat. ENJOY!! 🙂

    Serving Suggestions:
    Serve with a glass of milk.

    You MUST try these Date bars and let me know what you think! Post a photo on Facebook (Recipestable) or  on Twitter so I can see how lovely yours turn out.

    Happy Chocolate Date Bars making!

    If you like this Chocolate Date Bars Recipe, Please Subscribe to my blog. I have lots more recipes to share with you. And If you make it then let me know your feedback by commenting below.

  • Chicken Shawarma Wraps Recipe

    Chicken Shawarma Wraps Recipe

    Assalamu alaikum wa rahmatullahi wa barakatuhu!

    In the Name of Allah, Most Gracious, Most Merciful

    Shawarma is eaten in Arab countries, Pakistan, South Africa and the United Kingdom, and the meats, toppings and sauce vary depending on the country. Traditionally, Shawarma is made with chicken, lamb, beef, or goat that has been marinated, and is wrapped and cooked on a vertical rotisserie (similar to Greek gyro meat). When an order is placed, meat is shaved off and served as a wrapped sandwich (using pita bread) with fresh pickles and sauce.

    Chicken Shawarma Wraps
    Photo: Chicken Shawarma Wraps Recipe

    Chicken Shawarma Wraps

    So today, I’m going to share this awesome Chicken Shawarma Wraps recipe with my fans. This dish is not hard to make, it just requires a little bit of planning ahead. Well worth the effort!

    Chicken Shawarma Wraps Recipe
    Photo: Chicken Shawarma Wraps Recipe

    This Chicken Shawarma Wraps recipe is bursting with middle eastern flavors. Simple to make. Think of your favorite gyro place where they are slicing meats from a spit, and placing it inside of warm pita or flat-bread, along with sauces and vegetables. That’s shawarma, and this is my take on it. Did I mention my entire family was totally in love with this??

    Chicken Shawarma Wraps Recipe
    Photo: Chicken Shawarma Wraps Recipe

    It is really difficult to recreate the taste of shawarma at home, but this recipe I think, does it justice. The key is to leave the chicken marinading overnight for maximum flavour, and to have the grill smoking hot when cooking. And I made the Shawarma Pickles two days before and made a batch of sour cream as well as hummus sauce.

    Chicken Shawarma Wraps Recipe
    Photo: Chicken Shawarma Wraps Recipe

    Sorry I din’t get step by step picture as I was in a bit hurry to assemble the wraps. But I will try to upload step by step pictures later. InshaAllah !!

    Let’s get started !

    Check it out the Chicken Shawarma Wraps Recipe and printable version below!!

    Chicken Shawarma Wraps

    This Chicken Shawarma Wraps recipe is bursting with middle eastern flavors. Simple to make.

    For Chicken & Marinade

    • 750 gm boneless chicken (cubed)
    • 2 tablespoon plain yogurt
    • 1 tablespoon vinegar
    • 1 tablespoon lemon juice
    • 2 teaspoon hot sauce
    • 1 teaspoon onion powder
    • 1 teaspoon ginger garlic paste
    • 1 teaspoon mustard paste
    • 1 teaspoon degi mirch (pepper)
    • 1/2 teaspoon cumin powder
    • 1/2 teaspoon coriander powder
    • 1/4 teaspoon cinnamon powder
    • salt to taste
    • 2 tablespoon olive oil

    For Pita Bread

    • 3 cups plain flour
    • 1 tablespoon yeast
    • 1 tablespoon sugar
    • 4 tablespoon oil
    • 1 teaspoon salt

    For Hummus Sauce

    • 1 cup boil chickpea
    • 2 tablespoon lemon juice
    • 1 tablespoon garlic powder
    • 1/2 teaspoon white pepper
    • 1/2 teaspoon salt
    • 1/4 cup water
    • 1 tablespoon olive oil

    For Sour Cream

    • 1/2 cup mayonise
    • 1 tablespoon lemon juice
    • 1 tablespoon garlic (finely chopped)
    • 1/4 teaspoom white pepper powder
    • 1/4 teaspoon salt or to taste

    For Shawarma Pickle

    • 1 small onion (thinly sliced)
    • 4-5 black and green olives (pitted & sliced)
    • 1 cucumber (thinly sliced)
    • 1 to mato (thinly sliced)
    • 1 cup cabbage (thinly sliced)
    • 1 cup lettuce leaves (chopped)
    • 4 tablespoon vinegar
    • a pinch of crushed red pepper
    • a pinch of salt

    Method

    To Make Chicken Marinade

    1. Cut chicken into cubes.
    2. Place in a large bowl. Add plain yogurt, vinegar, lemon juice, hot sauce(optional) onion
    3. powder, ginger garlic paste, mustard paste, degi mirch(pepper), cumin powder, coriander powder,cinnamon powder and salt. Stir to coat evenly.
    4. Cover and marinate for at least 4 hour or overnight.
    5. Now heat 2 tablespoon oil in a grill pan over medium heat.
    6. Cook chicken for 10-12 minutes or until all juices run clear. OR Grill chicken pieces for 25 minutes or until chicken is nicely cooked or no longer pink.
    7. Cut chicken into very thin pieces or chunks and set aside.

    To Make Pita Bread

    1. Place flour , yeast, sugar, salt and oil in a mixing bowl.
    2. Knead a soft and smooth dough with warm water.
    3. Wipe some oil on the palms of your hands and rub over the lump of kneaded dough.
    4. Then cover the dough with a wet cloth or a plastic sheet and let it rise for 1 hour or until it doubled in size.
    5. Once well-risen, make small balls of equal size.
    6. Roll out each ball gently and evenly (do not lean/press down hard on the ball of dough, you
    7. need to use a light hand) to a thickness of a little more than a quarter inch.
    8. Place the rolled-out pitas on a lightly floured surface and cover them with a towel that not
    9. too much air can get in. Leave them to stand for about 2 hours until they rise again.
    10. Now Preheat oven for 250 degree C.
    11. Bake pita breads in the preheated oven for 5-7 minutes.
    12. keep warm.

    To Make Shawarma Pickle

    1. Wash vegetables and cut into thin slices.
    2. Put all vegetables in a mixing bowl or jar. Drizzle vinegar over them.
    3. Season with salt and red chilli.
    4. Stir well and keep aside.

    To Make Hummus Sauce

    1. Place chickpea, lemon juice, garlic powder, white pepper, salt, water and olive oil in a
    2. blender.
    3. Blend until well combined.
    4. Take it out in a bowl and sprinkle a pinch of red chili over it.
    5. Set aside.

    To Make Sour Cream

    1. In a small bowl, mix together the mayonnaise, lemon juice, garlic, white pepper and salt.
    2. Stir well and keep aside.

    To Assemble Chicken Shawarma Wraps

    1. Place pita bread in a clean surface.
    2. Spread sour cream and hummus over it.
    3. Put chicken pieces on it.
    4. Add shawarma pickle and roll tightly.
    5. Secure with a wooden pick or wrap in a butter-paper.
    6. Do this procedure with remaining ingredients.
    7. Chicken Shawarma Wraps are ready to eat!!

    Serving Suggestions:
    Serve with Hummus Sauce, chili garlic sauce and french fries.

    Important Tips:

    1. Try not to pile the pitas on top of each other until after they have cooled. This keeps them nice and plump for filling.
    2. To store pita breads, you can wrap them in cling film and freeze for up to 3 weeks.
    3. For the filling you can use any mixture of your choice with salad, just slit the pitas and stuff them with your favorite ingredients.
    4. You can also make pita breads on a frying pan or hot griddle or even it a bread-maker.

    If you like this Chicken Shawarma Wraps Recipe, Please Subscribe to my blog. I have lots more recipes to share with you. And If you make it then let me know your feedback by commenting below.

  • Baked Vegetable Spring Rolls Recipe

    Assalamu alaikum wa rahmatullahi wa barakatuhu!

    In the Name of Allah, Most Gracious, Most Merciful

    I hope you’re well and have had a good start to the week.   I’m sorry to let you worry about me, but these days I’m a bit busy.  As you know study study study. lol 😀 I am madly busy with my assignments. Sorry for this post being late.

    My class got cancelled today. Glad I get a chance to breathe. So I decide to write a post for my lovely reader’s. Last week, I made these Veggie rolls ( Baked Version) to give myself a break from ‎assignment work. They are very easy to prepare and tastes absolutely delicious! I had too much fun making this. 

    baked veggie rolls
    Take a Break and bake Some Veggie Rolls 🙂

    These yummlicious veggie rolls are healthy and very filling. And they smell amazing when they’re baking. They crisped up fine in the oven. The only problem is that three wrappers have 180 calories! What!???? That’s a lot. I ate 3 rolls anyway. 😛 😉 They are ready in only 35 minutes and you can use your favorite veggies.

    Baked Veggie Rolls Recipe
    Photo: Baked Veggie Rolls Recipe

    You could fry these, too, but I was trying to keep them healthy. I hope you all give this Baked Veggie Rolls recipe a try and let me know how they turn out!

    Baked Veggie Rolls 

    So let the fun begin!

    1. First Prepare Veggie Filling: Heat a small amount of oil in a wok over medium heat. Add giner and garlic. Saute until fragrant. Might you think, it’s a stupid instruction, isn’t it? Tell you what, just cook your garlic few seconds until they’re soft-ish.
    2. Now add green peas, red beans and corns. Cook for 2-3 minutes or until they are soft.Add remaining veggies and add a splash of vingear. Stir fry for few minutes. You can add soy sauce or any store bought sauce etc. But I didn’t add it. As I try to avoid artifical ingredients to follow my journey towards clean eating. 🙂
      Sprinkle black pepper, red chili, and maybe a little salt if you need it. If you want to use fresh herbs then I think that would be lovely.
    3. Stir well and Let everything simmer for a couple of minutes, but don’t let everything get overly soft because you still have to stuff and bake your rolls.
    4. Take the mixture into a bowl and let it cool for few minutes. Once everything is cool, you can either proceed to stuffing the rolls, or cover your bowl and put everything in the fridge overnight. If you do refrigerate the veggie mixture, be sure to bring it room temperature before stuffing your rolls.
    5. When you’re ready to stuff your rolls, be sure your stuffing mixture and wrappers are at room temperature. You’ll want a clean work surface for this part and a bowl of water nearby.
    6. Don’t be intimidated by this part. You just want the rolls to hold the yummy stuffing in. They don’t need to be perfect. And, frankly, if someone is going to judge you on how pretty your spring rolls are, then you probably shouldn’t be feeding them. lol 😛
    7. Preheat an oven for 200 degree C and brush a baking sheet with oil.
    8. Place a wrapper out in a diamond shape on your work surface.Put a tablespoons of filling in the center of the wrapper. I under-stuffed these rolls, so they turned out chewier that I would have liked. However, you don’t want to stuff them so full that they split open. It’s a delicate balance.
    9. Bring the bottom point of your wrapper up over the filling and tuck it under as tight as you can. Fold the sides over and shape into a roll.
    10. Moisten the edges of the top flap slightly with water and roll the roll over, pressing the point on the underside of the roll to seal it.
    11. Put on a lightly oiled baking sheet and repeat this method the rest of your rolls.
    12. Lightly brush the tops of the rolls with egg-wash and sprinkle sesame seeds over them.
    13. Bake in the preheated oven for 20 minutes or until they turn golden brown. This took my oven around 22-25 minutes.
    14. You can eat these veggie rolls with tamari or soy sauce, but we prefer sweet and sour sauce.
      Ready !!
    Baked Veggie Rolls Recipe
    Photo: Baked Veggie Rolls Recipe

    Sorry I din’t get step by step picture as I was hungry and on in a hurry to eat 😛

    Check it out the Baked Veggie Rolls Recipe and printable version below!!

    Baked Veggie Rolls

    Last week, I made these Veggie rolls ( Baked Version) to give myself a break from ‎assignment work. They are very easy to prepare and tastes absolutely delicious! I had too much fun making this.

    • 1 large carrot (cut into julienne)
    • 1 spring onion (cut into julienne)
    • 1 cup cabbage thinly sliced
    • 1 green pepper (thinly sliced)
    • 1/4 cup boiled green peas
    • 1/4 cup boiled corns
    • 1/4 cup boiled red beans (optional)
    • 1 tablespoon chopped ginger
    • 1 garlic clove (crushed)
    • 1 tablespoon olive oil
    • 2 tablespoon freshly parsley (chopped)
    • 1/2 teaspoon vinegar
    • 1/2 teaspoon pepper
    • a pinch of crushed red chili
    • salt to taste
    • 1 egg (for brushing)
    • 1 tablespoon sesame seeds (for sprinkling)
    • 16 roll wrappers or sheets

    Directions

    1. Heat oil in a wok over medium heat. Saute giner and garlic till fragrant.
    2. Add green peas, red beans and corns. Cook for 2-3 minutes then add remaining veggies and add vinegar.
    3. Cook and stir for few minutes.
    4. Season with salt , pepper and red chili.
    5. Mix well and cook for 1 more minute. ( Don’t over cook).
    6. Transfer the veggie mixture into a bowl and let it cool completely.
    7. Preheat an oven for 200 degree C and brush a baking sheet with oil.
    8. Place a wrapper like diamond, put 2 tablespoons of filling near corner, tightly roll the wrapper, fold over left side, fold over right side, brush a little water along the edge and close it up.
    9. Put on a lightly oiled baking sheet and repeat this method the rest of your rolls.
    10. Lightly brush the tops of the rolls with egg-wash.
    11. Sprinkle sesame seeds over them.
    12. Bake in the preheated oven for 20 minutes or until they turn crispy and golden brown.

    Serving Suggestions :
    Serve with sweet and sour sauce.

    Keep me in your duas please, and have a lovely week,

    Wasalaam!

    If you like this Baked Veggie Rolls Recipe, Please Subscribe to my blog. I have lots more recipes to share with you. And If you make it then let me know your feedback by commenting below.

  • Chicken Pita Sandwiches Recipe

    Chicken Pita Sandwiches Recipe

    Chicken Pita Sandwiches 

    Need a quick and delicious lunch option? or If you’re looking for fast, easy dishes to bring to a picnic, an Asian twist. Then this Pita Chicken Sandwiches recipe is sure to please you and your family.

    Chicken Pita Sandwiches Recipe
    Photo: Chicken Pita Sandwiches Recipe

    Say goodbye to your boring sandwiches. This Chicken Pita Sandwiches recipe is so easy to make and sure to spice up your lunch routine. Twenty minutes is all you need to whip up these simple yet satisfying Chicken Pita Sandwiches. Perfect to pack for school or work!!

    Chicken Pita Sandwiches Recipe
    Photo: Chicken Pita Sandwiches Recipe

    This mouthwatering sandwiches stuffed with a delicious chicken veggie filling will make mealtime exciting.Ah ___Sounds delish !! This simple Chicken Pita Sandwiches packs a lot of flavor and nutrition, which makes it ideal for an easy weekday meal. They may be tiny in size, but made this way, the lunch or dinner favorite is big on flavor!

    Chicken Pita Sandwiches Recipe
    Photo: Chicken Pita Sandwiches Recipe

    These Pita Chicken Sandwiches will help you enjoy every minute of these glorious warm days. When the weather is beautiful there is nothing better than a picnic. It’s the best appetizer recipe to bring to a picnic that are sure to be a hit!  I put Different veggies with roasted chicken, olives and cheese.You Can also stuff Pita Sandwiches with leftover ingredients from previous meals. Simple, fast and satisfying. Who has time for much more? The options truly are endless. Must try it,  I hope you enjoy it as much as I did!

    Check it out the Chicken Pita Sandwiches Recipe and printable version below!!

    Chicken Pita Sandwiches

    Say goodbye to your boring sandwiches. This Chicken Pita Sandwiches recipe is so easy to make and sure to spice up your lunch routine. Twenty minutes is all you need to whip up these simple yet satisfying Chicken Pita Sandwiches. Perfect to pack for school or work!!

    • 4 Pita breads
    • 2 boneless chicken breasts (cut into thin strips)
    • 1 small green bell pepper (thinly sliced)
    • 1 small yellow bell pepper (thinly sliced)
    • 1 small onion
    • 1 cucumber (thinly sliced)
    • 4 olives (thinly sliced)
    • 1 jalapeño pepper (thinly sliced)
    • 4 tablespoon tomato ketchup
    • 2 tablespoon mayonnaise
    • 2 tablespoon olive oil
    • 1 teaspoon garlic powder
    • 1 teaspoon black pepper
    • salt to taste
    • 1/2 cup grated mozzarella cheese
    • lettuce leaves

    Directions

    1. Heat oil in a frying pan.
    2. Stir fry chicken in hot oil for 4-5 minutes or until no longer pink.
    3. season with salt, garlic powder, black pepper and crushed chili.
    4. Cover the pan and let it cook in its own water for 10 minutes or until chicken is tender.
    5. Now add onion and stir fry for 30 seconds.
    6. Now add green pepper, yellow pepper, jalapeno pepper.
    7. Stir fry for 1-2 minutes then stir in the
    8. tomato ketchup.
    9. Turn the heat off.
    10. Now add olives, cheese and mayonnaise.
    11. Adjust seasoning to taste.
    12. Slightly roast pita bread on hot griddle from both sides.
    13. Put some lettuce leaves and cucumber on a pita bread.
    14. Top with chicken mixture.
    15. Generously cover with another pita bread.
    16. Cut each bread into four pieces.
    17. Transfer into a serving platter. Delicious Chicken Pita Sandwiches are ready to serve. ENJOY!!

    If you like this Chicken Pita Sandwiches Recipe, Please Subscribe to my blog. I have lots more recipes to share with you. And If you make it then let me know your feedback by commenting below.

  • Pocket Bread Sandwich Recipe

    Pocket Bread Sandwich Recipe

    Pocket Bread Sandwich

    Arrival of the holy month of Ramadan disrupts ones routine. From eating to sleeping to socializing, everything changes for Muslims. So In today’s Iftar, I made Pocket Bread Sandwich for my family. A great break from the usual toasted chicken veggie sandwich. Very Easy to make and yummy to eat. Do try it.

     Pocket Bread Sandwich Recipe
    Photo: Pocket Bread Sandwich Recipe

    You’ll never buy sandwiches from market again once you’ve learned how to make these quick and easy Pocket Bread Sandwich in your own kitchen.This Pocket Bread Sandwich recipe is ideal for Iftar parties, Picnics and Tea time chit chats.

    Bismillah, let’s begin!

    Check it out the Pocket Bread Sandwich Recipe and printable version below.

    Pocket Bread Sandwich Recipe

    For Stuffing

    • 1 cup cooked chicken (shredded)
    • 1 cup shredded cabbage
    • 1 capsicum (thinly sliced)
    • 1 carrot (shredded)
    • 3 tablespoon tomato ketchup
    • 2 tablespoon mayonnaise
    • 1 tablespoon soy sauce
    • 1 teaspoon cooking oil
    • 1/2 teaspoon freshly ground black pepper
    • salt to taste
    • For Sandwiches
    • 12 bread slices
    • 4 eggs
    • 1 cup bread crumbs
    • oil for shallow frying

    Method

    To Make Sandwich Stuffing

    1. Heat up oil in a large frying pan over medium high heat.
    2. Add chicken and stir fry for 1-2 minutes or until crispy.
    3. Now add all the veggies and stir fry for 1 minutes or until crisp-tender.
    4. Season with salt and pepper.
    5. Stir in the mayonnaise, ketchup and soy sauce until well combined.
    6. Turn the heat off.

    To Make Sandwich Stuffing

    1. Take two bread slices and cut them into round shape with a cutter or a mug.
    2. Press them to make it thin.
    3. In a shallow bowl, beat eggs with salt and pepper.
    4. Press the round part of both slices together and dip in egg then roll in bread crumbs.
    5. Shallow fry for 2 minutes or until they turn crispy and golden on both sides.
    6. Remove from the oil and repeat this method with remaining bread slices.
    7. Now cut bread slices into halves.
    8. Try open them from between like a pocket and fill it with chicken veggie filling.
    9. Transfer into a serving platter. Pocket Bread Sandwich is ready to serve. ENJOY!

    Serving Suggestions:
    Serve with tomato ketchup or your favorite dipping sauce.

    I have also posted Chicken Pita Pockets Recipe which is another easiest & tastiest version of making sandwiches. Do check it out as well.


    Put your own spin on it. And lemme know how it turns out. Post a photo on Facebook (Recipestable) or  on Twitter so I can see how lovely yours turn out.


    Happy Cooking!!

    If you like this post, Please Subscribe to my blog and let me know your feedback by commenting below.. I have lots more recipes to share with you.


  • The Secret to Bakery-Style Jam Filled Butter Cookies (This Recipe is a Gem!)

    Jam Filled Butter Cookies

    This Jam Filled Butter Cookies Recipe is an easy thumbprint cookie with a fruit jam center. Whip up these simple jam drops in just a few minutes, they make wonderful any-time treats.

    Jam Filled Butter Cookies Recipe
    Photo: Jam Filled Butter Cookies Recipe

    Check it out the  Jam Filled Butter Cookies Recipe here!!

    Jam Filled Butter Cookies Recipe

    • 2 egg yolks
    • 3/4 cup softened butter
    • 1/2 cup white sugar
    • 1-3/4 cups all-purpose flour
    • 1/2 cup fruit preserves (any flavor)

    Method

    1. Preheat the oven to 190 degrees C.
    2. Take a bowl, cream together the butter, white sugar and egg yolks.
    3. Stir in the flour a little bit at a time until a soft dough forms.
    4. Roll dough into 1 inch balls or cut with a cookie cutter.
    5. If dough is too soft, refrigerate for 15 to 20 minutes.
    6. Place balls 2 inches apart onto ungreased cookie tray.
    7. Use your finger or an instrument of similar size to make a well in the center of each cookie.
    8. Fill the hole with 1/2 teaspoon of preserves.
    9. Bake in the preheated oven for 8-10 minutes or until golden brown on the bottom.
    10. Remove from cookie sheets to cool on wire racks.
    11. Store in an airtight jar or container. Jam Filled Butter Cookies are ready to serve. ENJOY!

    Serving Suggestions:
    Serve with Tea.


    I have also posted Nankhatai recipe which are another easiest & tastiest version of making cookies at home. Do check it out as well.  It’s finger lickin’ good. You’ll be coming back for more. 


    Put your own spin on it. And lemme know how it turns out. Post a photo on Facebook (Recipestable) or  on Twitter so I can see how lovely yours turn out.


    Happy Cupcakes Making!!

  • The BEST Chicken Finger Sandwich Recipe Ever!

    Chicken Finger Sandwiches

    This delicious Chicken Finger Sandwiches recipe is always a favorite sandwich. So easy to make and so delicious. With ketchup and [highlight]herbs seasoning[/highlight] for color and tang, this dressed-up chicken salad is wonderful on bread fingers or served on a lettuce leaf. 

    Finger sandwiches are the easiest and most requested party food. It’s a lovely way to serve sandwiches and a great way to use up leftover chicken, or great to take as lunch as a normal sandwich. Perfect for afternoon tea.

    Chicken Finger Sandwiches Recipe
    Photo: Chicken Finger Sandwiches Recipe

    The weekend was full of foodie experiences. A few days ago, I decided to do a tea party with a my childhood friend and her child’s and made these as one of the finger foods. They were a HUGE hit with her little girls. They are just so dainty and are perfect for little tea parties (or family gathering, birthdays, .. etc..) plus, they are SUPER easy to make.

    The secret of this recipe is fresh herbs. You can make a variety of sandwiches as well, using egg salad, chicken salad, or tuna as layers– just make sure you chop or process the ingredients up enough so it spreads easily.

    Chicken Finger Sandwiches Recipe
    Photo: Chicken Finger Sandwiches Recipe

    Note: These can be served immediately but in my opinion they taste best when refrigerated at least 2 hours– they will easily keep if made a day ahead of time.

    Check it out the Chicken Finger Sandwiches Recipe and printable version below!!

    Chicken Finger Sandwiches

    This delicious Chicken Finger Sandwiches recipe is always a favorite sandwich. It’s a lovely way to serve sandwiches and a great way to use up leftover chicken, or great to take as lunch as a normal sandwich.

    • 2 cups boiled chicken (shredded)
    • 1/2 cup mayonnaise
    • 1 tablespoon cream cheese
    • 1 tablespoon tomato ketchup
    • 1 teaspoon fresh herbs (chopped)
    • 1/2 teaspoon freshly ground black pepper
    • salt according to taste
    • 12 slices white bread (crusts removed)
    • butter as required

    Directions

    1. In a mixing bowl, Combine together the mayonnaise, and cream cheese.
    2. Add shredded chicken and mix well.
    3. Season with herbs, salt and pepper.
    4. Toast bread slices with butter.
    5. Spoon the mixture over half the bread slices and cover with the remaining slices.
    6. Slice each sandwich into thirds to make three fingers.
    7. Transfer into a serving platter. Garnish with lettuce leaves. Chicken Finger Sandwiches are ready to serve. ENJOY!!

    Serving Suggestions:
    Serve with French Fries, Ketchup and Coleslaw.


    If you like this Chicken Finger Sandwiches Recipe, Please Subscribe to my blog. I have lots more recipes to share with you. And If you make it then let me know your feedback by commenting below.
  • Chicken Cheese Sandwich Recipe

    Chicken Cheese Sandwich Recipe

    Chicken and Cheese Sandwich

    Chicken Cheese Sandwich is a light meal or snack in slight appetite. Leftover  chicken and cream cheese are turned into a hot and spicy chicken sandwich. When you pack lunch boxes or in game party these super fantastic sandwiches are a great solution of your huger.

    Chicken Cheese Sandwich Recipe
    Photo: Chicken Cheese Sandwich Recipe

    Check it out the Chicken Cheese Sandwich Recipe here!!

    Chicken Cheese Sandwich Recipe

    • 12 bread slices
    • 1 cup boiled & shredded chicken
    • 3 tablespoon Mayonnaise
    • 4 tablespoon shredded Cheese
    • 1 tablespoon cream cheese
    • salt and pepper to taste
    • shredded lettuce as required
    • tomato ketchup as required
    • butter as required
    1. In a bowl, mix together the chicken, cheese, cream cheese and mayonnaise.
    2. Season with salt and pepper.
    3. Add shredded lettuce and mix well.
    4. Remove the edges of bread slices.
    5. Spread butter and toast on a hot griddle or pan.
    6. Spread ketchup on one side of six bread slices.
    7. Put some chicken cheese mixture over them. Cover with remaining bread slices and cut into triangles. Secure with wooden pick.
    8. Transfer into a serving platter. Garnish with lettuce  leaves.
    9. Delicious Chicken Cheese Sandwich is ready to serve. ENJOY!!

    Serve with French Fries.

    Appetizer, Comfort Food, Snack
    American, Indian, Pakistani
    cheese, cheese sandwiches, Chicken, chicken sandwich, sandwich

    If you like Chicken Cheese Sandwich Recipe and make it then let me know your feedback by commenting below.And if you know more innovative ways in which we can utilize this mouth watering Chicken Cheese Sandwich , do share with us and we would be glad to give it a try.