Tag: Picnic Recipes

  • Lip Smacking Cheesy Chicken Cups Recipe

    Lip Smacking Cheesy Chicken Cups Recipe

    An EASY comfort food recipe with just few ingredients and ready in 30 minutes!! Lip Smacking Cheesy Chicken Cups with a cheesy filling are sure to be a family favorite. Great for breakfast, dinner, snacks, a party appetizer or anything in between!!

    Cheesy Chicken Cups Recipe
    Cheesy Chicken Cups

    Cheesy Chicken Cups

    I had some extra chicken cooked and was looking to use it in a super fast and easy recipe. Since I also had few slider buns in my fridge, this fit the bill perfectly. I love the idea of the Slider cups (I can’t wait to get creative and try other things with that concept) and the filling was ooey-gooey, warm and cheesy. This is a very quick and simple way to get that comfort food taste/feeling.

    Here is my first try. I was thrilled they turned out just right.  They look so Lip smacking and appetizing (thus the name Lip Smacking Cheesy Chicken Cups). These are just as beautiful as they are delicious. My taste buds are going crazy, and I cannot wait for the next course in this meal.
    For a change of pace from your average dinner, this Cheesy Chicken Cups fits the bill! Unusual as it may be, once you take a bit, you will be reminded of some of your favorite chicken recipes. This is cheesy, flavorful, and will be loved by the whole family. Try making it tonight!

    Cheesy Chicken Cups Recipe
    Cheesy Chicken Cups yes!  Please give me one moment. All righty – I’m good now. I had to take a break to stare at these little beauties

    Extra Cheesiness Alert

    Alright, lets move to the cheesiness of this recipe.  


    Cheesy chicken filling, extra cheese on top and pepper flakes all stuffed up in a crispy slider bun shell.  Slider Buns are great for so many appetizers.  I used regular sized muffin tins, so I used bun half per cup, overlapping the corners so that all the edges are covered.   This whole recipe is sure to leave you stuffed and satisfied!

    Cheesy Chicken Cups Recipe
    Cheesy Chicken Cups Recipe

    What I Love About The Cheesy Chicken Cups?

    What I love about these Cheesy Chicken Cups – they are SO SIMPLE.  Seriously, simple ingredients, and half an hour are all it takes to make these Lip Smacking Cheesy Chicken Cups!   They are very good and easy to make, filled with a delicious cheesy chicken filling that everyone will love. We normally have all these items on hand. Mini Slider Buns make great cups for these cheesy treats. You can also use any leftover chicken for this.

    Cheesy Chicken Cups Recipe
    Cheesy Chicken Cups Recipe

    If you serve these at your Iftar Party or next get together , you may want to make a few a double batch – your guests will love them too!

     Cheesy Chicken Cups with Pasta Salad
    Cheesy Chicken Cups with Pasta Salad that are hearty enough to serve for dinner.

    Bismillah let’s get started. 
    Check it out Hot and Sour Noodles Recipe and printable version here!!

    Lip Smacking Cheesy Chicken Cups Recipe

    Lip Smacking Cheesy Chicken Cups – baked to perfection in muffin tins! Great for holidays and lunch boxes – it’s portable and makes for easy serving!
    Prep Time 15 minutes
    Cook Time 15 minutes
    Servings 12
    Author Bushra Waheed

    Ingredients

    • 6 mini slider buns

    For Cheesy Chicken Filling:

    • 1 cup boiled chicken shreded
    • 1 small onion chopped
    • 1 tablespoon plain flour
    • 1 cup milk
    • 1/2 cup cheddar cheese
    • 2 tablespoon butter
    • 1 teaspoon black pepper freshly ground
    • 1 teaspoon dried basil
    • 1/2 teaspoon red chili flakes
    • salt to taste

    For Topping:

    • 1/2 cup grated cheese
    • red pepper flakes
    • dried or fresh basil

    Instructions

    • Preheat oven to 180 degrees C.
    • Lightly greased a muffin pan with non-stick cooking spray or butter.

    To Prepare the Chicken Filling:

    • Melt butter in a frying pan over medium heat.
    • Fry onion till soft and translucent. Now add the plain flour and stir well.
    • Stir in the milk and cook for 2-3 minutes or until sauce is thickened.
    • Season with salt, black pepper, red chili flakes.
    • Stir in the shredded chicken and keep stirring for few minutes or until well combined.
    • Add cheese and dried basil and give it a good stir.
    • Turn the heat off.

    To Assemble the Cheesy Chicken Cups:

    • Cut buns into halves and put each half into the prepared muffin pan.
    • Press the buns into the holes to form cups.
    • Spoon chicken filling evenly into cups.
    • Sprinkle remaining cheese over them.
    • Top with chili flakes and dried basil (optional).
    • Bake for 12 to 15 minutes or until cheese is melted and they turn golden brown.
    • Take it from the oven. Remove from the muffin pan.
    • Lip Smacking Cheesy Chicken Cups are ready to serve. ENJOY!!

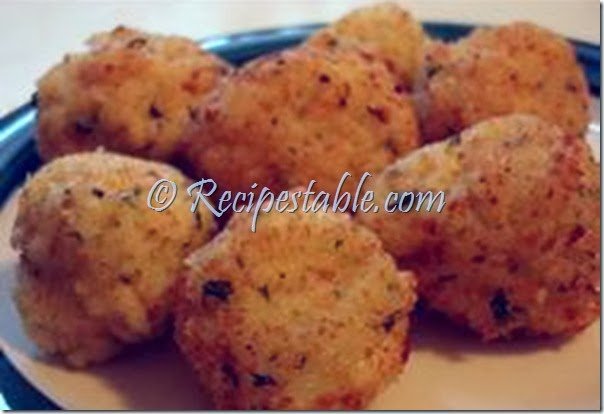
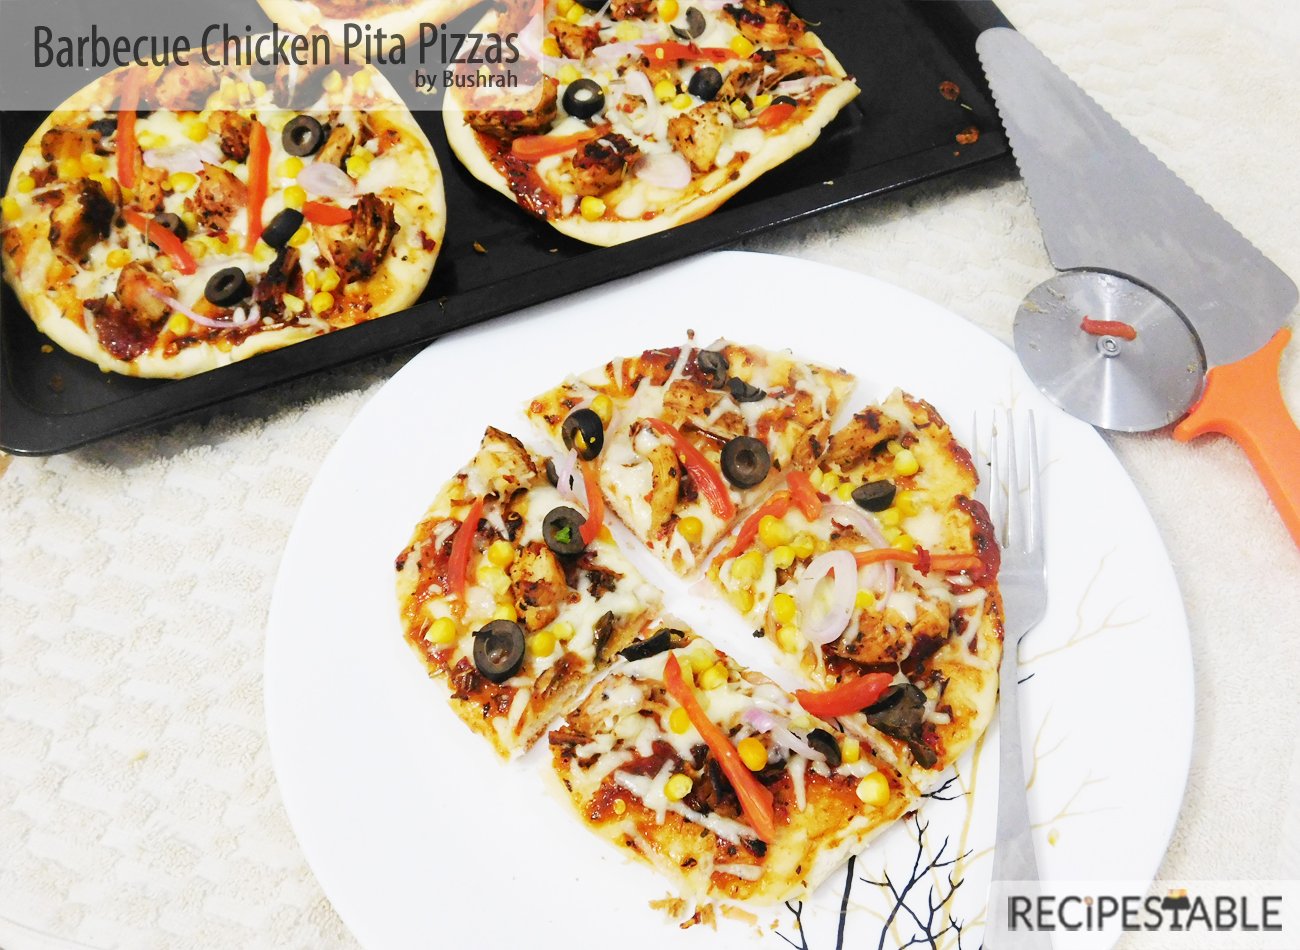
    I have also posted Buffalo Chicken Cheese Balls Recipe and Mini Pizza Cups Recipe which are another easiest & tastiest version of Comfort Food. Do check it out as well.

    Put your own spin on it. And lemme know how it turns out. Post a photo on Facebook (Recipestable) or Instagram on Twitter so I can see how lovely yours turn out.

    Happy Cooking

  • The Best Vegetable Spring Rolls Recipe: Easy and Delicious

    Vegetable Spring Rolls

    Here is the my favorite Vegetable Spring Rolls Recipe. You can make them before Ramadan and can also freeze them and fry them when ever you want.

    Vegetable Spring Rolls
    Vegetable Spring Rolls


    These spring rolls are a perfect tea time snack and great party food. With a combination of colorful veggies and exotic taste of soy sauce, these rolls are a great choice for snacking. Give it a try!!

    Vegetable Spring Rolls
    Vegetable Spring Rolls

    A really delicious and colourful way to eat your spring vegetables.These Vegetable Spring Rolls tastes fresh and crisp and adds a lot of beautiful color to tea time.

    colorful vegetables
    Colourful And Delicious Ways To Eat Spring Vegetables

    Vegetable Spring Rolls Recipe With Step By Step Pictures:

    Step 1 : Heat 1 tablespoon vegetable oil in a wok over high heat.

    Vegetable Spring Rolls
    Step 1 

    Step 2:Stir fry onion, garlic, green peas, carrot, green pepper and cabbage for few minutes or until crisp tender.

    Vegetable Spring Rolls recipe
    Step 2 

    Step 3: Stir in the instant noodles (crushed) and soy sauce. Add seasoning and mix well.

    vegetable Spring Rolls
    Step 3

    Step 4: Turn off the stove and let it slightly cool.

    Vegetable Spring Rolls Recipe
    Step 4 

    Step 5: Transfer into a bowl. Keep aside to cool completely.

    Vegetable Spring Rolls recipe
    Step 5

    Step 6:Place a roll wrapper on a clean surface with a corner pointing towards you.Put 1 tablespoon vegetable mixture into the center of the wrap. Brush the edges with egg yolk or cornflour mixture.

    Vegetable Spring Rolls recipe
    Step 6 

    Step 7:Fold corner over the filling then roll up from corner to corner, folding edges in  to enclose filling.

    Vegetable Spring Rolls recipe
    Step 7 

    Step 8:Repeat this method with remaining wrappers and vegetable filling. And make twenty spring rolls.

    Vegetable Spring Rolls recipe
    Step 8 

    Step 9:Heat oil in a wok over medium heat.

    Vegetable Spring Rolls
    Step 9 

    Step 10: Fry spring rolls in batches.

    Vegetable Spring Rolls recipe
    Step 10

    Step 11: Fry on both sides for 1-2 minutes or until they turn crispy and golden in colour.

    Vegetable Spring Rolls recipe
    Step 11

    Step 12: Remove from the oil and transfer into a plate. Ready to enjoy!!

    Vegetable Spring Rolls recipe
    Step 12

    Check it out the printable version recipe below:

    Vegetable Spring Rolls

    A really delicious and colourful way to eat your spring vegetables.This Vegetable Spring Rolls recipe tastes fresh and crisp and adds a lot of beautiful color to tea time.
    Prep Time 20 minutes
    Cook Time 10 minutes
    Total Time 30 minutes
    Servings 10
    Author Bushrah | Recipestable

    Ingredients

    • 1 packet instant noodles
    • 1 tbsp vegetable oil
    • 2 cups shredded cabbage
    • 1/2 cup boiled green peas
    • 3 green onions sliced
    • 2 garlic cloves crushed
    • 1 carrot grated
    • 1 green pepper chopped
    • 1 tbsp soy sauce
    • 1/4 tsp white pepper
    • salt to taste
    • 20 frozen spring roll wrappers thawed
    • oil for frying
    • 2 tablespoon cornflour dissolved in a lil water and make a thick paste or a egg yolk

    Instructions

    Directions

    • Heat vegetable oil in a pan over high heat.
    • Add onion, garlic, green peas, carrot, green pepper and cabbage. Cook and stir for few minutes or until crisp tender.
    • Add instant noodles (crushed) and soy
    • sauce.
    • Season with salt and pepper.
    • Turn the heat off and take it out in a
    • bowl.
    • Set aside to cool.
    • Place 1 wrapper on a board with a corner pointing towards you.
    • Brush edges with cornflour mixture.
    • Spoon 1 tbsp vegetable mixture into the corner of the wrap.
    • Fold corner over the filling then roll up from corner to corner, folding edges in to enclose filling.
    • Repeat with remaining wrappers, cornflour mixture and filling.
    • Heat oil in a deep pan over medium high heat.
    • Deep fry spring rolls, in batches, for 2-3 minutes or until crispy and golden.
    • Remove from the oil and drain on kitchen paper. ENJOY!

    Notes

    Notes:
    Keep remaining wrappers covered with damp tea towel.
    Serving Suggestions:
    Serve hot with sweet chilli sauce.

    If you like this  recipe, Please Subscribe to my blog. I have lots more recipes to share with you. And If you make it then let me know your feedback by commenting below.

  • Easy & Delicious Homemade Pizza Rolls Recipe: Perfect for Parties or Snacks!

    A tasty dinner option for busy nights and with few simple ingredients , prep has never been easier! Take your pizza and give it a roll!

    Homemade Pizza Rolls
    Homemade Pizza Rolls

    Homemade Pizza Rolls

    Does anyone remember those mini pizza bites…? Am I the only one that gobbled up two to three every day as a tea time snack? Well, guess what. These are sooooo much better! And easy to make!

    Homemade Pizza Rolls
    Homemade Pizza Rolls

    They would be perfect for the friends pizza party because you can fill them individually with a vast array of toppings. They’d also be perfect as an appetizer with a glass of lemonade. In fact, I don’t really know of a time that these pizza rolls is not appropriate, do you?

    I didn’t think so.

    Homemade Pizza Rolls
    Homemade Pizza Rolls

    This Homemade Pizza Roll Recipe is perfect and my family favorites. I used my favorite pizza dough recipe to make these rolls and they turned out beautifully in just over an hour, start to finish. Super fast. You could also make the dough ahead of time and freeze it, which is what I do often!

    Homemade Pizza Rolls
    Homemade Pizza Rolls

    Let it be known that although the recipe calls for whole wheat flour, more often times than not, I just use all white flour. What can I say? I’m a carb purist.

    All you is roll out the Pizza dough, then fill with whatever toppings you choose, rolled into a spiral then baked. I kept things simple with pizza sauce, chicken and mozzarella cheese, few veggies but you could totally go crazy here and add sauteed mushrooms, goat cheese, pepperoni, bits of sausage and even scrambled eggs and cheese. The options are endless!

    Homemade Pizza Rolls
    Homemade Pizza Rolls

    Pizza sauce is my favorite part about the pizza (besides a crispy crust) and the cheese is Fatima’s & Wahab’s favorite. I fill these pizza rolls with just a little bit of sauce to make them happy and I serve with extra sauce to make me happy. 🙂

    Dip until your heart is content!

    Check it out the printable version Homemade Pizza Rolls Recipe here!!

    Homemade Pizza Rolls

    A tasty dinner option for busy nights and with few simple ingredients , prep has never been easier! Take your pizza and give it a roll!
    Prep Time 10 minutes
    Cook Time 43 minutes
    Total Time 1 hour 13 minutes
    Servings 9
    Author Bushrah @ Recipestable

    Ingredients

    • 1 lb pizza dough
    • 1/2 cup pizza sauce
    • 1/2 cup cooked chicken pieces or mince
    • 1 cup grated Mozzarella Cheese
    • 1/2 cup grated Cheddar Cheese
    • 1 green bell pepper chopped
    • 4-5 black olives chopped
    • 1 teaspoon dried oregano
    • 1 teaspoon dried basil
    • a pinch of red pepper flakes

    Instructions

    • Line a 9×9 baking dish with parchment paper and keep aside.
    • Lightly flour a work surface and roll the dough into an 8×12 rectangle.
    • Spread the pizza sauce over the dough to the edges.
    • Top with the chicken or mince, then 1/2 of the mozzarella cheese, green pepper and olives.
    • Sprinkle oregano and basil over it.
    • Starting on the long side, roll the dough up to form a log.
    • Trim the edges if uneven, then cut the dough into 9 equal slices.
    • Place the slices, cut side down, in the prepared baking dish, making 3 rows of 3 rolls each.
    • Cover the dish with foil and let it sit to rise for 30 minutes.
    • Meanwhile, preheat the oven to 375ºF.
    • Place the rolls in the preheated oven, still covered, and bake for 20 minutes.
    • Remove the foil and return the pan to the oven and bake for an additional 20 minutes.
    • The rolls should be browned and the cheese melted.
    • Sprinkle the remaining 1/2 cup of mozzarella and red pepper flakes over the top of the rolls, then return to the oven until the cheese is melted, about 3 minutes.
    • Let the rolls cool slightly in the pan, then top with the remaining basil.
    • Delicious Homemade Pizza Rolls are ready to serve. ENJOY!

    Notes

    Recipe Note’s:
    You may use whole wheat pizza dough instead of white flour.
    If you prefer, you can bake these rolls in two muffin pans or even a 9×13 baking pan.

    Homemade Pizza Rolls Recipe with Step by Step Pictorial 

    Homemade Pizza Rolls Step. No: 1
    Homemade Pizza Rolls Step. No: 1

    Homemade Pizza Rolls Step. No: 2
    Homemade Pizza Rolls Step. No: 2

    Homemade Pizza Rolls Step. No: 3
    Homemade Pizza Rolls Step. No: 3

    Homemade Pizza Rolls Step. No: 4
    Homemade Pizza Rolls Step. No: 4

    Homemade Pizza Rolls Step. No: 5
    Homemade Pizza Rolls Step. No: 5

    Homemade Pizza Rolls Step. No: 6
    Homemade Pizza Rolls Step. No: 6

    Pin it For Later

    Homemade Pizza Rolls Recipe Pictorial
    Homemade Pizza Rolls Recipe Pictorial

    If you have any question about this Homemade Pizza Rolls Recipe  then you can ask by using comment box and I will clarify your confusion.

    I have also posted Mini Pizza Cups Recipe  and Two Cheese Pizza Recipe which are another easiest & tastiest version of making Pizza. Do check it out as well.  It’s finger lickin’ good. You’ll be coming back for more.


    Put your own spin on it. And lemme know how it turns out. Post a photo on Facebook (Recipestable) or  on Twitter so I can see how lovely yours turn out.

    Follow my blog with Bloglovin


    Happy Baking!!

    If you like this post, Please Subscribe to my blog and let me know your feedback by commenting below.. I have lots more recipes to share with you.

  • Think Outside the Pan: Double Pan Pizza Recipe (Next-Level Homemade Pizza!)

    Double Pan Pizza

    Bismillah, let’s begin!

    Check it out the Double Pan Pizza recipe and printable version below!

    Double Pan Pizza Recipe

    Prep Time 45 minutes
    Cook Time 30 minutes
    Total Time 1 hour 15 minutes
    Servings 6
    Author Bushrah | Recipestable

    Ingredients

    For Pizza Dough

    • 2 cups wheat flour
    • 2 cups refined flour
    • 1 egg
    • 3 tbsp milk powder
    • 2 tbsp yeast
    • 1 tbsp sugar
    • 1 tsp salt
    • 1 tsp fresh coriander
    • a pinch of onion seeds
    • 2 pinch crushed red chili
    • 2-1/2 cps Luke warm water or milk

    For Pizza Topping

    • 1 cup boneless chicken cut into cubes
    • 1 cup onion cut into cubes
    • 1 capsicum cut into cubes
    • 8 mushrooms
    • 1 packet Mozzarella Cheese
    • 2 tbsp garlic minced
    • 2 tbsp garlic sauce
    • 1 tbsp red chili crushed
    • 1 tsp black pepper
    • 1/2 tsp mustard seeds
    • 1 tsp salt

    For Pizza Sauce

    • 2 cups tomato paste
    • 4 tbsp olive oil
    • 2 tbsp garlic minced
    • 2 tbsp sugar
    • 2 tbsp coriander leaves
    • 1 tbsp red chili crushed

    Instructions

    To Make Pizza Sauce

    • Heat oil in a pan.
    • Add garlic and cook for 30 seconds.
    • Then add all sauce ingredients.
    • Mix well.
    • Cook on medium heat for 10 minutes or until sauce is thickened.

    To Make Pizza Topping

    • Heat oil in an another pan.
    • Saute garlic in it.
    • Put chicken to the pan and fry for for 5 minutes.
    • Then add red chili, onion seed and black pepper, salt.
    • Mix well.

    To Make Pizza Dough

    • In a large bowl, combine together flour, green coriander, milk powder, yeast, sugar, salt, crushed red chili, mustard seeds and egg.
    • Knead a dough by using warm water or warm milk.
    • Leave it for 45 minutes.

    To Proceed

    • Take a simple frying pan and spread the pizza dough on it.
    • Cover the pan with a lid and cook for 2-3 minutes.
    • Press it a little bit with a cloth like chapatti, to cook properly.
    • When it starts rising/cooking, turn it over.
    • Spread prepared pizza sauce over the cooked side of dough.
    • Place chicken, onion, capsicum and mushrooms on it.
    • Sprinkle mozzarella cheese over it.
    • Cover the pan again and let it cook on low flame for 15 minutes or until cheese melts.
    • Double Pan Pizza is ready to serve.

    Notes

    Serve hot with Mexican Tomato Sauce.

    I have also posted My Favorite French Bread Pizza which is another easiest & tastiest version of making Pizza. Do check it out as well.


    Put your own spin on it. And lemme know how it turns out. Post a photo on Facebook (Recipestable) or  on Twitter so I can see how lovely yours turn out.


    Happy Pizza Making!!

    If you like this post, Please Subscribe to my blog and let me know your feedback by commenting below.. I have lots more recipes to share with you.

  • Recipe: Extra Easy Cupcakes

    Recipe: Extra Easy Cupcakes

    If you’re a cupcake making newbie, then this is the perfect starter recipe.  Simple and oh-so-delicious, these Extra Easy cupcakes make a lovely.You can change the ingredients of these easy cupcakes to match the occasion.

    Extra Easy Cupcakes recipe
    Extra Easy Cupcakes

    I mentioned a couple weeks ago that I’d be bringing you some new basic favorites and I started with a Banana Chocolate Loaf cake. Today, we are talking about these Extra Easy  cupcakes and I’m pumped! One of the things that I’m always messing with is vanilla cake or simple cupcakes. It’s the never ending quest for all the best versions.There are so many ways to vary a Simple cupcake and I want the best of all of them! I’m greedy like that. Plus, I know not every has the same idea of the perfect cupcake, so I like to have options.

    Extra Easy Cupcakes recipe
    Extra Easy Cupcakes

    So let’s talk a bit about these Extra Easy cupcakes. These cupcakes use butter and are lighter and super moist. We’ve got the usual suspects in this cupcake, starting with the dry ingredients: all-purpose flour, baking powder and salt. Easy, common ingredients that you should totally have in your pantry already. Mix ’em all together and set ’em aside.

    Next are the wet ingredients:butter, sugar, milk, vanilla extract and eggs. The butter is the fat component instead of vegetable oil and in my opinion, tends to make a more moist cake that stays moist for longer. Totally true for these cupcakes. The milk  adds to the structure of the cake, in addition to adding moisture. Milk adds fluff and I love some fluff.

    I used a teaspoon of vanilla extract to make sure there’s plenty of delicious vanilla flavor. Then the eggs add more moisture, structure and flavor. I switched it up in these and went with whole eggs instead of egg whites. No more egg yolks getting wasted here!

    Once the wet and dry ingredients are combined, the milk is added.

    Extra Easy Cupcakes recipe
    Extra Easy Cupcakes

    There’s so much moisture in these cupcakes! I love them! I’m a big, big fan of their ease of making, their flavor and moisture. They use such simple ingredients that you likely already have in your pantry too – score!

    Extra Easy Cupcakes recipe
    Extra Easy Cupcakes

    When topped with my favorite buttercream frosting, these vanilla cupcakes really are a dream! They were a big hit in our house and I hope you love them as much as we did!

    Perfect for offering as a snack, at tea time or as party food or any occasion. Exercise your creative muscle by decorating these cupcakes to suit your mood.Pipe the frosting onto the cupcakes for an extra special look.

    Bismillah, let’s begin!

    Check it out the Extra Easy Cupcakes Recipe and printable version below.

    Extra Easy Cupcakes Recipe

    If you’re a cupcake making newbie, then this is the perfect starter recipe.  Simple and oh-so-delicious, these Extra Easy cupcakes make a lovely.You can change the ingredients of these easy cupcakes to match the occasion.
    Course Dessert, Snack
    Prep Time 20 minutes
    Cook Time 25 minutes
    Total Time 45 minutes
    Servings 12
    Author Bushra Waheed

    Ingredients

    • 200 gm plain flour
    • 3 eggs
    • 200 gm butter
    • 200 gm sugar
    • 1 tsp baking powder
    • 1/2 tsp vanilla essence
    • 1/2 cup milk
    • 12 cupcases

    Instructions

    • Preheat oven to 325°F (180°C) and prepare a cupcake pan with liners.
    • Add the flour, sugar, baking powder and salt to a large mixer bowl and combine. Set aside.
    • In a medium bowl, cream butter with sugar. Then add eggs and beat well.
    • Add the wet ingredients to the dry ingredients and beat until well combined. Stir vanilla in it.
    • Slowly add the milkr to the batter and mix on low speed until well combined.
    • Scrape down the sides of the bowl as needed to make sure everything is well combined. Please note that the batter will be very thin.
    • Fill the cupcake liners about half way and bake for 15-17 minutes, or until a toothpick comes out with a few moist crumbs.
    • Remove the cupcakes from oven and allow to cool for 2 minutes, then remove to a cooling rack to finish cooling.Extra Easy Cupcakes are ready to serve.

    Notes

    Serve with tea or coffee.

    I have also posted Picnic Cupcakes Recipe  which is another easiest & tastiest version of making Cupcakes. Do check it out as well.


    Put your own spin on it. And lemme know how it turns out. Post a photo on Facebook (Recipestable) or  on Twitter so I can see how lovely yours turn out.


    Happy baking!!

    If you like this post, Please Subscribe to my blog and let me know your feedback by commenting below.. I have lots more recipes to share with you.

  • Chocolate Tea Biscuit Rolls Recipe

    Chocolate Tea Biscuit Rolls

    This Chocolate Tea Biscuit Rolls recipe is a kid and adult favorite. Chocolate covered Marie biscuits that are served with tea or coffee and used as a small snack. They are so good. Must try this Chocolate and Tea Biscuit Rolls recipe and give your feedback by commenting below.

    Chocolate Tea Biscuit Rolls Recipe
    Photo: Chocolate Tea Biscuit Rolls Recipe

    Chocolate Tea Biscuit Rolls Recipe
    Photo: Chocolate Tea Biscuit Rolls Recipe

    Chocolate Tea Biscuit Rolls Recipe
    Photo: Chocolate Tea Biscuit Rolls Recipe

    [divider]

    [one_fourth]Prep Time: 20 minutes[/one_fourth] [one_fourth]Cook Time: 2 minutes[/one_fourth] [one_fourth]Servings: 6 [/one_fourth] [one_fourth_last]Difficulty Level: Easy [/one_fourth_last]

    [divider]

    [tabs type=”horizontal”] [tabs_head] [tab_title]Ingredients[/tab_title] [tab_title]Nutrition[/tab_title] [/tabs_head] [tab]

    • 450 gram Marie biscuits, broke into small pieces
    • 200 gram butter
    • 1 -1/4 cup castor sugar
    • 1 cup milk
    • 1/2 cup coca powder
    • 4 teaspoon powder milk
    • 5 teaspoon thick cream

    [/tab] [tab]Yield: 6 servings

    Nutritional information is not yet available. [/tab] [/tabs]

    Directions:
    [tabs type=”horizontal”] [tabs_head] [tab_title]Step by Step Method[/tab_title] [tab_title]Recipe Note’s[/tab_title][tab_title]Serving Suggestions[/tab_title][/tabs_head] [tab]

    Step 1

    Melt butter in a small saucepan.

    Step 2

    Stir in the coca powder until it becomes a smooth mixture.

    Step 3

    In a separate bowl, cook and stir sugar and milk for 2-3 minutes (make sure it doesn’t boil).

    Step 4

    Now mix together both the mixtures.

    Step 5

    Stir in the milk powder and thick cream. Mix well.

    Step 6

    Now add broken biscuits and stir until well combined.

    Step 7

    Pour this mixture over an aluminum foil. Roll it tightly.

    Step 8

    Place it in the freezer for 6 hours or overnight.

    Step 9

    For serving cut into slices.

    Step 10

    Sprinkle some chocolate over it. Chocolate and Tea Biscuit Rolls are ready to serve. ENJOY!!

    [/tab][tab]

    • You can added walnuts or cashew nuts along with the biscuits and it turned out great.

    [/tab] [tab]

    • Serve with tea or coffee.

    [/tab] [/tabs]

    If you like Chocolate and Tea Biscuit Rolls Recipe  and make it then let me know your feedback by commenting below.

  • RECIPE: Crispy Chicken Kebab

    RECIPE: Crispy Chicken Kebab

    Instead of getting bored with simple kebab, try this crispy  chicken kebab recipe with refreshing mint flavor. Serve with ketchup or your other favorite dip and satisfy your taste buds. 

    [one_third] Prep Time: 15 minutes[/one_third] [one_third]Cook Time: 5 minutes[/one_third] [one_third_last] Servings: 5[/one_third_last]

     [tabs type=”horizontal”] [tabs_head] [tab_title]Ingredients[/tab_title] [tab_title]Nutrition[/tab_title] [/tabs_head] [tab]

    • 500 gm chicken mince
    • 2 egg whites, lightly beaten
    • 1 cup bread crumbs
    • 2 tbsp cornflour
    • 1 bunch mint leaves, finely chopped
    • 4 green chilies, finely chopped
    • 1 tsp black pepper, crushed
    • 1 tsp red chili
    • 2 tbsp seekh kebab spice
    • salt to taste
    • Oil for frying

    [/tab] [tab]Yield: 5 servings Nutritional information is not yet available. [/tab] [/tabs] Directions: [tabs type=”horizontal”] [tabs_head] [tab_title]Step by Step Method[/tab_title] [tab_title]Serving Suggestions[/tab_title][/tabs_head] [tab]

    1. Place chicken mince in a electric chopper.
    2. Add cornflour, green chilies, black pepper, red chili, seekh kebab spice and salt.
    3. Chop together.
    4. Then add mint leaves and mic well.
    5. Make kebabs out of the mixture.
    6. Dip each kebab in egg white then roll into bread crumbs.
    7. Heat oil in pan over medium high heat.
    8. Fry kebabs for 2 minutes on each side or until golden and crispy.
    9. Remove from the oil and drain on kitchen paper.
    10. Crispy Chicken Kebabs are ready now.

    [/tab] [tab]

    • Serve with chutney.

    [/tab] [/tabs]

  • Recipe: Spaghetti Balls

    Recipe: Spaghetti Balls

    Spaghetti Balls are easy and delicious. These balls are an interesting way to eat spaghetti and your little one won’t mess his or her clothes too! sweet corn make it more nutritious, while the cheese adds a rich, pleasing flavor. A Great snack for lunch and picnic. Enjoy with Chili Garlic Sauce or Tomato Ketchup. Try this Mouthwatering Spaghetti Balls  recipe.

    [one_third] Prep Time: 15 minutes[/one_third] [one_third]Cook Time: 5 minutes[/one_third] [one_third_last] Servings: 6 [/one_third_last]

    [review]

    [tabs type=”horizontal”] [tabs_head] [tab_title]Ingredients[/tab_title] [tab_title]Nutrition[/tab_title] [/tabs_head] [tab]

    For Spaghetti Balls:

    • 1-1/2 cups spaghetti, boiled
    • 1 cup thick white sauce
    • 1/2 cup sweet corn
    • 1 egg, lightly beaten
    • 3 tbsp grated cheese
    • 2 tbsp fresh coriander leaves, chopped
    • 3 green chilies, chopped
    • 1/2 tsp black pepper
    • 1/2 tsp salt
    • bread crumbs as required
    • oil for frying

    For White Sauce:

    • 1 cup milk
    • 2 tbsp butter
    • 1 tbsp plain flour, heaped
    • 1/2 tsp pepper
    • 1/2 tsp mustard powder
    • 1/2 tsp salt

    [/tab] [tab]Yield: 6 servings

    Nutritional information is not yet available. [/tab] [/tabs]

    Directions:
    [tabs type=”horizontal”] [tabs_head] [tab_title]Step by Step Method[/tab_title] [tab_title]Serving Suggestions[/tab_title][/tabs_head] [tab]

    1. Place boiled spaghetti and sweet corn in a large bowl.
    2. Also add white sauce, cheese, coriander leaves, green chilies, salt and pepper.
    3. Mix until well combined.
    4. Make small balls of the mixture.
    5. Dip spaghetti balls in beaten egg then roll in bread crumbs.
    6. Deep fry for 4-5 minutes or until golden brown.
    7. Remove from the oil and drain on an absorbent paper.
    8. Spaghetti Balls are ready to serve.
    9. ENJOY!!

    [/tab] [tab]

    • Serve hot with Chili Garlic Sauce.

    [/tab] [/tabs]

  • The Perfect Anytime Snack or Appetizer: Homemade Pizza Pockets Recipe!

    Homemade Pizza Pockets

    This week things are super crazy, so I decided to make a pizza pocket version. They are seriously so easy to make – and the perfect finger food!

    Bismillah, let’s get started!

    Check it out the Homemade Pizza Pockets Recipe and printable version below!

    Homemade Pizza Pockets Recipe

    Prep Time 40 minutes
    Cook Time 20 minutes
    Total Time 1 hour
    Servings 6
    Author Bushrah @ Recipestable

    Ingredients

    For Dough

    • 2 cups flour
    • 2 tbsp oil
    • 1 tsp instant yeast
    • 1/2 tsp sugar
    • 1/4 tsp salt

    For Filling

    • 1 cup Mozzarella cheese grated
    • 1 cup chicken tikka shredded
    • 1 capsicum cut into cubes
    • 1 to mato cut into cubes
    • 1 onion cut into cubes
    • 1 tsp oregano leaves

    Instructions

    • In a bowl, combine together flour, salt, sugar, Instant yeast and oil.
    • Knead a soft dough with lukewarm water.
    • Leave it to rise for 30 minutes.
    • Preheat oven to 200 degree C.
    • Grease a pizza pan with butter.
    • Divide pizza dough into 3 equal portions.
    • Roll pizza dough into 3 circles size of a quarter plate.
    • On one half of each circle sprinkle cheese, tomato, onion, capsicum and shredded chicken Tikka.
    • Sprinkle oregano over it.
    • Top with grated cheese.
    • Brush the edges of each pizza base with oil.
    • Fold the plain half over to form a semi circle.
    • Press the edges firmly.
    • Place pizza pockets on greased pizza pan.
    • Brush with oil.
    • Bake for 20 minutes or until golden brown.
    • Cut into half.
    • Pizza Pockets are ready to serve.

    Notes

    Serving Suggestions:
    Serve with Chili Garlic sauce.
     

    I have also posted Homemade Pizza Rolls Recipe which are another easiest & tastiest version of making Pizza at home. Do check it out as well.  It’s finger lickin’ good. You’ll be coming back for more. 


    Put your own spin on it. And lemme know how it turns out. Post a photo on Facebook (Recipestable) or  on Twitter so I can see how lovely yours turn out.


    Happy Dinner Making!!

  • The Tastiest Zinger Burger Recipe to Try at Home

    The Tastiest Zinger Burger Recipe to Try at Home

    Can you resist a tempting, crispy, juicy burger? Well I can’t, for sure. May it be chicken, veggie or fish, bring it on baby. 

    Homemade Tastiest Zinger Burger Recipe
    The Tastiest Zinger Burger Recipe to Try at Home

    Zinger Burger

    Zinger Burger is a heart favorite fast food of all ages people especially kids love it. Oh yes, that zinger that makes us drool ..How the HELL do they make it ? Well, here’s the solution mates. Now you can make this versatile burger at home with this easy zinger burger recipe. Just follow My recipe to make these delicious all time favorite burgers.

    A thing of beauty, joy forever! This is pure joy, alhumdulillah!

    The Tastiest Zinger Burger Recipe to Try at Home
    The Tastiest Zinger Burger Recipe to Try at Home
    The Tastiest Zinger Burger Recipe to Try at Home
    The Tastiest Zinger Burger Recipe to Try at Home

     I have given a lot of zinger burger recipes a try but this one seemed to click. Because, it was quick, easy and oh-so perfect! Enough said, let’s make some burgers.

    The Tastiest Zinger Burger Recipe
    The Tastiest Zinger Burger Recipe to Try at Home
    The Tastiest Zinger Burger Recipe to Try at Home
    The Tastiest Zinger Burger Recipe to Try at Home
    The Tastiest Zinger Burger Recipe to Try at Home
    The Tastiest Zinger Burger Recipe to Try at Home

    Please your family with homemade Zinger Burger. You may enjoy this crispy zinger burger with Coleslaw salad any time of the day especially at evening.

    Bismillah Let’s get started!

    Ingredients in Zinger Burger?

    How to make The Tastiest Zinger Burger at Home (step by step instructions):

    The Tastiest Zinger Burger Recipe to Try at Home
    Ingredients You need to make the Tastiest Zinger Burger at Home

    Check it out the Zinger Burger recipe and printable version below!!

    Zinger Burger Recipe

    Prep Time 30 minutes
    Cook Time 15 minutes
    Total Time 45 minutes
    Servings 4
    Author Bushra Waheed

    Ingredients

    For Chicken Marination

    • 4 boneless skinless chicken breast flattened
    • 3 tablespoon white vinegar
    • 2 tablespon mustard paste
    • 1 teaspoon red chili crushed
    • 1 teaspoon garlic powder
    • Salt to taste

    For Coating

    • 3 eggs lightly beaten
    • 1 cup rice flour
    • 1 cup corn flour
    • 1/2 cup white plain flour
    • 2 tablespoon chicken powder
    • 1 teaspoon black pepper
    • 1/4 teaspoon white pepper
    • 1/2 teaspoon baking powder
    • oil for frying

    Other ingredients

    • 1 cup mayonnaise
    • 4 burger buns
    • salad leaves as required

    Instructions

    Method

    • Flatten chicken breast with a kitchen hammer.
    • Put them in a large mixing bowl.
    • Add mustard paste, white vinegar, salt, red chilli and garlic powder. Turn to coat evenly.
    • Cover and marinate for 30 minutes to blend flavors.
    • In a small bowl, Mix together the mayonnaise and mustard paste. Set aside.
    • Meanwhile, Take a large bowl, combine together the rice flour, corn flour, white flour, black pepper, white pepper, chicken powder, baking powder, garlic powder and salt. Keep aside.
    • Beat eggs in a small bowl.
    • First, coat the marinated chicken with flour mixture. Then dip in eggs and again repeat this process.
    • Heat oil in a large pan or skillet over medium heat. Deep fry Chicken for 5 minutes then put the lid on and cook anoher 5-8 minutes or until chicken is cooked thorough and turn golden brown.
    • Remove from oil and keep warm.
    • Cut the burger buns in half. Hot a non-stick griddle over medium heat. Toast or warm the burger buns on it.
    • Spread mayo sauce on the burger bun then put fried chicken on it. Again spread mayo sauce on it. Top with lettuce or salad leaves. Cover with the other half of the bun. Delicious Zinger Burger is ready to serve.

    Notes

    Serving Suggestions:
    Serve hot with french fries or coleslaw salad.

    Put your own spin on it. And lemme know how it turns out. Post a photo on Facebook (Recipestable) or  on Twitter so I can see how lovely yours turn out.

    Happy Cooking!!

    [divide icon=”circle”]

    If you like this Zinger Burger recipe, Please Subscribe to my blog. I have lots more recipes to share with you. And If you make it then let me know your feedback by commenting below.

    [divide icon=”circle”]

  • Easy Barbecue Chicken Pita Pizzas (20 Minutes!)

    Easy Barbecue Chicken Pita Pizzas (20 Minutes!)

    Barbecue Chicken Pita Pizzas

    Barbecue Chicken Pita Pizzas
    Barbecue Chicken Pita Pizzas

    I Love Pizza.But I never buy frozen pizza.Why?? Because I have found several alternative options that are fresher, tastier, healthier, and often cheaper than frozen grocery store pizza. Pita bread pizza is one of those options.

    Using Pita Bread As Pizza Crust

    There are typically many different kinds and brands of pita bread in the grocery store. It’s a cheap food item that can be used in many different ways, from making sandwiches, wraps to homemade pita chips.

    I made these Pita Pizzas on a rainy Sunday Evening. You know those weekends when you’re feeling slightly lazy, but still want a homemade meal, and something that is special, but not too much work? Anyone with me? Well, it was one of those days and this simple Barbecue Chicken Pita Pizzas recipe came in really handy especially with ready made pita bread (or you could make your own).

    Barbecue Chicken Pita Pizzas Recipe
    Photo: Barbecue Chicken Pita Pizzas

    Indulge your love for pizza with these Pita pizza’s!! If you prefer a crisp pizza crust, heat the pita bread in the oven for a few minutes before adding toppings. The pizzas in the photo above are topped with tomato sauce, tomato, mushrooms, onion,green pepper, Barbecue Chicken, and cheese.

    Let’s get started !

    Ingredients you will need:

    1. pita bread
    2. BBQ Chicken(Tikka)
    3. Cheddar Cheese
    4. Barbecue Sauce
    5. Green Chilies
    6. Mushrooms
    7. Tomato
    8. Green Pepper
    9. Onion

    Bismillah, let’s begin!

    Check it out the Barbecue Chicken Pita Pizzas recipe and printable version below!!

    Barbecue Chicken Pita Pizzas

    An easy to make BBQ flavor pizza recipe with chicken and barbecue sauce; top with lots of cheese , mushrooms and veggies. Enjoy the tangy taste of this pita pizzas. Simple and Flavorful. 
    Prep Time 5 minutes
    Cook Time 10 minutes
    Total Time 15 minutes
    Servings 4
    Author Bushra | Recipestable

    Ingredients

    • 4 6 inches each pita bread
    • 1 cup cooked chicken cubed
    • 1 cup shredded cheddar cheese
    • 1/2 cup barbecue sauce
    • 1 can 4 ounces chopped green chilies
    • 1 can 4 ounces mushroom stems and pieces, drained
    • 1 small tomato chopped
    • 1 green pepper chopped
    • 1 small onion chopped

    Instructions

    Method

    • Place pita breads in a baking sheet. Spread barbecuePizza sauce over the pitas.
    • Place chicken over them.
    • Sprinkle with cheese.
    • Top with tomato, onion, green pepper, chilies and mushrooms.
    • Bake at 450 degree F, for 10 minutes or until cheese is melted and heated through.
    • Remove from the oven and cut into wedges. Barbecue Chicken Pita Pizzas are ready to serve. ENJOY!!

    Notes

    Serving Suggestions:
    Serve with ketchup or chili garlic sauce.

    Other Alternative Pizza’s

    If you feel like you need more pizza in your life (who doesn’t?) and are open to alternative options, try this recipe or check out these posts:

    If you like this Barbecue Chicken Pita Pizzas Recipe, Please Subscribe to my blog. I have lots more recipes to share with you. And If you make it then let me know your feedback by commenting below.

  • Mayo Potato Chicken Cutlets Recipe

    Mayo Potato Chicken Cutlets Recipe

    Mayo Potato Chicken Cutlets

    These Mayo Potato Chicken Cutlets will make a delicious appetizer, snack or a perfect meal for lunch box or picnic basket. Give it a try!!

    Mayo Potato Chicken Cutlets  Recipe
    Photo: Mayo Potato Chicken Cutlets Recipe

    Check it out the Mayo Potato Chicken Cutlets Recipe here!!

    [divider]

    [one_fourth]Prep Time:15 minutes[/one_fourth] [one_fourth]Cook Time:10 minutes[/one_fourth] [one_fourth]Servings:6 [/one_fourth] [one_fourth_last]Difficulty Level: Easy[/one_fourth_last]

    [divider]

    [tabs type=”horizontal”] [tabs_head] [tab_title]Ingredients[/tab_title] [tab_title]Nutrition[/tab_title] [/tabs_head] [tab]

    • 250 gm boiled chicken
    • 2 boiled potatoes , mashed
    • 2 green bell pepper, chopped
    • 2 green chilies, chopped
    • 1 egg
    • 1 cup bread crumbs
    • 1/2 cup mayonnaise
    • 2 tbsp corn flour
    • 1/4 tsp black pepper
    • salt to taste
    • Oil for shallow frying

    [/tab] [tab]Yield: 6 servings

    Nutritional information is not yet available. [/tab] [/tabs]

    Directions:
    [tabs type=”horizontal”] [tabs_head] [tab_title]Step by Step Method[/tab_title] [tab_title]Serving Suggestions[/tab_title][/tabs_head] [tab]

    Step 1

    Place mashed potatoes and chicken in a bowl. Mix until well combined.

    Step 2

    Add green chilies, corn flour, capsicum and mayonnaise. Season with salt and pepper. Mix well.

    Step 3

    Shape into small cutlets.

    Step 4

    Dip each cutlet in beaten egg then roll in fresh bread crumbs.

    Step 4

    Turn to coat evenly.

    Step 5

    Heat oil in a frying pan over medium heat. Shallow fry cutlets on each side for 2 minutes or until golden brown.

    Step 6

    Remove from the oil and drain on paper towel. Mayo Potato Chicken Cutlets are ready to serve. ENJOY!!
    [/tab] [tab]

    • Serve with Chili Garlic Sauce.

    [/tab] [/tabs]
    If you like Mayo Potato Chicken Cutlets recipe and make it then let me know your feedback by commenting below.And if you know more innovative ways in which we can utilize this mouth watering Mayo Potato Chicken Cutlets , do share with us and we would be glad to give it a try.

  • Chocolate Cake In Sandwich Maker

    Chocolate Cake In Sandwich Maker

    How about a fun new recipe to celebrate the Month Of Ramadan? Have you ever thought of making a chocolate cake in sandwich maker?

    You dont have oven? No problem but still you can make cakes.

    You dont like pressure cooker cake?..Dont worry this recipe is for you.

    You dont know how to bake cakes without oven?? Trust me this Chocolate cake recipe is for you.

    You  have a sandwich maker and don’t know how to make use of it??

    Dont worry after going through this post, I am sure you will use your sleeping sandwich maker at least once or twice a week.

    Photo: Chocolate Cake In Sandwich Maker
    Photo: Chocolate Cake In Sandwich Maker

    A pillowy, softy cake with sandwich maker,yes you can make it with less efforts and with usual ingredients, you can make some spongy triangle cakes for your Iftar Party, or for Brunch or for an evening snacks with a sandwich maker. 

    Just prepare the cake batter and cook it with your sandwich maker, sounds very easy.I was hearing about this sandwich maker cake for some time so I thought, why not give it a try?? I tried at home with my sandwich maker and they came out extremely spongy, soft and very fluffy.A perfect delicious treat to satisfy your sweet cravings without spending too much time in the kitchen 🙂

    Chocolate Cake In Sandwich Maker
    Chocolate Cake In Sandwich Maker

    This cake was so easy & quick to make & the taste was something between a fluffy pancake and a cake.My Family loved having this triangle Chocolate Cakes for our snacks drizzled with honey, dates syrup, honestly we have fallen in love with these easy cakes. One of the easy breezy cake i have ever prepared earlier, loved the simplicity of this dish.

    Really I should stop praising and tell you the recipe. So Let’s get started !

    Tools You needed to make this recipe are:

    1. A Sandwich Maker
    2. A Mixing bowl
    3. A Spatula
    4. A Hand beater

    Check it out the Chocolate Cake In Sandwich Maker recipe and printable version below!!

    Chocolate Cake In Sandwich Maker

    Have you ever thought of making a cake in a sandwich maker? It is so easy and quick that just takes a few minutes to cook.
    Prep Time 10 minutes
    Cook Time 10 minutes
    Total Time 30 minutes
    Servings 12
    Author Bushra

    Ingredients

    • 2 cups plain flour
    • 2 tablespoon coco powder
    • 1-1/2 teaspoon baking powder
    • 4 eggs
    • 1 cup butter or oil
    • 1 cup caster sugar
    • 1 teaspoon vanilla essence
    • 1/4 cup milk

    For Serving

    • vanilla ice cream
    • chocolate syrup
    • fruit of your choices

    Instructions

    • In a large bowl, Cream butter with sugar.
    • Now add eggs and beat well.
    • Sieve flour, baking powder and cocoa powder in another bowl.
    • Now fold dry ingredients into the egg mixture.
    • Stir in the 1/4 cup of milk and then whisk it well.
    • Meanwhile, Preheat your sandwich maker and brush with oil.
    • Once maker gets hot, Spoon enough batter to the sandwich maker.
    • Close it and cook for 3-4 minutes or until the green light of the sandwich maker appears.
    • Remove the cooked cake from the maker and repeat the same process with remaining batter.
    • Delicious Chocolate Cake is ready to serve.

    Notes

    Serving Suggestions:
    You can serve it with chocolate syrup.
    You can also have them just dusted with confectioner’s sugar.
    Adapted from Recipestable

    Recipe Note’s:

    1. Check after 3 minutes with a toothpick, if the tooth pick comes out clean, it’s ready. If not, cook a little longer, checking after every minute. 
    2. They are best eaten right away. But you can make them in advance too, just microwave for a minute or so until warm.

    You MUST try this Chocolate Cake In Sandwich Maker Recipe  and let me know what you think! Post a photo on Facebook (Recipestable) or  on Twitter so I can see how lovely yours turn out.

    Happy Baking!

    If you like this Chocolate Cake In Sandwich Maker Recipe , Please Subscribe to my blog. I have lots more recipes to share with you. And If you make it then let me know your feedback by commenting below.