Tag: Baking

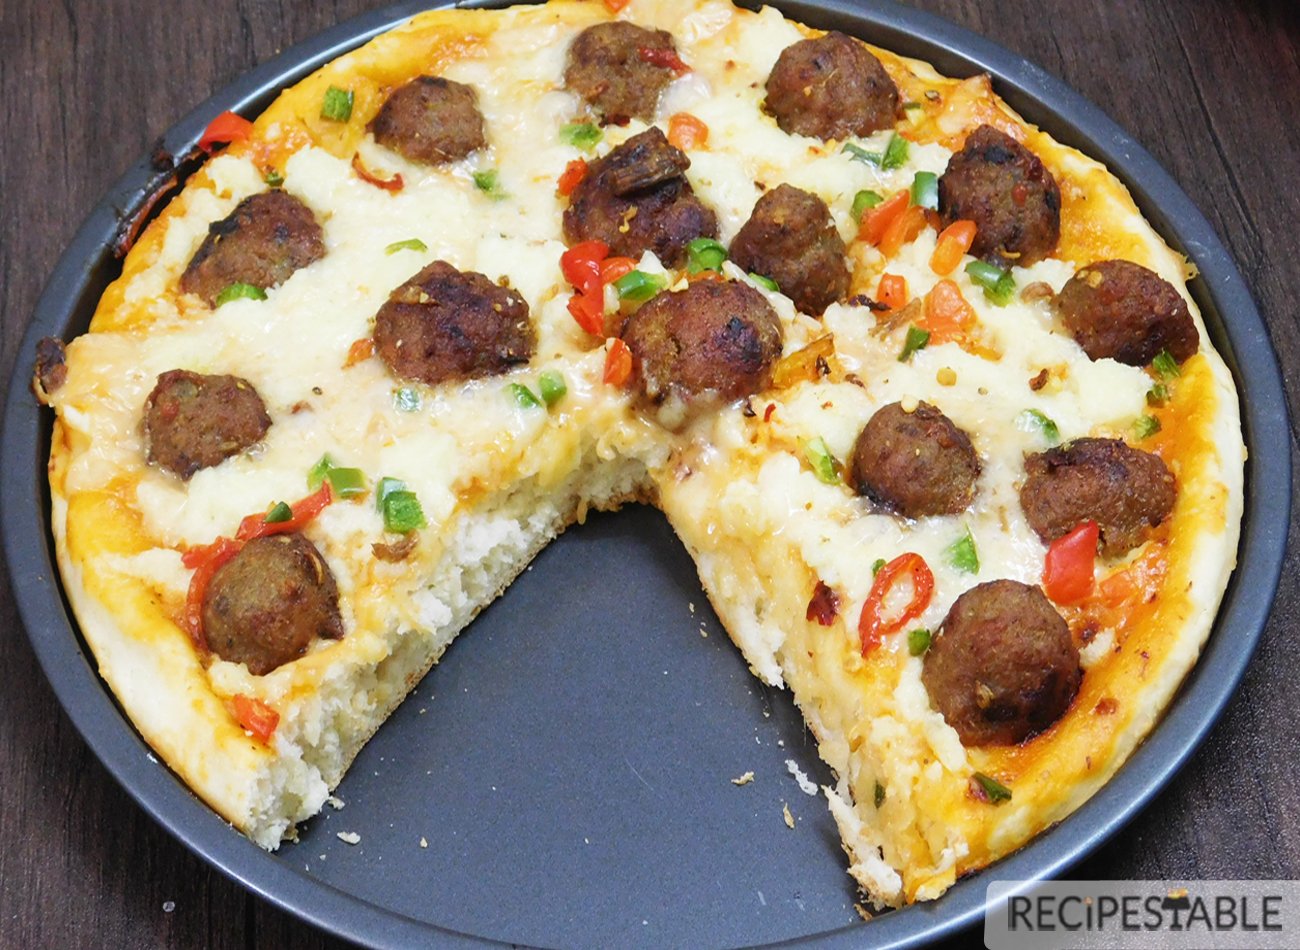
  • The Best Meatball Pizza Recipe

    The Best Meatball Pizza Recipe

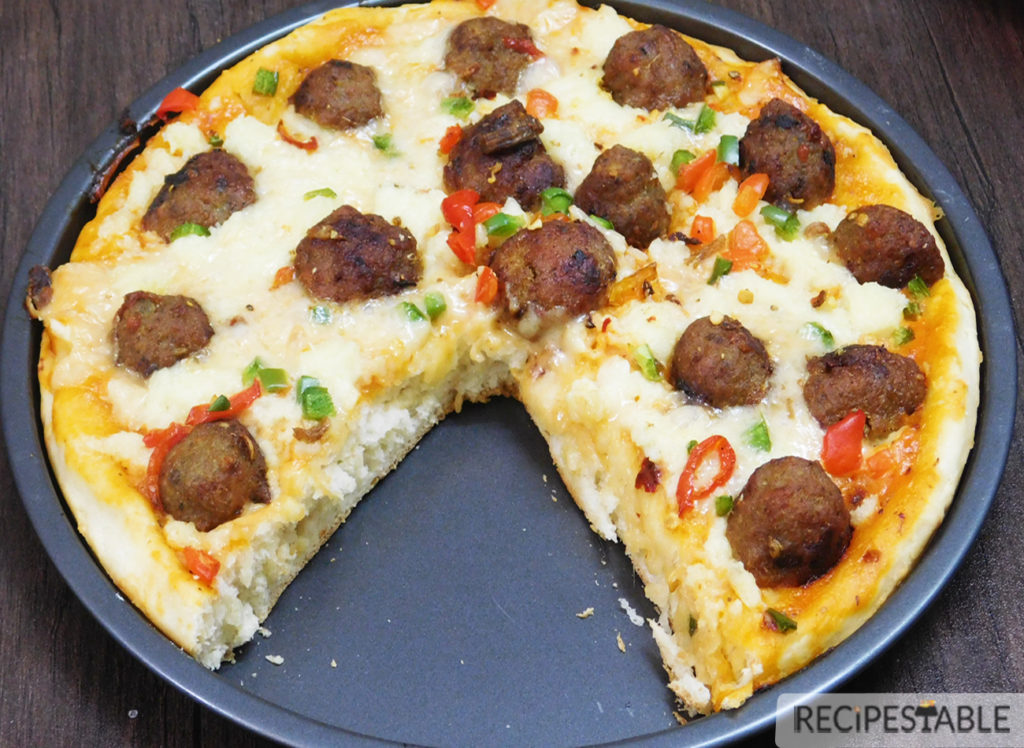
    This meatball pizza, made with a secret sauce, mozzarella cheese, and the surprise element of juicy chicken meatballs piled atop pizza dough, takes homemade pizza to a whole new and indulgent level. That’s better than takeout.

    The Best Meatball Pizza Recipe

    Chewy crust, spicy sauce, meatballs and plenty of melted cheese? Ummmm…. yes, please.

    The Best Meatball Pizza Recipe
    The Best Meatball Pizza Recipe

    Pizza is always a winner in our house and cheesy meatballs are definitely comfort food around here, so we threw together a super easy, super cheesy meatball pizza. Make a big batch of meatballs and freeze in portions along with this fresh pizza dough recipe so you’ll have meatball pizzas ready to go when you want them.
    The Best Meatball Pizza Recipe
    The Best Meatball Pizza Recipe

    You can use frozen meatballs to save on time but you will have to adjust points accordingly, I prefer to make my own and I added a little pizza flare to mine.

    How do you make Meatball Pizza?

    1. A pizza pan is rubbed with a little bit of oil. Pizza dough is spread into the pan, poked with a fork. Then spread prepared sauce over it.
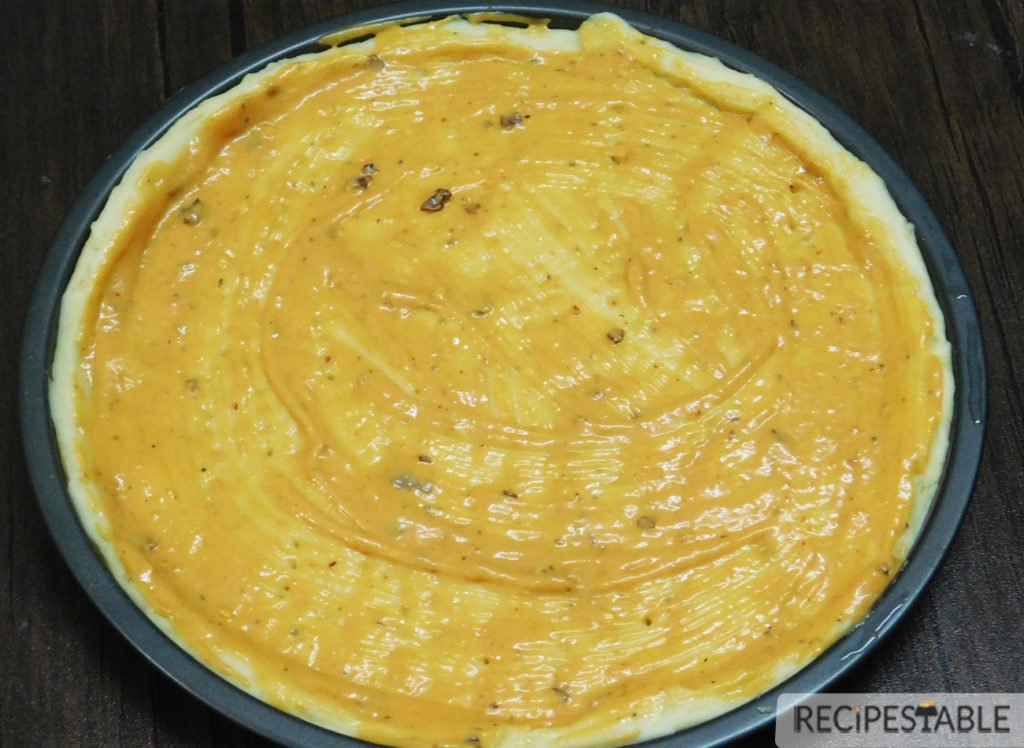
    Spread pizza sauce over the dough

    2. The topping is assembled by cooking the meatballs in a hot pan.
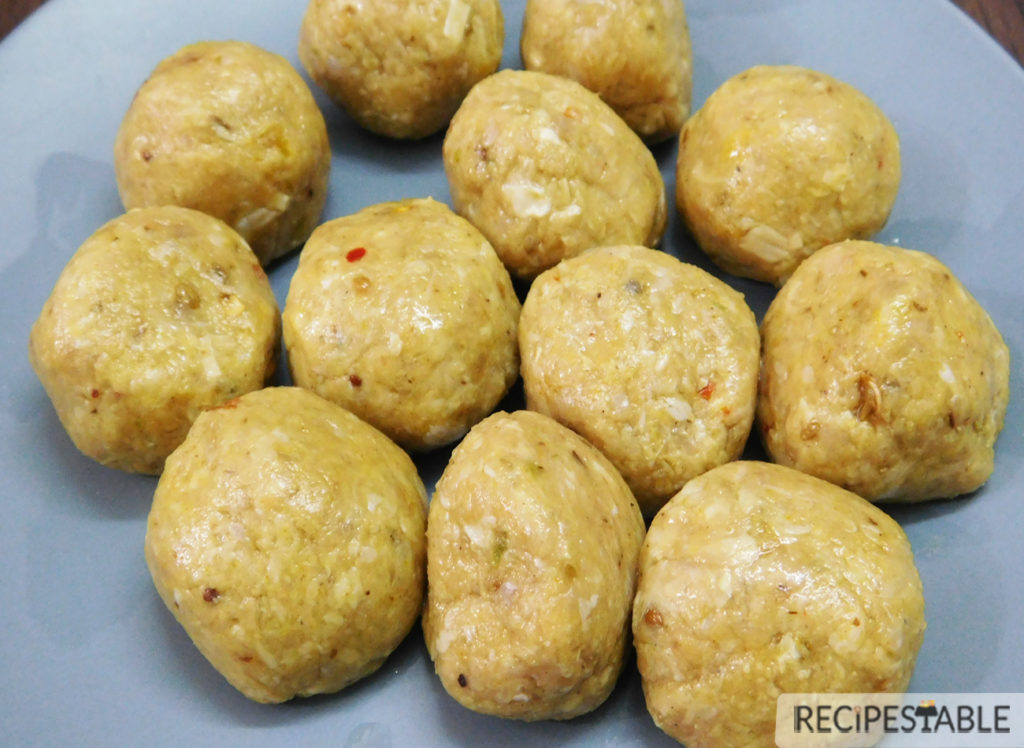
    The Best Meatball Pizza Recipe
    Meatballs 🙂

    3. Then pizza dough is topped with the cheddar cheese, meatballs, red and green bell pepper and a generous portion of mozzarella cheese.
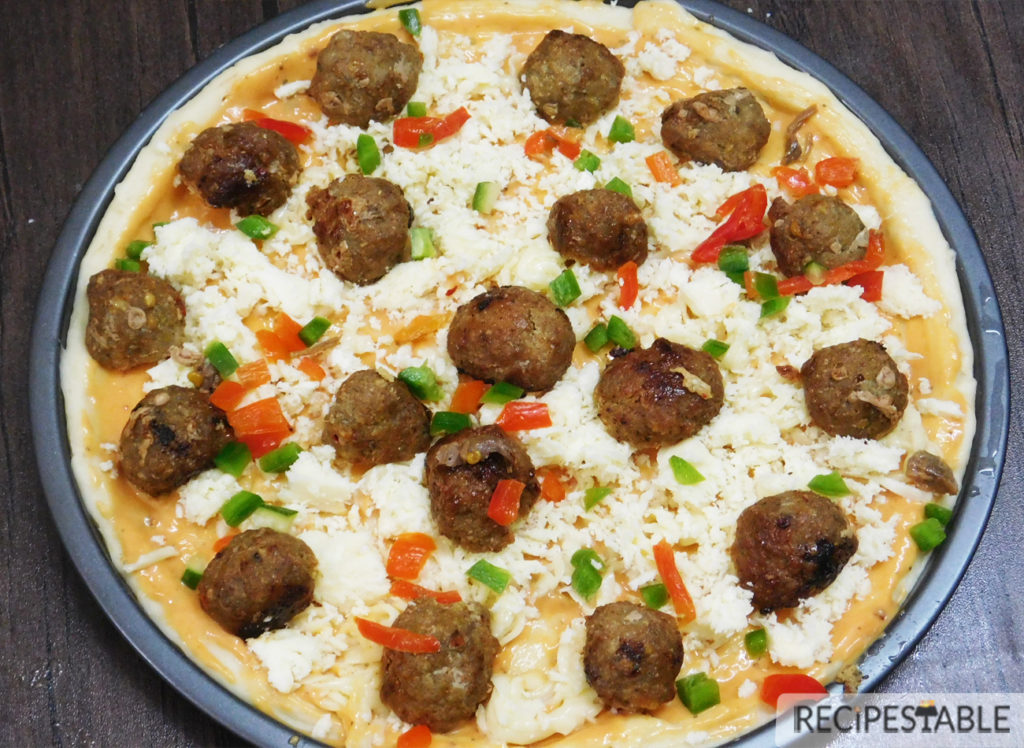
    The Best Meatball Pizza Recipe
    Meatball Pizza ready to go in the oven!!

    4. Then baked in the preheated oven until the cheese is golden and crust is cooked! Remove from the oven and cut into the wedges. ENJOY 🙂
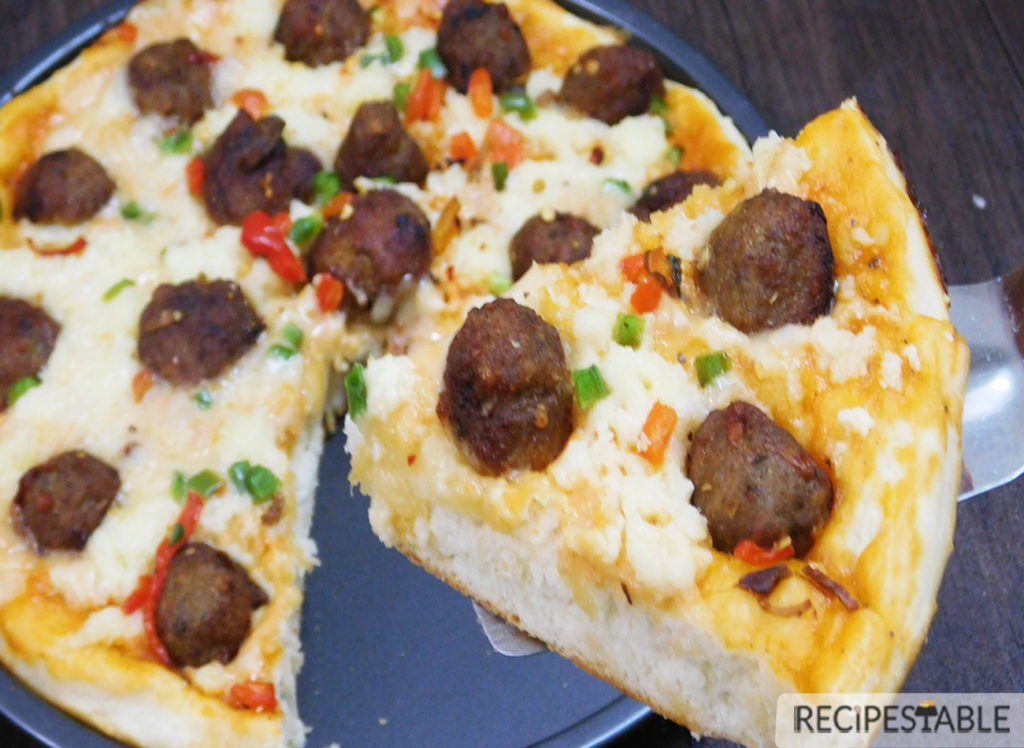
    The Best Meatball Pizza Recipe
    The Best Meatball Pizza Recipe

    Where is the best place to buy Pizza dough?

    1. Most markets have some sort of pizza dough that they sell.  You’ll probably be able to find the kind of pizza dough in the can (not my favorite), and some will offer it in a little plastic baggie (probably a better product and likely more fresh).
    2. I do have a tip for the best place to buy pizza dough.  Most pizza restaurants will likely be willing to sell you a ball of their pizza dough.  Just ask!  That’s going to be your best bet for good pizza dough!
    3.  You can also make your own. I have good recipe for Easy Pizza Dough.

    What are the best toppings for pizza?

    1. If you’re a meat lover, you’ll most likely enjoy some sort of meat lover’s pizza like this Meatball Pizza!  BBQ Chicken Pizza is my another favorite. 
    2. And my personal choice for pizza topping is Bell Peppers, Olives and Pineapple.  Chicken Chunks, Sausage are also popular pizza toppings ( but I don’t like it that much).
    3. Some people like to add olives, corn, goat cheese, spinach and more.  The possibilities are endless!

    It’s pretty likely that everyone in your family will enjoy this Meatball Pizza.  It’s a nice, quick and easy dinner for those nights that are crazy!

    Bismillah let’s get started.
    Check it out The Best Meatball Pizza Recipe and printable version here!!

    The Best Meatball Pizza Recipe

    Instead of ordering pizza tonight, try this perfectly pleasing meatball pizza recipe! Great for light dinner or go-with — so simple! So delish!
    Keyword 30 minutes meals, Baking, cheese, chicken mince, Dinner, meatball, Pizza, Quick and Easy
    Prep Time 10 minutes
    Cook Time 25 minutes
    Total Time 35 minutes
    Servings 4
    Author Bushra Waheed

    Ingredients

    For The Meatballs:

    • 500 gm chicken mince
    • 1 bread slice crust removed
    • 1/3 cup warm water
    • 1 large egg white lightly beaten
    • 1 tsp chopped garlic
    • 1 small garlic clove minced
    • 1 tsp onion powder
    • 1 tbsp fresh parsley chopped
    • 1 tbsp fresh basil chopped
    • 1 tsp red pepper crushed
    • freshly ground black pepper to taste
    • salt to taste
    • oil for frying

    For the Meatball Pizza:

    • 1 pound homemade pizza dough for recipe click here
    • 12 meatballs halved and thawed
    • 1/4 cup pizza sauce
    • 2 tbsp mayonnaise
    • 1 cup Mozzarella Cheese shredded
    • 1/4 cup cheddar cheese
    • 1 small green pepper chopped
    • 1 small red pepper chopped
    • few fresh basil optional
    • a pinch of crushed red pepper to add a extra kick
    • and/or other toppings of your choice

    Instructions

    To Make The Meatballs:

    • In a bowl, combine the bread and water. Let stand, turning the bread occasionally to thoroughly moisten it, for 10 minutes.
    • Squeeze the bread gently to remove most of the water.
    • Discard the water. Tear the bread into 1-inch chunks and toss them into a large bowl.
    • Add the chicken mince, ginger, garlic, onion powder, parsley, basil, egg white, red pepper, 1/4 teaspoon salt, and black pepper to taste.
    • Mix thoroughly with moistened hands.
    • Shape the meat mixture into 12 mini balls.
    • Place the meatballs on the lined sheet, cover with plastic wrap, and refrigerate for at least 2 hours or up to overnight.
    • Now heat oil in a frying pan over medium heat and cook meatballs for 6-8 minutes or until golden, flip and cover the pan fry additional 5 minutes to cook from inside(make sure not to over cooked).
    • Remove meatballs from the oil and drain on kitchen paper.
    • Let the meatballs cool slightly and then cut each one in half.
    • Set aside.

    To Prepare the Sauce:

    • In a small bowl, mix together the pizza sauce, mayonnaise, basil and a pinch of crushed red pepper. Set aside.

    To Assemble The Meatball Pizza:

    • Preheat the oven at 180 degre C or 425 F.
    • Drizzle a round pizza pan or a rectangular baking sheet with olive oil or non-stick spray.
    • On lightly floured surface, roll out pizza dough into a 12-inch circle, with a rolling pin.
    • Spread bases evenly with prepared pizza sauce. Scatter evenly with cheddar cheese.
    • Top with meatballs halves and pressing lightly into base. Scatter evenly with Mozzarella cheese.
    • Top with chopped green and red bell pepper.
    • Bake 25 minutes or until the crust is crisp and golden and the cheese is hot and bubbly.
    • Let pizza sit for a few minutes then cut into 4 slices.
    • Delicious Meatball Pizza is ready to serve.
    • ENJOY 🙂

    Notes

    Serve with salad mix.

    Some Useful Tips & Hints:

    1. For make-ahead meatballs, you can make the meatballs up to the end of step 1 and freeze them layered between baking paper in an airtight container. Store them for up to 2 months. Defrost in the fridge overnight and continue recipe from step 2.
    2. Chicken mince is easily available at major supermarkets or local butchers.
    3. Use a store-bought pizza base for quicker version.
    4. You can add your favorite herbs and spices for a spicy version.

    Want more Pizza Inspiration? 

    Here are some other pizza recipes on my blog:

    If you’re looking for more easy, family friendly dinner ideas, you might also enjoy my The Best and Easiest Spaghetti Meatballs Recipe or this Butter Chicken Pasta,  Homemade Lamb Burgers and Keema Macaroni are also fun recipes for the family!

    Put your own spin on it. And lemme know how it turns out and do take a few seconds to rate it! I would love to see your recreations so tag me on instagram @recipestable or Facebook (Recipestable) or on Twitter so I can see how lovely yours turn out.
  • The Best Stuffed Chicken Buns Recipe You Will Ever Make

    The Best Stuffed Chicken Buns Recipe You Will Ever Make

    There’s nothing like Stuffed Chicken Buns: perfectly baked ,soft, warm buns stuffed with hot savory chicken filling. You’ll amaze your family and friends with my easy to make “stuffed chicken buns recipe”.

    Stuffed Chicken Buns

    Breads & Buns are one of my favorite things to make and with this Stuffed Chicken Buns recipe it’s really simple to make that you cannot go wrong with this and tastes delicious. They’re so easy to make, and the possibilities are endless! You can stuffed with ground beef, mutton, chicken, cheese or mushrooms for a healthier option. Even if you don’t eat meat, you can make a great-tasting veggie buns! Whatever it is you’re craving, you can satisfy it with it a stuffed bun!

    Stuffed Chicken Buns

    Why I like these Stuffed Chicken Buns?

    I love all breads but I have a special soft corner for stuffed buns and bread rolls. It makes for sumptuous snacks and the possibilities are endless. Stuffed buns are my favorite gateway to finish up leftovers and clear out the refrigerator. Though I did not use leftovers for this one since I had guests over but feel free to go where your imagination takes you.

    On the outside, these golden buns resemble ordinary dinner rolls. But one bite reveals the tasty filling inside! You know that saying: It’s not what is outside but its what is inside that counts? Yeah, well its kind of the case here. Only that the outside is just as good. Soft and fluffy Stuffed Chicken buns with the most unexpected surprise ever!
    Most scrumptious Cheesy Chicken filing!

    I just love it when something looks so innocent and unassuming and then when you bite into it! Hits you with an unexpected but most pleasant burst of flavor.

    Stuffed Chicken Buns Recipe
    Stuffed Chicken Buns Recipe

    Ingredients in Stuffed Chicken Buns Recipe?

    • For Dough:  flour, dry milk powder, sugar, yeast, salt, egg, oil, warm milk
    • Creamy Chicken Filling: boiled chicken shredded, butter, onion, plain flour, milk, Cheddar Cheese, black pepper, red pepper, salt , few coriander and mint leaves.
    • For Buns Topping: Egg white, sesame seeds for sprinkling, melted butter for brushing
    Stuffed Chicken Buns

    How to Bake Perfect Stuffed Chicken Buns every time!

    Stuffed Chicken Buns
    1. Dough: These stuffed buns are an easy bake with only a single rise needed for the dough. That makes it a comparatively quicker snack. When making anything with yeast, including these buns, let the dough rise to the point the recipe says it should, e.g., “Let the dough rise till it’s doubled in bulk.” Rising times are only a guide; there are so many variables in yeast baking (how you knead the dough; what kind of yeast you use) that it’s impossible to say that bread dough will ALWAYS double in bulk in a specific amount of time.
    2. Stuffing: They prepared a cheesy chicken filling and stuff into these soft buns and life will be so much simpler for you. You can fill up your buns with lots of different things. I like to add some mushrooms and olives to mine, but you can use any kind of vegetables, meat stuffing you prefer! Pizza sauce would be another great addition. Or throw in some fresh herbs. Oh, the possibilities are endless!
    3. Shaping: Shape them as per your liking and bake. For slightly smaller buns, divide the dough into 12 pieces instead of 10. Bake the buns for 12 to 15 minutes, instead of 15 to 18 minutes. And how about “slider buns” — about 3″ in diameter? Divide the dough into 24 pieces, and bake for 12 to 15 minutes. Proceed with the recipe as written.
    4. Alternative way of Shaping: What’s another easy way to shape buns, besides rolling them into balls and flattening? Gently deflate the dough, and form it into a smooth 8″ log. Slice the log as though you were slicing cinnamon buns. Gently pull each slice into a circle.
    5. Brushing: Brushing buns with melted butter will give them a soft, light golden crust. Brushing with an egg-white wash (1 egg white beaten with 1/4 cup water) will give them a shinier, darker crust. For seeded buns, brush with the egg wash; it’ll make the seeds adhere. And, feel free to add the extra yolk to the dough, reserving the white for the wash.
    stuffed chicken buns recipe
    stuffed chicken buns recipe

    And serve with your favorite dips and sauces.

    Stuffed Chicken Buns

    Double Up and Freeze a Batch:

    I highly recommended freezing a batch of these after they’ve cooled so you can pop them into the oven for a fast, warm breakfast or as side for dinner that will delight your fellow tablemates.

    Stuffed Chicken Buns

    Bismillah let’s get started.
    Check it out The Stuffed Chicken Buns Recipe and printable version here!!

    Other versions of this Stuffed Buns:

    I’ve shared some of the tastiest buns recipes out there for you to enjoy…check them out!

    Want more Bread Inspiration? 

    Here are some other Bread or Buns recipes on my blog:

    Pin it For Later

    Pin it for Later ~ Stuffed Chicken Buns

    Put your own spin on it. And lemme know how it turns out and do take a few seconds to rate it! I would love to see your recreations so tag me on instagram @recipestable or Facebook (Recipestable) or on Twitter so I can see how lovely yours turn out.

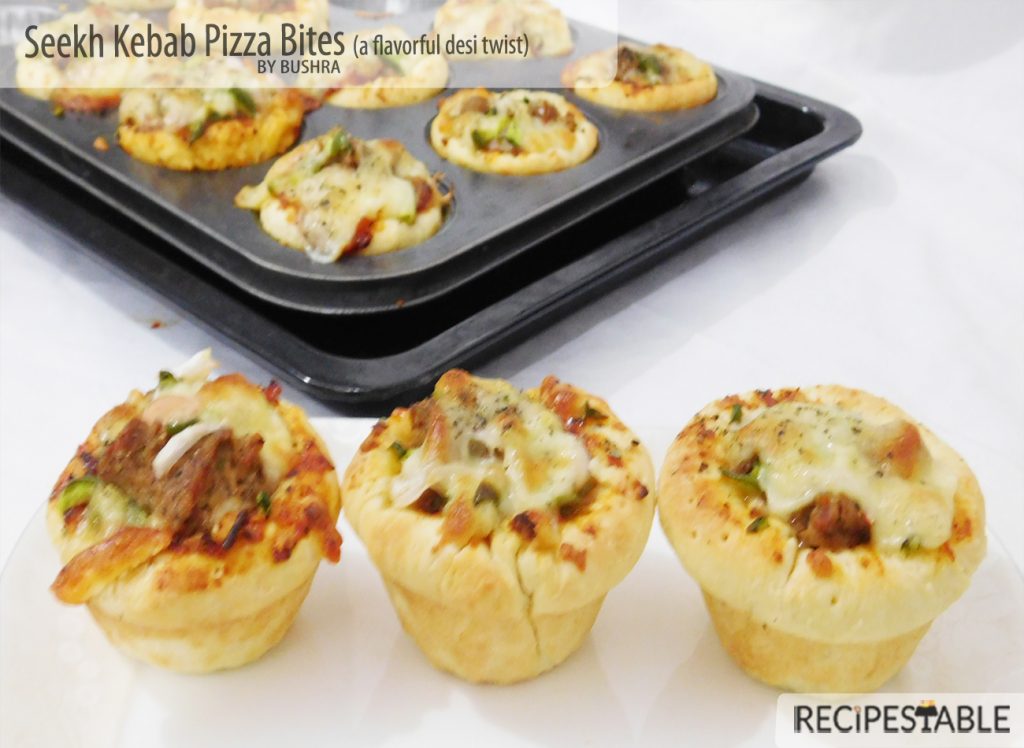
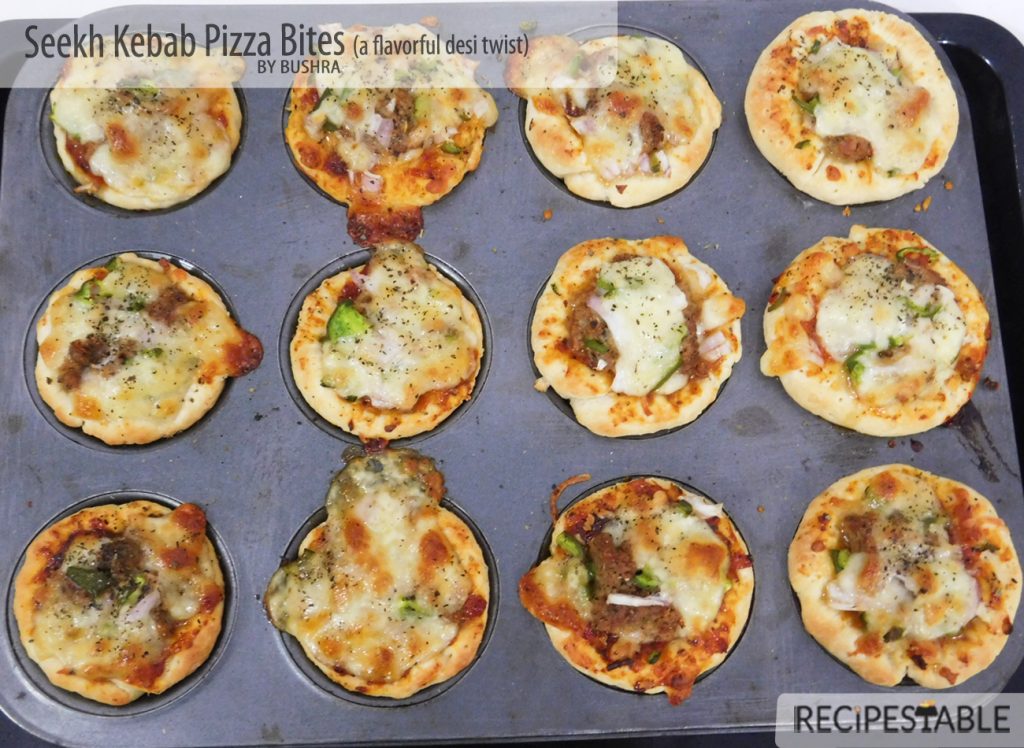
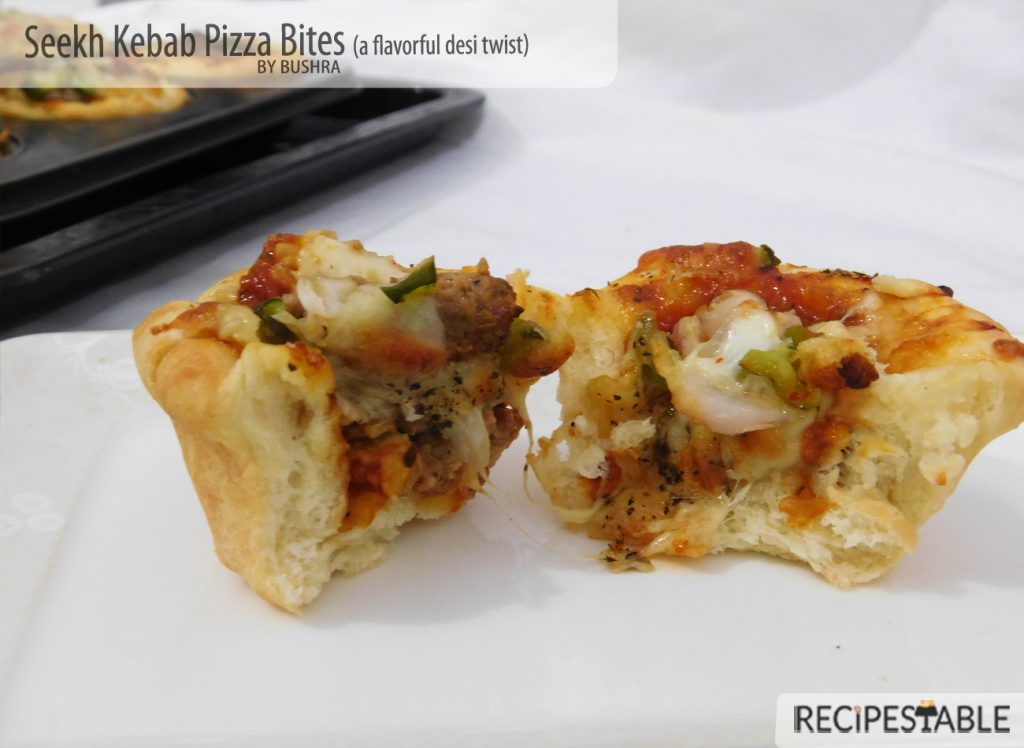
  • Seekh Kebab Pizza Bites Recipe (A Flavorful Desi Twist)

    Seekh Kebab Pizza Bites Recipe (A Flavorful Desi Twist)

    Craving pizza but your taste buds is calling for some desi twist?

    Satisfy your cravings with these Seekh Kebab Pizza Bites that are ready in 30 minutes or less and featuring everyone’s favorite flavor combo: Pizza, Seekh Kebab and  cheesy goodness—are sure to be the talk of the party.

    A Flavorful Desi Twist - Seekh Kebab Pizza Bites Recipe
    A Flavorful Desi Twist – Seekh Kebab Pizza Bites Recipe

    You all know I love pizza, and I couldn’t go too long without experimenting different pizza toppings. (For you newbies, they happen to be one of my favorite finger food!) These days pizzas come with many desi variations like butter chicken, spicy tikka or seekh kebabs.

    Seekh Kebab Pizza Bites (A Flavorful Desi Twist)

    So, Today why not take the classic Italian and make them unabashedly Pakistani ?

    Creativity, especially when it comes to food has absolutely no limits. There are some flavor combinations that are so brilliant —like seekh kebabs, pizza sauce, and cheese. All three of these offer undeniable flavor on their own, but when paired together, the result is nothing less than perfect. So, I changed the shape of pizza and turned it everyone’s favorite pizza ingredients into these cute little “Seekh Kebab Pizza Bites”!

    The smokiness of seekh kebabs, the sharp flavor of cheddar, the cheesy goodness of Mozzarella and the zest of pizza sauce combine like they were always meant to be together. All this ohso yummy !

    Seekh Kebab Pizza Bites Recipe
    Seekh Kebab Pizza Bites Recipe

    Does your family love pizza as much as mine does?

    Then this weekend, try something new : “Seekh Kebab pizza Bites”! These adorable little pizza bites are yours to enjoy. And let me tell ya – they will easily disappear quickly!

    Seekh Kebab Pizza Bites Recipe
    These Seekh Kebab Pizza Bites make a fun and delicious way to serve everyone’s favorite pizza! 

    Ingredients in Seekh Kebab Pizza Bites?

    To make these seekh kebab pizza bites, you’ll need pizza dough, pizza sauce, leftover seekh kebabs, onion, green bell pepper, Cheddar & Mozzarella cheese and Italian seasoning.

    Seekh Kebab Pizza Bites Recipe
    Seekh Kebab Pizza Bites Recipe

    How to make the Seekh Kebab Pizza Bites

    First I line up the muffin pan with homemade pizza dough and cut it into round circles (No need to be extremely accurate with the measurements).  I just wanted the pizza bites to be about the same size. Then I top it with the pizza sauce. I always keep a jar of homemade pizza sauce in my pantry to make these kinds of easy pizzas at a moment’s notice. Next is the cheese then the leftover seekh kebabs with onion and peppers then sprinkle herb seasoning and bake at 180 degree C for 10-15 minutes!

    These couldn’t be more simple.

    Seekh Kebab Pizza Bites Recipe
    Seekh Kebab Pizza Bites Recipe

    Once they have cooked, I remove them from the oven and allow them to cool enough so that they can be safely eaten, about 5 minutes and serve.

    Voila!!!

    Make-Ahead Seekh Kebab Pizza Bites Recipe

    They also make a great make-ahead meal or snack!

    Seekh Kebab Pizza Bites Recipe
    Seekh Kebab Pizza Bites Recipe

    How to Freeze Seekh Kebab Pizza Bites

    Once they have cooled completely, place them onto a sheet pan and allow them to flash freeze for about 30 minutes. Then, package them in freezer-safe zip top bags or containers for up to 2 weeks. To serve from frozen, just thaw overnight in the refrigerator and then reheat in the oven for about 10 minutes until heated throughout.

    Extra Bounce Tip:

    The fun thing is that they are completely customizable. And if you have kids around, or want to get friends involved in customizing their own, these are a great idea for a make-your-own-appetizer set up. Everyone will love tossing in their favorite toppings.

    Seekh Kebab Pizza Bites Recipe
    Seekh Kebab Pizza Bites Recipe

    Definitely a fun twist on serving pizza.  And in my opinion, much cuter — which is of course the bigger issue. enjoy 🙂

    Bismillah let’s get started.
    Check it out Seekh Kebab Pizza Bites Recipe and printable version here!!

    Want more Pizza Inspiration? 

    Here are some other pizza recipes on my blog:

    Put your own spin on it. And lemme know how it turns out and do take a few seconds to rate it! I would love to see your recreations so tag me on instagram @recipestable or Facebook (Recipestable) or on Twitter so I can see how lovely yours turn out.
  • Flower Shaped Buns Recipe with Step by Step Pictures

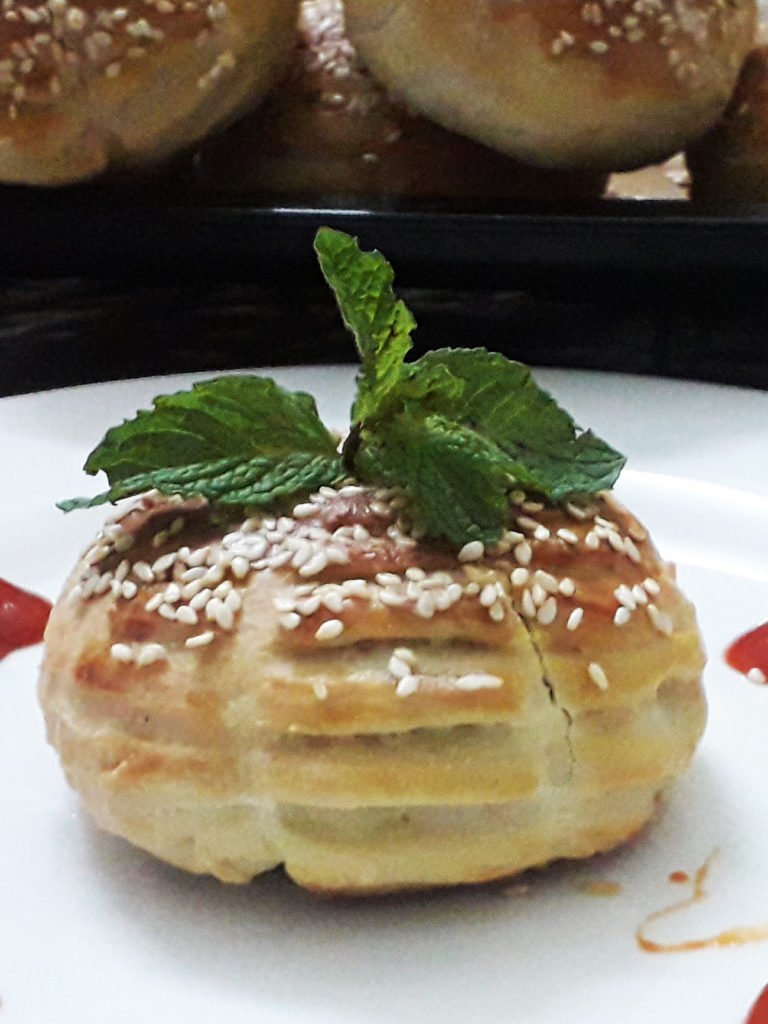
    Flower Shaped Buns Recipe with Step by Step Pictures

    Baking is an assortment of pure love, garnished with utmost care into a culmination of all the good things that life has to offer. These gorgeous Flower Shaped Buns are truly spectacular, and they taste just as amazing as they look! 

    Flower Shaped Buns recipe
    Warm, freshly baked Buns tastes very good with chicken filling.

     The Flower Shaped Buns. So elusive. So Cute. So majestic. So eye-catching

    How do you make them? Is there too hard to shape? Is there a complicated technique? Is it wizardry?

    Just a few of the thoughts I had before attempting these beauties. However, I’m elated to report that if you can master my Vegetable Stuffed Buns & Baby Chicken Bread (and you totally can), you can master the Flower Shaped Buns, too!

    These flower shaped buns are simple to make and cute to look at. 

    Flower Shaped Buns Recipe
    Flower Shaped Buns 

    It all starts with a simple dough that rises in 1 hour. To keep things a little on the healthier side, I went with a 2:1  mix of unbleached all purpose and whole wheat pastry flour for slightly-hearty-but-still-decadent buns.

    You could also go entirely all-purpose for true bakery style, all whole-wheat pastry for a healthier buns, or some other combination that I haven’t thought of! 

    So how are these simple? I’m glad you asked.

    13 ingredients including seasonings (sesame seeds being the 14th and optional ingredient)
    One true rise = less waiting
    Fool-proof methods
    No fancy techniques or equipment involved

    See? You can totally do this. Believe it.

    So what do these studs taste like? Amazing. They’re

    Soft
    Tender
    Fluffy
    Perfectly spiced
    Loaded with creamy chicken filling
    & Better with each bite

    Give it a try and You have bakery-worthy stuffed buns that will mystify your friends and family as to how you made them. Go you.

    Bismisllah Let’s Get This Started !

    Ingredients You will Need:

    For Buns Dough
    • 3 1/2 cups all-purpose flour
    • 1 cup milk
    • 2 tablespoon milk powder
    • 1/2 cup water (might use less)
    • 1 egg, lightly beaten
    • 1 tablespoon sugar
    • 4 tablespoon oil
    • 4 tablespoon melted butter
    • 1 1/2 teaspoon instant yeast
    • 1 teaspoon salt
    Chicken Filling
    • 2 cups boiled chicken, shredded
    • 1 large red onion, finel chopped
    • 2 tablespoon butter
    • 2 tablespoon plain flour
    • 1 teaspoon salt
    • 1 teaspoon black pepper
    • 1/2 teaspoon red chili, crushed
    • 4 tablespoon coriander leaves
    • 4 green chilies, finely chopped
    • 1 cup milk
    For Assembling Buns
    • white & black sesame seeds, as required
    • 1 egg yolk, beaten with 1 tsp milk, for brushing the buns before baking

    How to Make Flower Shaped Buns:

    Step 1: Sieve the flour and dry milk powder in a large mixing bowl. Make three holes in the flour, and then put sugar, yeast, and salt in each hole. Gently cover the holes with the flour. Then add the oil, melted butter and the egg, and combine together.

    Flower Shaped Buns Step 1
    Flower Shaped Buns Step 2

    Step 2: Pour lukewarm milk in the flour mix. Start kneading together and gradually add the lukewarm water a little at a time. You may not need to use all the water, so add it sparingly until your dough comes together and is nice and soft. Knead for a good 10-15 minutes.When the dough becomes smooth and elastic, it is done. (Note: The more you knead the dough, the softer the buns will be).

    Step 3: Touch a bit of oil with your fingertips and apply all over the ball of dough. Loosely cover the bowl with plastic wrap or cover with a damp cloth and set it in a warm place for 40 minutes to an hour for it to double in size.

    Flower Shaped Buns Step 3

    Step 4 :To Make Chicken Filling – Melt 2 tablespoon butter in a frying pan or wok. Saute onion in butter until transculant. Add flour, salt, pepper and red chili and cook for 2-3 minutes. Now add milk and cook for 4-5 minutes or until sauce is thickened. Add shredded chicken, green chilies, fresh coriander leaves. Stir until well combined and remove from the heat. Let it cool completely.

    Flower Shaped Buns Recipe Step 4

    Step 5: When the dough has risen into a nice big size, take the dough out of the bowl and Punch it down to remove some of the air in the dough.

    Flower Shaped Buns Recipe Step 5

    Step 6: Divide the dough into 16-18 balls, depending on the size of buns you would like.

    Flower Shaped Buns Recipe Step 6

    Step 7: Gently roll out each piece of dough and make a round ball. Flatten a ball until it is about 3 inches in diameter and place 2 tablespoon of chicken filling in the center.

    Flower Shaped Buns Recipe Step 7

    Step 8: Pull up the edges of the rolled out dough and pinch together to firmly seal the filling within.

    Flower Shaped Buns Recipe Step 8

    Step 9: Put the sealed part face down on the board and press the dough into about a 2 inch diameter. Make 8 decorative slits around the edge, equally spaced apart (either using a pizza cutter or sharp knife or even a pair of kitchen scissors).

    Flower Shaped Buns Recipe Step 9

    Step 10 : Place the prepared buns on a greased cooking sheet or tray and cover with a light cloth and let them rise for about 20 minutes to half an hour.

    Flower Shaped Buns Recipe Step 10

    Step 11: Brush each bun with beaten egg yolks and put some black and white sesame seeds in the center of the each bun.

    Flower Shaped Buns Recipe Step 11

    Step 12: Bake the buns, in the preheated oven for about 20 minutes or until golden.

    Flower Shaped Buns Recipe Step 12

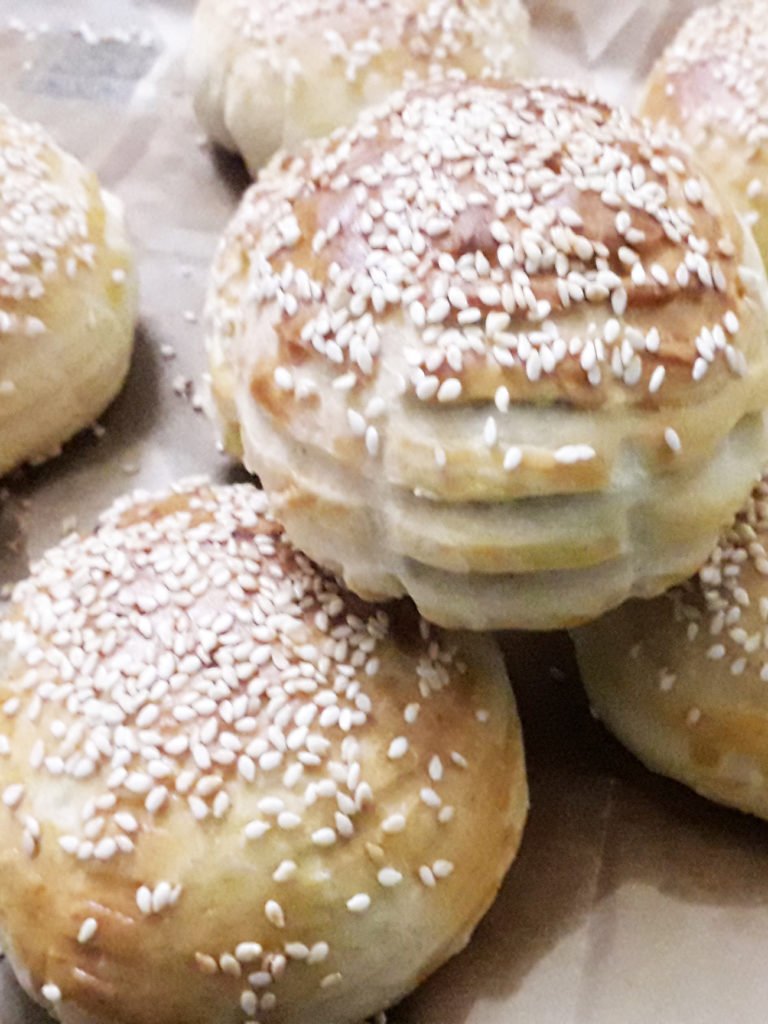
    Step 13: Remove and brush the buns top with melted butter (it will give nice shiny look) and let it rest covered with a cloth for 2-3 min to soften the bread completely.. Flower Shaped Buns are ready to serve. ENJOY with your favorite dipping sauce.

    Flower Shaped Buns Recipe Step 13

    These Flower Shaped Buns are definitely a treat for weekend Tea Party. Especially when served with a luxurious garlic sauce generously topped with mayonnaise.

    Check it out the Flower Shaped Buns recipe and printable version here!!

    I believe that homemade cooking is delicious and healthy. If you love savory breads or rolls, but want to eat a little healthier, this recipe can be good to try. 🙂 Put your own spin on it. And lemme know how it turns out. Post a photo on Facebook (Recipestable) or  on Twitter so I can see how lovely yours turn out.

    Happy Baking!!

    Pin it For Later: 


    ATTENTION: All photos and content are copyright protected. Please do not use our photos without prior written permission. If you wish to republish this recipe, please rewrite the recipe in your own unique words and link back to Super Easy, Super Moist Chocolate Cupcakes on Recipestable. Thank you!

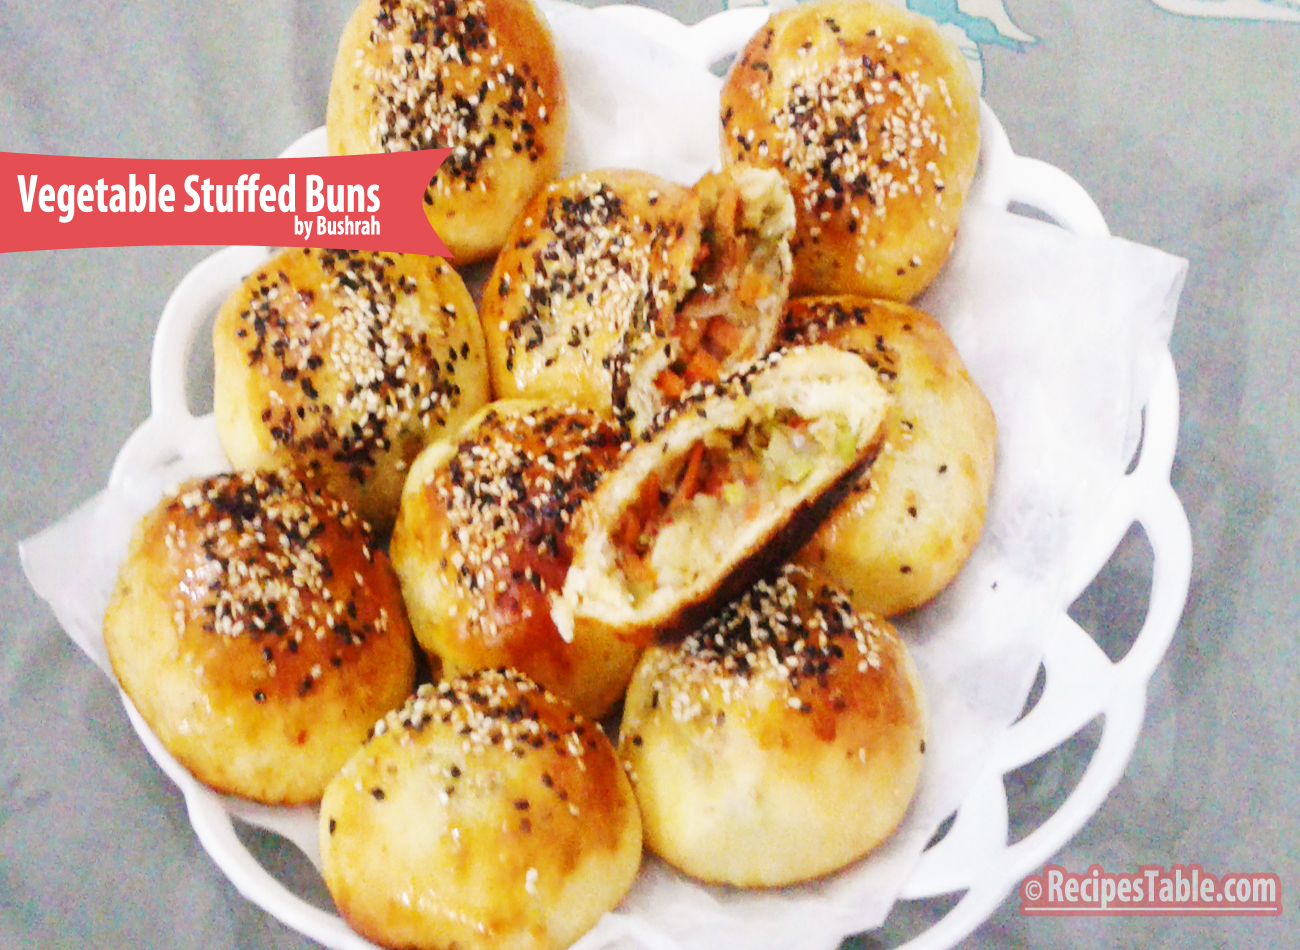
  • Vegetable Stuffed Buns Recipe

    Vegetable Stuffed Buns Recipe

    Homemade Vegetable Stuffed Buns?  These Stuffed buns are loaded with veggies and are topped with two types of sesame seeds.  So warm, soft, Fluffy, fragrant and stuffed with fresh veggies – no can or frozen veggies, all real – totally yummy  ( + point is it contains only 200 calories). Try making these if you’re looking for the ultimate comfort food.

    Vegetable Stuffed Buns

    Photo: Vegetable Stuffed Buns

    This.

    I’ve made it twice in the last week, once for bringing life to the original recipe concept and taking some photos, and once for “recipe testing”. Aka licking the filling and testing the dough. Again. More. Soft Buns In my mouth. I like this recipe a lot, you guys.

    Unlike store bought buns, these are healthy and homemade, and can be packed with any filling of your choice, be it cheese, chicken, lamb or mutton, mushrooms (choices are endless). These vegetable stuffed buns are a fun way of using leftover dough and any stuffing of your choice. These can be eaten for tea or breakfast or a satisfying meal with some salad. It works well as a snack for children to take to school, or to simply enjoy with a favorite drink at any time of the day.

    These stuffed buns succeeds in titillating your senses with its soft, tenderness, and that fresh sesame-ish flavour makes these buns more appetizing. Bake Stuffed buns not because you must but because it tastes so yummy that you would regret not making it at your earliest once you devour its first bite! Having said that, I am not dropping more clues, get ready with some all purpose flour and some basic ingredients (filling of your choice) and get ready to bake fresh stuffed buns this weekend! So, are you ready to read the recipe?

    Vegetable Stuffed Buns

    Photo: Vegetable Stuffed Buns

    When you make these Vegetable Stuffed Buns, all you have to do is open your windows and let the divine baking aromas drift and I will come to you. My nose can find these things. Okay? See you soon.

    Check it out the Vegetable Stuffed Buns recipe and printable version here!!

    Extra Bonus Tips:

    1. It can last  for a week in an air tight container in the refrigerator or it can be frozen for longer. Any time you wish to serve these heat them in the microwave for 15-20 seconds or preheat in the oven for 2-3 minutes and enjoy the warm, soft vegetable-y stuffed buns!
    2. What I really love is that once you have this basic idea, the variety of stuffing you can make for these buns is absolutely endless.

    I have also posted Baby Chicken Bread recipe which is another easiest & tastiest version of making stuffed bread at home. Do check it out as well.  It’s finger lickin’ good. You’ll be coming back for more. 


    Put your own spin on it. And lemme know how it turns out. Post a photo on Facebook (Recipestable) or  on Twitter so I can see how lovely yours turn out.


    Happy Baking!!

  • Super Easy, Super Moist Chocolate Cupcakes Recipe

    Super Easy, Super Moist Chocolate Cupcakes Recipe

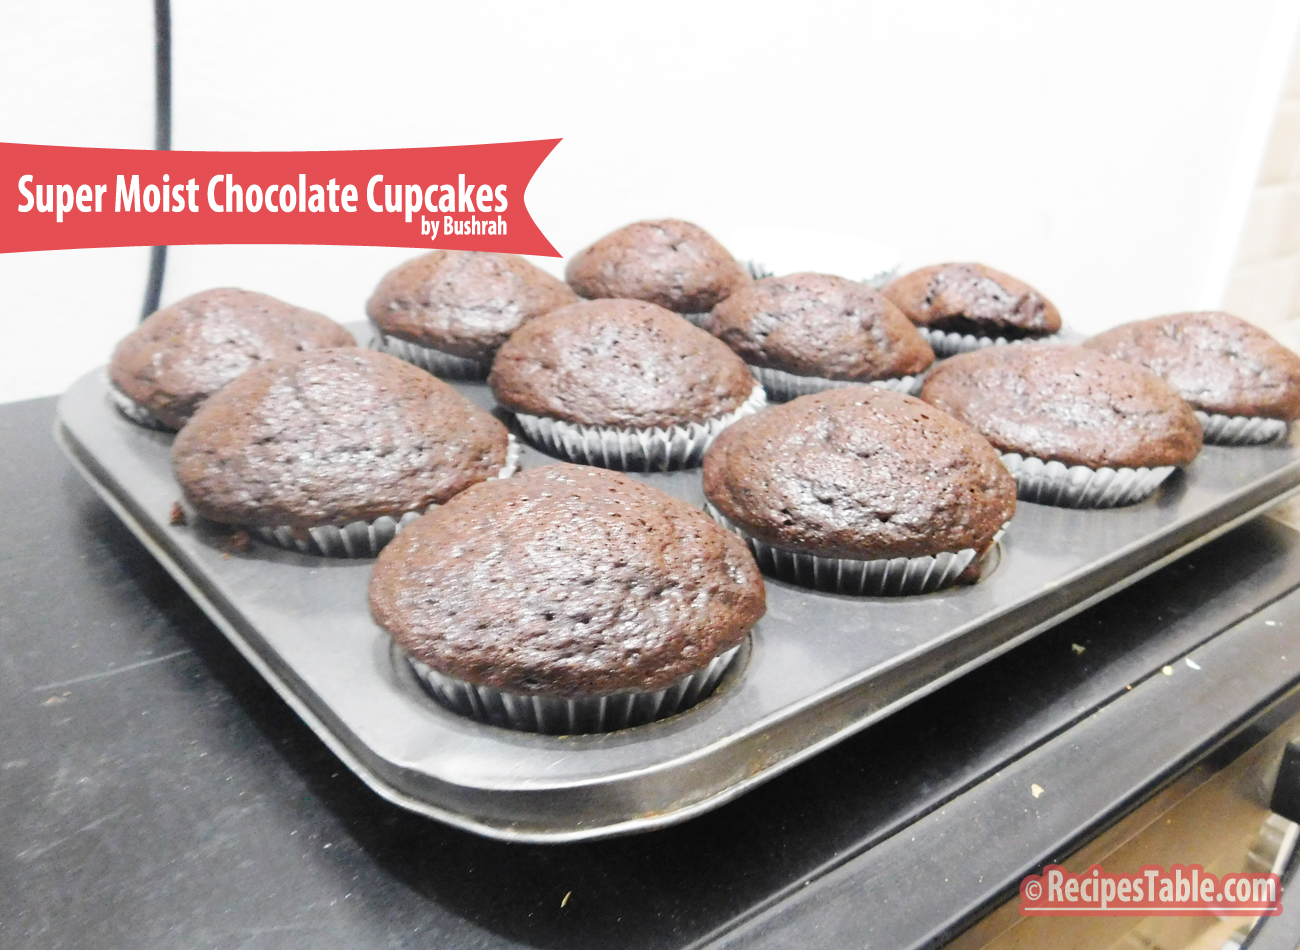
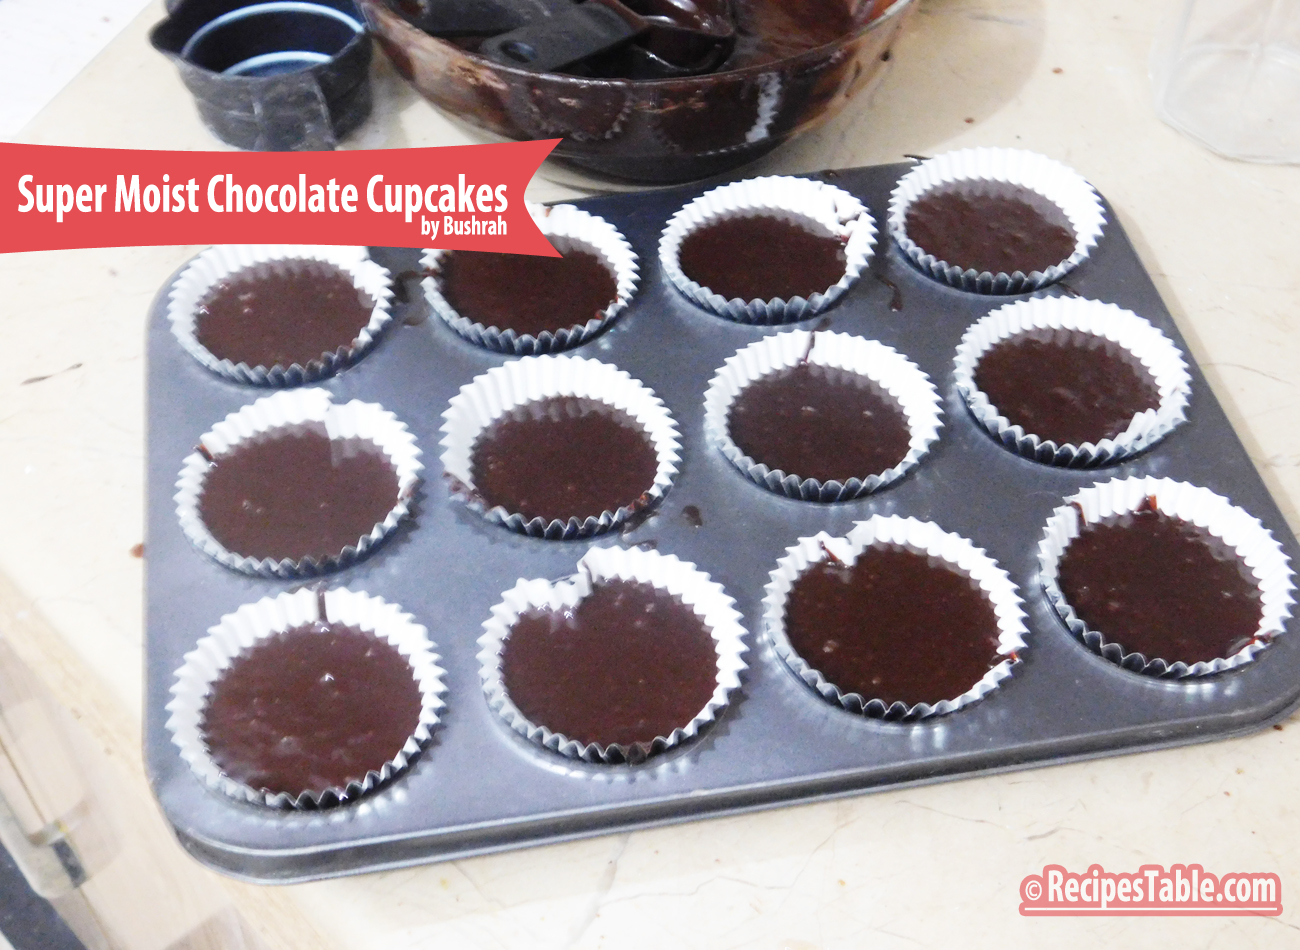
    Like the title says, these are the ‘Super Easy,Super Moist Chocolate Cupcakes’. They are perfectly moist and insanely chocolaty, topped with More Chocolate Ganache & Coconut. Royal Treat ♥

    Super Moist Chocolate Cupcakes recipe
    Photo: Super Moist Chocolate Cupcakes

    Looking for the perfect recipe can be exhausting because there are just so many out there. I’ve tried countless cupcakes over the years, but this is my top favorite recipe. I know we all have different preferences when it comes to our taste buds, but I honestly don’t think you can go wrong with this.

    The absolute best recipe to make Chocolate Cupcakes that are super easy, super moist, chocolaty and really delicious. If chocolate is what makes you go weak in the knees, then these are for you. This one is a must try for all Chocolate Lovers out there.

     Super Moist Chocolate Cupcakes
    Photo: Super Moist Chocolate Cupcakes
     
    Super easy, Super Moist Chocolate Cupcakes
    Super easy, Super Moist Chocolate Cupcakes
     
    Super easy, Super Moist Chocolate Cupcakes
    Super easy, Super Moist Chocolate Cupcakes

    One of the great things about this happy little dessert is that it doesn’t take long to make and it doesn’t break the bank!  Not only is the dessert met with smiles and giggles, it’s an easy and inexpensive way to make everyone at the table happy!  And making everyone happy is what its all about.

    Super easy, Super Moist Chocolate Cupcakes
    Super easy, Super Moist Chocolate Cupcakes

    I made the Chocolate Coffee ganache with hot cream, good quality chocolate, butter and coffee extract. The higher the quality of chocolate used, the better the flavor and texture your ganache will have in the end. Coffee and coffee extract enhances the flavor of chocolate. It enhances the chocolate, and brings out the flavors in the chocolate while adding richness to the taste. I love to add coffee to all of my chocolate cakes. Some things are classics.I put chocolate cupcakes in that category. Pillows of rich chocolate cake. Top with chocolate ganache.

    Super easy, Super Moist Chocolate Cupcakes
     Pillows of rich chocolate cake. Top with chocolate ganache.

    Check it out the Super Easy, Super Moist Chocolate Cupcakes recipe and printable version here!!

    Extra Bonus Tips:

    1. If you would like to add coffee to the recipe, either add 1 teaspoon espresso powder or instant coffee granules along with the sifted dry ingredients, or replace the water with room temperature brewed coffee.
    2. Please make sure that you bake these for 20 minutes and not more. Baking timing is the most crucial thing for any cake recipe. A few minutes over and you’ll have a hard rock in the name of muffin. So keep checking!
    3. And yes..no peeking and opening the oven door for the first 15 minutes at  least.
    4. Cupcakes are best the same day they’re made, but can be kept in an airtight container at room temperature for up to 3 days.
    5. Un-frosted cupcakes can be kept in the freezer for up to 2 months. Thaw, still covered, on the counter or overnight in the fridge.

    I have also posted Vanilla Cupcakes with Chocolate Frosting recipe which is another easiest & tastiest version of making cupcakes home. Do check it out as well.  It’s finger lickin’ good. You’ll be coming back for more. 


    Put your own spin on it. And lemme know how it turns out. Post a photo on Facebook (Recipestable) or  on Twitter so I can see how lovely yours turn out.


    Happy Cupcakes Making!!

    ATTENTION: All photos and content are copyright protected. Please do not use our photos without prior written permission. If you wish to republish this recipe, please rewrite the recipe in your own unique words and link back to Super Easy, Super Moist Chocolate Cupcakes on Recipestable. Thank you!

  • Baby Chicken Bread Recipe

    Baby Chicken Bread Recipe

    The recipe I am sharing today is a Family FAVORITE. All families have certain dishes they love to cook and eat. Mine goes gaga for these baby Chicken Breads! Put 12 dozen in front of them and they’ll still demand more. I am sure you will face the same situation with your siblings, cousins, random guests when you try these magical Baby Chicken Bread. (unless they are gluten intolerant. Oops)

    I thought, I would share this FAMILY FAVORITE with everyone since so many Friends nd ClassFellows have asked for this recipe. Enjoy!

    Baby Chicken Bread
    Photo: Baby Chicken Bread

    Baby Chicken Bread

    Chicken bread is a classic of Pakistani bakeries and we served it at most of the tea parties as a staple here. This simple yet delicious bread is easy to make and full of flavor.

    All you really need is a few basic ingredients: salt, flour, baking soda and yeast etc. The “trick” to achieving a perfect texture is not to over knead the dough and don’t over bake, as this will make it tough & hard, ugh not good! Brush with egg wash. Sprinkle a few sesame seeds. And voila! It’s ready to go in the oven for 25 minutes. 

    Baby Chicken Bread recipe
    Photo: Baby Chicken Bread

    On weekend night, I decided to bake chicken bread from scratch and Just for a twist I made  them in baby sizes.

    Don’t ask me why I do these things. I’m not quite sure myself.

    But you have to admit….they’re pretty darn cute.

     Baby Chicken Bread
    Photo: Baby Chicken Bread

    So now that my kitchen is covered with Baby Chicken Breads, what should I do with them?
    Of course, slathering them with hot pepper sauce and taking a big bite doesn’t count. I already did that. Twice.

    Baby Chicken Bread
    Photo: Baby Chicken Bread

    This recipe is especially handy because it makes A LOT of Baby Chicken Breads (1-1/2 dozen to be exact). So they are the perfect, fuss-free party food. Easy to make, fun to eat.

    Bismillah, Let’s get started!

    Check it out the Baby Chicken Bread recipe and printable version below.


    Baby Chicken Bread Recipe

    Chicken bread is a classic of Pakistani bakeries and we served it at most of the tea parties as a staple here. This simple yet delicious bread is easy to make and full of flavor.
    Prep Time 20 minutes
    Cook Time 25 minutes
    Total Time 45 minutes
    Servings 16
    Author Bushra Waheed

    Ingredients

    For Baby Chicken Bread Dough

    • 4 cups plain flour
    • 1 tablespoon instant yeast
    • 2 tablespoon dry powdered milk
    • 1 teaspoon salt
    • 1 teaspoon castor sugar
    • 4 tablespoon oil
    • 1 egg plus one for glazing

    For Baby Chicken Bread Filling

    • 2-1/2 cups boiled chicken shredded
    • 1 large onion finely chopped
    • 1 teaspoon salt
    • 1 teaspoon black pepper
    • 1 teaspoon garam masala powder
    • 1/2 cup coriander leaves
    • 4 green chilies finely chopped
    • 1 cup milk
    • 2 tablespoon plain flour
    • 2 tablespoon butter
    • sesame seeds & flax seeds as required

    Instructions

    To Make the Baby Chicken Bread Dough

    • In a large mixing bowl combine the plain flour, salt, castor sugar, dry milk powder, instant yeast, oil and egg.
    • Slowly mix in the lukewarm water with your hands till all the ingredients are mixed well and dough starts to form.
    • Knead the dough for 5-7 minutes on a floured surface till the dough becomes smooth and is no longer sticky.
    • Bang the dough on the floured surface 7-8 times for elasticity.
    • Shape the dough in a large ball add place in a greased bowl.
    • Brush the top lightly with some oil.
    • Cover with a kitchen cloth and let the dough to rise somewhere warm until doubled in size, around 1 hour.

    To make the Chicken Filling

    • Meanwhile, Melt butter in a frying pan over medium heat.
    • Fry onion till soft and translucent.
    • Now add 2 tablespoon plain flour and stir well.
    • Season with salt , black pepper and garam masala powder.
    • Stir in the milk and cook for 2-3 minutes or until thickened.
    • Stir in the shredded chicken add chopped green chillies and coriander leaves.
    • Remove from the heat and let it cool completely.
    • Punch the dough to release air.
    • Preheat oven at 200 degree C.
    • Now divide the dough into 14-16 parts depending on how small you want the baby chicken bread to be.
    • Roll each piece of dough to a rectangular shape.
    • Snip the sides with a sharp knife and put chicken filling in the center.
    • Fold each side so they overlap each other (like a braid) the filling will show slightly but that’s ok.
    • Brush top with beaten egg.
    • Sprinkle sesame seeds and flex seeds.
    • Bake, in the preheated oven, for 25-30 minutes or until its turn golden brown.
    • Right after taking out of the oven apply butter well on whole bread and let it rest covered with a cloth for 2-3 minutes to soften the bread completely.
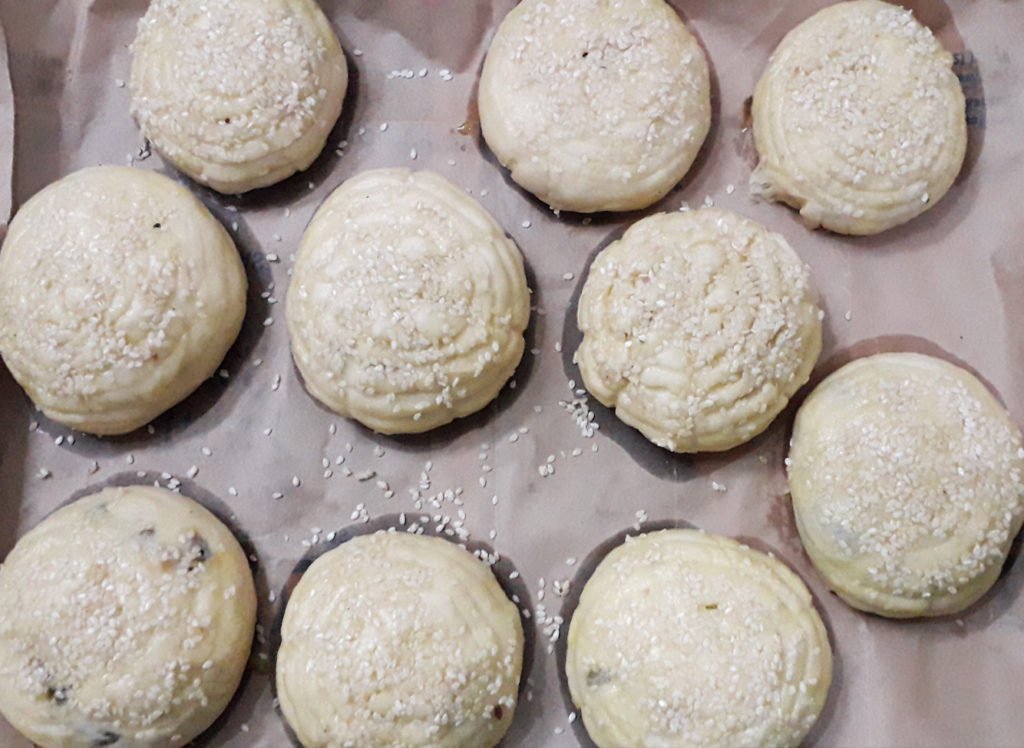
    • Delicious Baby Chicken Breads are ready to serve.

    Notes

    Serving Suggestions:
    Voila! Enjoy your delicious bread with hot tea to the loving and deserving.


     Recipe Tip’s:

    1. I always make big batches of chicken bread at a go and then wrap them well in foil, then put them in some sort of a cellophane bag and tie it up tight and freeze.
    2. They can keep up to 4 weeks! When you need one, you just thaw it out overnight in the fridge or keep it out on the counter until it’s thawed out, then unwrap and then splash a little bit of water using your fingertips on it and put it in the oven for about 5 minutes to freshen it back up. Becomes as good as new! 

    Put your own spin on it. And lemme know how it turns out by sharing a picture  on Instagram, Facebook (Recipestable) or Twitter with this hashtag #Recipestable so I can see how lovely yours turn out.

    Happy Baking!!

    If you like this post, Please Subscribe to my blog and let me know your feedback by commenting below.. I have lots more recipes to share with you.

  • The Best Meatballs You’ll Ever Have Recipe

    The Best Meatballs You’ll Ever Have Recipe

    Aslam-o-Alakaum My Lovelies !!

     In the Name of Allah, Most Gracious, Most Merciful

    Good Afternoon

    It is the middle of March and spring is here and in full bloom, budding flowers, chirping birds, and plenty of new activities to do.
    With spring here in full bloom, I try to get out for daily walks, which is a joy. With the earth greening, trees budding, flowers blossoming and songbirds chirping, hope and renewal fill every living thing. (inshaAllah)

    The days are getting much warmer now and my family always looks forward for light and comforting food. Dinner is the only time when everybody gets to gather around and have meal as a family. So I always plan to cook something simple and most importantly light and healthy.

    meatballs

    The Best Meatballs You’ll Ever Have

    The Best Meatballs You'll Ever Have
    The Best Meatballs You’ll Ever Have

    Last week, I made the world’s most amazing Meatballs in a tomato sauce with garlic bread on the side – where’s my invitation to go on Masterchef??  💁🏻 lol 😛

     I like to cook meatballs in sauce! These Italian flavored  meatballs in tomato sauce are my new favorite! 😀 ☺

    These meatballs are light, tender, and bursting with juicy flavor.You can just mix all the ingredients together, roll them and cook them and the best part of all, you can have these on your dinner table in less than 45 minutes.

    The Best Meatballs You'll Ever Have
    The Best Meatballs You’ll Ever Have

    They would be great over pasta, mixed with tomato sauce as an appetizer or on their own, But I served these meatballs over some veggie noodles tossed in olive oil along with garlic bread. A recipe must try! The Best Meatballs You’ll Ever Have!

    I have also posted Meatball and Pea Pulao which is another easiest & tastiest version of making Dinner. Do check it out as well.


    Put your own spin on it. And lemme know how it turns out. Post a photo on Facebook (Recipestable) or  on Twitter so I can see how lovely yours turn out.


    Happy Meatballs Making!!

    Keep remember me in your Dua’s and Stay tuned for new content on the blog 😉

    If you like this post, Please Subscribe to my blog. I have lots more recipes to share with you. And If you make it then let me know your feedback by commenting below.

  • Baked Vegetable Spring Rolls Recipe

    Assalamu alaikum wa rahmatullahi wa barakatuhu!

    In the Name of Allah, Most Gracious, Most Merciful

    I hope you’re well and have had a good start to the week.   I’m sorry to let you worry about me, but these days I’m a bit busy.  As you know study study study. lol 😀 I am madly busy with my assignments. Sorry for this post being late.

    My class got cancelled today. Glad I get a chance to breathe. So I decide to write a post for my lovely reader’s. Last week, I made these Veggie rolls ( Baked Version) to give myself a break from ‎assignment work. They are very easy to prepare and tastes absolutely delicious! I had too much fun making this. 

    baked veggie rolls
    Take a Break and bake Some Veggie Rolls 🙂

    These yummlicious veggie rolls are healthy and very filling. And they smell amazing when they’re baking. They crisped up fine in the oven. The only problem is that three wrappers have 180 calories! What!???? That’s a lot. I ate 3 rolls anyway. 😛 😉 They are ready in only 35 minutes and you can use your favorite veggies.

    Baked Veggie Rolls Recipe
    Photo: Baked Veggie Rolls Recipe

    You could fry these, too, but I was trying to keep them healthy. I hope you all give this Baked Veggie Rolls recipe a try and let me know how they turn out!

    Baked Veggie Rolls 

    So let the fun begin!

    1. First Prepare Veggie Filling: Heat a small amount of oil in a wok over medium heat. Add giner and garlic. Saute until fragrant. Might you think, it’s a stupid instruction, isn’t it? Tell you what, just cook your garlic few seconds until they’re soft-ish.
    2. Now add green peas, red beans and corns. Cook for 2-3 minutes or until they are soft.Add remaining veggies and add a splash of vingear. Stir fry for few minutes. You can add soy sauce or any store bought sauce etc. But I didn’t add it. As I try to avoid artifical ingredients to follow my journey towards clean eating. 🙂
      Sprinkle black pepper, red chili, and maybe a little salt if you need it. If you want to use fresh herbs then I think that would be lovely.
    3. Stir well and Let everything simmer for a couple of minutes, but don’t let everything get overly soft because you still have to stuff and bake your rolls.
    4. Take the mixture into a bowl and let it cool for few minutes. Once everything is cool, you can either proceed to stuffing the rolls, or cover your bowl and put everything in the fridge overnight. If you do refrigerate the veggie mixture, be sure to bring it room temperature before stuffing your rolls.
    5. When you’re ready to stuff your rolls, be sure your stuffing mixture and wrappers are at room temperature. You’ll want a clean work surface for this part and a bowl of water nearby.
    6. Don’t be intimidated by this part. You just want the rolls to hold the yummy stuffing in. They don’t need to be perfect. And, frankly, if someone is going to judge you on how pretty your spring rolls are, then you probably shouldn’t be feeding them. lol 😛
    7. Preheat an oven for 200 degree C and brush a baking sheet with oil.
    8. Place a wrapper out in a diamond shape on your work surface.Put a tablespoons of filling in the center of the wrapper. I under-stuffed these rolls, so they turned out chewier that I would have liked. However, you don’t want to stuff them so full that they split open. It’s a delicate balance.
    9. Bring the bottom point of your wrapper up over the filling and tuck it under as tight as you can. Fold the sides over and shape into a roll.
    10. Moisten the edges of the top flap slightly with water and roll the roll over, pressing the point on the underside of the roll to seal it.
    11. Put on a lightly oiled baking sheet and repeat this method the rest of your rolls.
    12. Lightly brush the tops of the rolls with egg-wash and sprinkle sesame seeds over them.
    13. Bake in the preheated oven for 20 minutes or until they turn golden brown. This took my oven around 22-25 minutes.
    14. You can eat these veggie rolls with tamari or soy sauce, but we prefer sweet and sour sauce.
      Ready !!
    Baked Veggie Rolls Recipe
    Photo: Baked Veggie Rolls Recipe

    Sorry I din’t get step by step picture as I was hungry and on in a hurry to eat 😛

    Check it out the Baked Veggie Rolls Recipe and printable version below!!

    Keep me in your duas please, and have a lovely week,

    Wasalaam!

    If you like this Baked Veggie Rolls Recipe, Please Subscribe to my blog. I have lots more recipes to share with you. And If you make it then let me know your feedback by commenting below.

  • The Secret to Bakery-Style Jam Filled Butter Cookies (This Recipe is a Gem!)

    Jam Filled Butter Cookies

    This Jam Filled Butter Cookies Recipe is an easy thumbprint cookie with a fruit jam center. Whip up these simple jam drops in just a few minutes, they make wonderful any-time treats.

    Jam Filled Butter Cookies Recipe
    Photo: Jam Filled Butter Cookies Recipe

    Check it out the  Jam Filled Butter Cookies Recipe here!!

    Jam Filled Butter Cookies Recipe

    Prep Time 10 minutes
    Cook Time 30 minutes
    Total Time 40 minutes
    Servings 36
    Author Bushrah @ Recipestable

    Ingredients

    • 2 egg yolks
    • 3/4 cup softened butter
    • 1/2 cup white sugar
    • 1-3/4 cups all-purpose flour
    • 1/2 cup fruit preserves any flavor

    Instructions

    Method

    • Preheat the oven to 190 degrees C.
    • Take a bowl, cream together the butter, white sugar and egg yolks.
    • Stir in the flour a little bit at a time until a soft dough forms.
    • Roll dough into 1 inch balls or cut with a cookie cutter.
    • If dough is too soft, refrigerate for 15 to 20 minutes.
    • Place balls 2 inches apart onto ungreased cookie tray.
    • Use your finger or an instrument of similar size to make a well in the center of each cookie.
    • Fill the hole with 1/2 teaspoon of preserves.
    • Bake in the preheated oven for 8-10 minutes or until golden brown on the bottom.
    • Remove from cookie sheets to cool on wire racks.
    • Store in an airtight jar or container. Jam Filled Butter Cookies are ready to serve. ENJOY!

    Notes

    Serving Suggestions:
    Serve with Tea.

    I have also posted Nankhatai recipe which are another easiest & tastiest version of making cookies at home. Do check it out as well.  It’s finger lickin’ good. You’ll be coming back for more. 


    Put your own spin on it. And lemme know how it turns out. Post a photo on Facebook (Recipestable) or  on Twitter so I can see how lovely yours turn out.
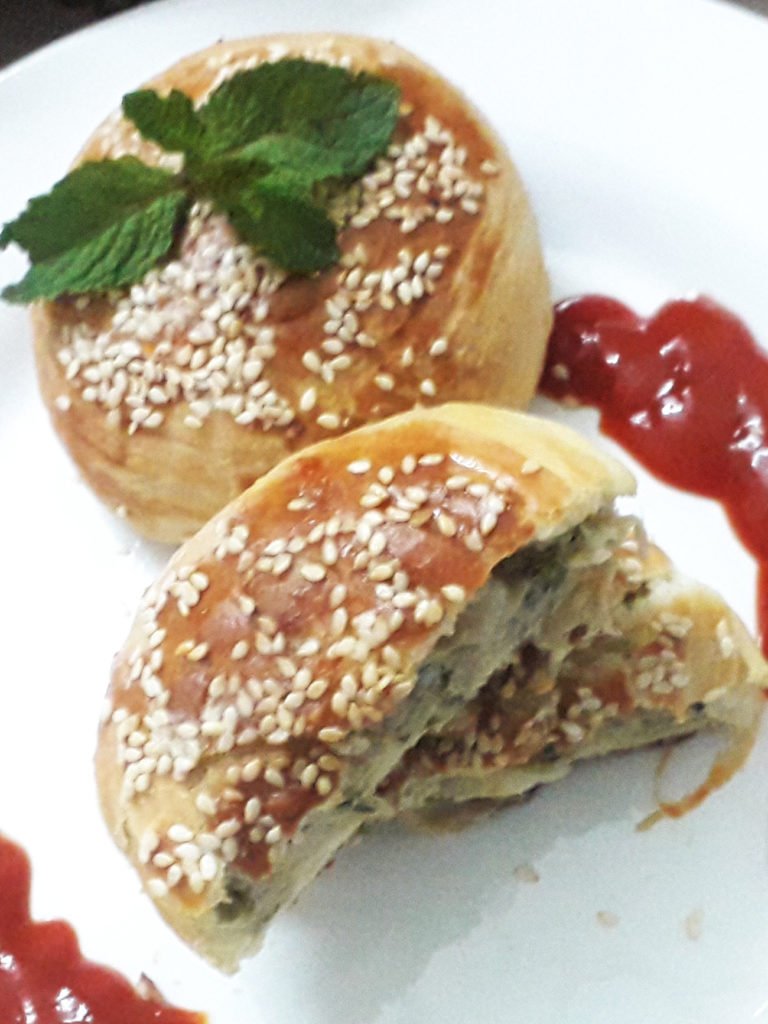

    Happy Cupcakes Making!!

  • Lip Smacking Cheesy Chicken Cups Recipe

    Lip Smacking Cheesy Chicken Cups Recipe

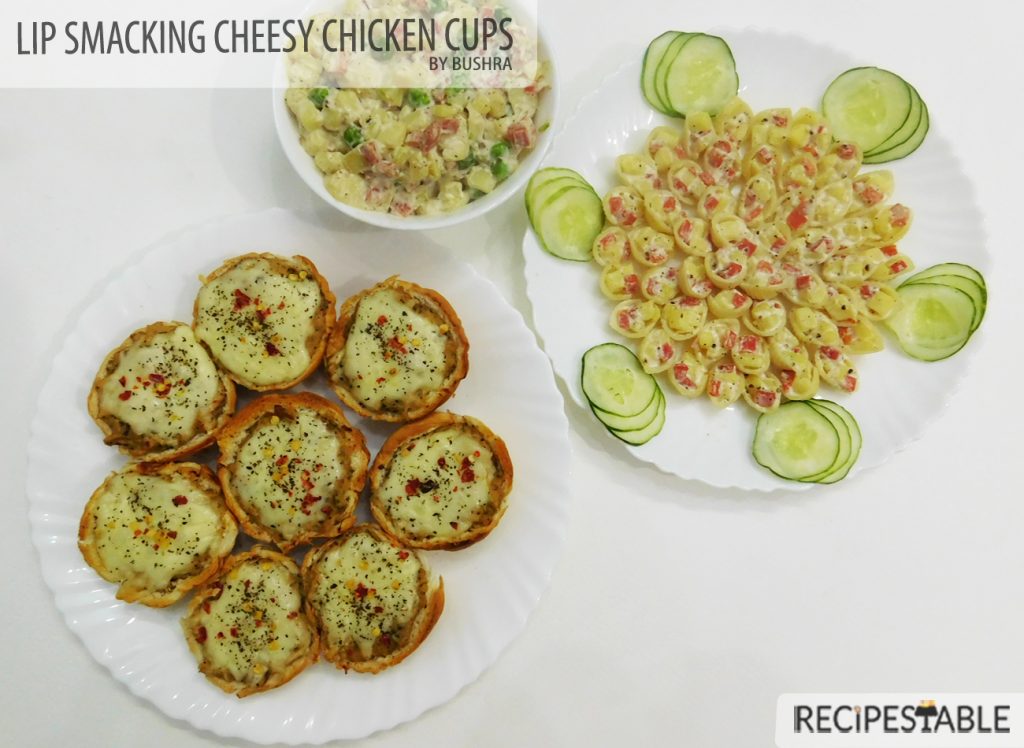
    An EASY comfort food recipe with just few ingredients and ready in 30 minutes!! Lip Smacking Cheesy Chicken Cups with a cheesy filling are sure to be a family favorite. Great for breakfast, dinner, snacks, a party appetizer or anything in between!!

    Cheesy Chicken Cups Recipe
    Cheesy Chicken Cups

    Cheesy Chicken Cups

    I had some extra chicken cooked and was looking to use it in a super fast and easy recipe. Since I also had few slider buns in my fridge, this fit the bill perfectly. I love the idea of the Slider cups (I can’t wait to get creative and try other things with that concept) and the filling was ooey-gooey, warm and cheesy. This is a very quick and simple way to get that comfort food taste/feeling.

    Here is my first try. I was thrilled they turned out just right.  They look so Lip smacking and appetizing (thus the name Lip Smacking Cheesy Chicken Cups). These are just as beautiful as they are delicious. My taste buds are going crazy, and I cannot wait for the next course in this meal.
    For a change of pace from your average dinner, this Cheesy Chicken Cups fits the bill! Unusual as it may be, once you take a bit, you will be reminded of some of your favorite chicken recipes. This is cheesy, flavorful, and will be loved by the whole family. Try making it tonight!

    Cheesy Chicken Cups Recipe
    Cheesy Chicken Cups yes!  Please give me one moment. All righty – I’m good now. I had to take a break to stare at these little beauties

    Extra Cheesiness Alert

    Alright, lets move to the cheesiness of this recipe.  


    Cheesy chicken filling, extra cheese on top and pepper flakes all stuffed up in a crispy slider bun shell.  Slider Buns are great for so many appetizers.  I used regular sized muffin tins, so I used bun half per cup, overlapping the corners so that all the edges are covered.   This whole recipe is sure to leave you stuffed and satisfied!

    Cheesy Chicken Cups Recipe
    Cheesy Chicken Cups Recipe

    What I Love About The Cheesy Chicken Cups?

    What I love about these Cheesy Chicken Cups – they are SO SIMPLE.  Seriously, simple ingredients, and half an hour are all it takes to make these Lip Smacking Cheesy Chicken Cups!   They are very good and easy to make, filled with a delicious cheesy chicken filling that everyone will love. We normally have all these items on hand. Mini Slider Buns make great cups for these cheesy treats. You can also use any leftover chicken for this.

    Cheesy Chicken Cups Recipe
    Cheesy Chicken Cups Recipe

    If you serve these at your Iftar Party or next get together , you may want to make a few a double batch – your guests will love them too!

     Cheesy Chicken Cups with Pasta Salad
    Cheesy Chicken Cups with Pasta Salad that are hearty enough to serve for dinner.

    Bismillah let’s get started. 
    Check it out Hot and Sour Noodles Recipe and printable version here!!

    Lip Smacking Cheesy Chicken Cups Recipe

    Lip Smacking Cheesy Chicken Cups – baked to perfection in muffin tins! Great for holidays and lunch boxes – it’s portable and makes for easy serving!
    Prep Time 15 minutes
    Cook Time 15 minutes
    Servings 12
    Author Bushra Waheed

    Ingredients

    • 6 mini slider buns

    For Cheesy Chicken Filling:

    • 1 cup boiled chicken shreded
    • 1 small onion chopped
    • 1 tablespoon plain flour
    • 1 cup milk
    • 1/2 cup cheddar cheese
    • 2 tablespoon butter
    • 1 teaspoon black pepper freshly ground
    • 1 teaspoon dried basil
    • 1/2 teaspoon red chili flakes
    • salt to taste

    For Topping:

    • 1/2 cup grated cheese
    • red pepper flakes
    • dried or fresh basil

    Instructions

    • Preheat oven to 180 degrees C.
    • Lightly greased a muffin pan with non-stick cooking spray or butter.

    To Prepare the Chicken Filling:

    • Melt butter in a frying pan over medium heat.
    • Fry onion till soft and translucent. Now add the plain flour and stir well.
    • Stir in the milk and cook for 2-3 minutes or until sauce is thickened.
    • Season with salt, black pepper, red chili flakes.
    • Stir in the shredded chicken and keep stirring for few minutes or until well combined.
    • Add cheese and dried basil and give it a good stir.
    • Turn the heat off.

    To Assemble the Cheesy Chicken Cups:

    • Cut buns into halves and put each half into the prepared muffin pan.
    • Press the buns into the holes to form cups.
    • Spoon chicken filling evenly into cups.
    • Sprinkle remaining cheese over them.
    • Top with chili flakes and dried basil (optional).
    • Bake for 12 to 15 minutes or until cheese is melted and they turn golden brown.
    • Take it from the oven. Remove from the muffin pan.
    • Lip Smacking Cheesy Chicken Cups are ready to serve. ENJOY!!

    I have also posted Buffalo Chicken Cheese Balls Recipe and Mini Pizza Cups Recipe which are another easiest & tastiest version of Comfort Food. Do check it out as well.

    Put your own spin on it. And lemme know how it turns out. Post a photo on Facebook (Recipestable) or Instagram on Twitter so I can see how lovely yours turn out.

    Happy Cooking

  • Quick Weeknight Dinner: Chicken Tikka Pizza Recipe (Ready in Under 30 Minutes)

    Chicken Tikka Pizza

    Pizza is a popular and delicious dish of Italian origin, that has become extremely popular all over the world.
    Today i am bringing you guys an amazing fusion dish. Fusion cooking is a delight! It creates magic and is fairly easy to do. When we combine a number of cuisines in one meal, we get a delicious combination of new tastes and flavors.
    If you love pizza and you love BBQ aroma – then this is totally your kind of Pizza.It sounded AH-mazing!…and it sure was! It was “love at first bite”!

    Chicken Tikka Pizza Recipe
    Photo: Chicken Tikka Pizza 

    Chicken tikka is Asian style of barbecued chicken and it tastes fabulous as a topping on pizza. It has become widely popular in Pakistan.

    Chicken Tikka Pizza Marination
    Photo: Chicken Tikka Pizza Marination

    I made it yesterday for my family and especially for my brother. He is a true pizza lover. He was sad when it got over and even though he knew there was no more pizza left he was talking about how he felt like having this pizza the next day. He still talks about it. And while writing this post, I wish I had some pizza dough so that I could make this again now.
    If you ask me what makes a good pizza, i would definitely say that it is the sauce. I will overlook a ‘meh’ crust if the sauce is good. Yeah, but of course, i would prefer when both the crust and sauce are amazing, but the highlight of a pizza for me is definitely its sauce. And this sauce is just ‘magical perfection’. Talking about the crust, i prefer thin crust pizza over a thick chewy one. And this recipe gives you the perfect crust. The best part is that it is super easy. Hope you guys give this recipe a try and be fall illustrious among your friends and relatives for making finest an admirable Chicken pizza.

    So let the fun begin

    1st Prepare Chicken Tikka:

    Marinate the chicken with the lemon juice, yogurt, ginger garlic paste, roasted cumin powder, garam masala, red chilli powder, tikka masala powder and salt.Marinate for atleast 4 hours ( perferably marinate overnight).

    Chicken Tikka Pizza MarinationPhoto: Chicken Tikka Pizza Marination

    Now broil on high for 8-10 minutes, turning over once. Or grill till cooked.
    Transfer into a bowl and keep side.

    Note:Sorry I din’t get grilling process pictures as I was on in a hurry to assemble the pizza. 😛

    Now Make Pizza Dough :

    In a large mixing bowl, mix 2 cups flour, yeast, sugar, milk powder and salt.
    Combine warm water, egg and butter in a small bowl.

    Pizza Dough Ingredients
    Photo: Pizza Dough Ingredients

    Add this in the flour mixture and beat with an electric mixer on High for 3 minutes.
    Using a wooden spoon, stir in as much of the remaining flour as you can. or knead with hand.
    Turn dough out onto a lightly floured surface. Knead in enough of the remaining flour to make a moderately stiff dough that is smooth and elastic ( 3 to 5 minutes ).
    Shape dough into a ball. Place in a lightly greased bowl, turning once to grease dough surface.

    Chicken Tikka Pizza Dough
    Photo: Pizza Dough

    Cover bowl and let the dough rise in a warm place until double in size ( 50 to 60 minutes ).
    Punch dough down. Turn dough out onto a lightly floured surface.
    Cover and let rest for 10 minutes.

    To Make Pizza Sauce :
    Blend tomato paste, tomato sauce, oregano in a blender.
    Heat 1 teaspoon butter in a pan, add garlic paste & fry for 1 minute.
    Add blended tomato mixture & paprika.
    Cook on medium heat until sauce is thick. Keep aside and let it cool competely.

    To Assemble The Pizza

    Preheat oven to the highest setting on your oven. Mine goes to 250 C degree.
    If you have a pizza stone, place it in the oven. I do not have one, and I use the back of my sheet pan.
    You do not have to preheat your sheet pan. Dust your sheet pan.
    Roll out your pizza dough.
    Drizzle some melted butter on top of your rolled out pizza.
    Prick with fork and let it rest for 10 minutes.
    Spread pizza sauce over it.
    Top generously with the chicken tikka and capsicum.
    Sprinkle cheddar cheese and mozzarella cheese.
    Sprinkle parsley and oregano on top the pizza.
    Bake for 20 minutes or until cheese has melted and crust has cooked.
    Sprinkle some extra parsley. Let cool a little. Cut into slices and serve.

    Lets go to weekend Programming class with this fabulous pizza. I’m sure my class-fellow’s will enjoy this pizza. 🙂

    Recipe Notes:

    1. .FOR PIZZA DOUGH:  If you want to store the extra pizza dough for future use, just oil the dough ball all around and put each ball into separate zippered freezer bag. You can freeze this way for about 2-3 days.The day before you plan on using them, just transfer the dough to the refrigerator. And on the day of usage, remove from fridge, place on a floured counter and gently press the ball into 1/2 inch thickness and let rise for 2 hours.

     Chicken Tikka Pizza Dough
    Photo: Pizza Dough

    FOR PIZZA CRUST: The crust cooks really fast. Mine actually took just 12 minutes. Do not over cook or your crust will become hard. By the time the cheese melts, the crust will get cooked. Even then just check before taking out.

    Chicken Tikka Pizza Crust
    Photo: Chicken Tikka Pizza Crust

    FOR PIZZA SAUCE: This recipe makes about 1-1/2 cups of pizza sauce, I often have a bit leftover for during the week if I want to make bread pizza pinwheels or homemade pizza rolls. Sometimes, I place the extra sauce in sterilized jars and freeze it until i need it next. I just let it thaw in the refrigerator when I know I am going to need it.

    FOR TIME SAVING: You wont require much time in the kitchen if you prepare the dough and marinate the chicken the night before. The next day, you will just have to grill the chicken, and thaw the dough for 2 hours and assemble the pizza.

    Chicken Tikka Pizza

    Prep Time 1 hour 30 minutes
    Cook Time 30 minutes
    Total Time 2 hours
    Servings 6
    Author Bushrah

    Ingredients

    For Pizza Dough

    • 2 cups flour
    • 1 egg beaten
    • 1/4 cup Luke warm water
    • 1 tablespoon butter
    • 2 tablespoon dry milk powder
    • 2 teaspoon yeast
    • 1 teaspoon sugar
    • 1 teaspoon salt

    For Chicken Tikka

    • 500 gm boneless chicken cubed
    • 2 tablespoon plain yogurt
    • 1 tablespoon oil or butter
    • 1 teaspoon ginger garlic paste
    • 1 tablespoon tikka masala powder
    • 1 teaspoon crushed red chili
    • 1 teaspoon salt
    • 1 teaspoon garam masala powder
    • 1/2 teaspoon cumin powder

    For Pizza Topping

    • 1 cup cheddar cheese grated
    • 1/2 cup Mozzarella cheese grated
    • 4 tablespoon pizza sauce
    • 1/2 teaspoon oregano
    • 1/2 teaspoon dried parsley
    • 1 capsicum sliced

    Instructions

    Directions

      To Make Dough

      • Knead all the dough ingredients with lukewarm water.
      • Keep covered in an oiled bowl in a warm place for 1 hour or until doubled and well risen.

      To Make Chicken Tikka

      • Marinate all chicken tikka ingredients for 30 minutes then cook on high heat for 20 minutes or until chicken is tender and all juices run clear.

      To Assemble The Pizza

      • Roll out the dough onto a floured surface and line a pizza plate with it.
      • Spread pizza sauce.
      • Top with chicken tikka, cheeses, oregano and let rise again in a warm place for 20 more minutes.
      • Sprinkle some dried parsley over it.
      • Bake at 200 degrees C for 20 minutes or till cheese has melted and dough is cooked.
      • Remove from the oven and cut into wedges. Chicken Tikka Pizza is ready to serve. ENJOY!!

      Notes

      Serving Suggestions:
      Serve with Chili Sauce.

    • Cheesy Spinach Bake Recipe

      Cheesy Spinach Bake

      Cheesy and delicious Spinach Casserole. Looks terrible but taste absolutely awesome!!

      Cheesy Spinach Bake Recipe
      Photo: Cheesy Spinach Bake Recipe

      Check it out the Cheesy Spinach Bake Recipe here!!

      [divider]

      [one_fourth]Prep Time:10 minutes[/one_fourth] [one_fourth]Cook Time:25 minutes[/one_fourth] [one_fourth]Servings: 6[/one_fourth] [one_fourth_last]Difficulty Level: Easy[/one_fourth_last]

      [divider]

      [tabs type=”horizontal”] [tabs_head] [tab_title]Ingredients[/tab_title] [tab_title]Nutrition[/tab_title] [/tabs_head] [tab]

      • 2 packages (10 oz each) frozen chopped spinach, thawed and drained
      • 1 can (10-3/4 ounces) condensed cream of potato soup, undiluted
      • 2 cups shredded Monterrey Jack cheese
      • 1 cup sour cream
      • 1/2 cup grated Parmesan cheese

      [/tab] [tab]Yield: 6 servings

      Nutritional information is not yet available. [/tab] [/tabs]

      Directions:
      [tabs type=”horizontal”] [tabs_head] [tab_title]Step by Step Method[/tab_title] [tab_title]Serving Suggestions[/tab_title][/tabs_head] [tab]

      Step 1

      Place spinach in a large bowl.

      Step 2

      Stir in potato soup, sour cream.

      Step 3

      Transfer into a greased 11×7-inch. baking dish.

      Step 4

      Sprinkle with Parmesan and Monterrey Jack cheese.

      Step 5

      Bake, uncovered, at 325 degree F, for 30 minutes or until cheese is melted and bubbly. Cheesy Spinach Bake is ready to serve. Enjoy!!

      [/tab] [tab]

      • Serve warm with crusty bread.

      [/tab] [/tabs]
      If you like Cheesy Spinach Bake Recipe and make it then let me know your feedback by commenting below.And if you know more innovative ways in which we can utilize this mouth watering Cheesy Spinach Bake, do share with us and we would be glad to give it a try.

    • Easy Cheesy Lasagna Recipe

      Easy Cheesy Lasagna

      This is a fast and easy way to make lasagna. It is yummy too. You get the same great flavor of a more complicated dish but exert none of the effort. Yum Yum !!

      Easy Cheesy Lasagna Recipe
      Photo: Easy Cheesy Lasagna Recipe

      Check it out the Easy Cheesy Lasagna Recipe here!!

      [divider]

      [one_fourth]Prep Time:10 minutes[/one_fourth] [one_fourth]Cook Time:30 minutes[/one_fourth] [one_fourth]Servings: 6[/one_fourth] [one_fourth_last]Difficulty Level: Easy[/one_fourth_last]

      [divider]

      [tabs type=”horizontal”] [tabs_head] [tab_title]Ingredients[/tab_title] [tab_title]Nutrition[/tab_title] [/tabs_head] [tab]

      • 1 pound ground beef
      • 1 (8 ounce) package wide egg noodles, cooked
      • 1 (8 ounce) package shredded mozzarella cheese
      • 1 (26 ounce) jar spaghetti sauce
      • 1 cup grated Parmesan cheese
      • 1 cup cottage cheese

      [/tab] [tab]Yield:6 servings

      Nutritional information is not yet available. [/tab] [/tabs]

      Directions:
      [tabs type=”horizontal”] [tabs_head] [tab_title]Step by Step Method[/tab_title] [tab_title]Serving Suggestions[/tab_title][/tabs_head] [tab]

      Step 1

      Heat a non-stick skillet over medium high heat.

      Step 2

      Place beef into the skillet. Cook for 15-20 minutes or until lightly browned.

      Step 3

      Drain.

      Step 4

      Stir in spaghetti sauce.

      Step 5

      Cover and simmer for 5 minutes.

      Step 6

      Stir in noodles.

      Step 7

      Sprinkle with mozzarella cheese and cottage cheese. Stir until well combined.

      Step 8

      Tranfer to a greased 2-quart casserole dish.

      Step 9

      Top with Parmesan cheese.

      Step 10

      Bake, uncovered, at 350 degree F, for 30 minutes or until bubbly and lightly browned. Easy Cheesy Lasagna is ready to serve. ENJOY!!

      [/tab] [tab]

      • Serve with Broccoli Bites.

      [/tab] [/tabs]
      If you like Easy Cheesy Lasagna Recipe and make it then let me know your feedback by commenting below.And if you know more innovative ways in which we can utilize this mouth watering Easy Cheesy Lasagna, do share with us and we would be glad to give it a try.

    • Fresh from the Garden: Flavorful Garden Pizza Recipe (A Burst of Summer!)

      Garden Pizza

      A delicious vegetarian pizza made with zucchini, sweet red pepper, carrots and tomatoes. Give it a try!!

      Garden Pizza Recipe
      Photo: Garden Pizza Recipe

      Check it out the Garden Pizza recipe here !!

      [divider]

      [one_fourth]Prep Time:15 minutes[/one_fourth] [one_fourth]Cook Time:10 minutes[/one_fourth] [one_fourth]Servings:2 [/one_fourth] [one_fourth_last]Difficulty Level: Easy[/one_fourth_last]

      [divider]

      [tabs type=”horizontal”] [tabs_head] [tab_title]Ingredients[/tab_title][tab_title]Nutrition[/tab_title] [tab_title]Diabetic Exchange[/tab_title][/tabs_head] [tab]

      • 1 prebaked mini pizza crust
      • 1/3 cup seeded tomato, chopped
      • 1/3 cup shredded Italian cheese blend
      • 1/2 cup zucchini, chopped
      • 1/2 cup sweet red pepper, chopped
      • 1/2 cup green pepper, chopped
      • 2 tbsp finely chopped onion
      • 2 tbsp finely chopped carrot
      • 2 tsp butter
      • 1 tsp garlic powder
      • 1/8 tsp Italian seasoning
      • 1/8 tsp dried oregano
      • a pinch of pepper

      [/tab] [tab]Yield: 2 servings

      Amount Per Serving:( 1 serving = 1/2 pizza)

      • Calories: 324
      • Fat: 13 g (6 g saturated fat)
      • Cholesterol: 23 mg
      • Sodium: 568 mg
      • Carbohydrate: 42 g
      • Fiber: 4 g
      • Protein: 12 g

      [/tab] [tab]

      • 2 starch
      • 2 vegetable
      • 1-1/2 fat
      • 1 lean meat.

      [/tab][/tabs]

      Directions:
      [tabs type=”horizontal”] [tabs_head] [tab_title]Step by Step Method[/tab_title] [tab_title]Serving Suggestions[/tab_title][/tabs_head] [tab]

      Step 1

      Preheat oven to 450 degree F.

      Step 2

      Place pizza crusts on a pizza stone.

      Step 3

      Melt butter in a large skillet over medium heat.

      Step 4

      Saute the zucchini, peppers, onion, carrot and garlic for 8-10 minutes or until crisp-tender.

      Step 5

      Sprinkle with Italian seasoning, oregano and pepper.

      Step 6

      Toss to coat.

      Step 7

      Spoon vegetable mixture onto the prepared crust to within 1/2 inch of edges.

      Step 8

      Top with tomato and Italian cheese.

      Step 9

      Bake, in the preheated oven, for 10 minutes or until cheese is melted.

      Step 10

      Remove from the oven. Cut into wedges. Garden Pizza is ready to serve. Enjoy!!

      [/tab] [tab]

      • Serve with your favorite dipping sauce.

      [/tab] [/tabs]
      If you like Garden Pizza Recipe and make it then let me know your feedback by commenting below.And if you know more innovative ways in which we can utilize this  mouth watering Garden Pizza, do share with us and we would be glad to give it a try.

    • Baked Alaska Recipe

      Baked Alaska

      Baked Alaska is a layered dessert consisting of cake, ice cream and sweet meringue. Treat yourselves to a sweet delight with this baked Alaska recipe.

       Baked Alaska Recipe
      Photo: Baked Alaska Recipe

      Check it out the Baked Alaska Recipe here!!

      [divider]

      [one_fourth]Prep Time:15 minutes + freezing[/one_fourth] [one_fourth]Cook Time:30 minutes[/one_fourth] [one_fourth]Servings: 6[/one_fourth] [one_fourth_last]Difficulty Level: Medium[/one_fourth_last]

      [divider]

      [tabs type=”horizontal”] [tabs_head] [tab_title]Ingredients[/tab_title] [tab_title]Nutrition[/tab_title] [/tabs_head] [tab]

      • 1 package white cake mix,(about 18.25 oz)
      • 1 cup white sugar
      • 1 egg
      • 8 egg whites
      • 1/2 tsp almond extract
      • 1/8 tsp cream of tartar
      • 1/8 tsp salt
      • 2 quarts vanilla ice cream, softened

      [/tab] [tab]Yield: 1 – 8 inch round Alaska

      Amount Per Serving

      • Calories: 330 kcal
      • Carbohydrates: 53.1 g
      • Cholesterol: 42 mg
      • Fat: 11.1 g
      • Fiber: 0.7 g
      • Protein: 6 g
      • Sodium: 315 mg

      [/tab] [/tabs]

      Directions:
      [tabs type=”horizontal”] [tabs_head] [tab_title]Step by Step Method[/tab_title] [tab_title]Serving Suggestions[/tab_title][/tabs_head] [tab]

      Step 1

      Line the bottom and sides of a deep 8×8 container with foil.

      Step 2

      Spread ice cream in container, packing firmly.

      Step 3

      Cover and freeze for overnight or until firm.

      Step 4

      Preheat oven to 175 degrees C.

      Step 5

      Grease and flour an 8×8 inch pan.

      Step 6

      Prepare cake mix with egg and almond extract.

      Step 7

      Pour into the prepared container.

      Step 8

      Bake, in the preheated oven, for 25 minutes or until center of cake springs back when lightly touched.

      Step 9

      Beat egg whites with cream of tartar, salt and sugar until stiff peaks form.

      Step 10

      Line a baking sheet with parchment paper.

      Step 11

      Place cake in the center.

      Step 12

      Turn molded ice cream out onto cake.

      Step 13

      Quickly and prettily spread meringue over cake and ice cream, all the way to paper to seal.

      Step 14

      Return to freezer for 2 hours.

      Step 15

      Preheat oven to 220 degrees C.

      Step 16

      Bake the Alaska on the lowest shelf for 8 minutes or until meringue is lightly browned.

      Step 17

      Remove from the oven. Baked Alaska is ready to serve.

      [/tab] [tab]

      • Serve as a dessert after any meal.

      [/tab] [/tabs]
      If you like Baked Alaska Recipe and make it then let me know your feedback by commenting below.And if you know more innovative ways in which we can utilize this sweet and mouth watering Baked Alaska, do share with us and we would be glad to give it a try.