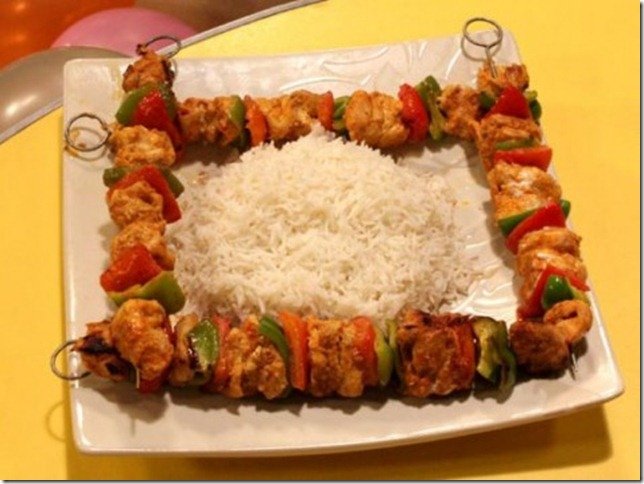
Kashmiri Chicken Pulao
A Colorful and flavorful one pot meal , this kashmiri chicken Pulao is my favourite quick fix for a weekday dinner. The chicken pulao comes to your rescue when the thought of preparing chicken biryani looks like too time consuming and difficult.
Last Sunday, I made Kashmiri Chicken Pulao along with Green Mango Chutney.This kashmiri Chicken Pulao looks great with all nuts and colors. My Grandpa(nana) and cousins love this pulao because its not too spicy. This chicken pulao is a milder version and the spice level can be adjusted according to the preference You can make this kashmiri Chicken Pulao recipe for lunch box,dinner any special occasion.

It’s a kashmiri style pulao. This kashmiri Chicken Pulao recipe uses aromatic spice and chicken. It is the delicious and shahi preparation of basmati rice, which is truly an aromatic. Must try this Kashmiri Chicken Pulao recipe and don’t forget to share your experience with us !!
 If you have any question about this Kashmiri Chicken Pulao Recipe then you can ask by using comment box and we will clarify your confusion. Check it out the Kashmiri Chicken Pulao Recipe here!!
[divider] [one_fourth]Prep Time:20 minutes[/one_fourth] [one_fourth]Cook Time:50 minutes[/one_fourth] [one_fourth]Servings:5 [/one_fourth] [one_fourth_last]Difficulty Level: Medium[/one_fourth_last] [divider] [tabs type=”horizontal”] [tabs_head] [tab_title]Ingredients[/tab_title] [tab_title]Nutrition[/tab_title] [/tabs_head] [tab]
- 1 kg basmati rice
- 1 kg chicken, cut into pieces
- 3-1/2 cups chicken stock
- 1 cup sliced onion
- 1 cup plain yogurt
- 1/2 cup desi ghee
- 1 tablespoon ginger garlic paste
- 2 teaspoon cumin seeds
- 2 teaspoon coriander powder
- 1 teaspoon black pepper powder
- 1 teaspoon red chilli powder
- 1 teaspoon mace powder
- 4 green cardamom
- 4 cinnamon sticks
- 4 green chilies, thinly sliced
- few black pepper corns
- 1 inch piece of ginger, thinly sliced
- Salt to taste
For Garnishing:
- 2 tablespoon raisins and nuts
- 2 tablespoon brown onion
[/tab] [tab]Yield: 5 servings Nutritional information is not yet available. [/tab] [/tabs] Directions: [tabs type=”horizontal”] [tabs_head] [tab_title]Step by Step Method[/tab_title] [tab_title]Serving Suggestions[/tab_title][/tabs_head] [tab]
Step 1
Wash rice with few changes of water and soak for 20 minutes.
Step 2
Wash chicken properly; trim all excess fat. Drain well.
Step 3
In a large bowl, combine the yogurt, red chilli powder, mace powder, coriander seed powder, salt and black pepper powder. Mix well and keep it aside.
Step 4
Heat desi ghee in a skillet or pot over medium heat.
Step 5
Saute onion in oil until golden brown. Now Add ginger garlic paste and cook for 30 seconds.
Step 6
Now add the green chillies and cook and stir for 1 minute then add yogurt mixture.
Step 7
Cook for 2-3 minutes then add chicken pieces. Add some salt too at this stage.
Step 8
Stir and cook until chicken is no longer pink.
Step 9
Add chicken stock. Bring to a boil.
Step 10
Cover and let it simmer for 10 minutes or until chicken is cooked.
Step 11
Add the rice to the chicken and Cover the pan with lid and pressure cook until the Chicken and rice is well cooked and tender.
Step 12
Gently stir the rice because basmati after soaking becomes very fragile.
Step 13
Dish it out.
Step 14
Garnish with brown onion, raisin and green chillies. Kashmiri Chicken Pulao is ready to serve. ENJOY!!
[/tab] [tab]
- Serve with green Mango chutney and salad.
[/tab] [/tabs] Here are some of the Pulao Recipes I’ve shared (click on the Recipe Name to get the recipe) !


View More Pulao Recipes Here>>
If you like Kashmiri Chicken Pulao Recipe and make it then let me know your feedback by commenting below.


