Wash chicken properly and cut into bite size pieces.
Step 2
Take a large bowl, add yogurt, lemon juice, oil, garlic-ginger paste, cumin powder, coriander powder, food color, salt, pepper and cayenne pepper in it.
Step 3
Mix until well combined.
Step 4
Add chicken to the marinade. Turn to coat evenly.
Step 5
Cover and refrigerate for 4 hours to blend flavours.
Step 6
Preheat an outside charcoal grill to medium.
Step 7
Brush grill grate with oil or cooking spray.
Step 8
Thread chicken pieces on metal skewers.
Step 9
Place skewers on the preheated grill. Cook for 20 minutes or until chicken is no longer pink inside and juices run clear when chicken is pierced.
Step 10
To Make Onion Relish:
Meanwhile, in a small bowl, combine together the onion, coriander, lemon juice, salt and pepper. Let stand for 30 minutes.
Step 11
Remove from the skewers and transfer into a serving platter. Delicious Chicken Tikka is ready to serve. ENJOY!!
[/tab] [tab]
Serve along with naan and onion relish.
[/tab] [/tabs]
If you like Chicken Tikka Recipe and make it then let me know your feedback by commenting below.And if you know more innovative ways in which we can utilize this mouth watering Chicken Tikka, do share with us and we would be glad to give it a try.
This Chicken Tacos Recipe is so quick and easy to make. It’s really good for those nights you don’t have a lot of time for dinner preparations. Do try it!!
1 pound boneless chicken breasts, cut into small cubes
1 cup lemonade
2 tablespoons olive oil
1 tablespoon lime juice
1-1/2 teaspoons Worcestershire sauce
1/2 teaspoon garlic powder
1/2 teaspoon onion powder
1 bay leaf
1 (about 12 ounce) package corn tortillas
1 head lettuce, shredded
2 large tomatoes, chopped
1 cup shredded Cheddar cheese
1 cup salsa
1 cup sour cream
[/tab]
[tab title=”Nutrition” ]
Yield: 8 servings
Amount Per Serving: ( 1 serving = 1 Each)
Calories: 401 kcal
Carbohydrates: 30.3 g
Cholesterol: 75 mg
Fat: 20.7 g
Fiber: 4.4 g
Protein: 24.9 g
Sodium: 435 mg
Percent Daily Values are based on a 2,000 calorie diet.
[/tab]
[/tabs]
Directions:
[tabs style=”h1″ ]
[tab title=”Step By Step Method” ]
Step 1
In a large bowl, combine together the chicken, lemonade, olive oil, lime juice, and Worcestershire sauce.
Step 2
Season with garlic powder, onion powder, and bay leaf.
Step 3
Marinate for 20 minutes to blend flavors.
Step 4
Place chicken in a skillet. Simmer on low heat for 20 minutes or until chicken is no longer pink and all juices run clear.
Step 5
Meanwhile, warm the tortillas in the oven or microwave until soft.
Step 6
Now divide chicken mixture in 8 tortillas evenly.
Step 7
Top each with lettuce, tomatoes, cheese, salsa, and sour cream. Delicious Chicken Tacos are ready to serve.
[/tab]
[tab title=”Serving Suggestions”]Serve with Lemonade.[/tab]
[/tabs]
If you like Chicken Tacos Recipe and make it then let me know your feedback by commenting below.And if you know more innovative ways in which we can utilize this mouth watering Chicken Tacos, do share with us and we would be glad to give it a try.
Super Crispy delicious Chicken Wings. The secret to these Fried Chicken Wingsis soaking the wings twice in the egg-milk mixture and double-dredging in seasoned flour for a superior crust. Give it a TRY!!
A little different – chicken wings are roll in cornflour then deep fried until crispy and golden brown. Goes great with Sweet and Sour Sauce.
Photo: Crispy Fried Chicken Wings Recipe
Check it out the Crispy Fried Chicken Wings Recipe here!!
[one_fourth]Prep Time:10 minutes + marination[/one_fourth] [one_fourth]Cook Time:10 minutes Per batch[/one_fourth] [one_fourth]Servings: 6[/one_fourth] [one_fourth_last]Difficulty Level: Very Easy[/one_fourth_last]
[tabs style=”h1″ ]
[tab title=”Ingredients” ]
2 pounds chicken wings,
1 large egg, lightly beaten
1 cup buttermilk
1-1/2 cup all-purpose flour
1/2 cup saltine crackers, crushed
1 teaspoon freshly ground black pepper
1 teaspoon crushed dried thyme
1/4 teaspoon cayenne pepper
1/2 teaspoon garlic powder
salt to taste
oil for deep frying
[/tab]
[tab title=”Nutrition” ]
Yield: 6 servings
Amount Per Serving ( 1 serving = 3 pieces)
Calories: 1064 kcal
Carbohydrates: 93.6 g
Cholesterol: 203 mg
Fat: 53.7 g
Fiber: 3.5 g
Protein: 48.3 g
Sodium: 1119 mg
Percent Daily Values are based on a 2,000 calorie diet.
[/tab]
[/tabs]
Directions:
[tabs style=”h1″ ]
[tab title=”Step By Step Method” ]
Step 1
Cut chicken wings into 3 sections; discard wing tips and keep aside.
Step 2
In a medium bowl, beat together the egg and buttermilk until amooth and well combined.
Step 3
Put chicken wings in the buttermilk mixture.
Step 4
Cover and refrigerate for 30 minutes.
Step 5
In a shallow bowl, mix together the flour, crushed crackers, black pepper, thyme, cayenne pepper, garlic powder and salt.
Step 6
Heat oil in a deep-fryer or large skillet over medium heat.
Step 7
Remove chicken wings from the buttermilk marinade, and discard the remaining marinade.
Step 8
Allow the excess buttermilk to drip from the wings.
Step 9
Press chicken wings into the bread crumbs to coat evenly.
Step 10
Cook in batches in the hot oil for 10-12 minutes or until the breading is golden brown on the outside, and the chicken wings are no longer pink at the bone.
Step 11
Remove from the oil and drain on a kitchen paper. Crispy Fried Chicken Wings are ready to serve. ENJOY!!
[/tab]
[tab title=”Recipe Note’s” ]For buffalo wings, same procedure as above only immediately after removing from oil, place in large seal-able container with wing sauce and shake to coat wings.[/tab]
[tab title=”Serving Suggestions”]Serve with cheese sauce and some salad.[/tab]
[/tabs]
If you like this Crispy Fried Chicken Wings Recipe, Please Subscribe to my blog. I have lots more recipes to share with you. And If you make it then let me know your feedback by commenting below.
An EASY comfort food recipe with just few ingredients and ready in 30 minutes!! Lip Smacking Cheesy Chicken Cups with a cheesy filling are sure to be a family favorite. Great for breakfast, dinner, snacks, a party appetizer or anything in between!!
Cheesy Chicken Cups
Cheesy Chicken Cups
I had some extra chicken cooked and was looking to use it in a super fast and easy recipe. Since I also had few slider buns in my fridge, this fit the bill perfectly. I love the idea of the Slider cups (I can’t wait to get creative and try other things with that concept) and the filling was ooey-gooey, warm and cheesy. This is a very quick and simple way to get that comfort food taste/feeling.
Here is my first try. I was thrilled they turned out just right. They look so Lip smacking and appetizing (thus the name Lip Smacking Cheesy Chicken Cups). These are just as beautiful as they are delicious. My taste buds are going crazy, and I cannot wait for the next course in this meal. For a change of pace from your average dinner, this Cheesy Chicken Cups fits the bill! Unusual as it may be, once you take a bit, you will be reminded of some of your favorite chicken recipes. This is cheesy, flavorful, and will be loved by the whole family. Try making it tonight!
Cheesy Chicken Cups yes! Please give me one moment. All righty – I’m good now. I had to take a break to stare at these little beauties.
Extra Cheesiness Alert
Alright, lets move to the cheesiness of this recipe.
Cheesy chicken filling, extra cheese on top and pepper flakes all stuffed up in a crispy slider bun shell. Slider Buns are great for so many appetizers. I used regular sized muffin tins, so I used bun half per cup, overlapping the corners so that all the edges are covered. This whole recipe is sure to leave you stuffed and satisfied!
Cheesy Chicken Cups Recipe
What I Love About The Cheesy Chicken Cups?
What I love about these Cheesy Chicken Cups – they are SO SIMPLE. Seriously, simple ingredients, and half an hour are all it takes to make these Lip Smacking Cheesy Chicken Cups! They are very good and easy to make, filled with a delicious cheesy chicken filling that everyone will love. We normally have all these items on hand. Mini Slider Buns make great cups for these cheesy treats. You can also use any leftover chicken for this.
Cheesy Chicken Cups Recipe
If you serve these at your Iftar Party or next get together , you may want to make a few a double batch – your guests will love them too!
Cheesy Chicken Cups with Pasta Salad that are hearty enough to serve for dinner.
Bismillah let’s get started. Check it out Hot and Sour Noodles Recipe and printable version here!!
Put your own spin on it. And lemme know how it turns out. Post a photo on Facebook (Recipestable) or Instagram on Twitter so I can see how lovely yours turn out.
Pizza is a popular and delicious dish of Italian origin, that has become extremely popular all over the world.
Today i am bringing you guys an amazing fusion dish. Fusion cooking is a delight!It creates magic and is fairly easy to do. When we combine a number of cuisines in one meal, we get a delicious combination of new tastes and flavors.
If you love pizza and you love BBQ aroma – then this is totally your kind of Pizza.It sounded AH-mazing!…and it sure was! It was “love at first bite”!
Photo: Chicken Tikka Pizza
Chicken tikka is Asian style of barbecued chicken and it tastes fabulous as a topping on pizza. It has become widely popular in Pakistan.
Photo: Chicken Tikka Pizza Marination
I made it yesterday for my family and especially for my brother. He is a true pizza lover. He was sad when it got over and even though he knew there was no more pizza left he was talking about how he felt like having this pizza the next day. He still talks about it. And while writing this post, I wish I had some pizza dough so that I could make this again now.
If you ask me what makes a good pizza, i would definitely say that it is the sauce. I will overlook a ‘meh’ crust if the sauce is good. Yeah, but of course, i would prefer when both the crust and sauce are amazing, but the highlight of a pizza for me is definitely its sauce. And this sauce is just ‘magical perfection’. Talking about the crust, i prefer thin crust pizza over a thick chewy one. And this recipe gives you the perfect crust. The best part is that it is super easy. Hope you guys give this recipe a try and be fall illustrious among your friends and relatives for making finest an admirable Chicken pizza.
So let the fun begin
1st Prepare Chicken Tikka:
Marinate the chicken with the lemon juice, yogurt, ginger garlic paste, roasted cumin powder, garam masala, red chilli powder, tikka masala powder and salt.Marinate for atleast 4 hours ( perferably marinate overnight).
Photo: Chicken Tikka Pizza Marination
Now broil on high for 8-10 minutes, turning over once. Or grill till cooked.
Transfer into a bowl and keep side.
Note:Sorry I din’t get grilling process pictures as I was on in a hurry to assemble the pizza. 😛
Now Make Pizza Dough :
In a large mixing bowl, mix 2 cups flour, yeast, sugar, milk powder and salt.
Combine warm water, egg and butter in a small bowl.
Photo: Pizza Dough Ingredients
Add this in the flour mixture and beat with an electric mixer on High for 3 minutes.
Using a wooden spoon, stir in as much of the remaining flour as you can. or knead with hand.
Turn dough out onto a lightly floured surface. Knead in enough of the remaining flour to make a moderately stiff dough that is smooth and elastic ( 3 to 5 minutes ).
Shape dough into a ball. Place in a lightly greased bowl, turning once to grease dough surface.
Photo: Pizza Dough
Cover bowl and let the dough rise in a warm place until double in size ( 50 to 60 minutes ).
Punch dough down. Turn dough out onto a lightly floured surface.
Cover and let rest for 10 minutes.
To Make Pizza Sauce :
Blend tomato paste, tomato sauce, oregano in a blender.
Heat 1 teaspoon butter in a pan, add garlic paste & fry for 1 minute.
Add blended tomato mixture & paprika.
Cook on medium heat until sauce is thick. Keep aside and let it cool competely.
To Assemble The Pizza
Preheat oven to the highest setting on your oven. Mine goes to 250 C degree.
If you have a pizza stone, place it in the oven. I do not have one, and I use the back of my sheet pan.
You do not have to preheat your sheet pan. Dust your sheet pan.
Roll out your pizza dough.
Drizzle some melted butter on top of your rolled out pizza.
Prick with fork and let it rest for 10 minutes.
Spread pizza sauce over it.
Top generously with the chicken tikka and capsicum.
Sprinkle cheddar cheese and mozzarella cheese.
Sprinkle parsley and oregano on top the pizza.
Bake for 20 minutes or until cheese has melted and crust has cooked.
Sprinkle some extra parsley. Let cool a little. Cut into slices and serve.
Lets go to weekend Programming class with this fabulous pizza. I’m sure my class-fellow’s will enjoy this pizza. 🙂
Recipe Notes:
.FOR PIZZA DOUGH: If you want to store the extra pizza dough for future use, just oil the dough ball all around and put each ball into separate zippered freezer bag. You can freeze this way for about 2-3 days.The day before you plan on using them, just transfer the dough to the refrigerator. And on the day of usage, remove from fridge, place on a floured counter and gently press the ball into 1/2 inch thickness and let rise for 2 hours.
Photo: Pizza Dough
FOR PIZZA CRUST: The crust cooks really fast. Mine actually took just 12 minutes. Do not over cook or your crust will become hard. By the time the cheese melts, the crust will get cooked. Even then just check before taking out.
Photo: Chicken Tikka Pizza Crust
FOR PIZZA SAUCE: This recipe makes about 1-1/2 cups of pizza sauce, I often have a bit leftover for during the week if I want to make bread pizza pinwheels or homemade pizza rolls. Sometimes, I place the extra sauce in sterilized jars and freeze it until i need it next. I just let it thaw in the refrigerator when I know I am going to need it.
FOR TIME SAVING: You wont require much time in the kitchen if you prepare the dough and marinate the chicken the night before. The next day, you will just have to grill the chicken, and thaw the dough for 2 hours and assemble the pizza.
Chicken Tikkawith rich taste texture with cheese, fresh cream and yogurt. You can make this as starter or as main dish with coriander chutney and parathas. This tikka can be grill or bbq instead of baking.
Photo: Tandoori Moti Tikka Recipe
Check it out the Tandoori Moti Tikka Recipe here!!
Put chicken in a large bowl. Add alll ingredients except oil. Mix well
Step 2
Cover and marinate for at least 2 hours to blend flavors.
Step 3
Preheat oven at 180 degree C.
Step 4
Thread chicken pieces on metal skewers and grill in the pre heat oven for 20 mins or until chicken is tender and all juices run clear.
Step 5
Turn and basting occasionally with butter and left over marination after every 5 minutes.
Step 6
Remove from the oven. Transfer into a serving platter.Tandoori Moti Tikka is ready to serve. ENJOY!!
[/tab] [tab]
Serve with onion rings, chutney and puri paratha.
[/tab] [/tabs]
If you like Tandoori Moti Tikka Recipe and make it then let me know your feedback by commenting below.And if you know more innovative ways in which we can utilize this mouth watering Tandoori Moti Tikka, do share with us and we would be glad to give it a try.
As the title of recipe Shimla Mirch with Chicken suggest this dish is a delicious combination of green bell pepper, spiced and mainly chicken. You can have it dinner as well as in lunch. Do confer it an attempt for your own good.
Photo: Shimla Mirch with Chicken Recipe
Check it out the Shimla Mirch with Chicken Recipe here!!
Saute onions, ginger and garlic paste, for few minutes or until trasnculent.
Step 3
Add tomatoes, salt, turmeric, coriander powder and red chilli.
Step 4
Stir well.
Step 5
Cook for 5 minutes or until the oil comes on the top and the tomatoes and tender.
Step 6
Add the chicken and cook on high flame for 15-20 minutes or until no longre pink.
Step 7
Add 1 cup of water.
Step 8
Cover the pot and cook on medium flame for 20 minutes or until the chicken is cooked thorough and little water is left.
Step 9
Now add green bell pepper and sliced onion. Cook on high flame so that the water dries and oil comes on surface.
Step 10
Sprinkle garam masala ovre it. Mix it well.Shimla Mirch with Chicken is ready to serve. ENJOY!!
[/tab] [tab]
Serve with chapati or rice.
[/tab] [/tabs]
If you like Shimla Mirch with Chicken Recipe and make it then let me know your feedback by commenting below.And if you know more innovative ways in which we can utilize this mouth watering Shimla Mirch with Chicken, do share with us and we would be glad to give it a try.
Once boiled, add chopped palak. Simmer for 5 minutes and then strain out the left water.
Step 3
Set the boiled palak aside to cool.
Step 4
Once cooled, blend the palak into a smooth paste.
Step 5
Separately grind onions, ginger, garlic, green chillies and tomatoes to make a fine masala paste.
Step 6
Heat oil in a pan and add the masala paste.
Step 7
Sauté till the masala turns brown.
Step 8
Now, add pepper powder, cumin seed powder, garam masala powder, turmeric powder, coriander powder and salt to it. Cook the mixture for 10 minutes.
Step 9
Now, add the palak paste and mix well.
Step 10
Cook for 10 more minutes add chicken and mix well.
Step 11
Cook for 20 to 30 minutes by covering the vessel with a lid.
Step 12
Remove from the heat when chicken pieces are fully cooked.
Step 13
Garnish with fresh cream. Palak Chicken is ready to serve.
[/tab] [tab]
Serve with rice.
[/tab] [/tabs]
If you like Palak Chicken Recipe and make it then let me know your feedback by commenting below.And if you know more innovative ways in which we can utilize this mouth watering Palak Chicken , do share with us and we would be glad to give it a try.
Learn how to make restaurant-style Hot and Sour Soup with this quick and easy recipe. It’s easy to adapt to your personal taste preferences, and so delicious!
Hot and Sour Soup
Delicious hot and sour soup does not need to be complicated. This Hot and Sour Soup recipe is quick and easy to make, SO tasty and flavorful, and tastes just like the Chinese restaurant version!
And today’s recipe is one that I’ve been meaning to share with you on the blog for years, after literally dozens and dozens of you have requested it. (apparently many of you usually opt for the hot and sour soup at your favorite Chinese restaurants and have wanted to learn how to make it!)
Well, good news, friends! Traditional hot and sour soup is actually incredibly easy to make as well. And the bonus of making it at home is that it’s also incredibly easy to customize to your taste. Like it extra hot? Add in more chili garlic sauce. Like it extra sour? Add in more rice wine vinegar. Like it vegetarian? Make it with tofu. Like the meat version? Just add in some chicken.
Trust me, this is one of those restaurant recipes that will taste just as good at home. And on chilly winter weeks like this one that we’re having here in Lahore, it’s guaranteed to warm you up in the most delicious of ways.
Really, traditional hot and sour soup is just a hotter and sour-er version of egg drop soup, with some mushrooms and chicken (or tofu) thrown in. Oh, and bamboo shoots. Although I’m not really a fan of those, so I left them out in the version above (and included instructions in the recipe for how to add them if you’d like).I highly recommend using shiitake mushrooms for this recipe if you want it to taste ultra-authentic. But if you can’t find any, baby bella or white button mushrooms will totally work too.
Winters’s most favorite mouth watering hot and sour soup, You can serve as appetizer to your guests in special dinner or lunch. Serve very hot to enjoy it’s real taste.
Hot and Sour Soup with lots of veggies has a wonderful blend of hot and sour flavours, this is the perfect choice for a lazy winter evening. I love hot n sour soup especially if I have one of those really bad sinus or chest colds. Try this Hot and Sour Soup Recipe, and don’t forget your experience with us !!
Then just follow the instructions and bring everything to a simmer, drizzle in those eggs in a thin stream while stirring the soup (to create those pretty egg ribbons), and add in your cooked chicken (or tofu) and sesame oil and green onions at the end…
…and serve it up nice and warm, topped with extra green onions for garnish.
The whole thing usually comes together for me in just about 20-25 minutes, making it the perfect meal to warm you up quickly on a chilly day. I love serving it with my homemade fried rice recipe, or any kind of stir-fry that sounds good. And it always, always hits the spot.
Stay warm this week, everyone!
Photo: Easy Hot and Sour Soup Recipe
Check it out the Easy Hot and Sour Soup Recipe here!!
Add carrots, bell peppers, corn and chicken. Saute for few minutes or until crisp-tender.
Add chicken cube and stock and cook on medium to high heat .
Bring to a boil then add cabbage.
Add seasoning that is chili sauce, vinegar, soy sauce, black pepper and salt to taste.
Add egg white and then add corn starch paste slowly to monitor consistency.
Don’t overcook it as it will become thin if you keep on cooking.
Top with spring onions.Easy Hot and Sour Soup is ready to serve. ENJOY!!
Notes
Serving Suggestions: Serve hot with bread-sticks.
I have also posted Chicken Corn Soup Recipewhich is another easiest & tastiest version of making soup. Do check it out as well.
Put your own spin on it. And lemme know how it turns out. Post a photo on Facebook (Recipestable) or on Twitter so I can see how lovely yours turn out.
Happy Cooking!!
If you like this post, Please Subscribe to my blog and let me know your feedback by commenting below.. I have lots more recipes to share with you.
Sometimes its just a bowl of simple chicken corn soup that we need to lift our mood, spirit and feel blessed. It’s a very quick and easy soup perfect for a Sunday night dinner.
This Chicken Corn Soup is made entirely with fresh corn and chicken stock, seasoned with chinese seasoning and flecked with egg. Give it a try, a warming Winter treat!!
Bring to a boil, add shredded chicken and boiled corn.
Step 3
Cover and simmer for 5 minuets than add the seasonings.
Step 4
Dissolve 1 tablespoon cornflour in 1/4 cup of water.
Step 5
Slowly add this mixture in the boiling stock . Note: Be careful, when you add the corn flour mixture .
Step 6
If you want light soup add little and if you want thick soup than add almost all the corn flour .
Step 7
Continuously mix it with spatula now add soya sauce and vinegar.
Step 8
Mix well .
Step 9
Finally, add the beaten eggs and mix it for 2 minutes.
Step 10
Turn the heat off and stir in chili sauce.
Step 11
Ladle into soup bowls. Chicken Corn Soup is ready to serve . ENJOY!!
[/tab] [tab]
Serve with breadsticks.
[/tab] [/tabs]
If you like Chicken Corn Soup Recipe and make it then let me know your feedback by commenting below.And if you know more innovative ways in which we can utilize this mouth watering Chicken Corn Soup , do share with us and we would be glad to give it a try.
Chicken Karahi is a very delicious and easy to make main dish. You can substitute chicken with mutton, and serve with peas pilaf or naan. Give it a try!!
Chicken Karahi is one of the recipes that is probably available in every restaurant and road side dhaba. Karahi refers to Pakistani style wok which is slightly deeper (compared to Chinese wok) and narrower in diameter with a round bottom and curved handles.
Since in Karahi ghost no water or stock is used to cook the ghost and rather the mutton cooks in the masala and its own stock, karahi makes sure the meat doesn’t burn and simmers away slowly braising the meat. Having said that, you may as well cook it in a deep bottom pot with a little stock to help you through.
It is a traditional Pakistani dish which is easy-to-make at home with less oil. In this recipe, chicken nicely is cooked with tomatoes, ginger garlic, green chilli, yogurt and traditionsl Pakistani spices. This simple dish can make your dinner more fantastic.
Photo: Chicken karahi Recipe
Photo: Chicken karahi Recipe
Check it out the Chicken Karahi Recipe here!!
Prep Time:10 minutes
Cook Time:40 minutes
Servings:4
Ingredients
I kg chicken (cut into medium pieces)
1 cup oil
1 medium onion, finely chopped
1 tbsp ginger paste
1 tbsp garlic paste
4 tomatoes,peeled and chopped
1/2 cup plain yogurt
1 tsp red chili powder
7 whole peppercorns, crushed
For Garnishing:
1/2 tsp garam masala powder
5 green chilies,thinly sliced
2 tbsp fresh ginger(julienne)
fresh Coriander leaves, finely chopped
Directions:
Step 1
Rinse and drained chicken properly and set aside.
Step 2
Heat oil in a karahi(pan), add chopped onions and cook it for 2-3 minutes.
Step 3
After 2 minutes add ginger,garlic paste and stir fry it.
Step 4
Add chicken in it and cook for 10 minutes.
Step 5
Then add tomato puree,yogurt,salt and chili powder.
Step 6
Cover with lid and continue cooking.
Step 7
When the water dries and chicken is tender add the peppercorns,and cook for 2 more minutes.
Step 8
Then remove from heat.
Step 9
Sprinkle garam masala on it.
Step 10
Garnish chicken karahi with julienne ginger,fresh coriander and green chilies. Chicken karahi is ready to serve.
Serve with naan and mint chutney.
Note:
If you want creamy mixture, you can also add 2-3 tablespoon fresh cream in the last step and simmer for 1-2 minutes and turn off the stove.
Adding onion to your desired level, above one is a medium spicy curry.
Adding peppercorn is optional, but sure it gives nice flavor and taste to the curry.
For dry masala skip the onion.
If you want to add more colour to the dish, add one teaspoon of tomato paste with the tomatoes. You may have to play around a bit with the chili heat. I find four to six chilies do the trick, my mommy always adds eight. Perhaps one could start with two for a taste-test.
If you like Chicken Karahi Recipe and make it then let me know your feedback by commenting below.And if you know more innovative ways in which we can utilize this mouth watering Chicken Karahi, do share with us and we would be glad to give it a try.
Chicken Rolls pack your favorite ingredients into a quick and easy recipe that makes chicken desirable again. You can prepare it in advance for guests. Give it a try!!
Combine all ingredients with 3/4 tsp iodized fine salt and 1/4 tsp pepper.
Step 2
Mix thoroughly.
Step 3
Wrap every 3/4 cup of mixture in aluminum foil. Roll.
Step 4
Steam for 1 hour.
Step 5
Cool and chill overnight.
Step 6
Unwrap and slice. Chicken Rolls is ready to serve. Enjoy!
[/tab] [tab]
Serve with your favorite dipping sauce.
[/tab] [/tabs]
If you like Chicken Rolls Recipe and make it then let me know your feedback by commenting below.And if you know more innovative ways in which we can utilize this mouth watering Chicken Rolls, do share with us and we would be glad to give it a try.
Boneless chicken are marinated in soya sauce, egg, cornflour, chili sauce and pepper, then deep fried and then seasoned again in sauces.
It tastes hot, sweet and sour. A very simple dish to cook, but has lot of unhealthy stuff in the restaurant style dry chilli chicken, like ajinomotto, food color and lot of oil since they are deep fried.
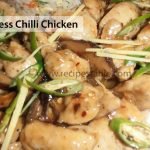
To make this Boneless chilli chicken, I have not used ajinimotto (chinese salt), no food color, yet tastes good. The quintessential Chinese chicken can now be savoured in the comfort of your homes with these few simple steps.Give it a try!!
Photo: Boneless Chilli Chicken Recipe
Check it out the Boneless Chilli Chicken Recipe here!!
Add egg, cornflour, garlic and ginger paste, pepper and salt. Mix well to coat evenly.
Cover and marinate for 30 minutes ot blend flavors.
Heat oil in a deep pan oevr medium heat.
Deep-fry the chicken pieces over high heat to begin with and then lower the heat till chicken is cooked through.
Remove from the oil and drain on absorbent paper.
Heat 2 tablespoon oil in a wok or pan.
Add onions and stir-fry over high heat for 4-5 minutes or until they are translucent.
Add the green chillies and stir a few times.
Then add salt, soy sauce, vinegar, and chilli sauce.
Add fried chicken.
Stir to coat evenly. Cook for 2 minutes or until sauce is thickened.
Dish it out. Garnished with the green chillies and green onion. Delicious Boneless Chilli Chicken is ready to serve. ENJOY!!
Notes
Serving Suggestions: Serve with Steamed Rice or Fried Rice
I have also posted Desi Chili Chicken Recipewhich is another easiest & tastiest version of making Chili Chicken. Do check it out as well.
Put your own spin on it. And lemme know how it turns out. Post a photo on Facebook (Recipestable) or on Twitter so I can see how lovely yours turn out.
Happy Cooking!!
If you like this post, Please Subscribe to my blog and let me know your feedback by commenting below.. I have lots more recipes to share with you.
This Club Sandwich is stacked high with chicken, cheese slices, mustard Mayo and fresh tomatoes goodness. This flavorful Chicken Club Sandwich will add brightness to even the coldest winter day–but are perfect for any time of year.
This quick and easy to prepare club sandwich, makes a tasty meal for two. Also It’s a great picnic food or can be served at a small lunch gathering. Goes great with french fries.
Photo: Chicken Club Sandwich Recipe
Check it out the Chicken Club Sandwich Recipe here!!
In a small bowl, mix together the mustard and mayonnaise.
Step 4
Spread mustard mayonnaise on one side of each bread slice.
Step 5
Place lettuce over a toast and cover with a slice of cheese and some cooked chicken.
Step 6
Cover with another toast and top with tomato slices.
Step 7
Put a fried egg over the tomato.
Step 8
Cover with remaining toast, buttered side down.
Step 9
Secure together with wooden-picks.
Step 10
Cut diagonally into half. Make the other sandwiches with the same method.
Step 11
Transfer into a serving platter. Chicken Club Sandwich is ready to serve. ENJOY!
[/tab] [tab]
Serve with tomato sauce and mustard sauce on the side.
[/tab] [/tabs]
If you like Chicken Club Sandwich Recipe and make it then let me know your feedback by commenting below.And if you know more innovative ways in which we can utilize this mouth watering Chicken Club Sandwich , do share with us and we would be glad to give it a try.
This is really a good dish for only a few ingredients. Very good and modifiableto suit your own tastes. Must try this Italian Chicken Bow Tie Pasta Recipe, you’ ll love it.
Photo:Italian Chicken Bow Tie Pasta
Photo:Italian Chicken Bow Tie Pasta
Check it out the Italian Chicken Bow Tie Pasta Recipe here!!
Bring a large pot of lightly salted water to a boil.
Step 2
Add bow tie pasta; cook for 8-10 minutes or until al dente.
Step 3
Drain and rinse in cold water.
Step 4
In a medium bowl, stir together chicken and salad dressing.
Step 5
Add pasta; toss to coat evenly.
Step 6
Stir in the chopped tomato. Italian Chicken Bow Tie Pasta is ready to serve. Enjoy!!
[/tab] [tab]
Serve warm.
[/tab] [/tabs]
If you like Italian Chicken Bow Tie Pasta Recipe and make it then let me know your feedback by commenting below.And if you know more innovative ways in which we can utilize this mouth watering Italian Chicken Bow Tie Pasta , do share with us and we would be glad to give it a try.
Put some oil in frying pan, Fry one chopped onion in oil until it is light brown.
Step 2
Take out onion and mash it to make a pulp.
Step 3
Put chicken pieces Use the same oil to brown the.
Step 4
Add a cup or so of water, salt and pepper, simmer it till become tender.
Step 5
Remove the meat, and add the ground onion to the stock.
Step 6
Cook until 1 cup of stock remains.
Step 7
Add the 2 grated carrots and cook them in oil on low heat until light brown.
Step 8
Add raisins and fry till plump.
Step 9
Drain and set aside.
Step 10
Boil the rice (become little soft) and drain the rice water.
Step 11
Put the rice into a large size pan.
Step 12
Sprinkle cumin seeds.
Step 13
Pour the meat stock over it and stir.
Step 14
Put the chicken meat in to the Layer half of the blend of raisin and carrots over rice.
Step 15
Cover the pan tightly and give the low heat for 20 minutes.
Step 16
Sprinkle raisin and carrot mixture on surface.Delicious Afghani Pulao is ready to serve.
[/tab] [tab]
Serve warm with salad.
[/tab] [/tabs]
If you like Afghani Pulao Recipe and make it then let me know your feedback by commenting below.And if you know more innovative ways in which we can utilize this mouth watering Afghani Pulao, do share with us and we would be glad to give it a try.