Category: Healthy Recipes

  • Creamy Cucumber Pasta Salad Recipe

    Creamy Cucumber Pasta Salad Recipe

    This post may contain affiliate links. Please read my disclosure policy.

    This quick and easy Creamy Cucumber Pasta Salad combines a creamy dressing – like a mixture of Greek yogurt or sour cream – with freshly sliced cucumbers and red onions along with plenty of chopped dill! It’s the perfect unique pasta salad recipe for your next barbecue party.
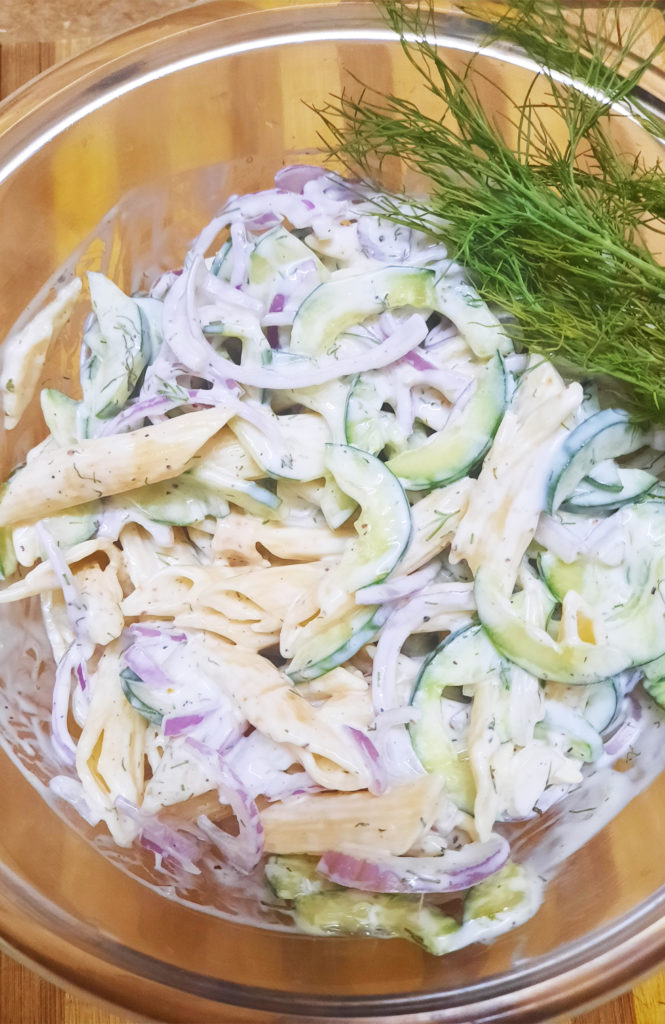
    This quick and easy Creamy Cucumber Pasta Salad combines a creamy dressing - like a mixture of Greek yogurt or sour cream - with freshly sliced cucumbers and red onions along with plenty of chopped dill! It's the perfect unique pasta salad recipe for your next backyard barbecue.
    Creamy Cucumber Pasta Salad Recipe

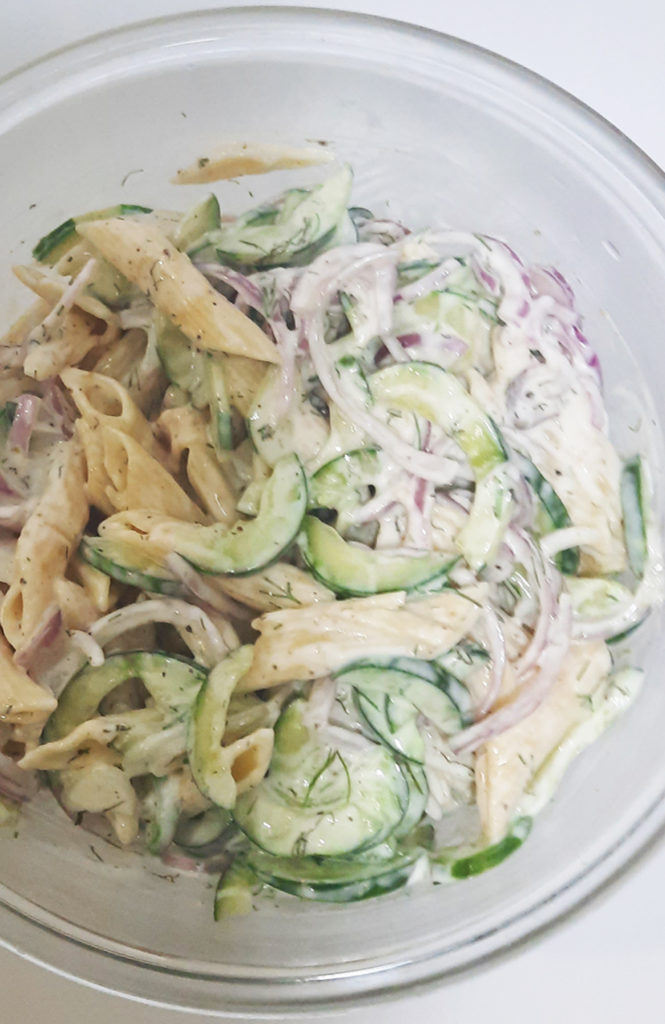
    Loaded with tender pasta, crisp juicy cucumbers, fresh dill and red onion, this dish will be the hit of every get together. And it comes together within just few minutes and it’s incredibly delicious! The dressing in this salad doesn’t have a lot of ingredients, but that’s really the beauty of this recipe! The fresh Greek yogurt adds a little zip to the dressing while the dill adds summery freshness complementing the cucumber and cooked pasta perfectly! 
    Creamy Cucumber Pasta Salad Recipe
    Creamy Cucumber Pasta Salad Recipe

    If you have access to fresh dill, it really makes a huge difference in this salad.

    Ingredients in Creamy Cucumber Pasta Salad Recipe?

    • Pasta: penne or rotini pasta
    • Cucumbers: fresh long English cucumbers work the best for this recipe
    • Onion: red onion (can sub white for less of a “bite”)
    • Dressing: sour cream or Greek yogurt and vinegar
    • Herb: fresh dill
    • Spices: salt and pepper

    Ist Gather Your Equipment’s:

    How to Make this Creamy Cucumber Pasta Salad:

    This is such an easy recipe, y’all. Seriously. Yes to Summer recipes that don’t require hardly any effort!

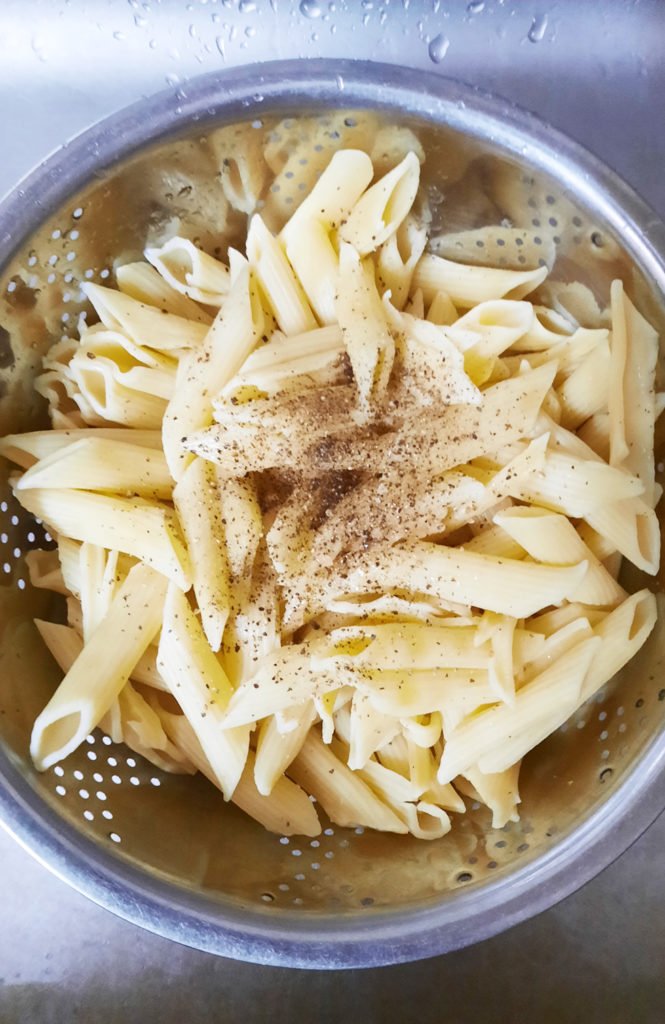
    1. First, begin by cooking your pasta according to the box instructions! Make sure to salt your water and cook the pasta until al dente. Once it’s done, let it cool! If desired, rinse cold water over top to stop the cooking and speed up the cooling process.
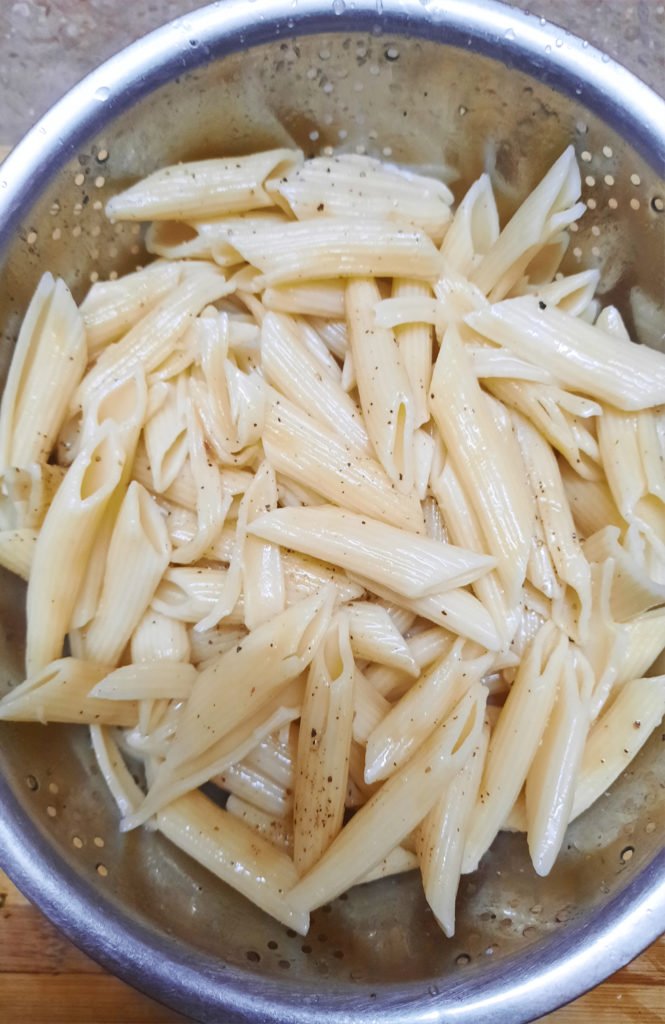
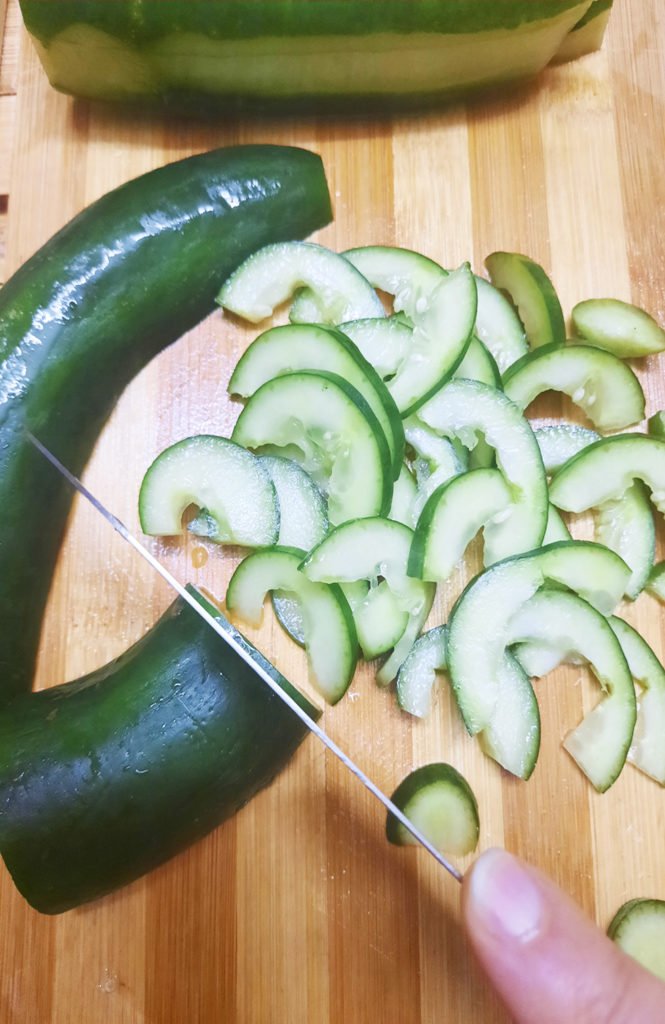
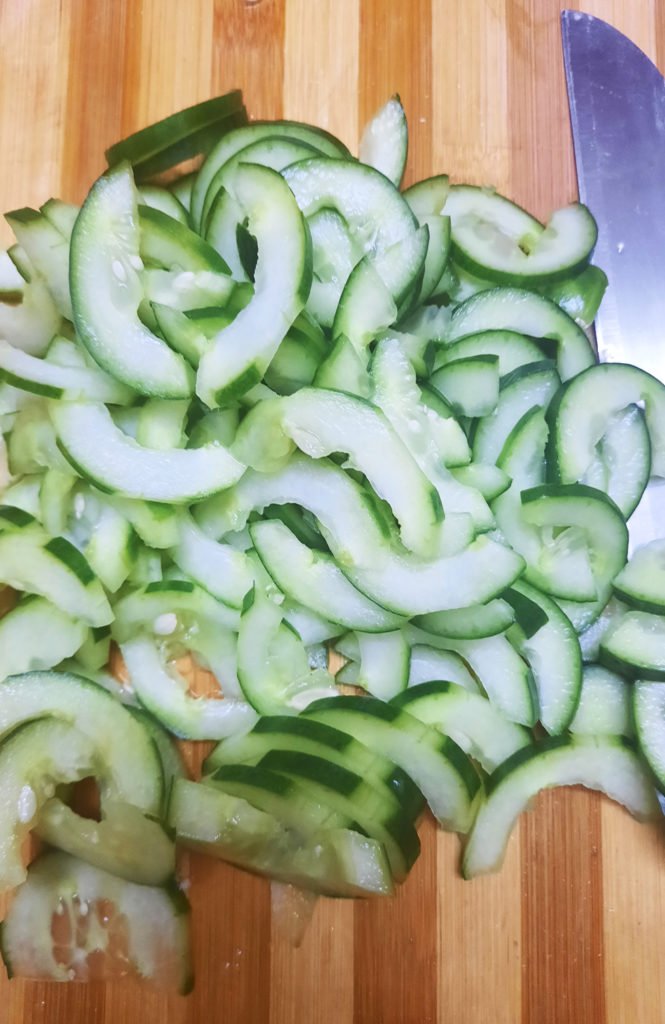
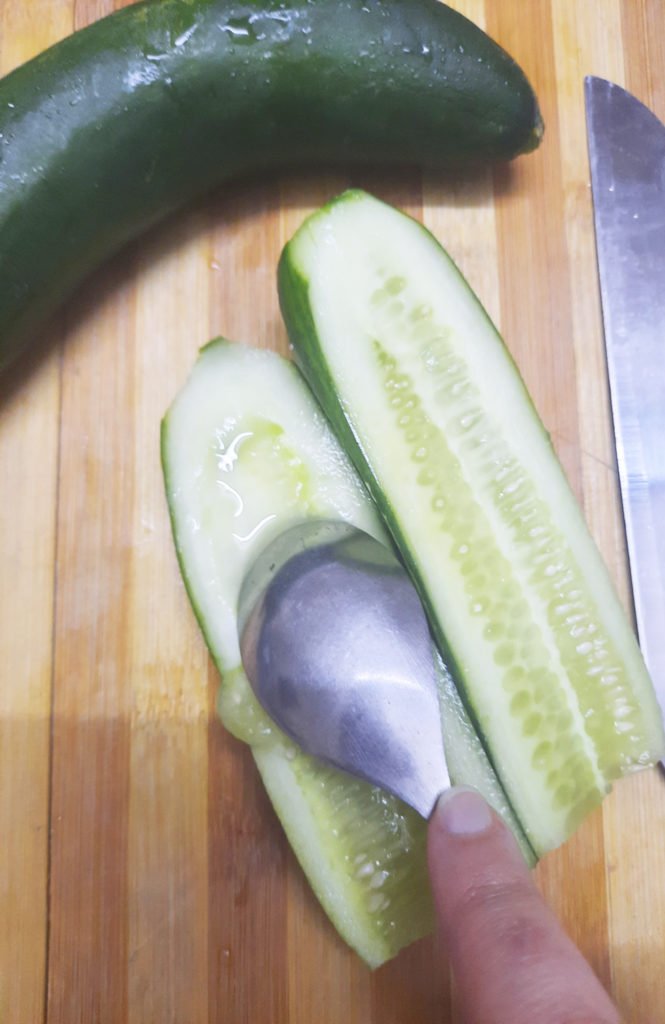
    2. While the pasta is cooling off, slice up your cucumber! Slice it in half lengthwise and then slice very thin slices of cucumber.
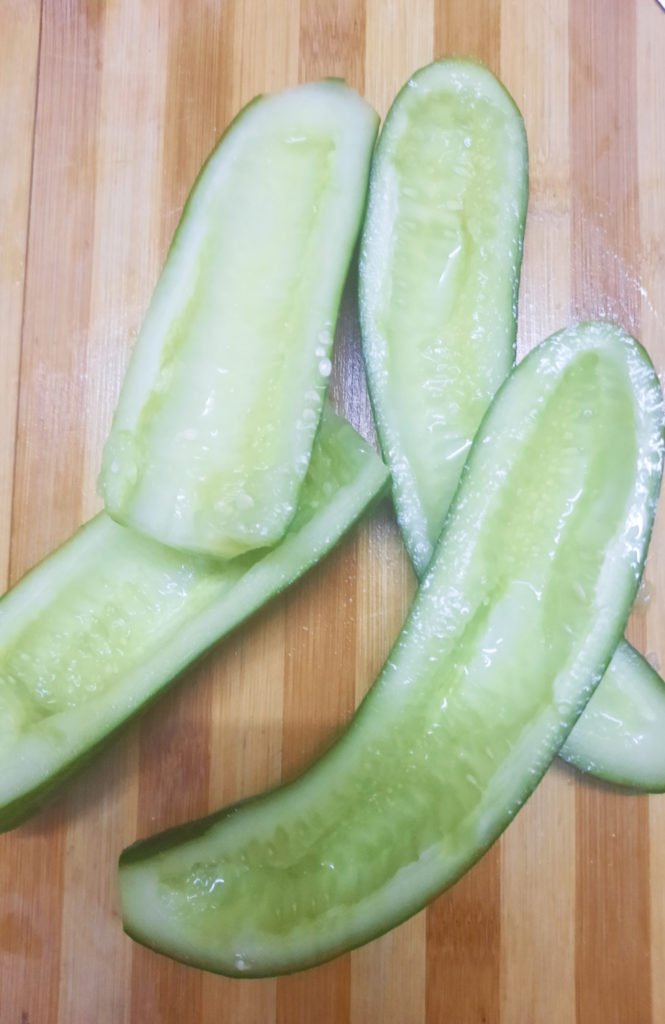
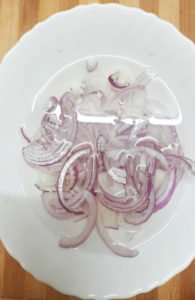
    3. Do the same thing with the red onion! Thin slices go a long way here, folks! While it’s not required, soaking the onions in cold water for a few minutes takes just a little bit of bite out of them.  .
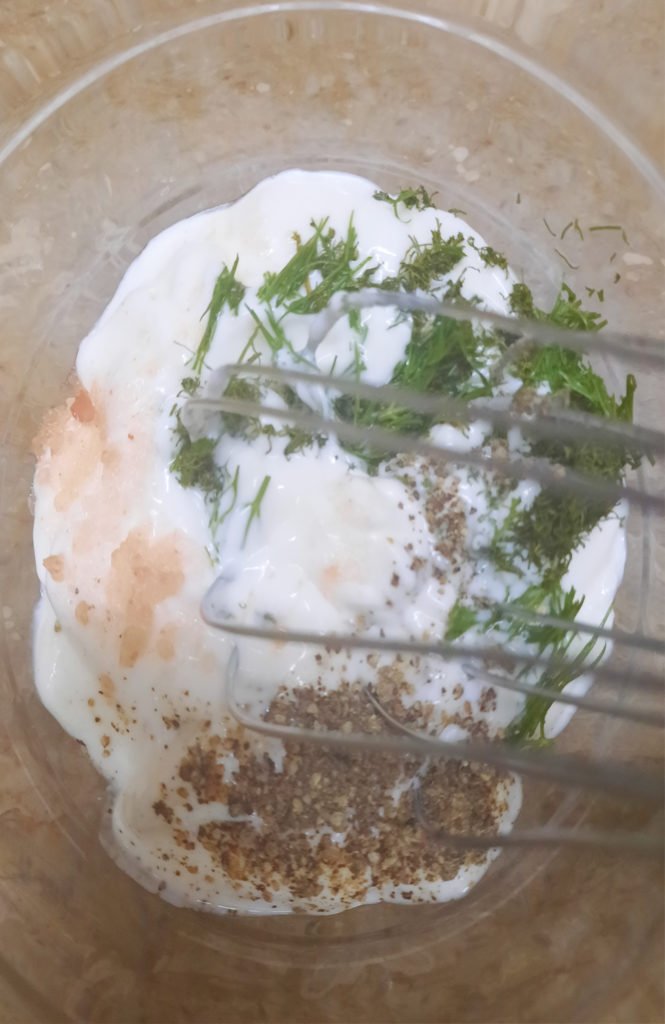
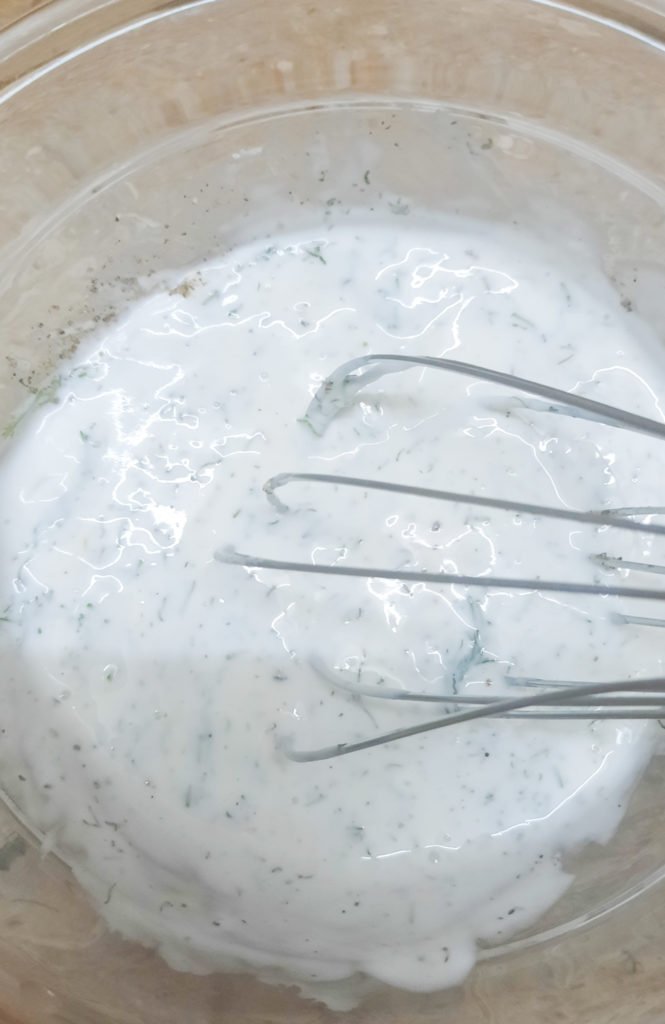
    4. Next, mix together the delicious Greek yogurt dill dressing! Combine the Greek yogurt with the dill, vinegar, salt (i added the pink salt) and pepper. Mix until deliciously thick and creamy. Set this aside.
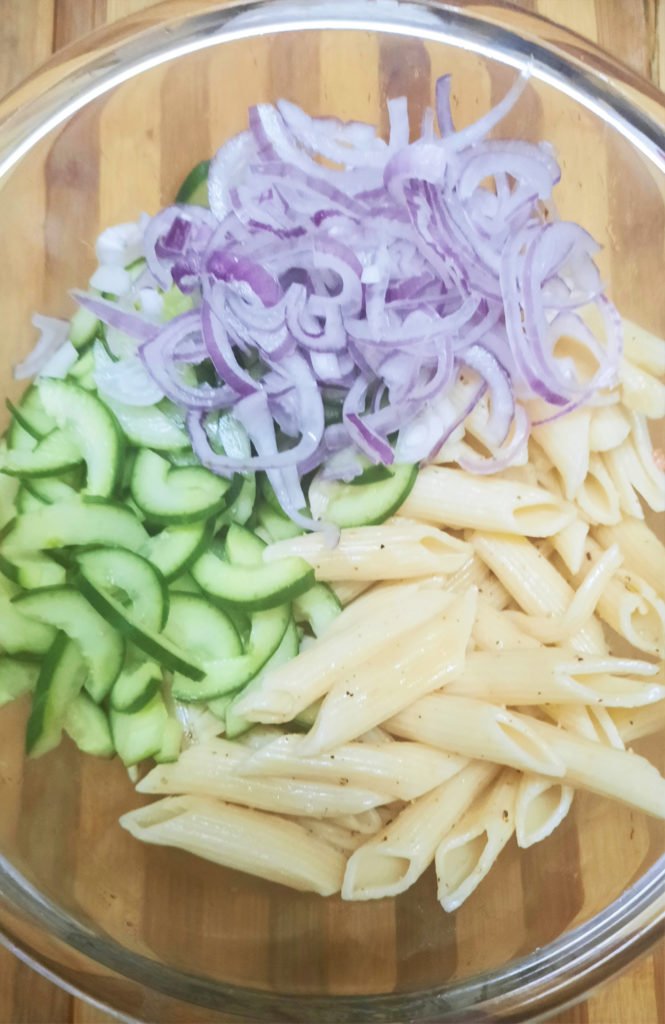
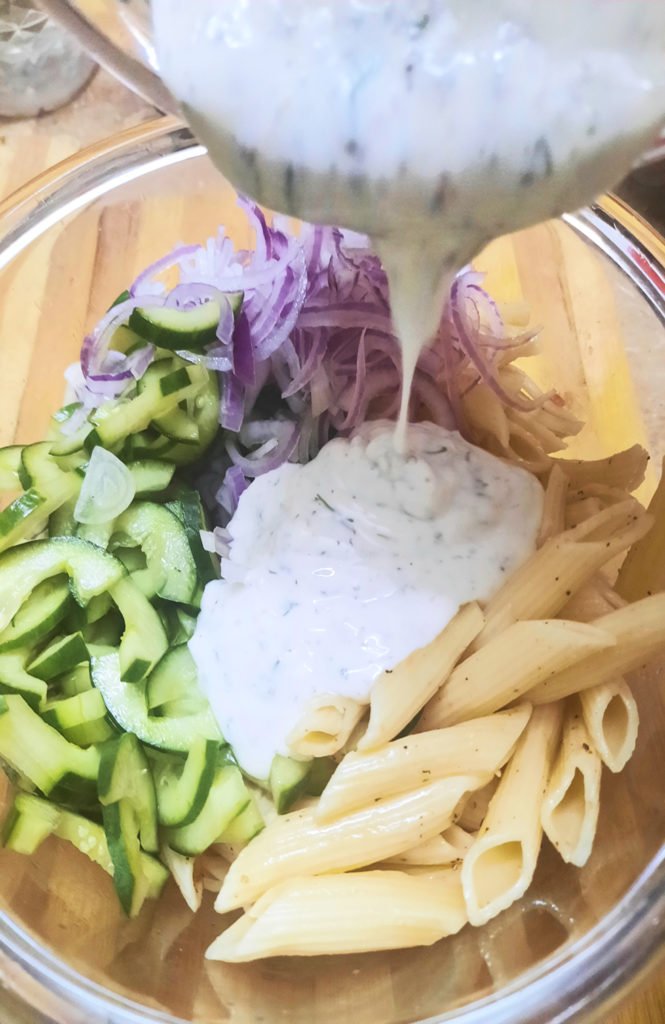
    5. In a large bowl, add your cooled off pasta. On top, add your cucumbers, onions and all of the Greek yogurt dressing! Mix together gently until fully combined.
    6. Taste and adjust the seasoning if necessary. I always love garnishing with a big pinch of extra dill – it makes it taste extra fresh and adds an amazing pop of flavor.
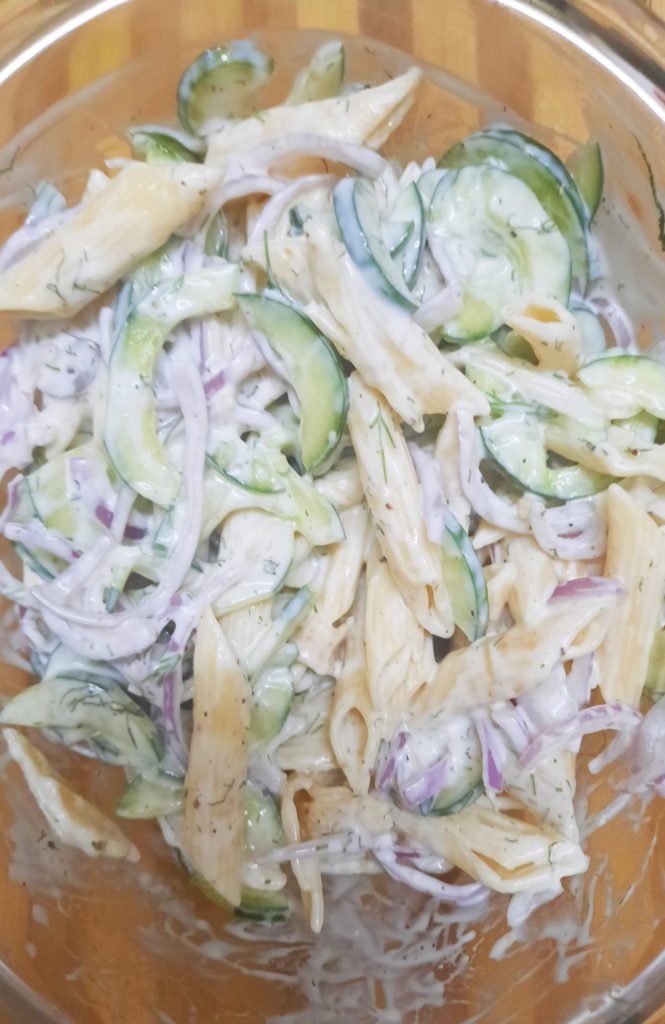
    7. Let it sit in the fridge for about 20-30 minutes to make sure all of the flavors can melt together and it can stay cold! Enjoy when chilled and eat up! 🙂


    Note: If possible try to toss this at least 1 hour before serving to allow the flavors to blend.

    Bismillah let’s get started.
    Check it out The Creamy Cucumber Pasta Salad Recipe and printable version here!!

    Creamy Cucumber Pasta Salad Recipe

    This quick and easy Creamy Cucumber Pasta Salad combines a creamy dressing – like a mixture of Greek yogurt or sour cream – with freshly sliced cucumbers and red onions along with plenty of chopped dill! It’s the perfect unique pasta salad recipe for your next backyard barbecue.
    Keyword 30 minutes meals, cucumber, greek yogurt, Pasta, pasta salad, salad, summer salad, veggie salad
    Prep Time 10 minutes
    Cook Time 10 minutes
    Total Time 20 minutes
    Servings 6
    Author Bushra Waheed

    Ingredients

    For Pasta Salad:

    • ½ pound medium sized pasta such as penne or rotini
    • 2 large English cucumber thinly sliced
    • 1 medium red onion thinly sliced

    For Salad Dressing:

    • 1 cup sour cream or whole fat plain Greek yogurt can substitute mayo if desired
    • 2 tbsp. fresh chopped dill
    • 2 tsp vinegar
    • 1/2 tsp salt
    • 1/2 tsp pepper

    For Garnishing

    • fresh dill

    Instructions

    • Cook pasta according to package directions, until al dente. Drain and drizzle with oil and sprinkle with a couple pinches of salt and pepper. Toss to coat evenly and let it cool.
    • While the pasta is cooling, Thinly slice onion and place in a bowl of cold water. (see note)
    • Slice the cucumber in half lengthwise and remove seeds using a spoon then dice it into thin slices.

    To Make The Salad Dressing:

    • In a small bowl, mix the sour cream or Greek yogurt along with the vinegar, fresh dill, salt and pepper. Mix until fully combined. Taste and adjust seasoning if needed.

    To Make The Creamy Cucumber Pasta Salad:

    • In a large bowl, add the cooled rigatoni pasta. Top with the fresh sliced cucumber and red onion.
    • Pour dressing over pasta and toss to combine.
    • Place in the refrigerator for 20-30 minutes to let the pasta salad cool off and for the flavors to meld together.
    • When serving, if desired, add a large handful of dill on top for garnish and an extra pop of flavor!
    • Delicious Creamy Cucumber Pasta Salad is ready to serve. Enjoy!

    Notes

    Soaking the onions in cold water is optional but takes a bit of the “bite” out of the onion.
    Serving Suggestions:
    Goes great with BBQ Chicken Wings.

    Want more Pasta Salad Inspiration? 

    Here are some other Pasta Salad recipes on my blog:

    Hope you guys loved this one and are having a great Summer. Let me know what your favorite garden produce is this time of year in the comments below! 

    Pin it For Later

    Put your own spin on it. And lemme know how it turns out and do take a few seconds to rate it! I would love to see your recreations so tag me on instagram @recipestable or Facebook (Recipestable) or on Twitter so I can see how lovely yours turn out.
  • Date-Filled Sandwich Biscuits Recipe

    Date-Filled Sandwich Biscuits Recipe

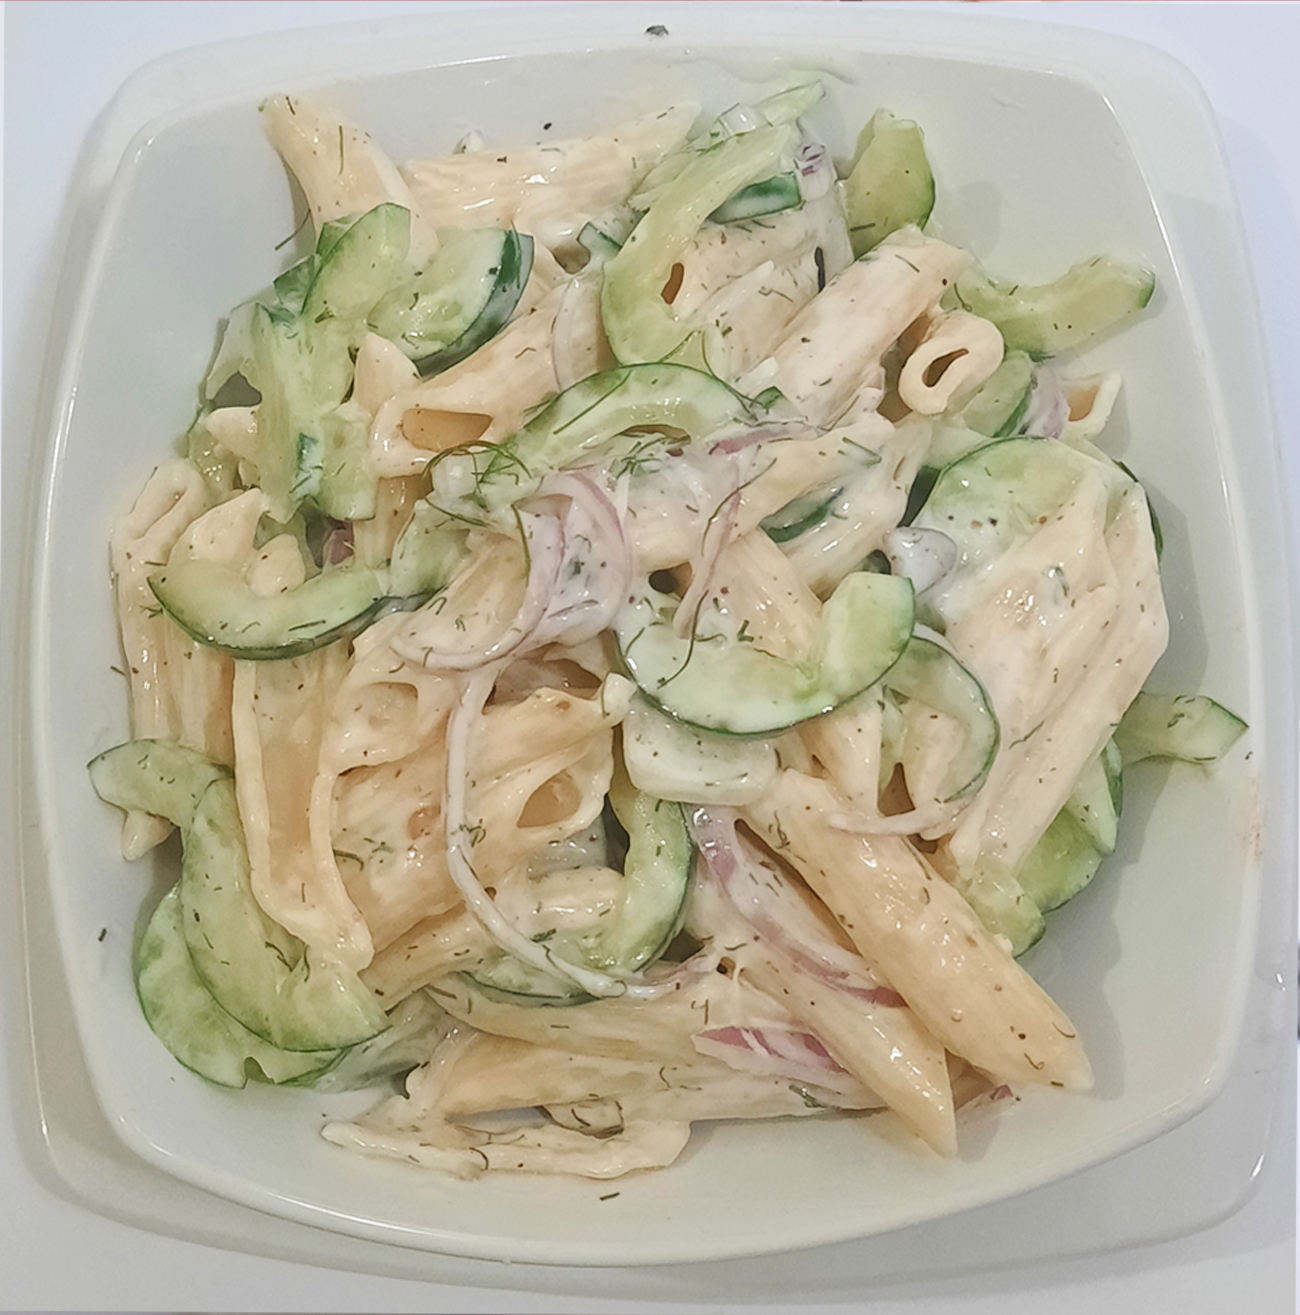
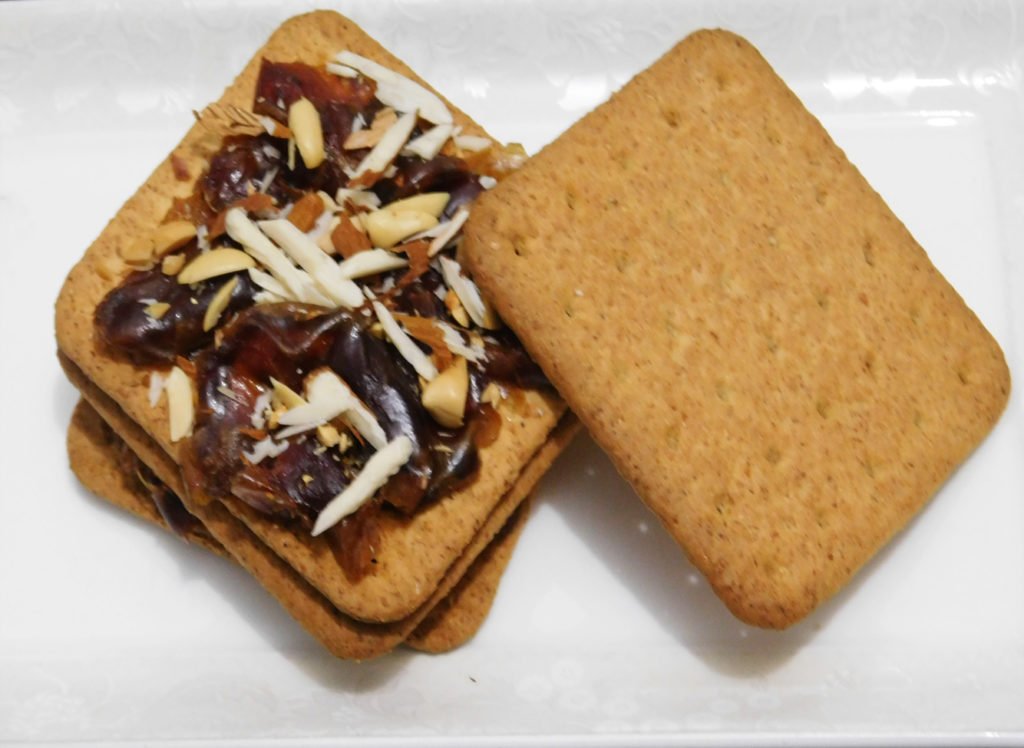
    Easy and impressive, these sandwich biscuits embellish store-bought whole wheat biscuits with a decadent three ingredient date-and-nutty spread that has a honey like sweetness and caramel overtones. Heavenly Delicious !

    A sticky and sweet date and nutty filling spread between Whole Wheat Fiber Rich Biscuits.

    Almost everyone enjoys having evening or morning tea with some light snacks. And if are a tea lover like me, cookies or biscuits would probably be your favorite tea companion. No matter which hot beverage you enjoy everyday, switching to healthy snacks is always a good idea for your health. I love digestive biscuits, but thanks to my sugar craving that persuaded me to turn these whole wheat slices into a delicious healthy treat to satisfy my sweet tooth.

    Why These Date-Filled Sandwich Biscuits are a smart choice

    • When you substitute dates for table sugar, you get a bunch of other nutrients along with your sugar! Sugar is just food that’s been stripped of all fiber, vitamins, and minerals, so why not make your treats sweet with something that actually provides all of those? Dates are high in calories, but unlike sugar, the calories obtained from dates come with a lot of nutritional properties.
    • Dates are rich in potassium, iron and other beneficial plant compounds. The high soluble fiber content helps in fighting off sugar cravings and stimulate the growth of healthy bacteria in the intestines. I prefer to use dates in dessert as a replacement for sugar.
    Date-Filled Sandwich Biscuits Recipe

    Enjoy the sweet, delicious taste of dates in these double-layered sandwich biscuits. This Date-Filled Sandwich Biscuits Recipe is very easy to follow, and the sandwich are a genuine treat that is hard to resist. These wholesome, healthy sandwich biscuits will quickly become one of your favorites. I use the word wholesome because they are made with whole wheat biscuits. Whole wheat provides more fiber. You will love the simplicity and the nutty flavor of these Hearty Date-Filled Sandwich Biscuits.

    Date-Filled Sandwich Biscuits Recipe

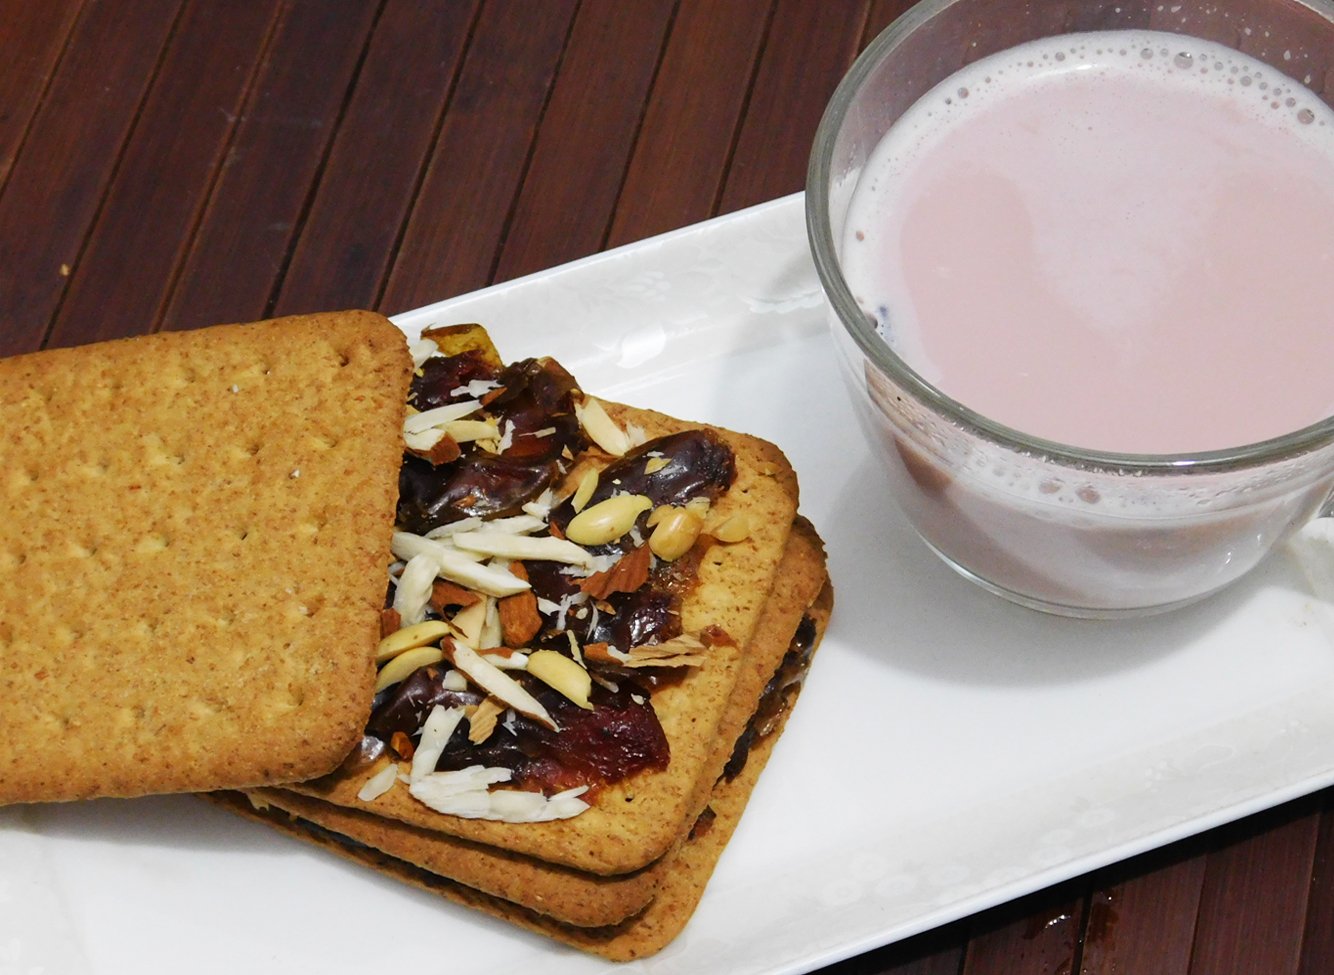
    They are perfectly sweetened with dates and make a great breakfast sandwich. As an added bonus, these healthy sandwich biscuits hold up perfectly when dunked in your hot beverage of choice. I enjoyed it with Kashmiri Green Tea. I know for sure that I’ll be experimenting more with dates in the future, but for now the best way I can think to eat them is squished between two Whole Wheat Sandwich Biscuits. Crunchy, soft, chewy and sweet. And they’re insanely good.

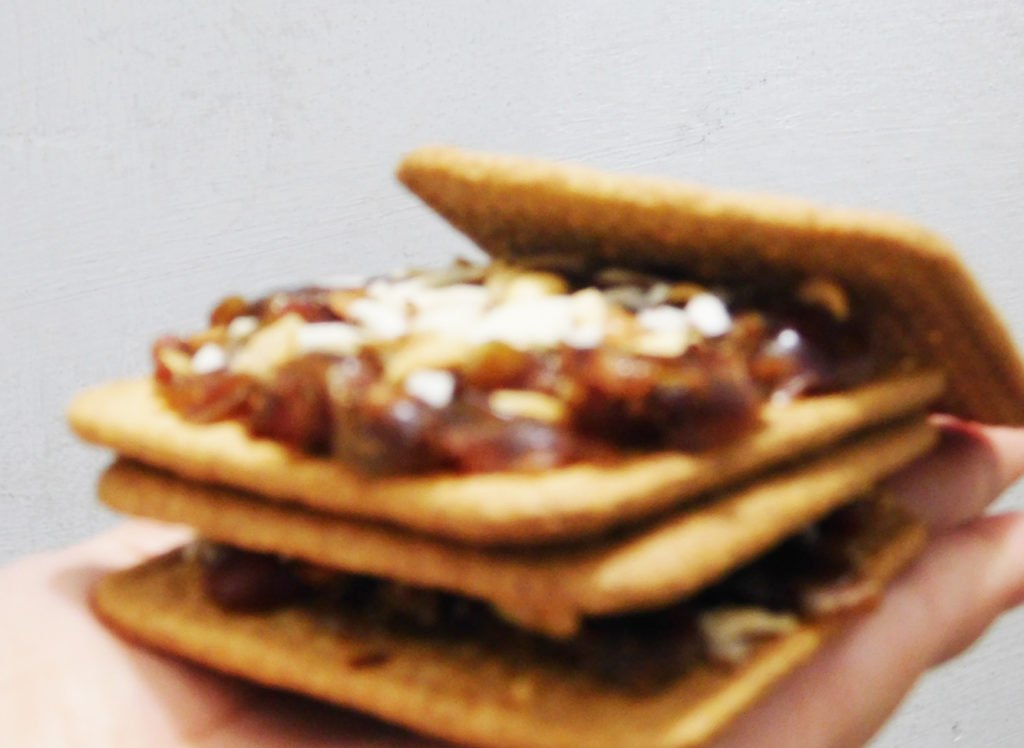
    Crunchy, soft, chewy Date-Filled Sandwich Biscuits. And they’re insanely good.

    Ingredients in Date-Filled Sandwich Biscuits Recipe?

    All you need Whole Wheat Pure Fiber Slices, pitted Medjool dates and nuts for topping. Surprisingly simple ?

    How to Make this Date-Filled Sandwich Biscuits:

    As I mentioned, these Date Filled Sandwich Biscuits are simple to make and they come together in no time at all.

    To make this sandwich biscuits, simply:

    1. First of all, smashed the dates with a fork. Medjool dates have a rich, almost caramel-like taste and a soft, chewy texture whereas regular dates and are easy to spread.
    2. Then arrange 4 whole wheat biscuits on a plate or sheet.
    3. Spread 3 smashed dates on each biscuit; sprinkle peanuts, almonds and pistachios and cover the sandwiches with remaining biscuits and enjoy 🙂
    Date-Filled Sandwich Biscuits Recipe

    Bismillah let’s get started.
    Check it out The Date-Filled Sandwich Biscuits and printable version here!!

    Date-Filled Sandwich Biscuits Recipe

    Enjoy the sweet, delicious taste of dates in these double-layered sandwich biscuits. This Date-Filled Sandwich Biscuits Recipe is very easy to follow, and the sandwich are a genuine treat that is hard to resist.
    Keyword biscuits, cookies, dates, dessert, healthy, kids friendly, Quick and Easy, Ramadan, sandwich, snack, sweet
    Prep Time 5 minutes
    Total Time 5 minutes
    Servings 4
    Author Bushra Waheed

    Ingredients

    • 8 Whole Wheat Pure Fiber Slices
    • 12 Medjool dates pitted
    • 2 tbsp chopped peanuts
    • 2 tbsp chopped almonds
    • 2 tbsp chopped pistachios

    Instructions

    • All you need to make these sandwich biscuits are dates, whole wheat slices or any cookies, nuts and a fork!
    • Smash dates with a fork.
    • Medjool dates have a rich, almost caramel-like taste and a soft, chewy texture whereas regular dates and are easy to spread.
    • Set aside.
    • Place 4 whole wheat biscuits on a plate or sheet.
    • Spread 3 smashed dates on each biscuit; sprinkle peanuts, almonds and pistachios and cover the sandwiches with remaining biscuits.
    • Serve immediately and enjoy 🙂

    Want more Healthy Snack Inspiration? 

    Here are some other healthy recipes on my blog:

    Hope that you all enjoy this one as much as I have!  Enjoy!

    Date-Filled Sandwich Biscuits Recipe

    Pin it For Later

    Enjoy the sweet, delicious taste of dates in these double-layered sandwich biscuits. This Date-Filled Sandwich Biscuits Recipe is very easy to follow, and the sandwich are a genuine treat that is hard to resist

    If you make this recipe, please let me know! Leave a comment, rate it, or snap a photo and tag it with #recipestable on Instagram!  I’d love to see your creations!

  • Simple & Refreshing Apple Orange Salad Recipe (Healthy & Easy!)

    Simple & Refreshing Apple Orange Salad Recipe (Healthy & Easy!)

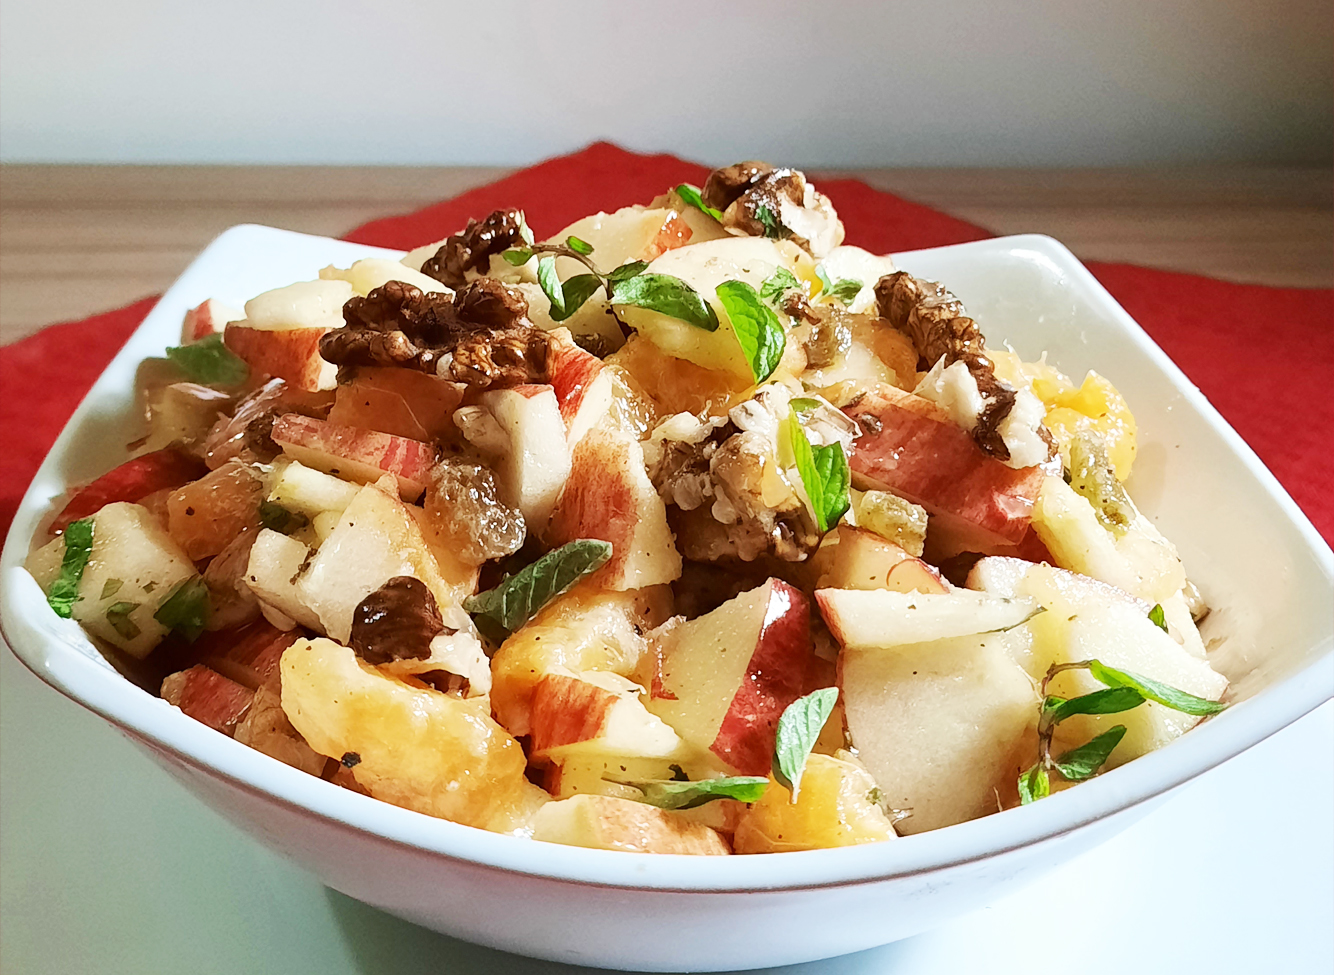
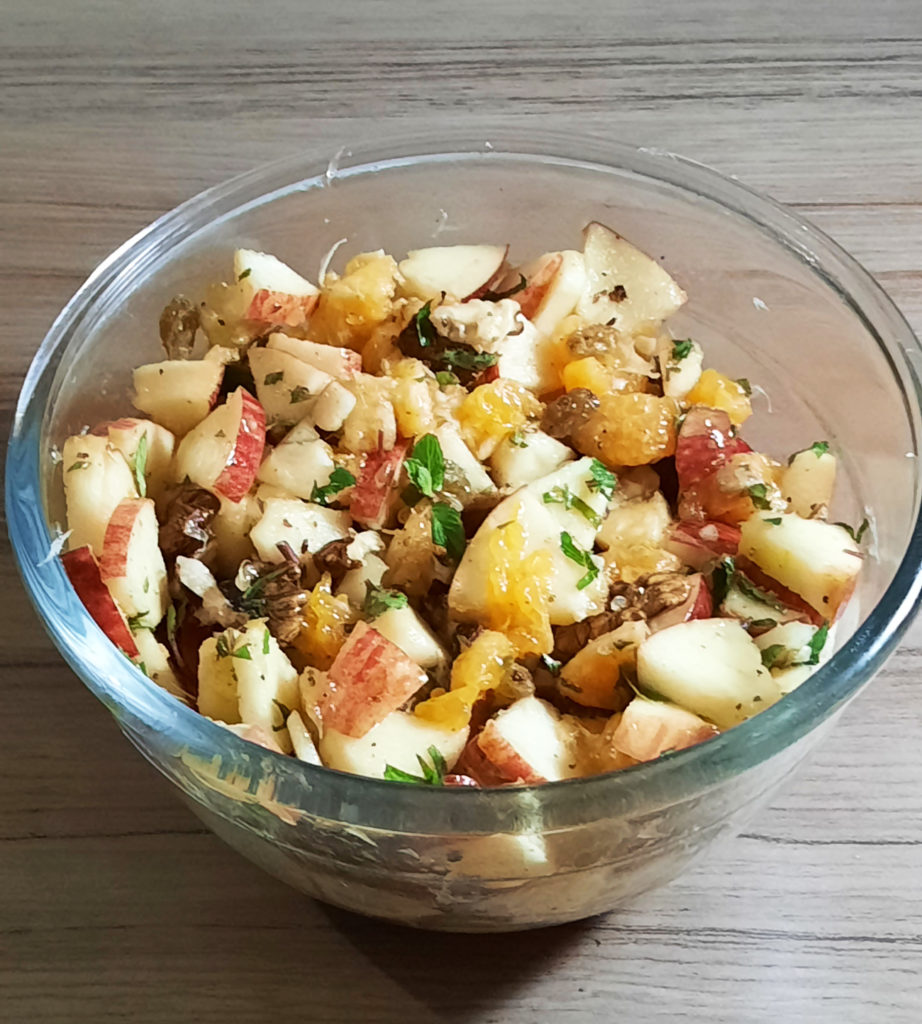
    A light, refreshing Apple and Orange Salad recipe loaded with apples, oranges, raisins and walnuts with a flavorful dressing – perfect as an appetizer or entree!The flavors of the apples, oranges, walnuts and raisins are so clean and fresh. It never fails to please.

    Feel-Good Apple and Orange Salad Recipe
    Feel-Good Apple and Orange Salad Recipe

    This year, I decided to try more salad recipes to stick to healthy diet. This was the first one on the list and it turned out excellent. Although I had it for lunch, I don’t know if I would recommend this for a main course, but definitely a great dinner salad.

    Feel-Good Apple and Orange Salad Recipe

    Ingredients in Apple and Orange Salad Recipe?

    With only few ingredients, it’s quick and easy to make. The only tricky part is cutting the oranges.

    1. Fruit: Apples & Oranges
    2. Dry Fruit: Raisins & Walnuts
    3. For Garnishing: Mint Leaves
    4. For dressing: Vinegar, Olive Oil, Orange or mosambi juice salt and pepper

    Feel-Good Apple and Orange Salad Recipe
    Feel-Good Apple and Orange Salad Recipe

    How to Make this Apple and Orange Salad:

    This apple and orange salad is super easy to make. To make this salad, simply:

    1. Prepare the salad dressing: To make the salad dressing recipe, just whisk all of the ingredients together in a bowl (or shake them up in a mason jar) until combined.
    2. Fruit Cutting: Next you need to peel an orange and cut it in small pieces. Then Core the apples and cut them in small pieces as well, equal to the orange pieces.
    3. Toss all of your salad ingredients together: Add the oranges and apples to the bowl with raisins and add about 2/3 of a cup of roughly chopped walnuts to the salad. Drizzle evenly with the dressing, then toss lightly until combined and voila!!
    4. And…serve!  Sprinkle fresh mint leaves and enjoy!  🙂
    Feel-Good Apple and Orange Salad Recipe

    Other variations to this Apple and Orange Salad recipe

    1. You can add Pecan or roasted almonds in place of Walnuts.
    2. You can use ground Cinnamon to spice up your Salad.
    3. You can also add some honey to sweeten your Salad as per your taste.
    Feel-Good Apple and Orange Salad Recipe
    Apple and Orange Salad Recipe

    Bismillah let’s get started.
    Check it out The Simple & Refreshing Apple Orange Salad Recipe and printable version here!!

    Apple Orange Salad Recipe (Healthy & Easy!)

    A light, refreshing Apple and Orange Salad loaded with apples, oranges, raisins and walnuts with a flavorful dressing – perfect as an appetizer or entree!
    Keyword 30 minutes meals, apple, clean eating, fruit, fruit salad, healthy, Lunch, orange, Ramadan, salad, walnuts
    Prep Time 15 minutes
    Total Time 15 minutes
    Servings 4
    Author Bushra Waheed

    Ingredients

    For Salad Dressing:

    • 1 tbsp olive oil
    • 1 tbsp vinegar
    • 4 tbsp orange juice freshly squeezed
    • 1/4 tsp salt
    • 1/4 tsp black pepper freshly ground

    For Salad:

    • 2 oranges peeled, seeded, sectioned and chopped
    • 3 red apples cored and cut into small pieces
    • 1/2 cup raisins
    • 1/2 cup walnuts roughly chopped
    • few mint leaves chopped (optional)

    Instructions

    • In a large bowl, whisk the olive oil, vinegar, orange juice, salt and black pepper.
    • Set it aside.
    • Peel the orange and cut it into small pieces.
    • Core the apples and cut them in small pieces.
    • Add the oranges, apples, walnuts to the bowl with raisins.
    • Toss everything together very well.
    • Adjust the seasoning.
    • If desired, garnish with fresh mint leaves.
    • Delicious Apple and Orange Salad is ready to serve.
    • Enjoy!

    Notes

    Want more Salad Inspiration? 

    If you’re looking for more side salad inspiration, here are a few more of my faves:

    Hope that you all enjoy this one as much as we have!  Enjoy:)

    Pin It For Later

    Feel-Good Apple and Orange Salad Recipe
    Feel-Good Apple and Orange Salad Recipe

    What are your favorite salads? Leave me a comment below to inspire my next salad recipe!

  • Lamb Corn Fritters Recipe

    Lamb Corn Fritters Recipe

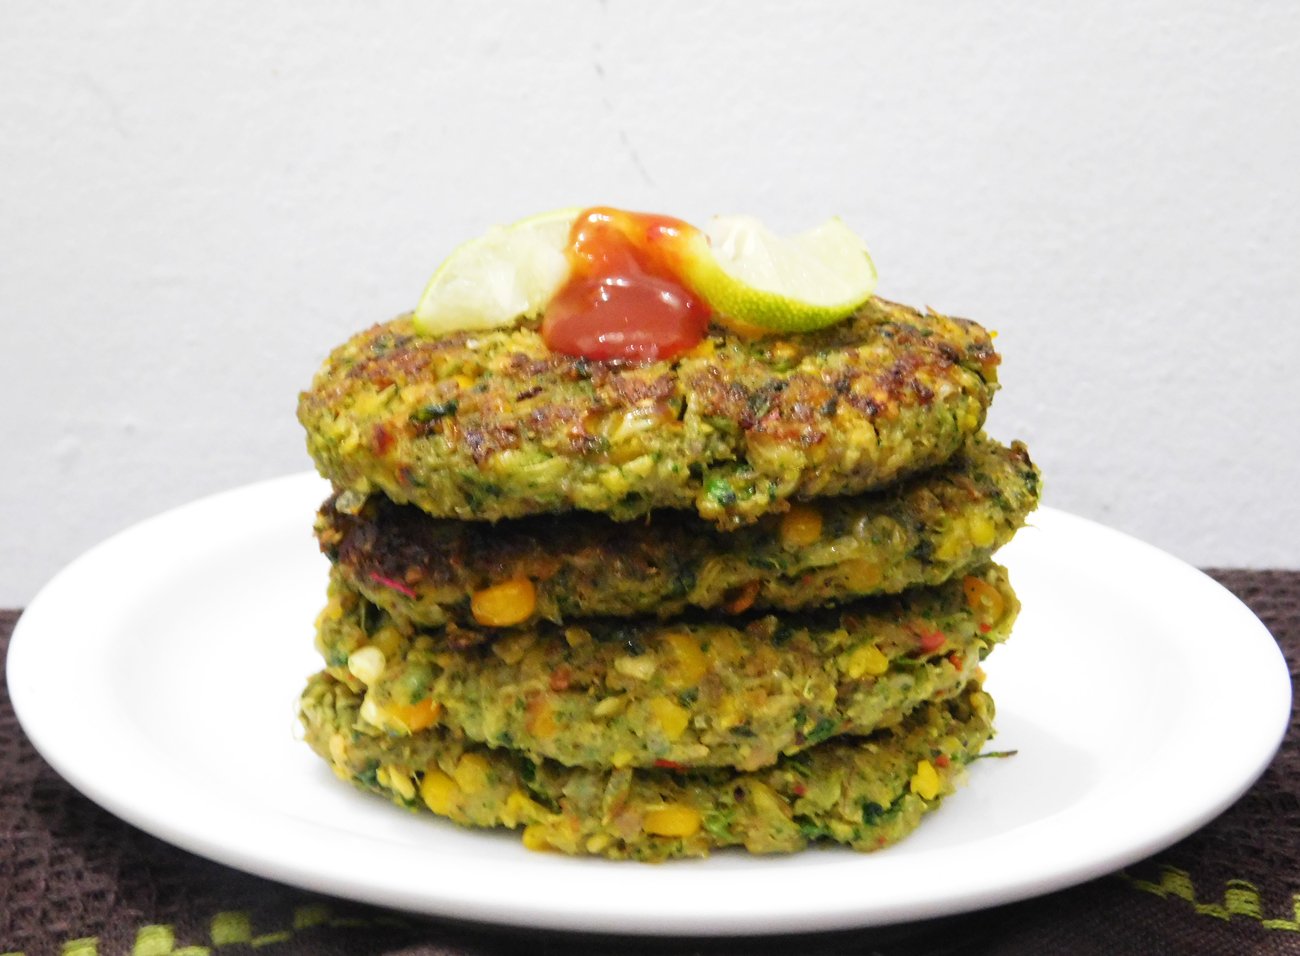
    Imagine if you will that a lamb meat patty married a corn fritter and they had babies = Lamb corn Fritters. I’m not sure why I hadn’t thought of this sooner. They are healthier than regular lamb fritters; being half meat and half veggie and they are super juicy and flavorful.

    Lamb Corn Fritters Recipe

    Here’s a healthy recipe for Lamb Corn Fritters – without deep frying! Because nobody likes soggy fritters. And nobody wants to deal with a vat of oil tonight! Dinner really doesn’t get any easier than this! These Lamb Corn Fritters are so easy, you can practically whip up these juicy fritters in no time!

    These fritters are ideal to make with fresh corn cut off the cob, but can be made with canned or frozen corn. Serve for breakfast, lunch, dinner!

    Lamb Corn Fritters Recipe
    Lamb Corn Fritters Recipe

    What you need to make really great, Lamb Corn Fritters

    Here’s what you need to make these Lamb Corn fritters:

    Ground Lamb: I like to grind my lamb at a ratio of about 80% lean. I feel this brings out the most flavor. The best places to buy fresh ground lamb is your local butcher shop. If you want to use lamb, ask your butcher to grind it for you or, to make your own ground lamb, start with a lean cut. You can also use lean ground beef or turkey instead.
    Corn: as noted above, fresh is better for both flavor and crispiness. But canned and frozen work too, you just need to make an effort to dry it out as much as you can.
    Egg: egg to bind the meat and corns. It will help to get mince to stick together better.
    Ricotta Cheese: – for a good hit of savory flavor AND to make the fritters extra juicy and flavorful!
    Green Masala: Green onion, green chilies and coriander – for a hit of freshness.
    Seasoning: salt, black pepper and red pepper flakes (my fav)
    Olive oil: to sauté

    Lamb Corn Fritters Recipe

    How to make Lamb Corn Fritters

    And here’s how to make them.

    1. Mixing: Place lamb mince and corn in a bowl. Then add 1 lb fresh ground lamb. 1 egg, finely sliced green chilies, green onions, fresh coriander, salt, black pepper, red pepper and 1 cup ricotta cheese. Mix until well combined. Let it rest for 15 minutes.
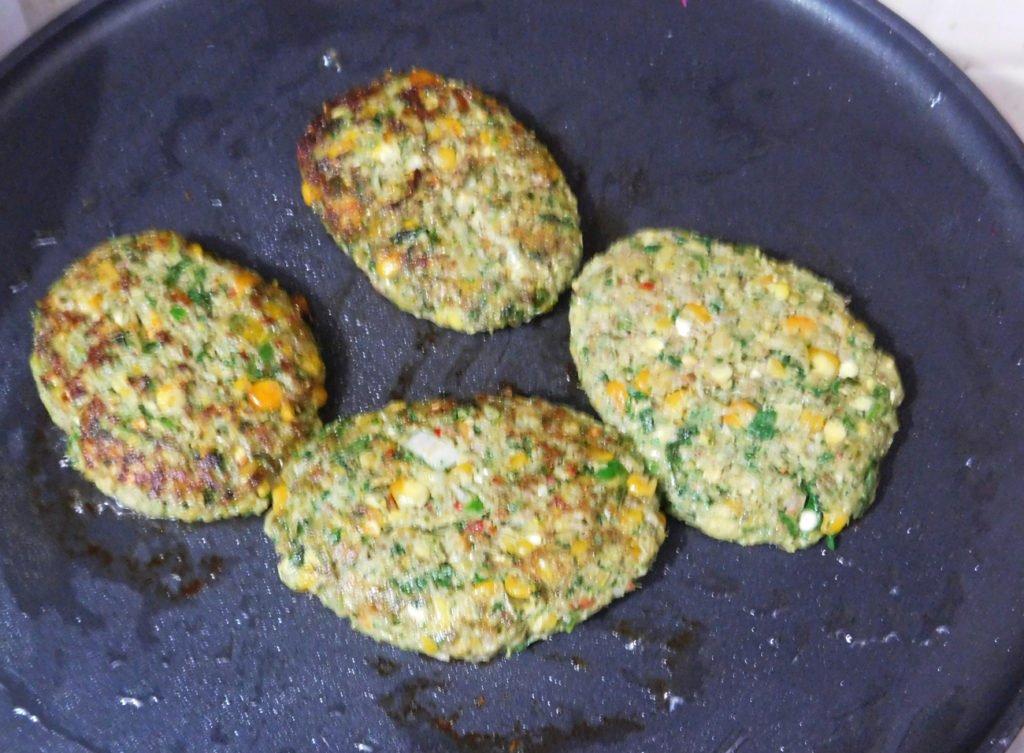
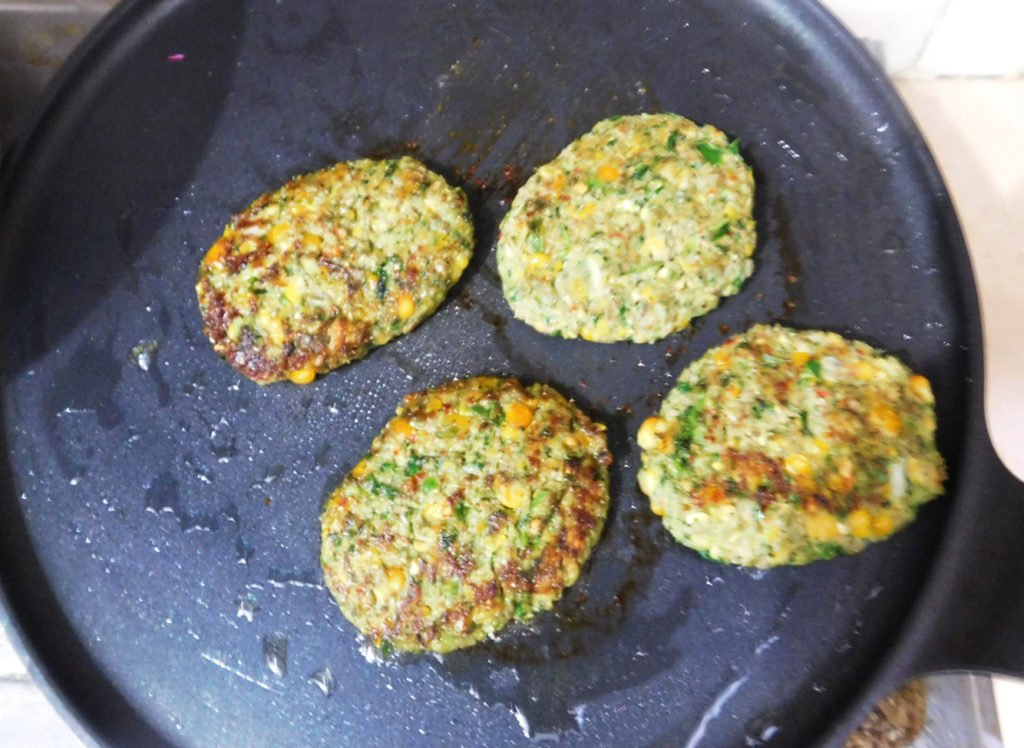
    2. Cooking: Heat a large non-stick skillet over medium heat and add 2 Tbsp. extra light olive oil. Place a heaping tablespoon of the mixture into your hand and form a oval or round shaped patty about 1/3-inch thick. Cook over medium heat uncovered for 5-7 minutes, then flip, cover and cook for another 5 minutes more or until meat cooked through. Add more oil to the pan as needed for subsequent batches.
    3. The fritters take a good 12-15 minutes to cook so they’re golden on the outside and for the raw meat to cook through (remember, these are fritters so they are not very thick).
    4. Pro Tip: You can use an ice cream scooper with a lever to scoop the batter into the pan. Then flatten using a greased spatula! But don’t crowd the skillet, adding more oil to pan if required.
    Lamb Corn Fritters Recipe

    How to serve corn fritters

    Corn fritters is one of those rare foods that truly spans the breakfast-lunch-dinner spectrum! Here’s how to serve it.

    Though having suggested those various ways to serve it, the reality is that you will want to snatch them fresh off the stove, before you’ve even had a chance to plate them up properly. And that’s totally ok too! – Bushra

    Lamb Corn Fritters Recipe

    Bismillah let’s get started.
    Check it out The Lamb Corn Fritters Recipe and printable version here!!

    Want more Fritters recipes? 

    If you’re looking for more fritters inspiration, here are a few more of my faves:

    Hope that you all enjoy this one as much as we have!  Cheers!

    HUNGRY FOR MORE? Subscribe to my newsletter and follow along on FacebookPinterest and Instagram for all of the latest updates.

    Pin it For Later

    Lamb Corn Fritters Recie
  • Crunchy Pickled Kachumber Salad Recipe

    Crunchy Pickled Kachumber Salad Recipe

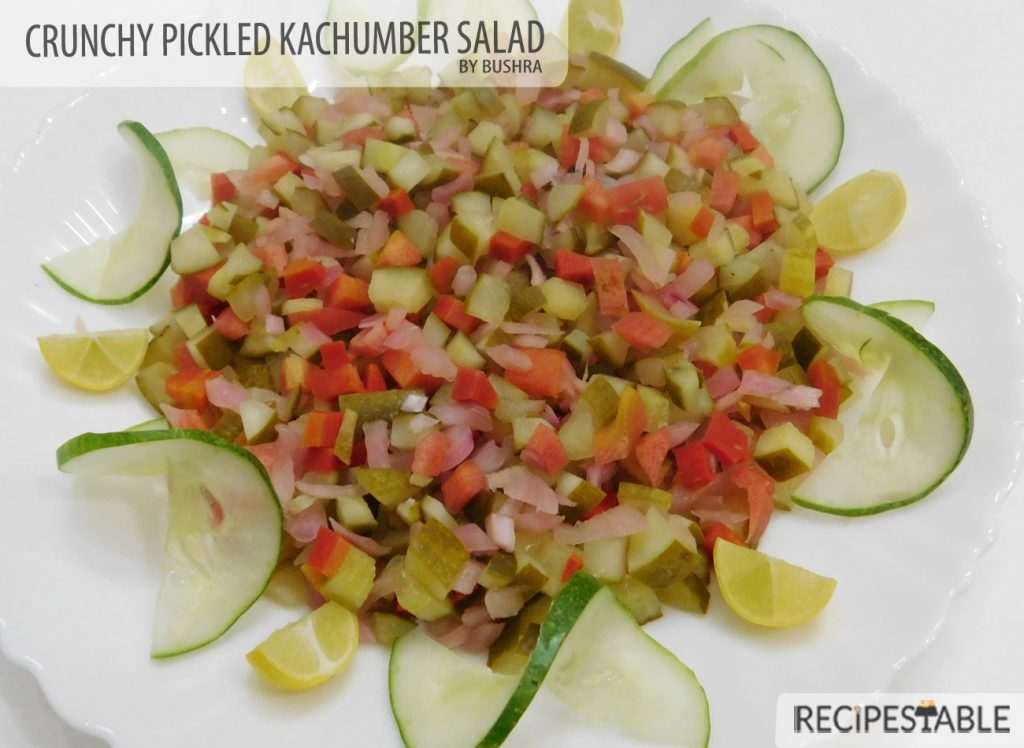
    Looking for something more adventurous than your usual Kachumber salad? Try this tasty Crunchy Pickled Kachumber Salad, a crunchy, squeaky pickle salad that would be amazing alongside a super fatty main dish, like this Chicken Biryani. But don’t worry, it’s not one briny mouthful, there are a lot of different textures going on between the crisp onions, crunchy pickles, red cabbage and juicy carrots.

    Crunchy Pickled Kachumber Salad Recipe
    Photo: Crunchy Pickled Kachumber Salad Recipe

    I like to experiment with creating no-cook dishes that can be easily thrown together at the last minute. I especially enjoy playing with the salads I’ve learned and putting a new spin on them, using whatever ingredients I have on hand to create something entirely new.

    This salad happened during one of my kitchen experiments. Things I really love in spring: 

    1. Super crisp, crunchy salads
    2. Juicy Colorful Veggies

    So clearly it make sense to combine these two faves into one, right?

    Crunchy Pickled Kachumber Salad

    I started with a simple family recipe for a Kachumbar salad. But for a change, I used the homemade pickled Cucumber, onion and baby carrots, vinegar, salt for this recipe. then tweaked the dressing and added some stuff I found in the fridge—red radishes and half a red cabbage. The result is a delightfully flavorful salad—cold, crunchy, pickled and easy to throw together at a moment’s notice. I call it my Crunchy Pickled Kachumber Salad.

    Crunchy Pickled Kachumber Salad Recipe
    Phot: Crunchy Pickled Kachumber Salad Recipe

    Some Useful Tips

    • If you like pickle vegetables, you’re going to love this salad. You can use store bought pickles or make your own by following my recipe.
    • Usually, we tend to favor pickles that are bright with acid and low on sugar; anything labeled “half-sour” usually fits the bill. If using sweeter pickles, add a bit more vinegar and black salt. And honestly, you can use whatever pickles you want in this recipe.
    • Organic cucumbers are smaller and thinner than non organic cucumbers.  They are smaller and slightly sweeter than the non-organic variety, and they have less seeds. Organic cucumbers are great for snacking. They have a wonderful mineral flavor to them. Unfortunately some grocery stores only carry Organic cucumbers seasonally, and some don’t carry them at all.
    • If you can’t find them, substitute Non-organic cucumbers—those are the long thin ones wrapped tightly in plastic. Avoid using regular fat cucumbers, as they are coated with wax and prone to bitterness.

    This is my favourite salad to serve with my Restaurant Style Lahori Mutton Karahi recipe. It just works so well with Tawa fish and the sweetness of the Apricot Chutney. I highly recommend serving this up with some extra Cucumber on the side. 

    Bismillah let’s get started. 

    Check it out Hot and Sour Noodles Recipe and printable version here!!

    Want more Salad Inspiration? 

    Here are some other salad recipes on my blog:

    Put your own spin on it. And lemme know how it turns out and do take a few seconds to rate it! I would love to see your recreations so tag me on instagram @recipestable or Facebook (Recipestable) or on Twitter so I can see how lovely yours turn out.
  • The Low-Carb Solution to Egg in a Hole Recipe

    The Low-Carb Solution to Egg in a Hole Recipe

    Can’t decide whether to make a grilled kabab or an egg in a hole? Make both!
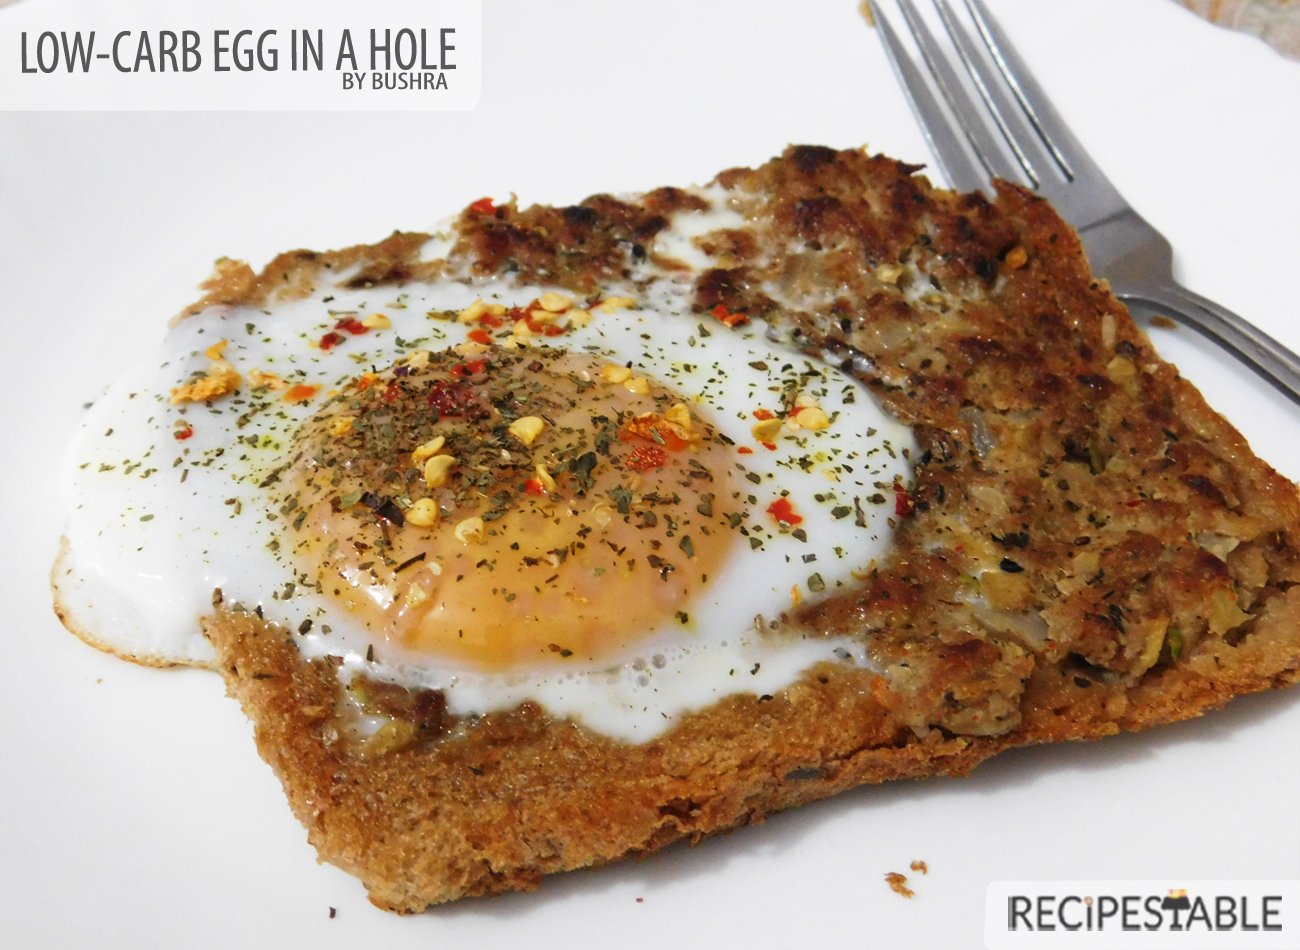
    Two of my favorite food groups—eggs and toast—unite in this take on the playful dish also known as egg in a hole, Egg in a Basket or Egg in a Boat or, more simply, egg in toast. I fancy it up by filling the bread center with mince crust and topping with basil or chili flakes. And It came out so delicious!

    Egg in-a-hole – Look at that perfect texture !!

    For this recipe, I used a normal mince kabab mixture for filling the bread , to keep it low carb. The outside was crunchy and crispy and inside was so juicy and tasted so good with the egg in the middle. A nice way to add some more protein to a sandwich, while also providing something of a sauce from the egg yolk (depending on how you cook your egg). It’s adds just a little oomph of flavor to the sandwich.

    Watch carefully as you cook the mince crust, and don’t raise the heat higher than medium: The goal is for the mince crust to brown and the egg to set simultaneously. Save the crust center for making breadcrumbs.

    Also how well the eggs must be cooked is a personal choice. Some like over easy, sunnyside up or completely cooked through. No matter how you make it, this will remain a favorite breakfast option passed on for many generations to come. When you make this cute breakfast-for-dinner recipe, you can vary it by using cheese, vegetables or sauteed Spinach in place of the mince filling.

    This Low-Carb Solution to Egg in a Hole Recipe can be an excellent addition to a healthy weight loss diet. They’re not only low-carb and low in calories but also high in protein and fiber that keep you feeling full.

    I’m really excited to share this recipe with you.
    So, Bismillah let’s get started and Check it out Low Carb Egg in a Hole Recipe and printable version here!!

    I have also posted Chocolate Date Bars recipe  and Vegetable Fried Brown Rice recipe which are another easiest & tastiest version of Healthy Eating. Do check it out as well.

    Put your own spin on it. And lemme know how it turns out. Post a photo on Facebook (Recipestable) or Instagram on Twitter so I can see how lovely yours turn out.
    Happy Healthy Eating!!
    Do you have another name for this classic breakfast? Please leave a comment below, and let me know!

  • Bean Salad with Olives and Herbs Recipe

    Bean Salad with Olives and Herbs Recipe

    This salad came to my mind right as I was falling asleep.

    Does your brain ever do crazy stuff like that? My best ideas seem to come when I’m about to doze off and don’t have a notebook or pen to write things down, so I just make a pact with my brain to remember. And the next day we both do our best to recall what we were thinking.

    Thankfully, this one made it through the pipeline! Three cheers for my old lady brain still working!

    Bean Salad with Olives and Herbs

    Bean Salad with Olives and Herbs

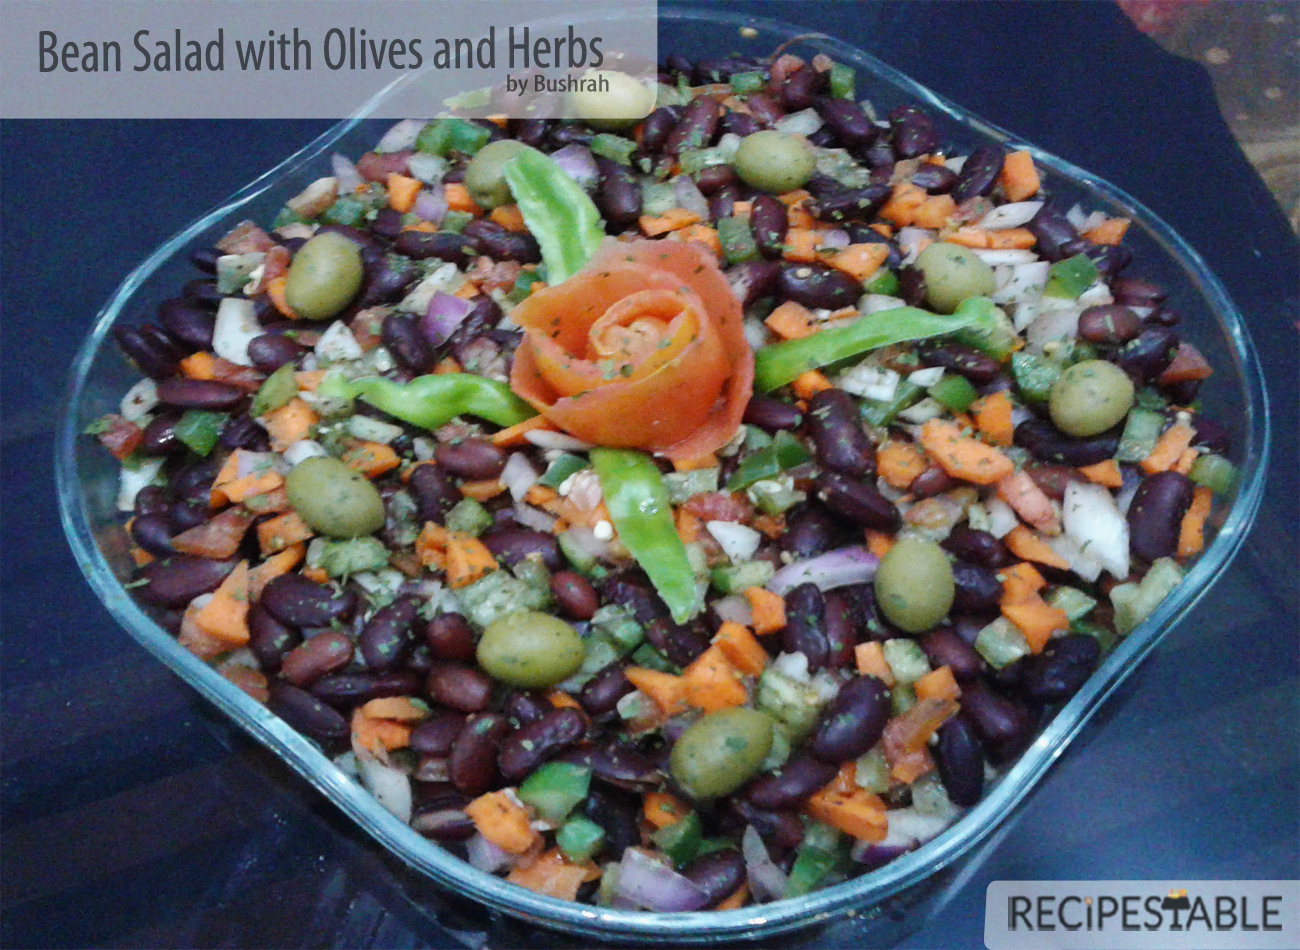
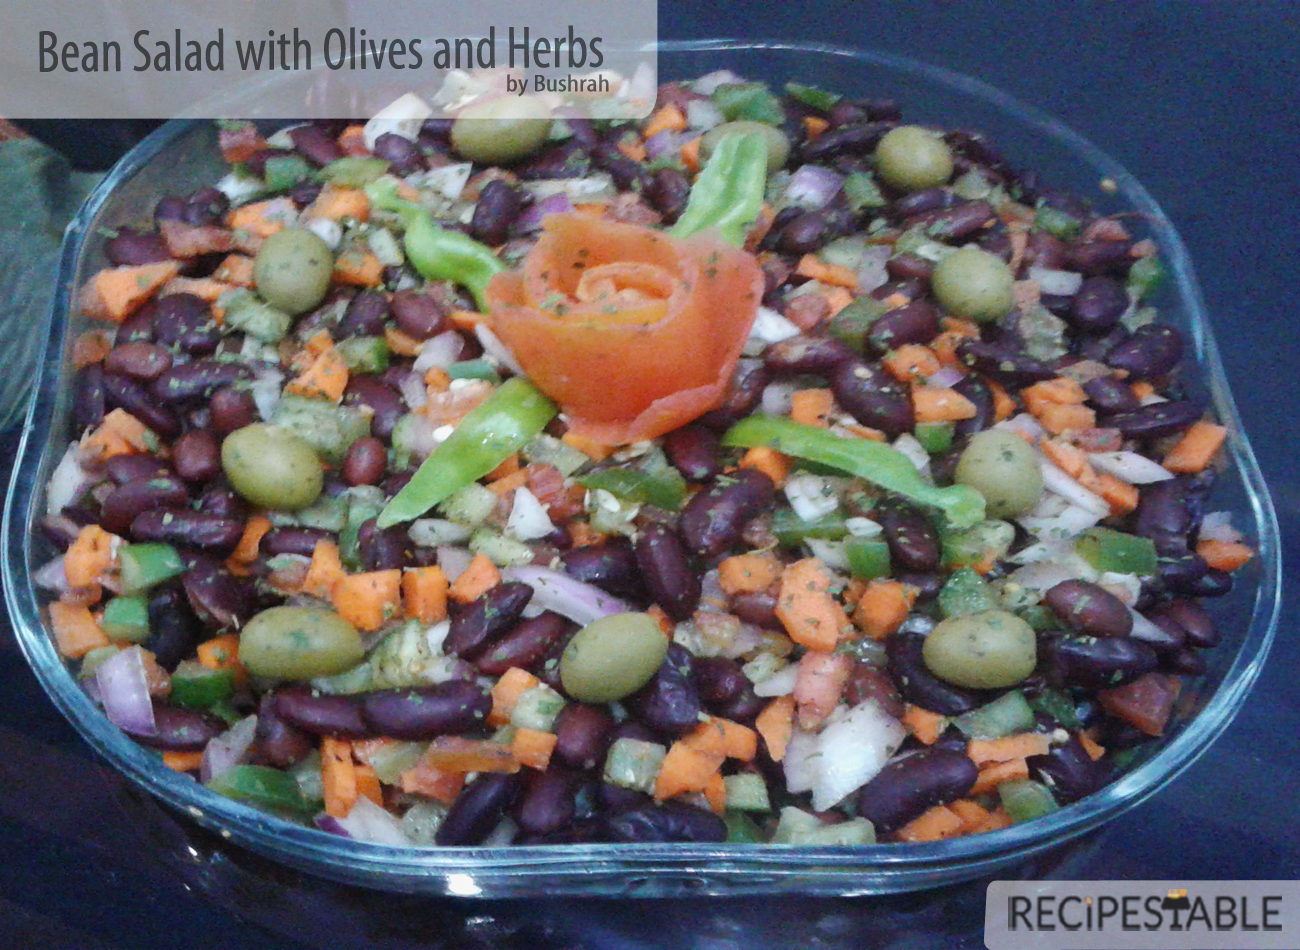
    I’ve made many a Bean salad before, but this one is special. This is the answer to the question, “What’s super cozy, flavorful and perfect for any BBQ Party?” It’s a great addition to any summer get together!

    This Pakistani/Italian flavor pairing came to mind, and the recipe is adapted from my all-time favorite Bean Salad.   One super easy thing you can prep ahead is beans. I love beans because you can make them so many different ways and they’re packed with protein, slow-digesting carbohydrates and fiber. Their nutritional profile makes them ideal for prepping before a workout and recovering after a workout. If you’re trying to lose weight or maintain a healthy weight, they’re great for that too since they make you feel full longer.

    One of my favorite ways to enjoy beans during the warmer months is with my Bean Salad. It’s super easy to make and it tastes really yummy too! This recipe is simple, requiring just 10 minutes to prepare! You can eat it all on its own (what I normally do) or dress it up by adding some more chopped veggies to it. It’s also great added to some greens either in a wrap or in a salad. 

    Bean Salad with Olives and Herbs

    Bean Salad with Olives and Herbs

    The dressing is SO easy (and dreamy).

    Italian herbs are blended with vinegar . Add olive oil water to thin and ‘voila!’ You have a super yummy, tangy Italian dressing ready to coat those gorgeous bean salad. Look at that salad goodness.

    Bean Salad with Olives and Herbs

    I hope you all LOVE this Bean salad! It’s:

    • Hearty
    • Flavorful
    • Vegetable-packed
    • Fiber- & Protein-rich
    • Tangy + Crunchy
    • Super healthy & Delicious

    This would make the perfect side dish for BBQ Party, or any get together, really. It yields four entrée-sized portions or 8 sides, so multiply as needed. Although it’s delicious on its own, it would pair extremely well with my Grilled Lamb Chops, and my Grilled Italian Chicken.

    Bismillah, let’s get started the recipe!!

    Check it out the Bean Salad with Olives and Herbs Recipe and printable version below!!

    Put your own spin on it. And lemme know how it turns out. Post a photo on Facebook (Recipestable) or  on Twitter so I can see how lovely yours turn out.

    Happy Salad Making!!

  • Fat Free Chicken Karahi Recipe

    Fat Free Chicken Karahi Recipe

    Starting a healthier diet can be easier than you think. But what happens when you start to get bored with the healthy foods you are eating?  Chicken Karahi in a hurry is a winner for everyone in our house. We all get to enjoy some delicious comfort food and I don’t have to spend long in the kitchen to make it. Hurrah! 


    Today I’am going to share a Clean eating Version of Chicken Karahi. It is very delicious and easy to make. A lighter and healthier version of the Pakistani Chicken Karahi, this tomato-based curry is packed with extra fragrant spices and creamy yogurt. Yummilicious treat that will have you wanting to savor every last bite! 
    Clean Eating Chicken Karahi Recipe
    Clean Eating Chicken Karahi
     If you are following a weight loss plan then take your taste buds on an exotic ride with this Fat Free chicken karahi recipe. This delicious Clean Eating Chicken Karahi recipe will keep you satisfied and still help you lose weight. This recipe is low fat, low sodium, and a good source of protein. 

    I have also posted Salmon Fish Fry recipe  which is another easiest & tastiest Clean Eating version of making Fried Fish. Do check it out as well.


    Put your own spin on it. And lemme know how it turns out. Post a photo on Facebook (Recipestable) or on Twitter so I can see how lovely yours turn out.

    Happy Clean Eating!!


  • Homemade Veggie Pizza Recipe

    Homemade Veggie Pizza Recipe

    We’ve entered the season of warm comfort food. Soups, Stews, roast meat, etc. And sometimes all that heavy food seems . . . well . . . heavy. 

    Homemade Veggie Pizza

    Just about everyone loves pizza, myself included. However, traditional restaurant pizza is generally made with refined (white) flour, and loaded with saturated fat and sodium – things that can quickly lead to weight gain and harm your health. To make pizza something I can feel good about eating regularly, I’ve found ways to make my own healthier versions. The key is using whole grains, less cheese and loading up on lots of healthy veggies and herbs. Also eating produce that’s in season helps you save money and also ensures you are getting a good variety of foods and nutrients.

    homemade-veggie-pizza3

    This pizza included some of my favorite veggies and herbs: carrots, red onion, broccoli, corn, green or red pepper, olives and fresh basil.  The ingredients only required about 20 minutes of prep time, starting with chopping the veggies and tossing them in a little olive oil for roasting.  Adding a fresh herbs to the veggies adds nice flavor (and makes your kitchen smell amazing during cooking!).

    In addition to its great taste, winter veggies especially broccoli  is  the good sources of dietary fiber and rich in magnesium. Broccoli is loaded with antioxidants, fiber, and numerous vitamins and minerals including magnesium, fol-ate and fiber which are good for health.

    Homemade Veggie Pizza

    While my super-food veggies were roasting I gathered and prepped my other ingredients. The dough only required a thin spread of pizza sauce and cheese to provide creamy texture and cheesy flavor.

    The veggies were done once they were slightly crisped and fork-tender, and I spooned them over the dough. I finished the pizzas off by topping them with the Mozzarella cheese, olives and a sprinkle of herbs.

    Homemade Veggie Pizza
    Photo: Homemade Veggie Pizza

    The last step involves popping the pizzas in the oven – I chose to make veggie pizzas  in individual mini pizza pans. They only needed about 15 minutes to cooked the dough and for the cheese to melt. I loved the contrast of the cheese, olives and herbs with the crunch from the veggies on this flavorful pizza!

    Homemade Veggie Pizza
    Photo: Homemade Veggie Pizza.. Yum 

    If you need a lighter dish, that doesn’t skimp on flavor, try this Homemade Veggie Pizza recipe. It’s fresh, full of flavor, and won’t weigh you down like the winter comfort food can.  Pizzas like this can be enjoyed as a quick and easy lunch or dinner, and make a tasty addition to a healthy diet. Enjoy! 

    Photo: Homemade Veggie Pizza
    Photo: Pizza loaded with cheese and veggies ♥

    Recipe Tip’s:

    1. Feel free to play around a bit with the ingredients in this recipe if you make it yourself.
    2. Add nuts (walnuts, pumpkin seeds), more veggies, would be great, and you could also skip the cheese all-together and instead use the ricotta cheese as the sauce/base.

    Bismillah, Let’s get started!

    Check it out the Homemade Veggie Pizza Recipe and printable version below.

    What other winter-veggies would you try on a pizza?

    Put your own spin on it. And lemme know how it turns out. Post a photo on Facebook (Recipestable) or  on Twitter so I can see how lovely yours turn out.


    Happy Cooking!!

    If you like this post, Please Subscribe to my blog and let me know your feedback by commenting below.. I have lots more recipes to share with you.


  • Chicken Tikka Masala Macaroni Recipe

    Chicken Tikka Masala Macaroni Recipe

    Aslam-o-Alakaum My Lovelies !!

     In the Name of Allah, Most Gracious, Most Merciful

    Happy Spring Season!

    Spring seems to be here, which is just amazing – I honestly just want to run around outside all day everyday and enjoy the beautiful sunshine! I love how the world changes when the sun comes out, everyone is so much happier and life just seems brighter and more awesome. It’s one of my favorite season of the year because of it’s colors, flowers,  birds cheering. What a great blessing of Allah (SWT). Alhumdulillah. 

    One of the most important things about this season is the positive impact you can make for your health and well being! So, Today I am sharing a SUPER yummy healthy, nutritious pasta recipe that has become a new family favorite around here (jus 237 calories)!!

    Chicken Tikka Masala Macaroni (Clean Eating Version)

     Chicken tikka Masala works well with macaroni. Who knew?

    Clean Eating Chicken Tikka Masala Macaroni
    Photo: Chicken Tikka Masala Macaroni (Clean Eating Version)

    Normally I’m not a huge pasta lover. But this Chicken Tikka Masala Macaroni is exactly how I like to eat macaroni when I want to follow my clean eating diet and don’t wish to work with many ingredients and want to cook dinner easily! This macaroni is in  Pakistani Style, tossed with chicken, tikka marinade, and fresh veggies.

    Pretty nutritious isn’t it? Honestly, it’s a dish which will satisfy your taste buds and same time will give you a proper nutritious lunch or dinner.

    Clean Eating Chicken Tikka Masala Macaroni
    Photo: Chicken Tikka Masala Macaroni (Clean Eating Version)

    Yeah, I know you will say’hey, Macaroni is surely not so Asian’, not in clean eating and will give me a doubtful look. But trust me that you will never be disappointed if you will give that Asian twist to any of your dishes.

    This Chicken Tikka Masala Macaroni is so easy and will be made with such ingredients, which you can find at your kitchen any time. So surely, it will be a time save too. For clean eating purpose, please make sure you are using whole grain pasta and Organic chicken. 

    This may not be the more traditional version you’re thinking of, but it’s close enough to get the job done and it definitely qualifies as comfort food. 

    Clean Eating Chicken Tikka Masala Macaroni
    Photo: Chicken Tikka Masala Macaroni (Clean Eating Version)

    Serve this decadent dish with a fresh green salad or some lightly steamed broccoli with a squeeze of lemon. By the way, this dish could just as easily be vegetable tikka mac and cheese if you substitute the chicken with some veggies such as cauliflower, zucchini or eggplant instead. Give this unusual recipe a try and let me know what you think! This is sure to be a winner with all the family.

    Check it out the Chicken Tikka Masala Macaroni (Clean Eating Version) recipe and printable version below!!

    Put your own spin on it. And lemme know how it turns out. Post a photo on Facebook (Recipestable) or  on Twitter so I can see how lovely yours turn out.

    Happy Clean Eating!!

    If you like this Chicken Tikka Masala Macaroni (Clean Eating Version), Please Subscribe to my blog. I have lots more recipes to share with you. And If you make it then let me know your feedback by commenting below.

  • Hearty Mince Lettuce Cups Recipe

    Hearty Mince Lettuce Cups Recipe

    Aslam-o-Alakaum My Lovelies !!

     In the Name of Allah, Most Gracious, Most Merciful

    Good Morning all, I hope you are all having a fantastic Winter so far & enjoying the same great weather we’re having here! A little wintery spring chill. Brrrrrrrrr!! Finally we are getting proper winter feeling. I’m doing good too! Haha, I’ve been trying to warm my toes up too, so cold here! 😛

    If you read my blog with any regularity, you probably know that I’ve started my journey towards a healthier lifestyle.
    Glad to have started my journey towards healthy eating and a healthy lifestyle. Already seeing results ♥ This new way of eating has been quite the adventure for me.

    So many people think healthy and clean eating is boring & bland? …hmm… I think not. Just Follow my journey, I will make it interesting for you.

    Clean Eating Mince Lettuce Cups 

    Clean eating is great. Healthy eating is giving your body what it needs! Nothing else.No one needs to be hungry or bored. Today I have come up with a very interesting recipe: Clean Eating Mince Lettuce Cups!! 

    clean eating Mince Lettuce Cups
    Photo: Clean Eating Mince Lettuce Cups

    Well don’t droll on my pic of my lettuce cups. lol

    It’s quick, easy to make, cheap and low in fat and carbs– the perfect combo!These clean eating mince lettuce cups are absolutely delicious with some amazing Asian flavours.This is one of those meals that will make you forget you’re eating healthy. Dinner on the table in just over 30 minutes that is loaded with fragrance, a hit of spice and full of freshness.

     Clean Eating Mince Lettuce Cups
    Photo: Clean Eating Mince Lettuce Cups

    This is the easiest, quickest meal you could ever make. And if you’re quick in the kitchen, you could even get this on the dinner table in less than 30 minutes. Plus, it’s budget-friendly and you can easily double or triple the recipe as needed. What more could you ask for?

     Clean Eating Mince Lettuce Cups
    Photo: Clean Eating Mince Lettuce Cups

    So Let’s get started!!

    Ingredients You will Need:

    1. mince 
    2. ginger _ garlic 
    3. lettuce leaves
    4. herb Seasoning 
    5. few veggies (green pepper, green onion)
    6. hot sauce 
    7. tomato paste
    8. lemon
    9. olive oil

    Tools You needed to make this recipe are:

    1. A pan
    2. A wooden spoon
    3. A plate to serve
    4. A knife to cut veggies
    5. Cutting board 

    Check it out the Clean Eating Mince Lettuce Cups recipe and printable version below!!

    Recipe Note’s 

     Eat it with your hands like a wrap (I do!) or be more civil and eat witha a spoon!

    Put your own spin on it. And lemme know how it turns out. Post a photo on Facebook (Recipestable) or  on Twitter so I can see how lovely yours turn out.
    Happy Clean Eating!!

    If you like this Clean Eating Mince Lettuce Cups recipe, Please Subscribe to my blog. I have lots more recipes to share with you. And If you make it then let me know your feedback by commenting below.

  • Broccoli Spaghetti Soup Recipe

    Broccoli Spaghetti Soup Recipe

    Aslam-o-Alakaum My Lovelies !!

     In the Name of Allah, Most Gracious, Most Merciful

    Broccoli Spaghetti Soup ( Clean Eating Version)

    I have slacked off a little on my health and I am working to reclaim it. This month, I am working on my diet and working on improving my all round health and fitness levels. I will NOT let this chronic illness get the best of me. InshaAllah.

    During the winter months, I find myself craving soup time and time again. So Today, I’m sharing an easy and healthy recipe for Broccoli Spaghetti Soup (Clean Eating Version). A simple soup that nourishes the body and soul. 

     Broccoli Spaghetti Soup Recipe
    Photo: Broccoli Spaghetti Soup (Clean Eating Version)

    I Picked these beauties from my Kitchen Garden yesterday. Not bad for the last day of the year and unseasonably cold weather!  Wishing you all Happy Harvesting ♥

    Beatuies from my garden
    Beatuies from my garden

    Oh ya, this is the good stuff. I mean,  spaghetti and broccoli are such a wonderful, comforting combination anyway. But turn that into soup and you’ve got a wonderful meal for a cold winter night! 

    Broccoli Spaghetti Soup (Clean Eating Version)
    Broccoli Spaghetti Soup (Clean Eating Version)

    In the last week, I seriously made four different types of soups. This Broccoli Spaghetti Soup was my favorite of the four, and surprisingly, the healthiest as well!

    The recipe starts with crisp stalks of organic broccoli. I am making the organic distinction here, because the main flavor of this soup comes from the broccoli, so it’s got to be top notch.  That means organic and preferably local.First tossed broccoli with olive oil until tender, caramelized and aromatic.  Then stir in born broth and cooked spaghetti. It’s chunky, brothy savory, and just the right balance of pasta and green veggie. I love the aroma of parsley and chunky broccoli in this soup.

    Broccoli Spaghetti Soup (Clean Eating Version)
    Broccoli Spaghetti Soup (Clean Eating Version)
    Do try it, Great for a busy weeknight too. It cooks up in jus 15 minutes (pretty quick). The ingredients are very basic, you probably have most of them on hand already, and if not, a quick trip to any grocery store will quickly get you what you need.

    Ingredients You will Need:

    1. Organic Broccoli Florets 
    2. Born Broth
    3. Seasoning 
    4. Spaghetti 

    Tools You needed to make this recipe are:

    1. A deep soup pot
    2. A wooden spoon
    3. A Strainer 
    4. Soup Bowls

    Check it out the Broccoli Spaghetti Soup (Clean Eating) recipe and printable version below!!

    Put your own spin on it. And lemme know how it turns out. Post a photo on Facebook (Recipestable) or  on Twitter so I can see how lovely yours turn out.
    Happy Soup making!

    If you like this Broccoli Spaghetti Soup, Please Subscribe to my blog. I have lots more recipes to share with you. And If you make it then let me know your feedback by commenting below.


  • Chocolate Date Bars Recipe

    Chocolate Date Bars Recipe

    Assalamu alaikum wa rahmatullahi wa barakatuhu!

    In the Name of Allah, Most Gracious, Most Merciful

    GOOD MORNING MY LOVELY READERS!!

     Good morning my fellow readers
    Good morning my fellow readers

    I hope you are well and happy today. The sun is shining brightly here this morning and the air is crisp. I need a little sun today and wireless signals are surprisingly good :P. So right Now, sitting in my roof top garden with my lappy writing today’s blog post and enjoying my morning tea. And beautiful pairs of sparrows and pigeons are also enjoying the morning sun with me. I love to hear the birds chirping in the morning – sweet songs of nature ♥☺

    Great start to the day.

    Trying to decide what to make for Quick Breakfast or Brunch, OR Snack? No worries, I’ve got you covered in today’s all new post.

    Today’s Recipe: Chocolate Date Bars

    SUPER healthy, naturally sweetened Chocolate Date Bars!! Just 7 ingredients to a snack that tastes more like a candy bar!! YUM YUM. The result is a simple, naturally-sweetened, healthy Date bars that is a little on the decadent side – just the way I like it.

    Chocolate date bars recipe
    Photo: Chocolate Date Bars Recipe

    They taste like Supreme awesomeness. They’re rich, dense, moist, super chocolaty, nutty, slightly crunchy and perfectly sweet and very filling.

    Chocolate Date Bars Recipe
    Photo: Chocolate Date Bars Recipe

    These Chocolate Date Bars DO indeed taste like a raw brownie. 😛

    1. They require just 7 ingredients.
    2. They’re no bake, aside from toasting your nuts (an optional step).
    3. They’re loaded with antioxidants, protein and healthy fats.
    4. They’re incredibly satisfying.
    5. They’re perfect for breakfast, dessert or a quick snack.
    6. They’re freezer-friendly.
    7. They’re uber chocolatey.
    8. They’re really just kind of perfect.

    I did have one for breakfast and found it quite filling. But for the most part I ate these as a healthy dessert. I’d go to the freezer, break off 1/3 and snack. Then repeat for the next 30 minutes until it was gone. Self control comes in waves, people, especially with these bars. 😛 ☺

    Really I should stop praising and tell you the recipe. So Let’s get started !

    Tools You needed to make this recipe are:

    1. A cookie sheet
    2. A frying pan
    3. A Spatula

    Check it out the Chocolate Date Bars Recipe and printable version below!!

    You MUST try these Date bars and let me know what you think! Post a photo on Facebook (Recipestable) or  on Twitter so I can see how lovely yours turn out.
    Happy Chocolate Date Bars making!

    If you like this Chocolate Date Bars Recipe, Please Subscribe to my blog. I have lots more recipes to share with you. And If you make it then let me know your feedback by commenting below.

  • Baked Vegetable Spring Rolls Recipe

    Assalamu alaikum wa rahmatullahi wa barakatuhu!

    In the Name of Allah, Most Gracious, Most Merciful

    I hope you’re well and have had a good start to the week.   I’m sorry to let you worry about me, but these days I’m a bit busy.  As you know study study study. lol 😀 I am madly busy with my assignments. Sorry for this post being late.

    My class got cancelled today. Glad I get a chance to breathe. So I decide to write a post for my lovely reader’s. Last week, I made these Veggie rolls ( Baked Version) to give myself a break from ‎assignment work. They are very easy to prepare and tastes absolutely delicious! I had too much fun making this. 

    baked veggie rolls
    Take a Break and bake Some Veggie Rolls 🙂

    These yummlicious veggie rolls are healthy and very filling. And they smell amazing when they’re baking. They crisped up fine in the oven. The only problem is that three wrappers have 180 calories! What!???? That’s a lot. I ate 3 rolls anyway. 😛 😉 They are ready in only 35 minutes and you can use your favorite veggies.

    Baked Veggie Rolls Recipe
    Photo: Baked Veggie Rolls Recipe

    You could fry these, too, but I was trying to keep them healthy. I hope you all give this Baked Veggie Rolls recipe a try and let me know how they turn out!

    Baked Veggie Rolls 

    So let the fun begin!

    1. First Prepare Veggie Filling: Heat a small amount of oil in a wok over medium heat. Add giner and garlic. Saute until fragrant. Might you think, it’s a stupid instruction, isn’t it? Tell you what, just cook your garlic few seconds until they’re soft-ish.
    2. Now add green peas, red beans and corns. Cook for 2-3 minutes or until they are soft.Add remaining veggies and add a splash of vingear. Stir fry for few minutes. You can add soy sauce or any store bought sauce etc. But I didn’t add it. As I try to avoid artifical ingredients to follow my journey towards clean eating. 🙂
      Sprinkle black pepper, red chili, and maybe a little salt if you need it. If you want to use fresh herbs then I think that would be lovely.
    3. Stir well and Let everything simmer for a couple of minutes, but don’t let everything get overly soft because you still have to stuff and bake your rolls.
    4. Take the mixture into a bowl and let it cool for few minutes. Once everything is cool, you can either proceed to stuffing the rolls, or cover your bowl and put everything in the fridge overnight. If you do refrigerate the veggie mixture, be sure to bring it room temperature before stuffing your rolls.
    5. When you’re ready to stuff your rolls, be sure your stuffing mixture and wrappers are at room temperature. You’ll want a clean work surface for this part and a bowl of water nearby.
    6. Don’t be intimidated by this part. You just want the rolls to hold the yummy stuffing in. They don’t need to be perfect. And, frankly, if someone is going to judge you on how pretty your spring rolls are, then you probably shouldn’t be feeding them. lol 😛
    7. Preheat an oven for 200 degree C and brush a baking sheet with oil.
    8. Place a wrapper out in a diamond shape on your work surface.Put a tablespoons of filling in the center of the wrapper. I under-stuffed these rolls, so they turned out chewier that I would have liked. However, you don’t want to stuff them so full that they split open. It’s a delicate balance.
    9. Bring the bottom point of your wrapper up over the filling and tuck it under as tight as you can. Fold the sides over and shape into a roll.
    10. Moisten the edges of the top flap slightly with water and roll the roll over, pressing the point on the underside of the roll to seal it.
    11. Put on a lightly oiled baking sheet and repeat this method the rest of your rolls.
    12. Lightly brush the tops of the rolls with egg-wash and sprinkle sesame seeds over them.
    13. Bake in the preheated oven for 20 minutes or until they turn golden brown. This took my oven around 22-25 minutes.
    14. You can eat these veggie rolls with tamari or soy sauce, but we prefer sweet and sour sauce.
      Ready !!
    Baked Veggie Rolls Recipe
    Photo: Baked Veggie Rolls Recipe

    Sorry I din’t get step by step picture as I was hungry and on in a hurry to eat 😛

    Check it out the Baked Veggie Rolls Recipe and printable version below!!

    Keep me in your duas please, and have a lovely week,

    Wasalaam!

    If you like this Baked Veggie Rolls Recipe, Please Subscribe to my blog. I have lots more recipes to share with you. And If you make it then let me know your feedback by commenting below.

  • Heart-Healthy Pan Fried Fish Recipe

    Pan Fried Fish

    This Pan Fried Fish recipe is melt-in-your-mouth delicious and healthy too! Fish Fillets or Fish steaks are pan-fried, searing in the flavors and omega-3 goodness of the fish.

    Tangy Pan Fried Fish (Clean Eating Version)
    Photo: Tangy Pan Fried Fish (Clean Eating Version)

    It is pretty simple and fast to put together and differs completely from another pan fried fish I have posted earlier. This Tangy Pan Fried Fish relies on warm flavor of ginger, sharp garlic and the grassy heat of green chillies along with a tang from vinegar and chaat masala. I pan fry the fish in virgin olive oil, you need to try fish cooked in it to know how awesome it tastes but canola or other oil will work fine too.

    Photo: Tangy Pan Fried Fish (Clean Eating Version)
    Photo: Tangy Pan Fried Fish (Clean Eating Version)

     Check it out the Tangy Pan Fried Fish Recipe and printable version below!!

    I have also posted Restaurant Style Tawa Fish Recipe which is another quick version of making Fried Fish. Do check it out as well.

    If you like this Tangy Pan Fried Fish Recipe,Please Subscribe to my blog. I have lots more recipes to share with you. And If you make it then let me know your feedback by commenting below.

  • Best Healthy Chicken Parmesan Recipe

    Best Healthy Chicken Parmesan

    Who said chicken Parmesan has to be deep-fried and loaded with fatty cheeses to be good? This Clean Eating  alternative saves you almost 600 calories.  Chicken breasts are breaded with flavorful crumbs, herbs, and Parmesan cheese, then baked for the easiest, quickest chicken dish ever.Serve with a salad and Broccoli or Brown rice for a quick, scrumptious dinner. 

    Clean Eating Chicken Parmesan Recipe
    Photo: Clean Eating Chicken Parmesan Recipe

    Check it out the Clean Eating Chicken Parmesan Recipe here!!

     If you like Clean Eating Chicken Parmesan Recipe and make it then let me know your feedback by commenting below.And if you know more innovative ways in which we can utilize this mouth watering Clean Eating Chicken Parmesan, do share with us and we would be glad to give it a try.