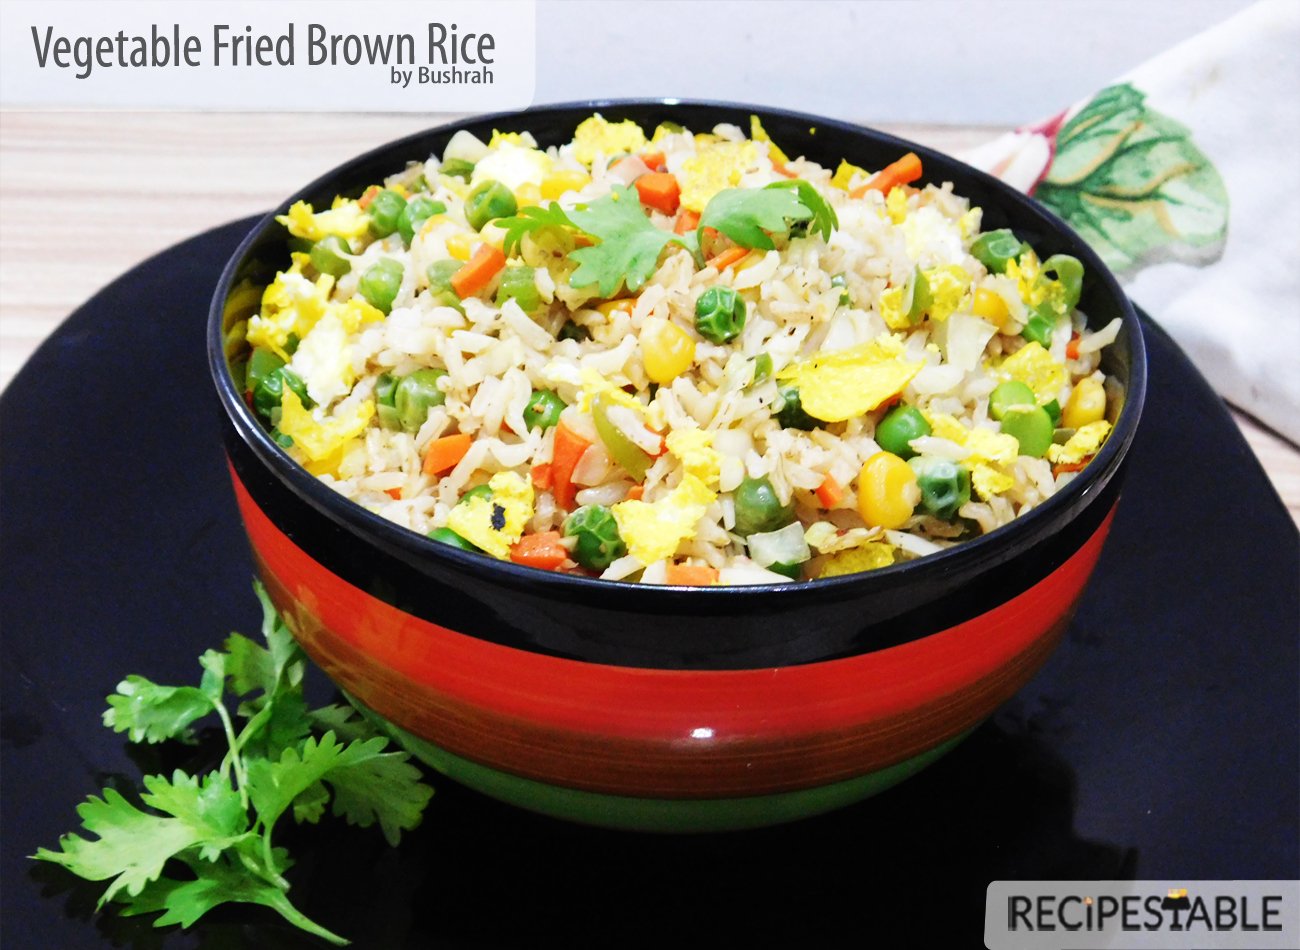
Category: Vegetables

  • Creamy Cucumber Pasta Salad Recipe

    Creamy Cucumber Pasta Salad Recipe

    This post may contain affiliate links. Please read my disclosure policy.

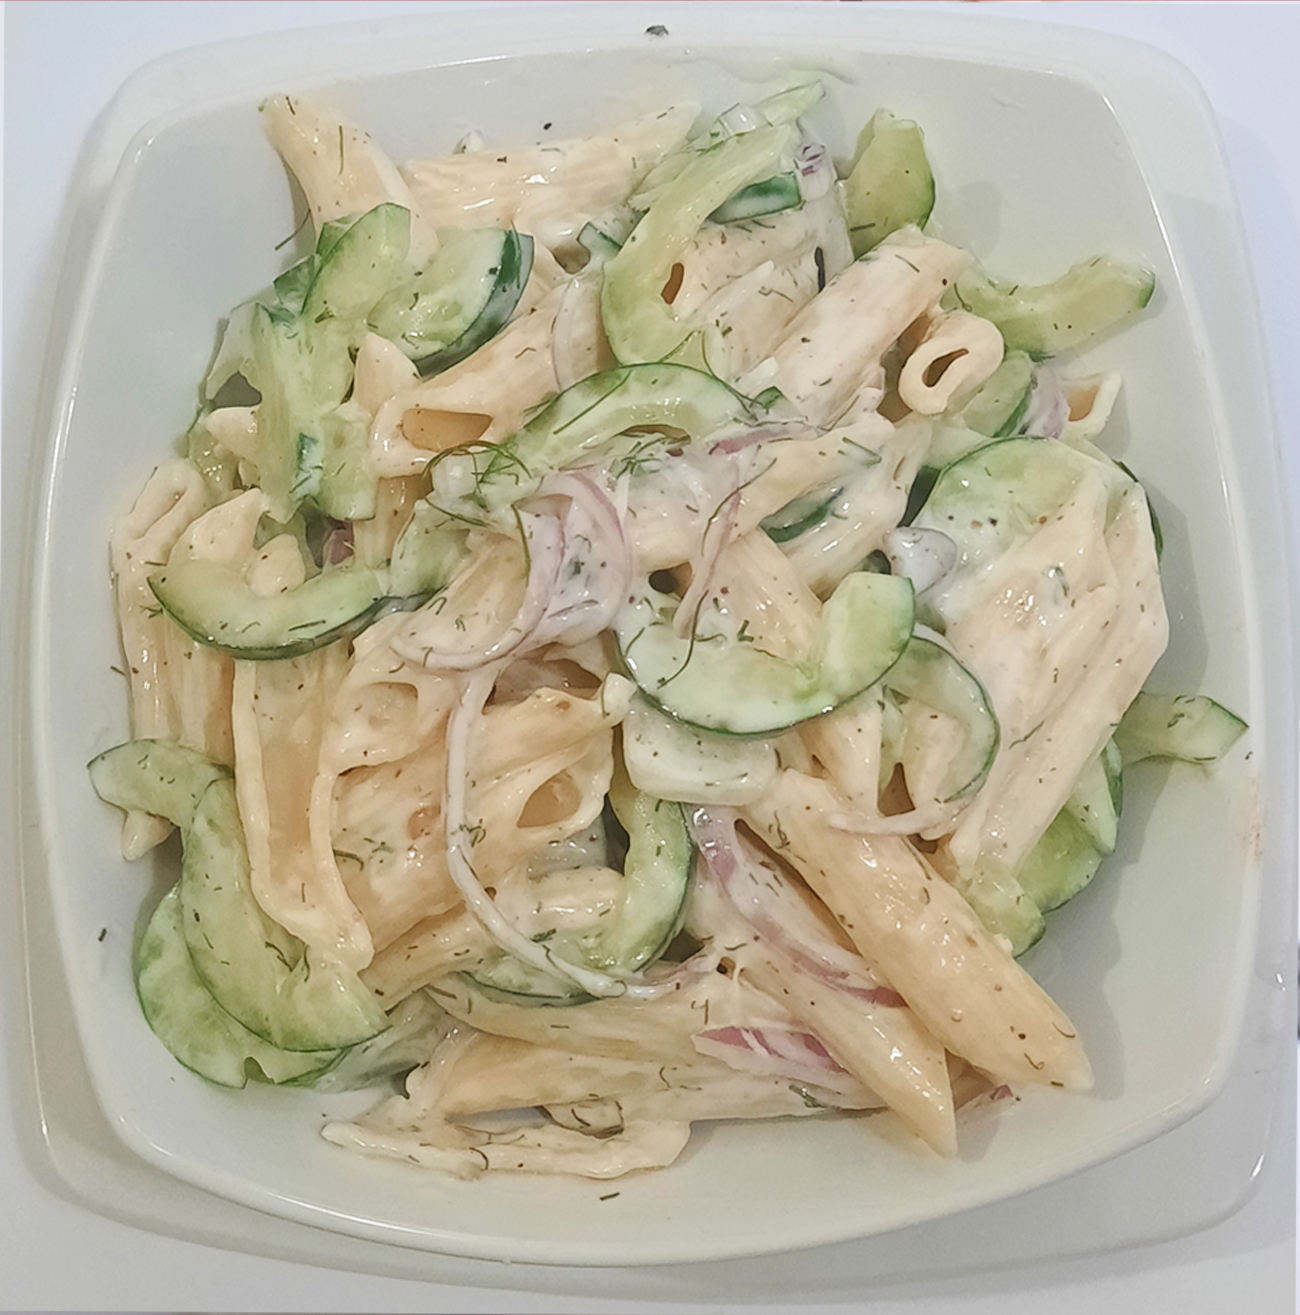
    This quick and easy Creamy Cucumber Pasta Salad combines a creamy dressing – like a mixture of Greek yogurt or sour cream – with freshly sliced cucumbers and red onions along with plenty of chopped dill! It’s the perfect unique pasta salad recipe for your next barbecue party.
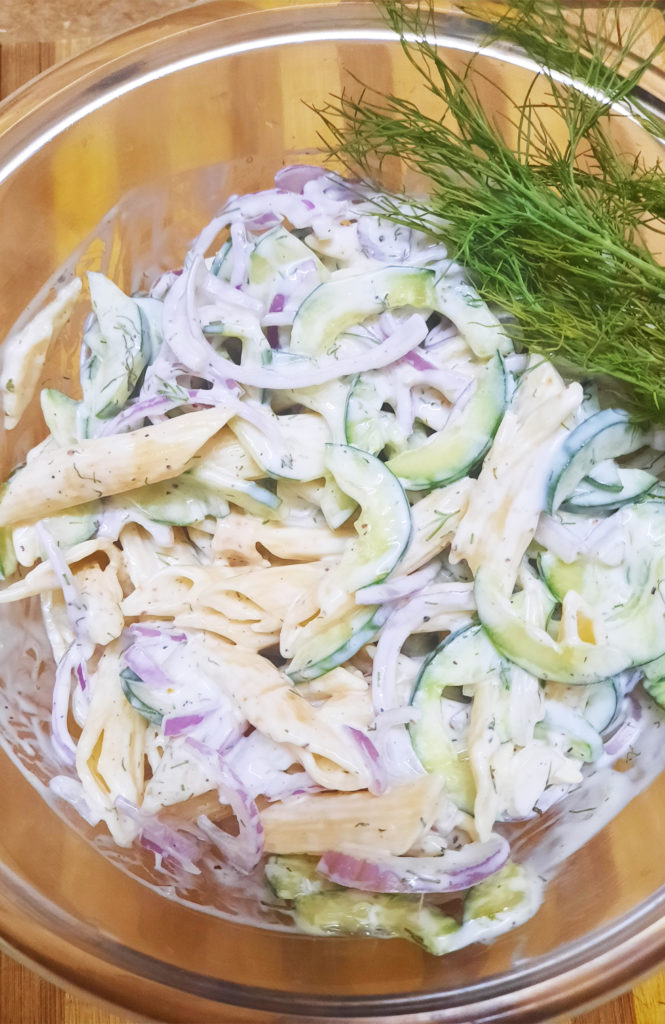
    This quick and easy Creamy Cucumber Pasta Salad combines a creamy dressing - like a mixture of Greek yogurt or sour cream - with freshly sliced cucumbers and red onions along with plenty of chopped dill! It's the perfect unique pasta salad recipe for your next backyard barbecue.
    Creamy Cucumber Pasta Salad Recipe

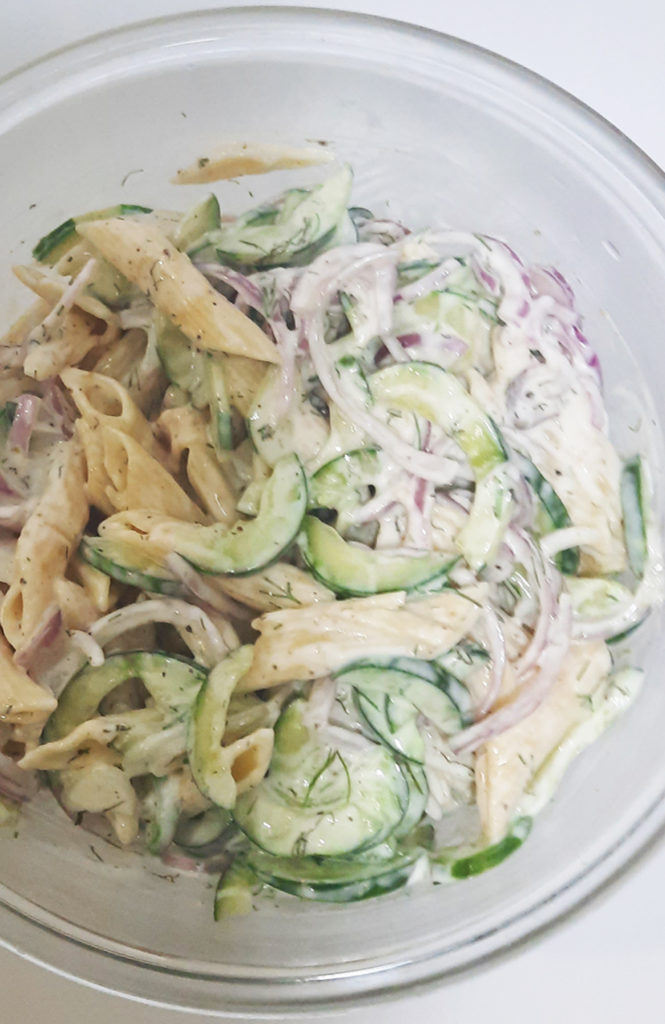
    Loaded with tender pasta, crisp juicy cucumbers, fresh dill and red onion, this dish will be the hit of every get together. And it comes together within just few minutes and it’s incredibly delicious! The dressing in this salad doesn’t have a lot of ingredients, but that’s really the beauty of this recipe! The fresh Greek yogurt adds a little zip to the dressing while the dill adds summery freshness complementing the cucumber and cooked pasta perfectly! 
    Creamy Cucumber Pasta Salad Recipe
    Creamy Cucumber Pasta Salad Recipe

    If you have access to fresh dill, it really makes a huge difference in this salad.

    Ingredients in Creamy Cucumber Pasta Salad Recipe?

    • Pasta: penne or rotini pasta
    • Cucumbers: fresh long English cucumbers work the best for this recipe
    • Onion: red onion (can sub white for less of a “bite”)
    • Dressing: sour cream or Greek yogurt and vinegar
    • Herb: fresh dill
    • Spices: salt and pepper

    Ist Gather Your Equipment’s:

    How to Make this Creamy Cucumber Pasta Salad:

    This is such an easy recipe, y’all. Seriously. Yes to Summer recipes that don’t require hardly any effort!

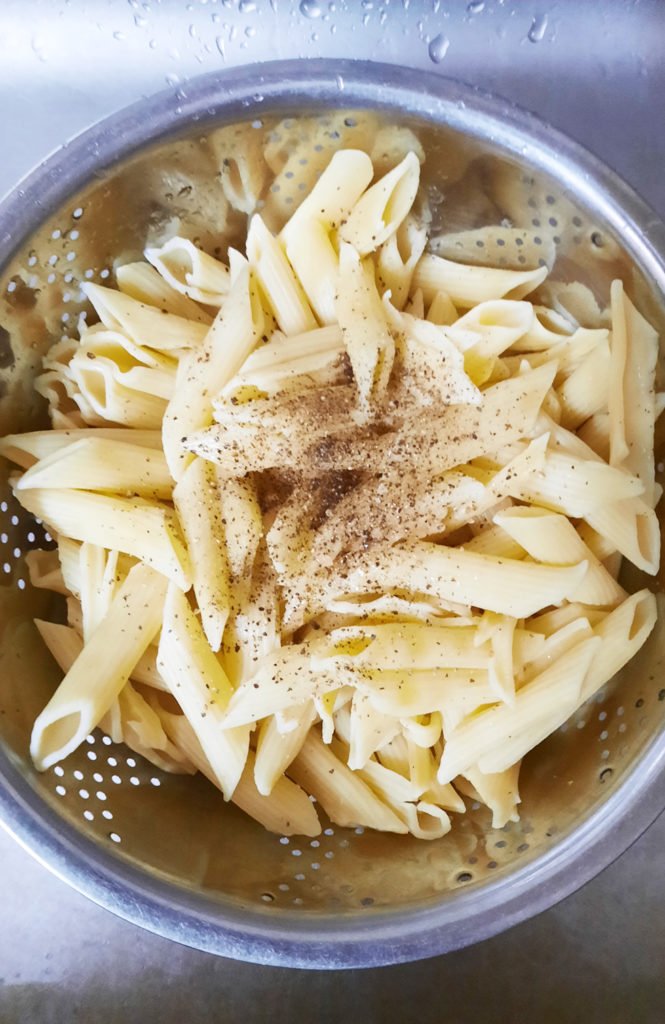
    1. First, begin by cooking your pasta according to the box instructions! Make sure to salt your water and cook the pasta until al dente. Once it’s done, let it cool! If desired, rinse cold water over top to stop the cooking and speed up the cooling process.
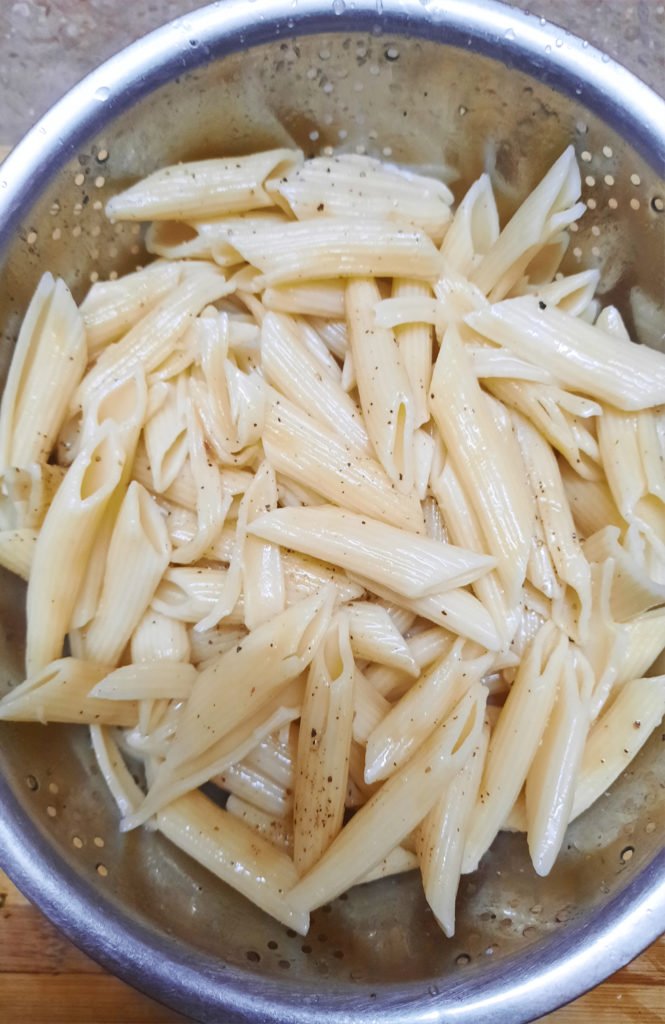
    2. While the pasta is cooling off, slice up your cucumber! Slice it in half lengthwise and then slice very thin slices of cucumber.
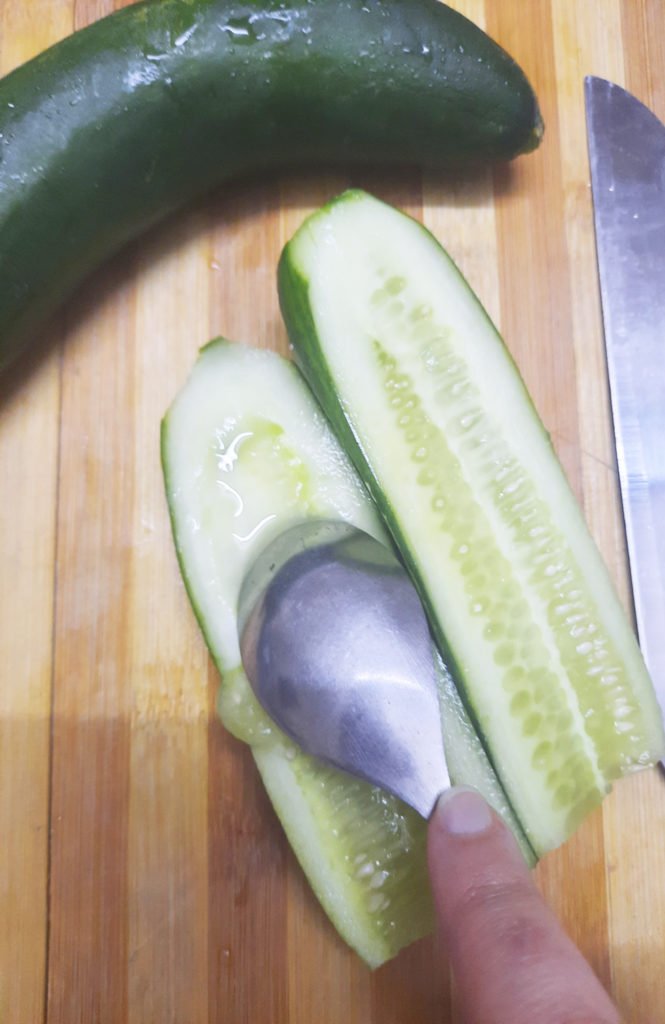
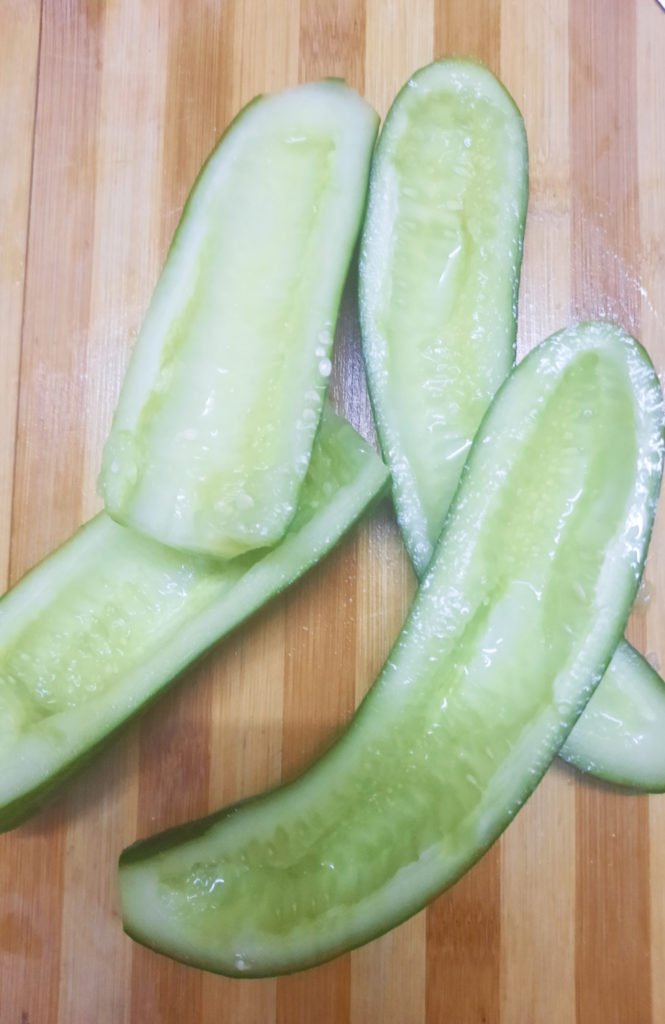
    3. Do the same thing with the red onion! Thin slices go a long way here, folks! While it’s not required, soaking the onions in cold water for a few minutes takes just a little bit of bite out of them.  .
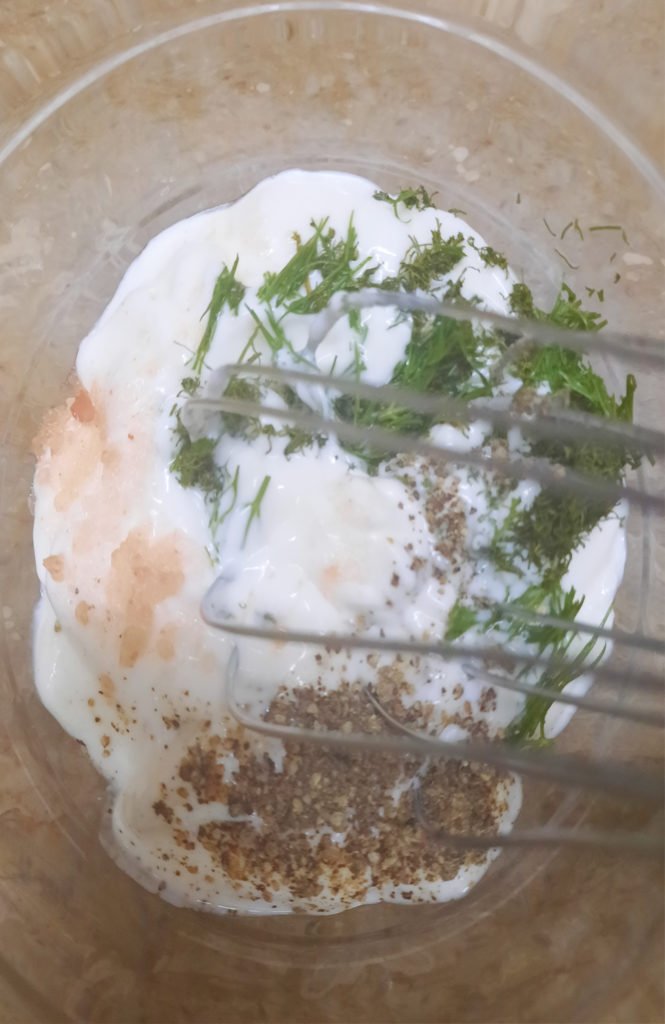
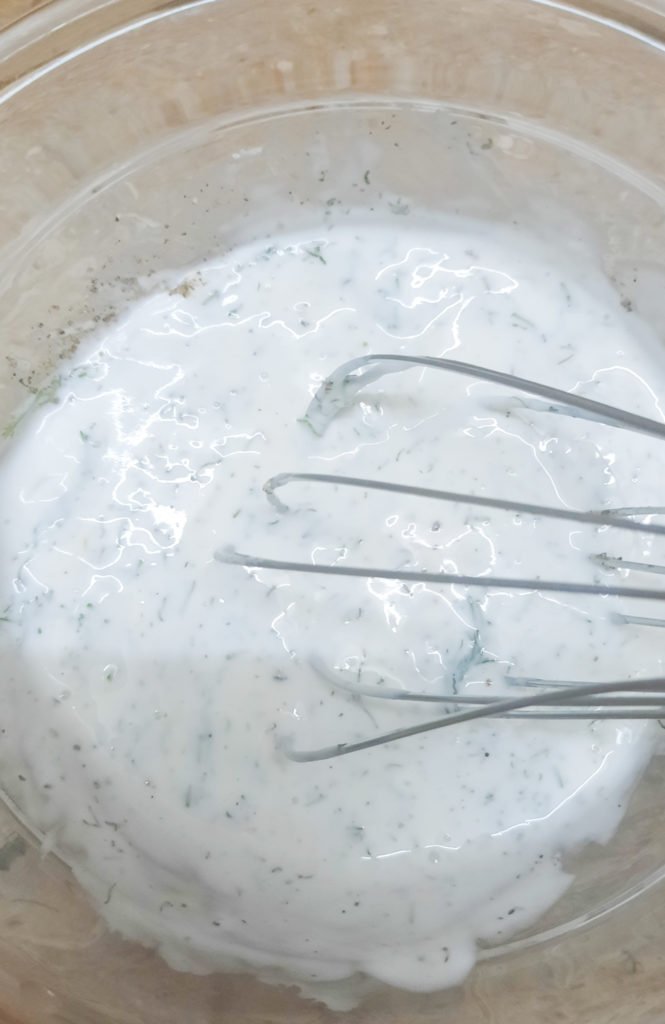
    4. Next, mix together the delicious Greek yogurt dill dressing! Combine the Greek yogurt with the dill, vinegar, salt (i added the pink salt) and pepper. Mix until deliciously thick and creamy. Set this aside.
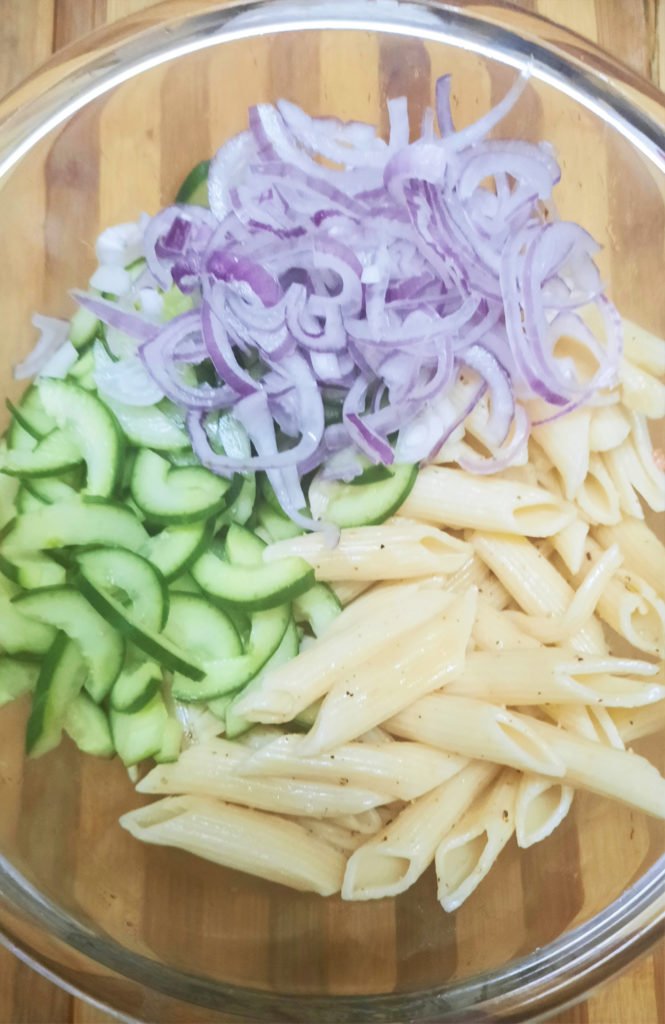
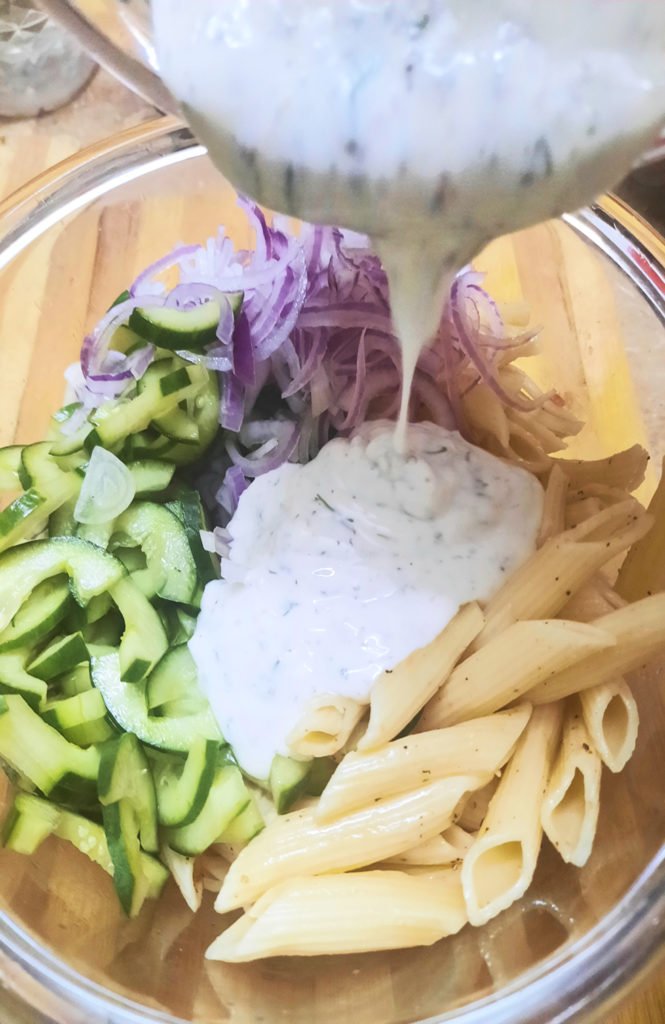
    5. In a large bowl, add your cooled off pasta. On top, add your cucumbers, onions and all of the Greek yogurt dressing! Mix together gently until fully combined.
    6. Taste and adjust the seasoning if necessary. I always love garnishing with a big pinch of extra dill – it makes it taste extra fresh and adds an amazing pop of flavor.
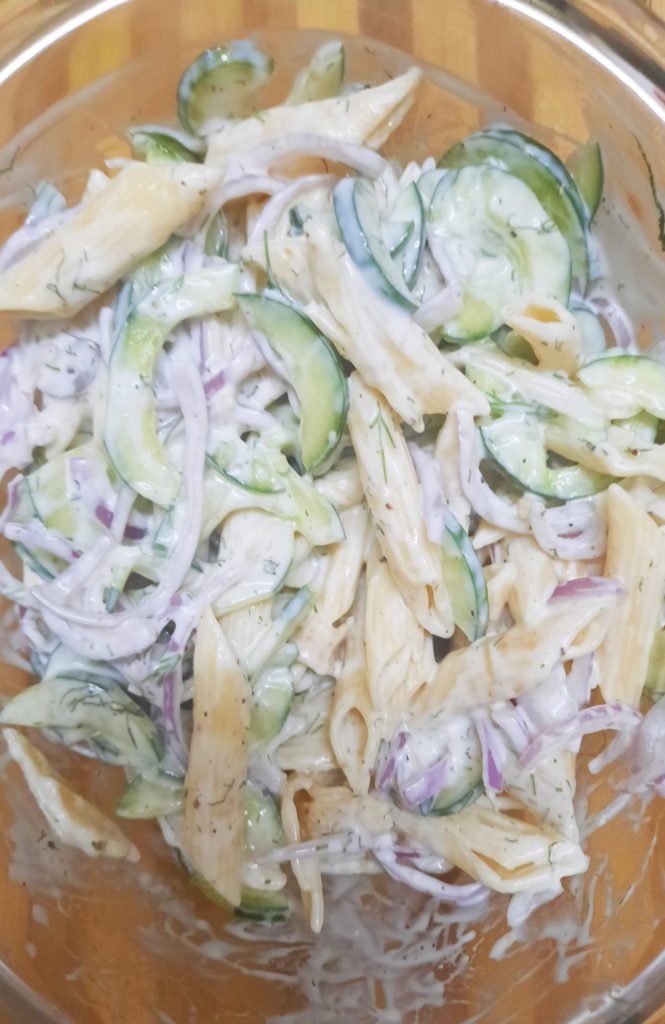
    7. Let it sit in the fridge for about 20-30 minutes to make sure all of the flavors can melt together and it can stay cold! Enjoy when chilled and eat up! 🙂


    Note: If possible try to toss this at least 1 hour before serving to allow the flavors to blend.

    Bismillah let’s get started.
    Check it out The Creamy Cucumber Pasta Salad Recipe and printable version here!!

    Creamy Cucumber Pasta Salad Recipe
    This quick and easy Creamy Cucumber Pasta Salad combines a creamy dressing – like a mixture of Greek yogurt or sour cream – with freshly sliced cucumbers and red onions along with plenty of chopped dill! It’s the perfect unique pasta salad recipe for your next backyard barbecue.
    Keyword 30 minutes meals, cucumber, greek yogurt, Pasta, pasta salad, salad, summer salad, veggie salad
    Prep Time 10 minutes
    Cook Time 10 minutes
    Total Time 20 minutes
    Servings 6
    Author Bushra Waheed

    Ingredients

    For Pasta Salad:

    • ½ pound medium sized pasta such as penne or rotini
    • 2 large English cucumber thinly sliced
    • 1 medium red onion thinly sliced

    For Salad Dressing:

    • 1 cup sour cream or whole fat plain Greek yogurt can substitute mayo if desired
    • 2 tbsp. fresh chopped dill
    • 2 tsp vinegar
    • 1/2 tsp salt
    • 1/2 tsp pepper

    For Garnishing

    • fresh dill

    Instructions

    • Cook pasta according to package directions, until al dente. Drain and drizzle with oil and sprinkle with a couple pinches of salt and pepper. Toss to coat evenly and let it cool.
    • While the pasta is cooling, Thinly slice onion and place in a bowl of cold water. (see note)
    • Slice the cucumber in half lengthwise and remove seeds using a spoon then dice it into thin slices.

    To Make The Salad Dressing:

    • In a small bowl, mix the sour cream or Greek yogurt along with the vinegar, fresh dill, salt and pepper. Mix until fully combined. Taste and adjust seasoning if needed.

    To Make The Creamy Cucumber Pasta Salad:

    • In a large bowl, add the cooled rigatoni pasta. Top with the fresh sliced cucumber and red onion.
    • Pour dressing over pasta and toss to combine.
    • Place in the refrigerator for 20-30 minutes to let the pasta salad cool off and for the flavors to meld together.
    • When serving, if desired, add a large handful of dill on top for garnish and an extra pop of flavor!
    • Delicious Creamy Cucumber Pasta Salad is ready to serve. Enjoy!

    Notes

    Soaking the onions in cold water is optional but takes a bit of the “bite” out of the onion.
    Serving Suggestions:
    Goes great with BBQ Chicken Wings.

    Want more Pasta Salad Inspiration? 

    Here are some other Pasta Salad recipes on my blog:

    Hope you guys loved this one and are having a great Summer. Let me know what your favorite garden produce is this time of year in the comments below! 

    Pin it For Later

    Put your own spin on it. And lemme know how it turns out and do take a few seconds to rate it! I would love to see your recreations so tag me on instagram @recipestable or Facebook (Recipestable) or on Twitter so I can see how lovely yours turn out.
  • The Flavorful Mix Vegetable Chicken Pulao Recipe

    The Flavorful Mix Vegetable Chicken Pulao Recipe

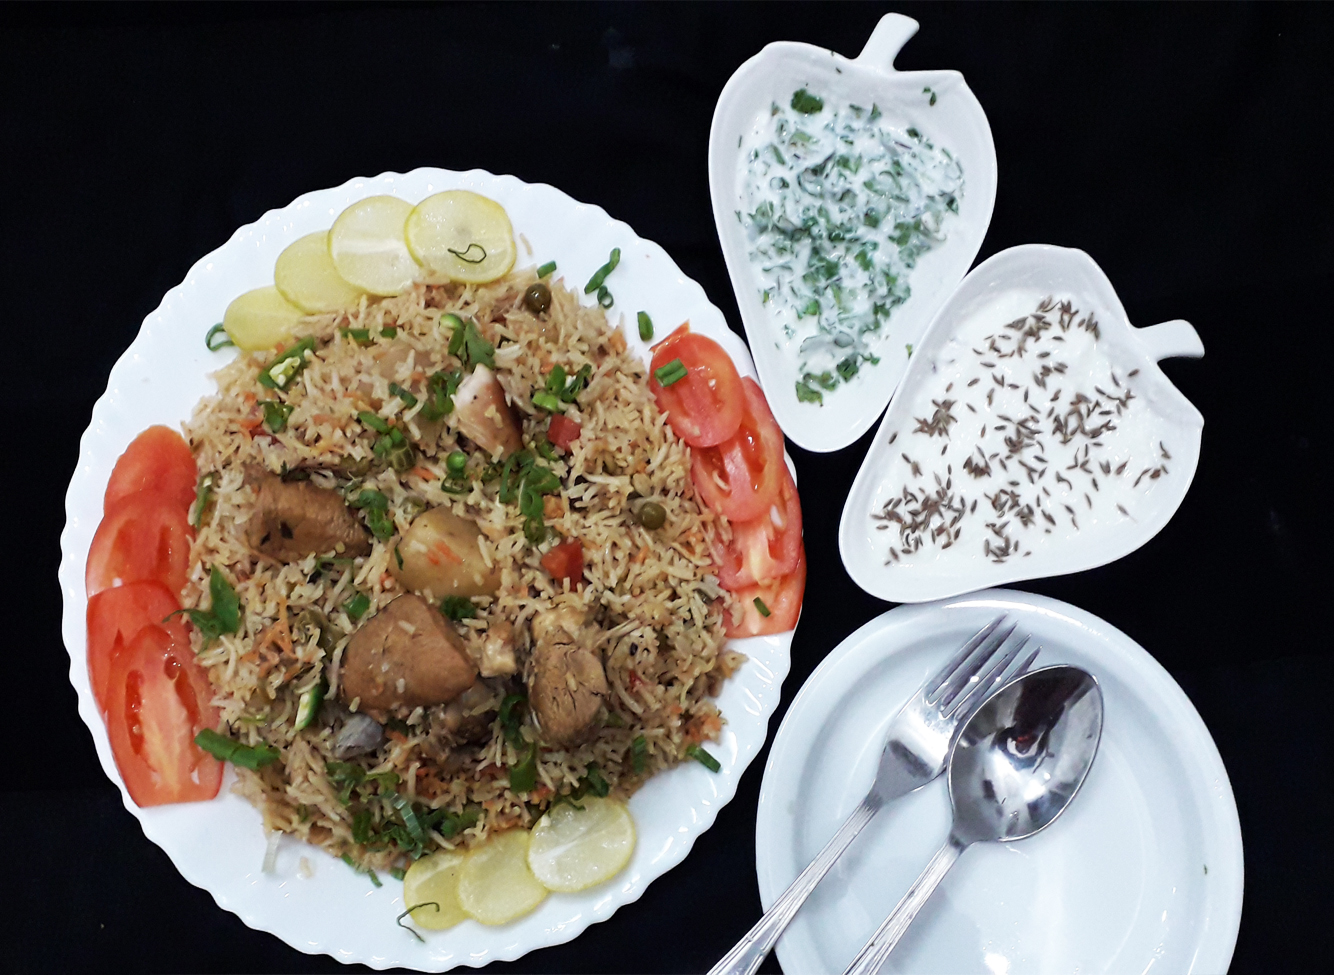
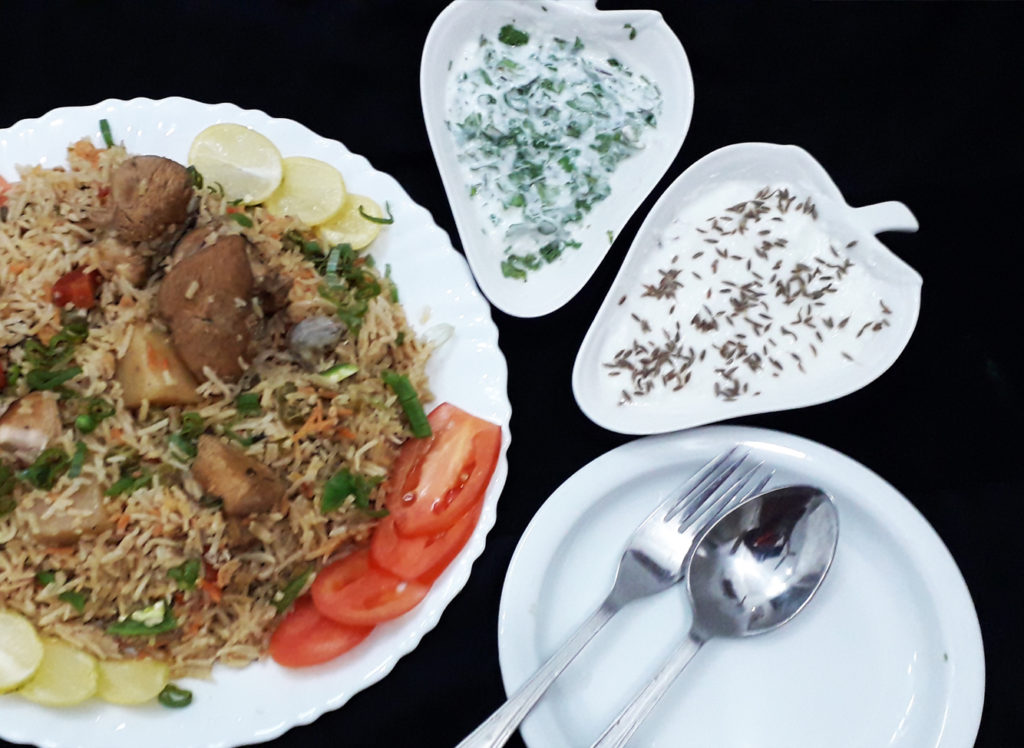
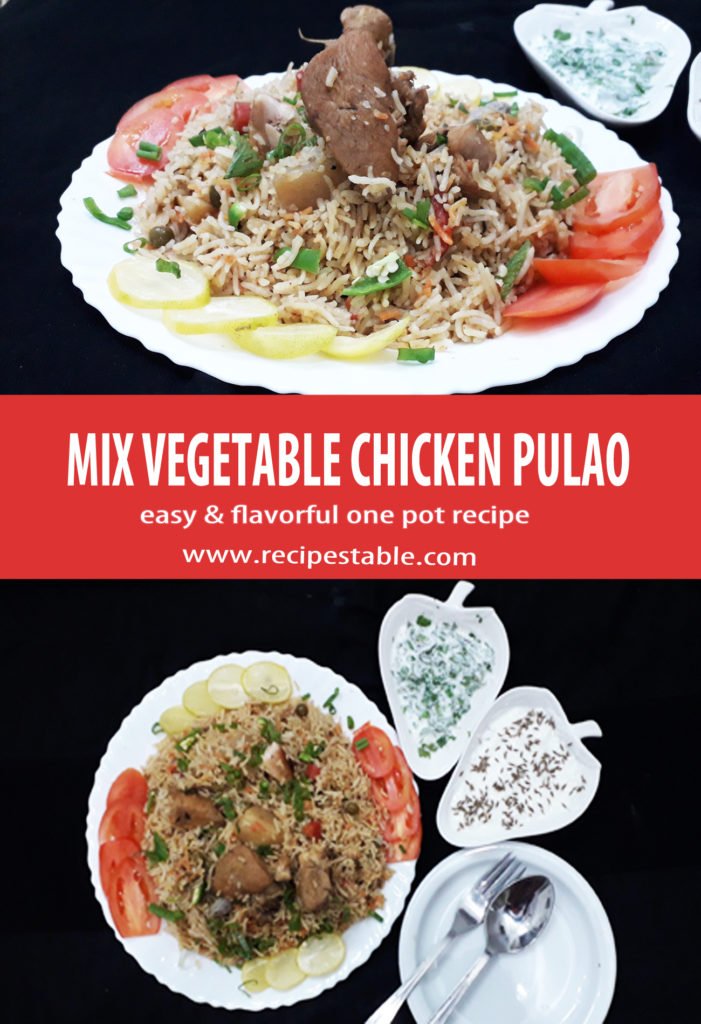
    Loaded with veggies and flavorful chicken, warm spices like cumin, cinnamon, nutmeg and mace and the heat of green chilies this Mix Vegetable Chicken Pulao is a delight to the taste buds in every bite!

    The Flavorful Mix Vegetable Chicken Pulao Recipe
    The Flavorful Mix Vegetable Chicken Pulao Recipe

    Chicken broth and seasonings are added to give it lots of flavor and moisture. It’s a one-pot meal to prepare and cook in a pot that comes together quickly for a hearty and hot week-night dinner.

    There are some Rice Pulao that are overly packed with gorgeous spices flavors, but this isn’t one of those. This Chicken pulao is a medley of rice, chicken, spices, and vegetables. I just add a tiny sprinkle of green onion as a garnish, just to add a little more color when serving. Pairs perfectly with any raita or curry of your choice.

    The Flavorful Mix Vegetable Chicken Pulao Recipe
    The Flavorful Mix Vegetable Chicken Pulao Recipe

    What goes in Mix Vegetable Chicken Pulao

    The ingredients you need to make this Mix Vegetable Chicken Pulao are:

    • Best rice for pulao – basmati rice is the best for both flavor and fluffiness. Basmati is a type of long grain rice – the longer the grain, the fluffier the rice. It also has a lovely subtle fragrance that really compliments the flavors in this rice pilaf; You can use brown rice as well for this pulao recipe.
    • Chicken: The juicy thighs or chicken breast are the ideal meat choices for making pulao. You can use either the boneless pieces or the bone-in ones like leg pieces. I personally, like pulao with boneless chicken pieces.
    • Fat – Ideally desi ghee (clarifying butter) is the best choice for making the pulao. I choose the clarified butter (desi ghee) for flavor, but if the aroma and taste of ghee are too over-powering for you, use unsalted butter, coconut oil, or any other cooking oil.
    • Flavor Base – sautéed ginger and onion, to add savouriness;
    • Pulao Spices – I’ve used a combination of cinnamon, cloves, nutmeg, mace, bay leaves and cumin in this Mix Vegetable Chicken Pulao. It’s reminiscent of traditional Middle Eastern flavors but also a festive combination. Feel free to customize this to your own taste;
    • Broth OR water – For extra flavor, I almost always make my pulao with broth. However, water will work just fine as well, though I’d add an extra pinch of each of the spices;
    • Vegetables – Use any vegetables you like here. I like using carrot and green peas for a vibrant color, and potatoes because the flavor melds in nicely with the rice. Cabbage and Capsicum also work well but be aware that they provide a sharper pop of flavor. Broccoli would also be great.
    • Garnishing – I’ve used green onions in this mix vegetable chicken pulao recipe. I adore both the flavor and fresh green color that green onion bring to this pulao. Fresh Coriander and Mint Leaves are also great!

    How to make Mix Vegetable Chicken Pulao:

    Mix Vegetable Chicken Pulao is straight forward to make.

    1. Soak the rice for 30 minutes then drain.
    2. Sauté onion and whole spices in butter, then add the ginger and chicken along with seasoning. Cook for 20 minutes or until chicken is no longer pink and all juices run clear.
    3. Then add carrots, green peas and potatoes cook 5-7 minutes or until vegetables crisp-tender then add chicken broth and bring it to boil. Then add rice cover the pot and let it simmer on medium low flame or until the rice is tender and the liquid has been absorbed. This takes roughly 10 minutes.
    4. Now give a dum for a further 15 minutes. Fluff the rice and dish it out.

    But here are my tips for how to make the best Pulao every time!

    • Soaking Rice or not: Soaking white rice for about half an hour before cooking allows moisture to get to the middle of the kernel. During cooking, the heat transfers quicker to the middle and the rice will be done in about eight minutes, causing less damage to the outside of the kernel. Thus, it’s more evenly cooked, and easier to separate than the non-soaked rice.
    • Right liquid to rice ratio – 1 1/2 Cups of liquid to 1 cup of rice will yield perfectly cooked fluffy rice. Adding too much liquid to cook rice always results in a mushy and sticky pulao
    • Do not peek while rice is cooking! Escaped heat compromises the cooking of the rice;
    • Rest undisturbed – this is the most important step for cooking rice. This is when the rice finishes cooking and becomes fluffy!

    What To Serve With Mix Vegetable Chicken Pulao?

    This is home-style, hearty chicken pulao with delicious flavors full of spices and aroma. I suggest, serve it hot right after dum (steaming) with zeera raita, or mint raita and kachumber salad for best taste. It would also go really well with my Chicken Shorba– a mild flavored desi style chicken stew with a great combination of Oriental spices. 

    The Flavorful Mix Vegetable Chicken Pulao Recipe
    The Flavorful Mix Vegetable Chicken Pulao Recipe

    Bismillah let’s get started.
    Check it out The Flavorful Mix Vegetable Chicken Pulao Recipe and printable version here!!

    The Flavorful Mix Vegetable Chicken Pulao Recipe

    Nothing like a good plate of aromatic pulao! This Flavorful Mix Vegetable Chicken Pulao hits all the right spots with its wonderful aroma and exotic flavors! Spice up your week with this flavorful Pulao!
    Keyword Chicken, Chicken Pulao, Dinner, Iftar Recipes, Pulao, Quick and Easy, Ramadan, Rice, vegetables, Veggie Pulao
    Prep Time 20 minutes
    Cook Time 40 minutes
    Total Time 1 hour
    Servings 4
    Author Bushra Waheed

    Ingredients

    • 2 pounds Boneless Chicken
    • 3 cups long gran rice basmati rice
    • 1/2 cup clarified butter/ desi ghee or oil
    • 1 onion thinly sliced
    • 4 inch Ginger piece thinly sliced
    • 4 carrots peeled and cubed
    • 3 potatoes peel and cubed
    • 2 cups Green Peas
    • 2 green onions thinly sliced( only green part)
    • 4 Green Chilies thinly sliced
    • 1 large Cinnamon Stick daarcheeni
    • 2 Black Cardamom bari elachi
    • 5-6 Cloves (loong)
    • 2 Bay Leaves tezpaat
    • 1 tsp Cumin Seeds (zeera)
    • 1 tsp nutmeg and mace powder
    • 1/2 tsp Black Peppercorns (kali mirch)
    • 2 tsp Red Chili Flakes
    • 1 tsp all spice powder garam Masala powder
    • 2 tsp salt or according to your taste
    • 6 cups Chicken Broth Yakhni

    Instructions

    • Rinse the basmati rice till the water becomes clear. Then soak it in water for 20 minutes. After soaking, drain the rice and keep it ready.
    • Take a heavy bottom skillet or pot and melt clarified butter in it.
    • Add the onions and sauté until they are a deep golden brown. This can take up to 5-7 minutes over a low heat. You will need to check and stir a couple of times. Don’t be tempted to rush this stage because this adds a lot of flavor to the finished dish.
    • Add the cumin seeds, cinnamon stick, black cardamom, black peppercorns and cloves. Sauté for 2 minutes or until popping and fragrant.
    • Now add the ginger slices and Chicken, cook for 15-20 minutes or till chicken turns golden brown before adding the vegetables.
    • Now add Carrot, Potatoes and green Peas. Sauté and cook for 10 minutes or until vegetables are just tender-crisp.
    • Season with salt, red pepper flakes and some garam masala.
    • Next, add green chilies and sauté for a second and adjust the seasoning and add more salt if needed.
    • Add Chicken Stock and once the it starts boiling add the soaked basmati rice and mix it gently.
    • Now, wait for it to boil again, then cover and simmer on medium low flame or until the rice is tender and the liquid has been absorbed. This takes roughly 10 minutes.
    • Put the pot covered (give a dum) for a further 15 minutes.
    • Now, uncover the pot sprinkle green onion (only green part)and fluff the rice gently from the corners
    • Remove from the heat and dish it out.
    • Enjoy flavorful Mix Vegetable Chicken Pulao!!

    I can’t wait to hear what you think of this Mix Vegetable Chicken pulao. If you’ve tried both my chicken biryani and my chicken pulao you really have to let me know what you think!

    Want more Pulao Inspiration? 

    Here are some of the other Pulao Recipes that I love to make for my weekday meals.

    Pin it For Later:

    Like this recipe? Pin it to your favorite Pinterest board now so you will remember to make it later!

    HUNGRY FOR MORE? Subscribe to my newsletter and follow along on FacebookPinterest and Instagram for all of the latest updates.

  • Very Veggie Box Patties Recipe

    Very Veggie Box Patties Recipe

    Very Veggie Box patties, the name itself rings in your ear, doesn’t it?
    You must be wondering is it a box or a patty 😉

    The unique and interesting name is because of the way the these patties are folded and made, like wrapping a box. A savory veggie filling is put inside samosa wrappers and then deep fried.

    Very Veggie Box Patties Recipe

    So what exactly are Very Veggie Box Patties? 

    If you are not familiar with box Patties, they are a deep-fried Pakistani pastry snack usually filled with something savory. They are called box patties because their shape resembles a square box which is made by overlapping two samosa wrapper sheets. They are loved all throughout the year but they become almost a staple in every household during Ramadan on the Iftar tables.

    Very Veggie Box Patties Recipe ~ Ramadan snack doesn’t get better than this!

    Ingredients in This Very Veggie Box Patties?

    Not only are these simple to make (they require nothing more than few veggies, seasoning and samosa sheets), but the stuffing possibilities are endless!

    1. Veggies: I used carrots, green peas, sweet corn, capsicum, boiled potatoes, cabbage.
    2. Olives: Green and Black Olives
    3. Seasoning: Black pepper, red Pepper flakes, salt
    4. Sauce: red chili Sauce and soy sauce
    That’s all you need to make this Very Veggie Box Patties ! Surprisingly simple ?

    How to Make this Veggie Box Patties:

    This Very Veggie Box Patties recipe is so easy to make and simple that definitely it’s worth trying.

    1. Prepare the Filling: I start off with sautéing veggies to which I add boiled green peas, potatoes, carrot, capsicum, cabbage and sweet corn and olives. Then season it with salt, black pepper, red chili flakes, soy sauce and for an extra kick red chili sauce . 

    2. Prepare the Box Patties: Then put two samosa sheets in a cross pattern, one over the other so they make a + (plus) sign. Then put some veggie filling in the middle. Fold each of the edges one by one over each creating a parcel.
    3. Frying: Then deep fry on medium flame till crispy and golden. You can fry these in advance and keep them in the oven on warm mode and serve when required.

    Very Veggie Box Patties Recipe

    Can I play around with the filling?

    Yes, you can! In this recipe, I have used vegetables carrot, cabbage, capsicum, corn and olives. Some options that I suggest are:

    • For a meaty version use chicken or beef instead of veggies or use shredded cottage cheese (paneer) instead of meat for a vegetarian option. Just make sure that the protein in the filling is cooked through. As the box patties are only fried for a few minutes, I wouldn’t suggest to put raw meat.
    • Skip the vegetables, or add more vegetables. Such as French beans carrots, black olives, green chilies, mushrooms or broccoli. 
    • If you are using large vegetables like broccoli or carrots, make sure they are finely chopped. Pulsing them in the processor for a few seconds will work.
    • Add some taco seasoning for a Mexican twist or experiment with other spice blends. 😛
    • To give a different taste to the patties box, you can also add pizza seasoning or Oregano and Chili Flakes to the vegetable stuffing.
    Very Veggie Box Patties Recipe
    Very Veggie Box Patties Recipe

    Other variations to this Very Veggie Box Patties?

    • Healthy Alternative: These square shaped patties are filled with a flavorful veggie filling. The chewiness of the veggie stuffing and the crunchiness of the covering, is a delicious combination. There are two options, baking or frying. If you do not like oil, you can bake it in pre-heated oven for 15 minutes or until crispy and golden brown. Deep frying obviously gives best results but they can also be baked or air-fried.
    • Wrappers: If you do not get samosa sheets , then cut the spring roll sheets into strips. The trimmings you can fry and keep them to garnish your soups or salads.
    • Extra Crispness: For extra crispiness, roll them with Bread Crumbs before frying.
    Very Veggie Box Patties Recipe
    Very Veggie Box Patties Recipe

    Can I freeze them? 

    Definitely!

    1. Grease a tray (can be plastic or a baking tray) and lay out the box patties one by one on it, making sure there is space between each one of them.
    2. Keep them in the freezer for an hour or so till they are partially frozen. Once they are frozen, carefully remove them from the tray and place them in a plastic box or  zip lock bags.
    3. To make the box patties, just take them out of the freezer, thawed and deep fry on medium heat until crispy and golden brown. 
    4. This recipe actually makes a large batch that can be easily frozen and is just the thing to have on hand for impromptu guests or if you are in the mood for a light snack to enjoy with your evening tea.

    Bismillah let’s get started.
    Check it out Very Veggie Box Patties Recipe and printable version here!!

    Want more Tea Time Snack Inspiration? 

    Here are some other Snack recipes on my blog:

    Hope that you all enjoy this one as much as we have!  Cheers!

    Pin it for Later:

    Very Veggie Box Patties Recipe

    What are your favorite Tea Time Snacks? Leave me a comment below to inspire my next snack recipe!

  • Crunchy Pickled Kachumber Salad Recipe

    Crunchy Pickled Kachumber Salad Recipe

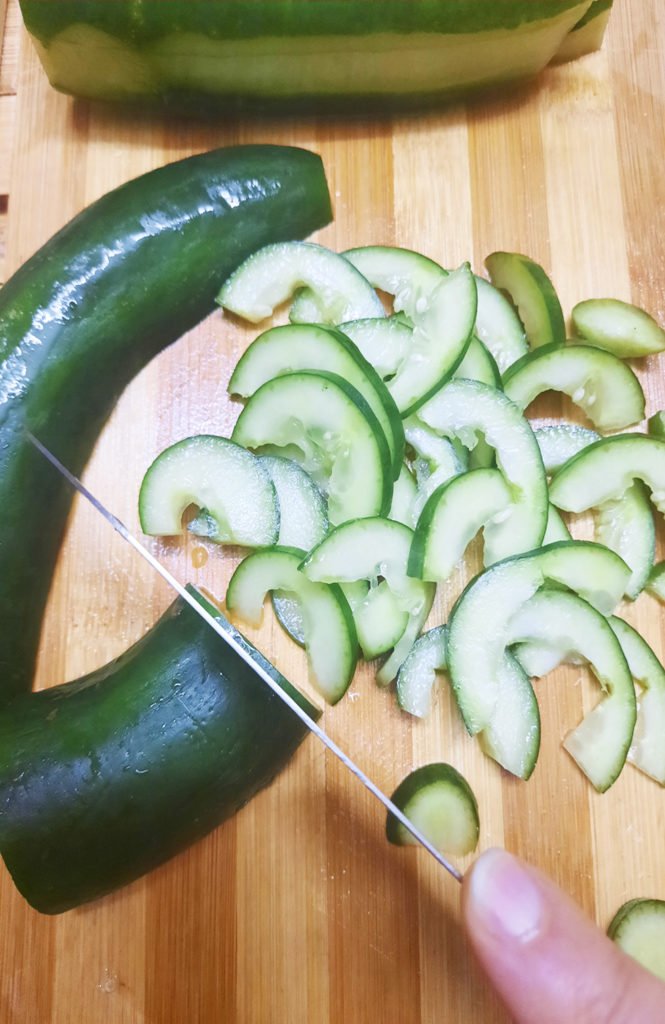
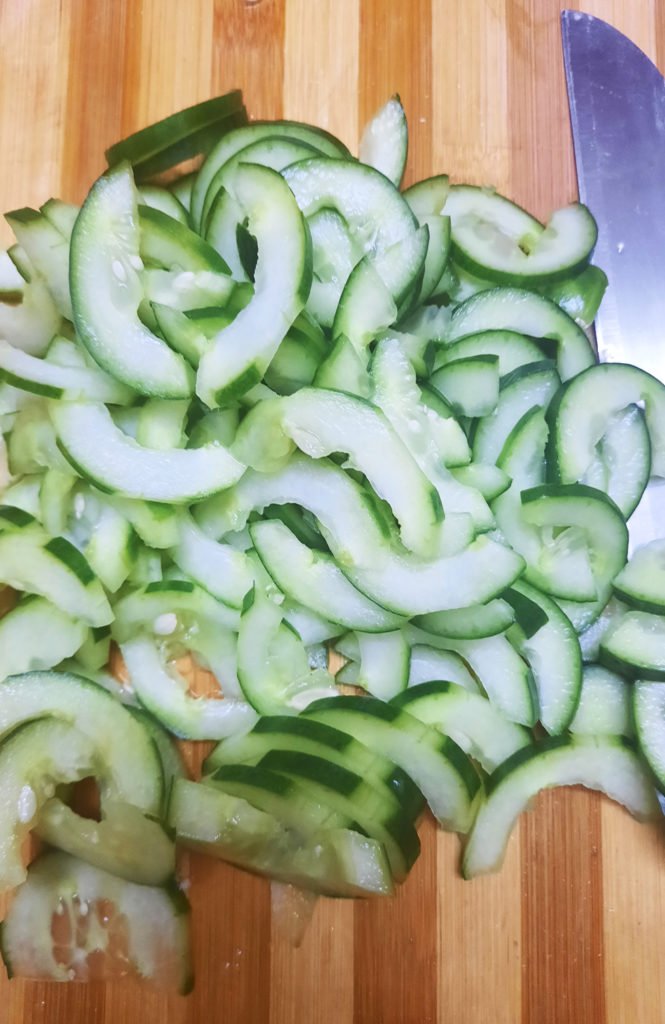
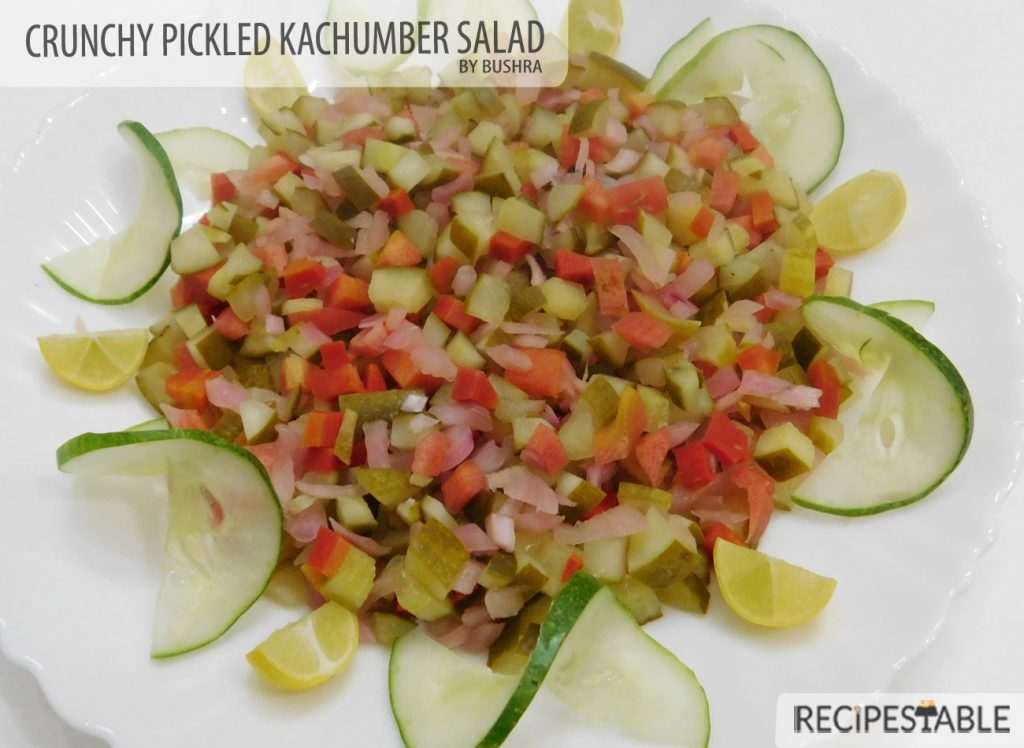
    Looking for something more adventurous than your usual Kachumber salad? Try this tasty Crunchy Pickled Kachumber Salad, a crunchy, squeaky pickle salad that would be amazing alongside a super fatty main dish, like this Chicken Biryani. But don’t worry, it’s not one briny mouthful, there are a lot of different textures going on between the crisp onions, crunchy pickles, red cabbage and juicy carrots.

    Crunchy Pickled Kachumber Salad Recipe
    Photo: Crunchy Pickled Kachumber Salad Recipe

    I like to experiment with creating no-cook dishes that can be easily thrown together at the last minute. I especially enjoy playing with the salads I’ve learned and putting a new spin on them, using whatever ingredients I have on hand to create something entirely new.

    This salad happened during one of my kitchen experiments. Things I really love in spring: 

    1. Super crisp, crunchy salads
    2. Juicy Colorful Veggies

    So clearly it make sense to combine these two faves into one, right?

    Crunchy Pickled Kachumber Salad

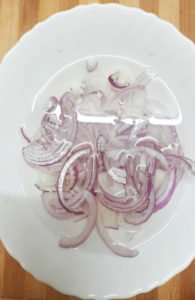
    I started with a simple family recipe for a Kachumbar salad. But for a change, I used the homemade pickled Cucumber, onion and baby carrots, vinegar, salt for this recipe. then tweaked the dressing and added some stuff I found in the fridge—red radishes and half a red cabbage. The result is a delightfully flavorful salad—cold, crunchy, pickled and easy to throw together at a moment’s notice. I call it my Crunchy Pickled Kachumber Salad.

    Crunchy Pickled Kachumber Salad Recipe
    Phot: Crunchy Pickled Kachumber Salad Recipe

    Some Useful Tips

    • If you like pickle vegetables, you’re going to love this salad. You can use store bought pickles or make your own by following my recipe.
    • Usually, we tend to favor pickles that are bright with acid and low on sugar; anything labeled “half-sour” usually fits the bill. If using sweeter pickles, add a bit more vinegar and black salt. And honestly, you can use whatever pickles you want in this recipe.
    • Organic cucumbers are smaller and thinner than non organic cucumbers.  They are smaller and slightly sweeter than the non-organic variety, and they have less seeds. Organic cucumbers are great for snacking. They have a wonderful mineral flavor to them. Unfortunately some grocery stores only carry Organic cucumbers seasonally, and some don’t carry them at all.
    • If you can’t find them, substitute Non-organic cucumbers—those are the long thin ones wrapped tightly in plastic. Avoid using regular fat cucumbers, as they are coated with wax and prone to bitterness.

    This is my favourite salad to serve with my Restaurant Style Lahori Mutton Karahi recipe. It just works so well with Tawa fish and the sweetness of the Apricot Chutney. I highly recommend serving this up with some extra Cucumber on the side. 

    Bismillah let’s get started. 

    Check it out Hot and Sour Noodles Recipe and printable version here!!

    Want more Salad Inspiration? 

    Here are some other salad recipes on my blog:

    Put your own spin on it. And lemme know how it turns out and do take a few seconds to rate it! I would love to see your recreations so tag me on instagram @recipestable or Facebook (Recipestable) or on Twitter so I can see how lovely yours turn out.
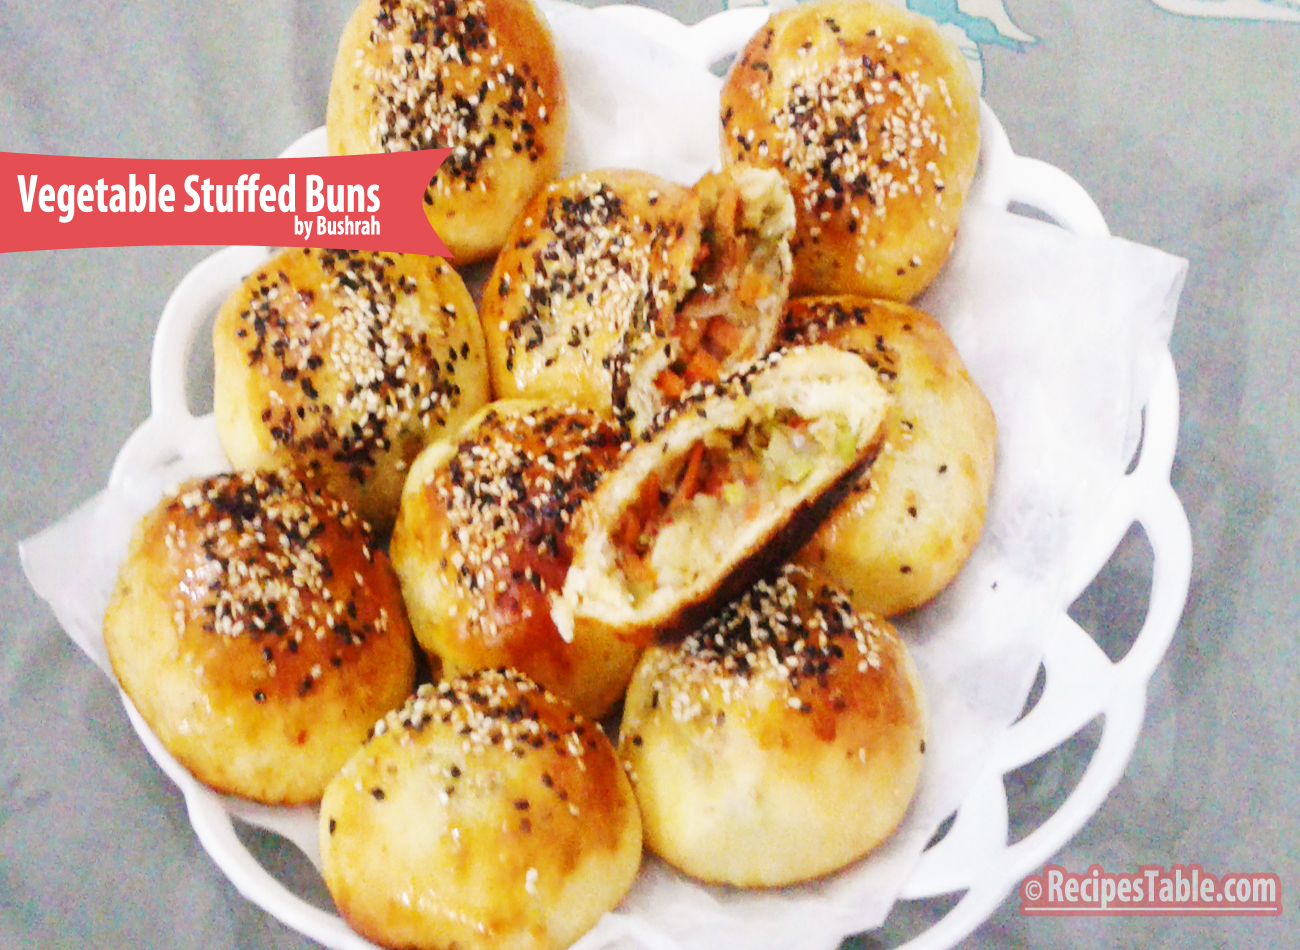
  • Vegetable Stuffed Buns Recipe

    Vegetable Stuffed Buns Recipe

    Homemade Vegetable Stuffed Buns?  These Stuffed buns are loaded with veggies and are topped with two types of sesame seeds.  So warm, soft, Fluffy, fragrant and stuffed with fresh veggies – no can or frozen veggies, all real – totally yummy  ( + point is it contains only 200 calories). Try making these if you’re looking for the ultimate comfort food.

    Vegetable Stuffed Buns

    Photo: Vegetable Stuffed Buns

    This.

    I’ve made it twice in the last week, once for bringing life to the original recipe concept and taking some photos, and once for “recipe testing”. Aka licking the filling and testing the dough. Again. More. Soft Buns In my mouth. I like this recipe a lot, you guys.

    Unlike store bought buns, these are healthy and homemade, and can be packed with any filling of your choice, be it cheese, chicken, lamb or mutton, mushrooms (choices are endless). These vegetable stuffed buns are a fun way of using leftover dough and any stuffing of your choice. These can be eaten for tea or breakfast or a satisfying meal with some salad. It works well as a snack for children to take to school, or to simply enjoy with a favorite drink at any time of the day.

    These stuffed buns succeeds in titillating your senses with its soft, tenderness, and that fresh sesame-ish flavour makes these buns more appetizing. Bake Stuffed buns not because you must but because it tastes so yummy that you would regret not making it at your earliest once you devour its first bite! Having said that, I am not dropping more clues, get ready with some all purpose flour and some basic ingredients (filling of your choice) and get ready to bake fresh stuffed buns this weekend! So, are you ready to read the recipe?

    Vegetable Stuffed Buns

    Photo: Vegetable Stuffed Buns

    When you make these Vegetable Stuffed Buns, all you have to do is open your windows and let the divine baking aromas drift and I will come to you. My nose can find these things. Okay? See you soon.

    Check it out the Vegetable Stuffed Buns recipe and printable version here!!

    Extra Bonus Tips:

    1. It can last  for a week in an air tight container in the refrigerator or it can be frozen for longer. Any time you wish to serve these heat them in the microwave for 15-20 seconds or preheat in the oven for 2-3 minutes and enjoy the warm, soft vegetable-y stuffed buns!
    2. What I really love is that once you have this basic idea, the variety of stuffing you can make for these buns is absolutely endless.

    I have also posted Baby Chicken Bread recipe which is another easiest & tastiest version of making stuffed bread at home. Do check it out as well.  It’s finger lickin’ good. You’ll be coming back for more. 


    Put your own spin on it. And lemme know how it turns out. Post a photo on Facebook (Recipestable) or  on Twitter so I can see how lovely yours turn out.


    Happy Baking!!

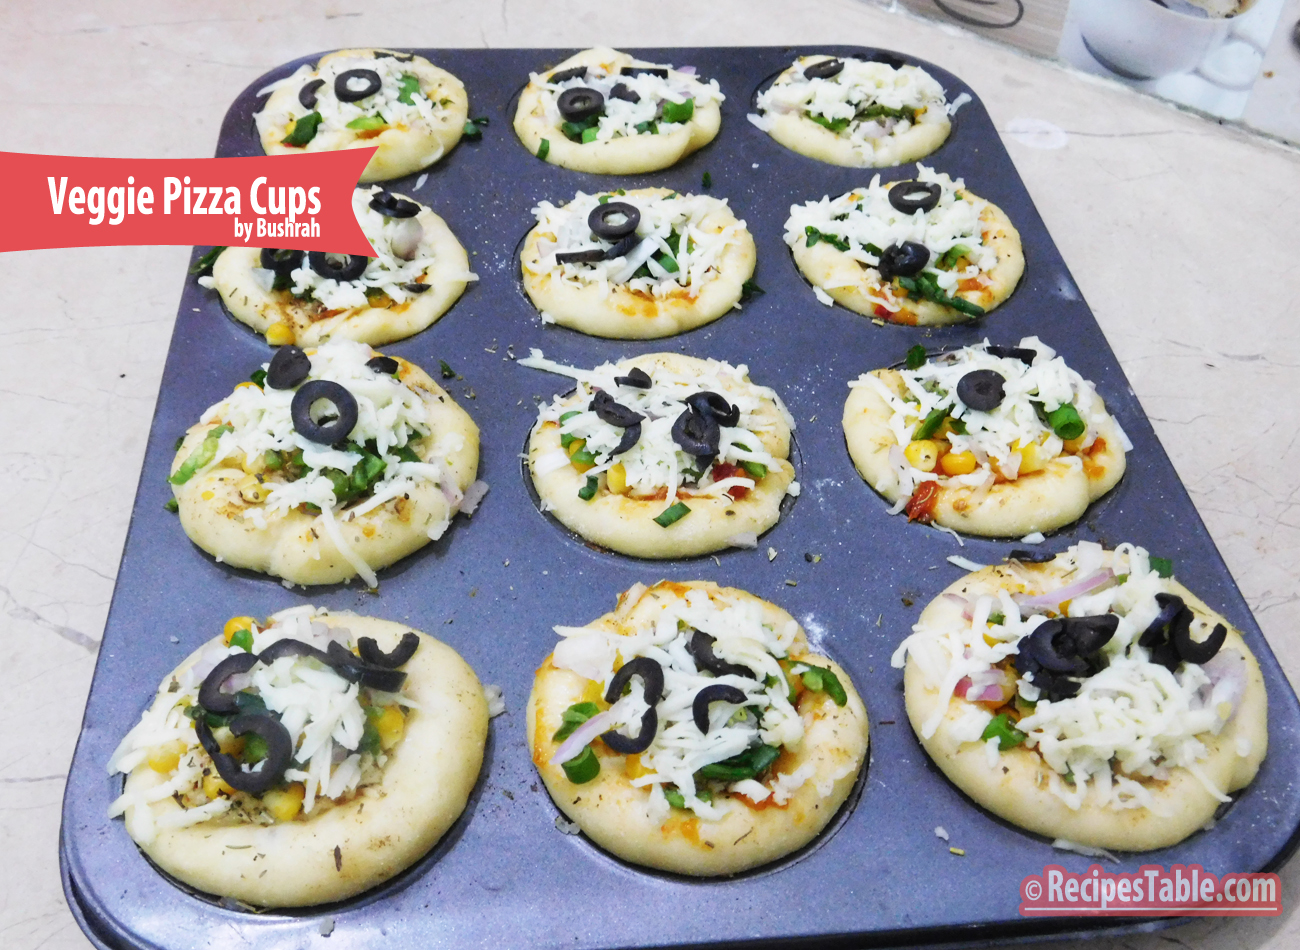
  • Veggie Pizza Cups Recipe

    Veggie Pizza Cups Recipe

    As a child I was not the veggie lover I am today.When my mommy cooked veggies, I was apprehensive. Vegetables? Ew! A few years have passed since then and I love veggies of all shapes and sizes.  

    This weekend, I had a day off and I decided to cook nothing but finger foods. I knew I wanted veggie pizza, but I wanted something more convenient and easier to eat. I have found that when I make veggie pizza in the flat pizza style, it can be a little messy to eat because the toppings want to fall off. So, I did a quick Youtube search and found the recipe I used as inspiration for my Veggie Pizza Cups.

    Veggie Pizza Cups

    Veggie Pizza Cups recipe
    Photo: Veggie Pizza Cups

    Ramadan is coming and with it comes family get-together’s and parties. And if you need an easy to make appetizer recipe for your next party, then you should try this Veggie Pizza Cups. There’s no reason for buying store made appetizers when they’re so easy to make, fun & cheap and are guaranteed to be a hit at your next party. Don’t slave away in the kitchen when you could be enjoying the party!

     Veggie Pizza Cups recipe

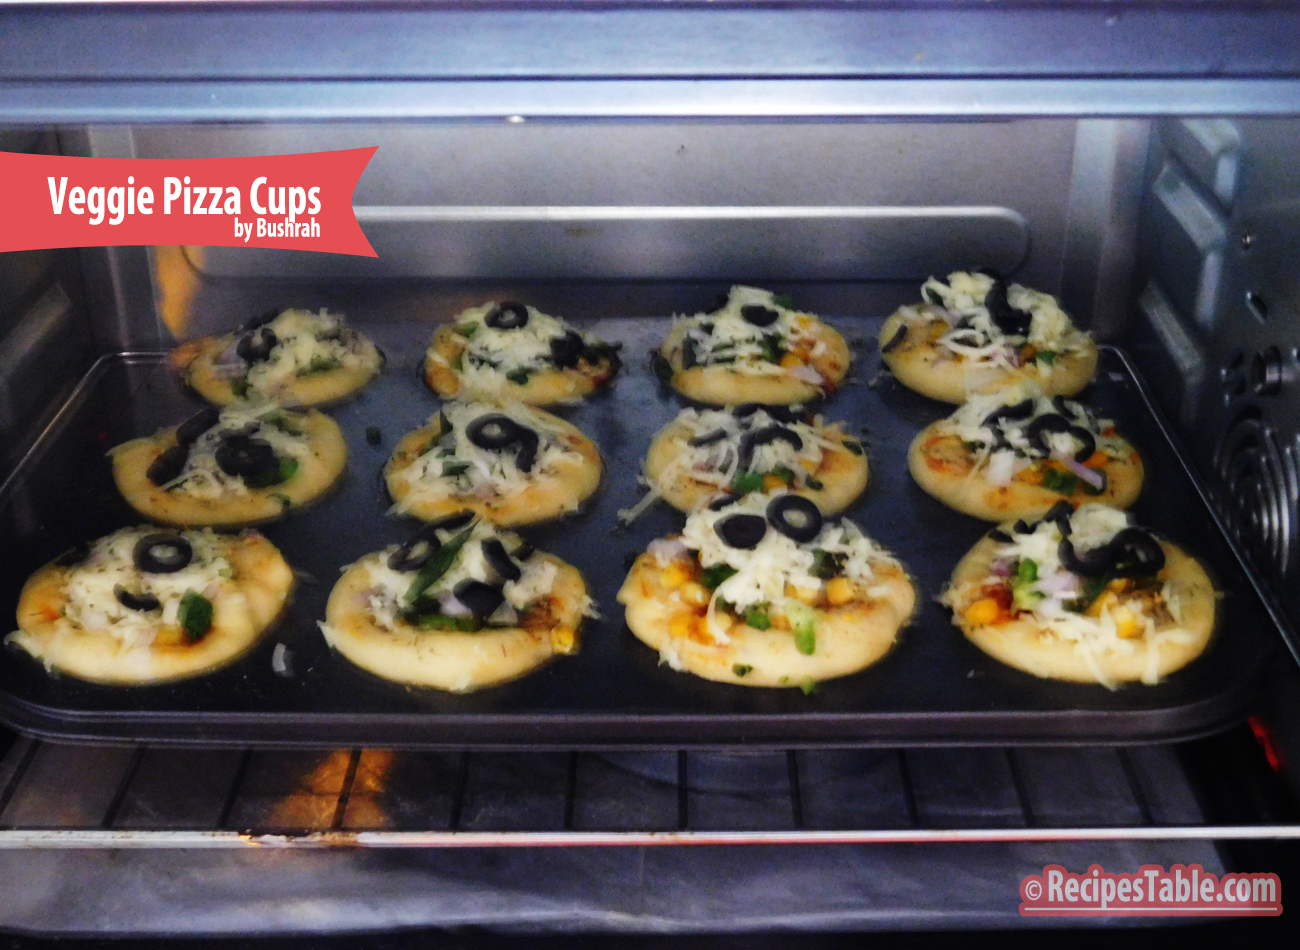
    The idea may seem daunting at first but I hope by now I’ve got you well acquainted with handling different types of pizza’s. Be it: my The Perfect pizza dough recipe used to make not just this beautiful Baby Chicken Bread but also these cute little Mini Pizza Cups. Or this super easy and frugal recipe for Pizza Paratha. And how can we forget, my all-time favorite, the soft puffy Pizza Rolls …O’so good!

     Veggie Pizza Cups recipe
    Cute little Veggie Pizza Cups in Oven

    It’s one of my favorite finger food. It’s amazing that just a few basic ingredients can come together into something so delicious.  For topping, I decided to use mixed veggies (corn, carrot, capsicum, green onion) and mushrooms in these because they’re my favorites veggies, but you could easily mix it up and use any toppings you like. I really do recommend making it as listed though, because these were just perfect. It tastes just like you’re eating a slice of pizza! Don’t skip out on the Italian Seasoning either – I think it adds a lot of flavor.

    They tasted delicious and impressed my family without making a mess. I will definitely be making them again this holiday season.

     Veggie Pizza Cups recipe
    Photo: These bite-sized Veggie Pizza Cups are perfect for picky eaters.

    These Veggie Pizza Cups can be used for appetizers, party snacks, a light lunch, the first course of a dinner. Perfect party for picky eaters.

    It would freeze well if you decided to double the batch. Enjoy 🙂

    Check it out the Veggie Pizza Cups recipe and printable version here!!

    I do hope that your plans for this holiday weekend teeter more to the side of savoring than that of to-doing.


    If you make this recipe, be sure to snap a photo and hashtag it #Recipestable. I’d love to see what you cook!

    Happy Cooking!!

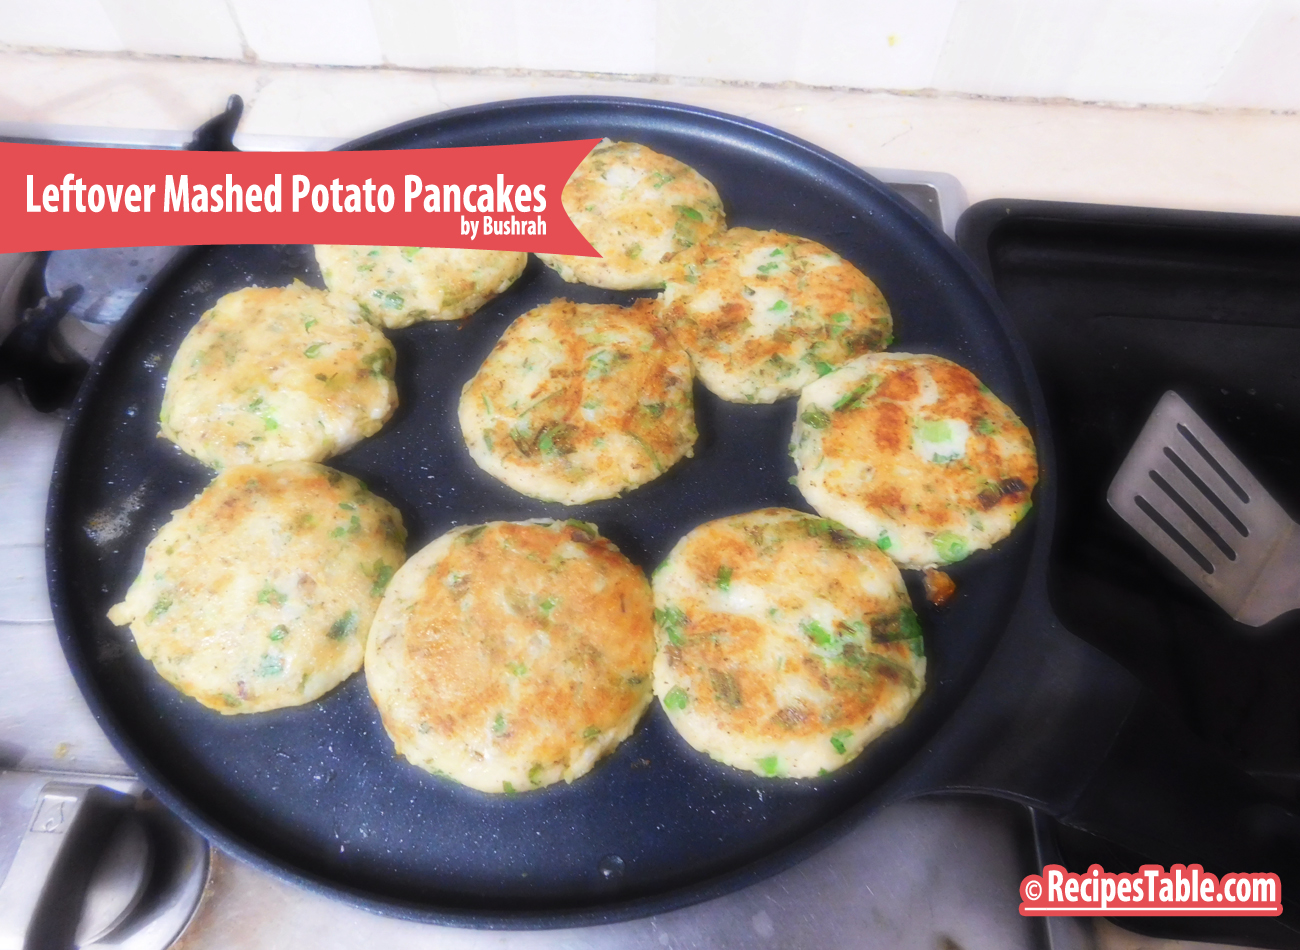
  • Leftover Mashed Potato Pancakes Recipe

    Leftover Mashed Potato Pancakes Recipe

    An essential part of the culinary heritage of Pakistan is the celebration of food with family and friends embedded in the concept of ‘dawat’ (feast). And anyone who hosts a ‘dawat’ (feast) knows that there’s always leftovers to deal with. As delicious as Pakistani Dawats (feast) are, you can only have so much roasted meat and stuffing for a meal. Instead of having the same food for the next day, transform the dishes into new ones!

    Leftover Mashed Potato Pancakes

    Last week, we hosted a ‘Family Dinner’ and made the ‘Roasted Chicken with Mashed Potatoes. We usually use leftover roasted meat for a sandwich or rolls with the apricot or mint chutney (sauce), gravy and stuffing, but what about the mashed potatoes? Add some flour, egg and cheese and turn them into mashed potato pancakes! Great for breakfast, lunch, or as a side dish or light dinner . A Perfect way to enjoy leftover potatoes and the flavor combinations are endless!

    Leftover Mashed Potato Pancakes recipe
    A Perfect way to enjoy leftover potatoes and the flavor combinations are endless!

    I love making these Potato Pancakes whenever I have leftover mashed potatoes so I don’t feel like I’m eating the same thing the next day. Serving size will change depending on how much mashed potatoes you have leftover. This works best with cold mashed potatoes.

    Leftover Mashed Potato Pancakes recipe
    Photo: Leftover Mashed Potato Pancakes

    These are as easy to make as normal pancakes – just mix together the mashed potatoes, flour, eggs, cheese, green onions and seasoning. Then cook the batter in a large pan until golden brown.

    Leftover Mashed Potato Pancakes
    Leftover Mashed Potato Pancakes

    With their crispy exterior and creamy, cheesy center, there’s not much to dislike here. I recommend topping these with a sour cream or garlic mayo. 

    Leftover Mashed Potato Pancakes recipe
    Leftover Mashed Potato Pancakes

    You can really get creative with the seasonings and add ins in this easy recipe!  Pretty much anything in your fridge is game… add some spices & herbs, a little bit of meat/protein and whatever veggies you have on hand!

    Remember to revel in your own amazingness for reducing food waste, saving time and making the best breakfast ever 🙂

    Check it out the Leftover Mashed Potato Pancakes recipe and printable version here!!

    If you make this recipe, be sure to snap a photo and hashtag it #Recipestable. I’d love to see what you cook!


    What are your holiday traditions guys? I would love to hear some from you all. Are there recipes passed down to you from your grand mom? Or the one from many generations? Share them all in comments below.

    Happy Cooking!!

  • Homemade Veggie Pizza Recipe

    Homemade Veggie Pizza Recipe

    We’ve entered the season of warm comfort food. Soups, Stews, roast meat, etc. And sometimes all that heavy food seems . . . well . . . heavy. 

    Homemade Veggie Pizza

    Just about everyone loves pizza, myself included. However, traditional restaurant pizza is generally made with refined (white) flour, and loaded with saturated fat and sodium – things that can quickly lead to weight gain and harm your health. To make pizza something I can feel good about eating regularly, I’ve found ways to make my own healthier versions. The key is using whole grains, less cheese and loading up on lots of healthy veggies and herbs. Also eating produce that’s in season helps you save money and also ensures you are getting a good variety of foods and nutrients.

    homemade-veggie-pizza3

    This pizza included some of my favorite veggies and herbs: carrots, red onion, broccoli, corn, green or red pepper, olives and fresh basil.  The ingredients only required about 20 minutes of prep time, starting with chopping the veggies and tossing them in a little olive oil for roasting.  Adding a fresh herbs to the veggies adds nice flavor (and makes your kitchen smell amazing during cooking!).

    In addition to its great taste, winter veggies especially broccoli  is  the good sources of dietary fiber and rich in magnesium. Broccoli is loaded with antioxidants, fiber, and numerous vitamins and minerals including magnesium, fol-ate and fiber which are good for health.

    Homemade Veggie Pizza

    While my super-food veggies were roasting I gathered and prepped my other ingredients. The dough only required a thin spread of pizza sauce and cheese to provide creamy texture and cheesy flavor.

    The veggies were done once they were slightly crisped and fork-tender, and I spooned them over the dough. I finished the pizzas off by topping them with the Mozzarella cheese, olives and a sprinkle of herbs.

    Homemade Veggie Pizza
    Photo: Homemade Veggie Pizza

    The last step involves popping the pizzas in the oven – I chose to make veggie pizzas  in individual mini pizza pans. They only needed about 15 minutes to cooked the dough and for the cheese to melt. I loved the contrast of the cheese, olives and herbs with the crunch from the veggies on this flavorful pizza!

    Homemade Veggie Pizza
    Photo: Homemade Veggie Pizza.. Yum 

    If you need a lighter dish, that doesn’t skimp on flavor, try this Homemade Veggie Pizza recipe. It’s fresh, full of flavor, and won’t weigh you down like the winter comfort food can.  Pizzas like this can be enjoyed as a quick and easy lunch or dinner, and make a tasty addition to a healthy diet. Enjoy! 

    Photo: Homemade Veggie Pizza
    Photo: Pizza loaded with cheese and veggies ♥

    Recipe Tip’s:

    1. Feel free to play around a bit with the ingredients in this recipe if you make it yourself.
    2. Add nuts (walnuts, pumpkin seeds), more veggies, would be great, and you could also skip the cheese all-together and instead use the ricotta cheese as the sauce/base.

    Bismillah, Let’s get started!

    Check it out the Homemade Veggie Pizza Recipe and printable version below.

    What other winter-veggies would you try on a pizza?

    Put your own spin on it. And lemme know how it turns out. Post a photo on Facebook (Recipestable) or  on Twitter so I can see how lovely yours turn out.


    Happy Cooking!!

    If you like this post, Please Subscribe to my blog and let me know your feedback by commenting below.. I have lots more recipes to share with you.


  • The Best Creamed Peas Recipe

    The Best Creamed Peas Recipe

    Creamed Peas 

    Everything’s better with cream…especially vegetables.Vibrant green peas simmer in a simple sauce of milk, flour, and butter in this quick side dish. 

    The Best Creamed Peas
    The Best Creamed Peas

    In my search for a good creamed peas recipe, I found many, but none that quite matched what I wanted. So I took to my own creativity and came up with this absolutely fabulous and The Best Creamed Pea recipe. My family love it so much and we have this on the side quite often. And I double this every time, and not a single pea is left! Alhumdulillah 🙂

    The Best Creamed Peas
    The Best Creamed Peas

    Do try this recipe, these Creamed Peas can become your ultimate side dish.

    Bismillah, Let’s get started!

    Check it out the Creamed Peas recipe and printable version below.

    Recipe Note’s:

    Don’t over cook the peas. Soggy peas will ruin this dish. You want them tender but firm.


    Put your own spin on it. And lemme know how it turns out. Post a photo on Facebook (Recipestable) or  on Twitter so I can see how lovely yours turn out.

    Happy Cooking!!

    If you like this post, Please Subscribe to my blog and let me know your feedback by commenting below.. I have lots more recipes to share with you.

  • How to: Make Karela Gosht (Meat Curry with Bitter Gourd)

    How to: Make Karela Gosht (Meat Curry with Bitter Gourd)

    Bitter Gourd (Karela)

    Bitter gourd, aka Karela In Urdu, is relished for its benefits and despised for its bitter taste – not many people like this veggie, but I die for it.

    Benefits of Bitter Gourd (Karela)

    Here are some Benefits of Mr. Bitter Gourd (Aka karela)

    Bitter gourds have many nutritional and health benefits and one of them is they are good for diabetes. It is an excellent source of vitamins B1, B2, and B3, C, magnesium, folate, zinc, phosphorus, manganese, and has high dietary fiber. It is rich in iron, contains twice the beta-carotene of broccoli, twice the calcium of spinach, and twice the potassium of a banana.

    As my Chronic illness  forces me to transform eating habits, I’ m always on the hunt for natural antioxidants ingredients and Bitter Gourd (Karela) is one of them. I try to eat bitter gourd at least twice in a month because of its antioxidant benefits. It is very good for you, specially if you are diabetic. This reduces your blood sugar level a lot than you can imagine..So try to include it in your everyday diet.

    Bitter Gourd aka 'Karela'
    Bitter Gourd aka ‘Karela’

    The people who have never had bitter gourd, I still know what you all must be thinking.

    Doesn’t it taste bitter??

    How can one eat it??

    Actually it is very much edible and likable.  Truth is that there are numerous ways in which Bitter gourd is prepared in Pakistan. It can be stuffed with tasty spice mix, it tastes delicious when deep fried with mince stuffing( Bharwan Karela ), it can be used to make a dry curry and my mommy makes amazing curry of bitter gourd (Karela Gosht) which doesn’t taste bitter at all. It just depends how it is prepared. So at times it depends on which ingredients and technique you use and also on individual preferences.

    Karela Gosht (Meat with Bitter Gourd)

    Karela Gosht (Bitter gourd cooked with meat) is a traditional Pakistani dish. Yet, there are many Pakistani’s who flee from the very name of Karela. 😛 

    Today, I am presenting one of the tried recipes that gained appreciation among random people. Signature style of using minimum ingredients to make a mouth-watering dish is again used. I am using mutton meat in this recipe, but if you like you can use beef or chicken too. 

    How to make Karela Gosht
    Photo: ‘Karela Gosht'{Bitter Gourd Cooked with Meat and Saute Onion}

    In my home, everyone loves bitter gourd and its diverse dishes. It tastes savory, tangy, wonderfully spicy and slightly bitter at the same time. Karela Gosht is my all time favourite. As I mention above,  I make them quite often and each time they turn out great.(Alhumdulillah)!

    How to make Karela Gosht
    Photo: Karela Gosht with Chapati

    It tastes great with roti / hot chapati or with tandoori roti along with zeera raita. 

    How to make Karela Gosht
    Photo: Karela Gosht

    How to make Karela Gosht

    Learn how to make easy and simple Karela Gosht by following the step by step instructions as shown in  pictures. The recipe is simple and very easy to follow. You would successfully cook it in first attempt. (InshaAllah)

    Bismillah Let’s Begin!

    Ingredients you will need:

    • 1 kg bitter gourd/ karela (peeled, cleaned and sliced)
    • 1 teaspoon salt, for sprinkling
    • 750 gm mutton or lamb meat
    • 1/2 cup cooking oil
    • 4 medium onion, thinly sliced, (divided into two parts)
    • 3 medium tomatoes, thinly sliced
    • 1 inch piece of ginger, thinly sliced
    • 1 garlic bulb, peeled & minced
    • 4 green chilies
    • 2 teaspoon red chili powder
    • 1 teaspoon cumin powder
    • 1 teaspoon coriander powder
    • 1/2 teaspoon turmeric powder
    • 1 teaspoon garam masala powder (all spice powder)
    • salt to taste
    • 4 cups water for meat tenderness
    Step 1:

    First wash bitter gourds thoroughly in cold running water. Now Scrape the outer peel of the bitter melon with a sharp peeler or paring knife to remove a thin layer of peel.

    karela gosht step 1
    Peel or Scrape skin of bitter gourd (Karela)

    Step: 2

    Cut the bitter gourd in half length-wise. Slit from one side to remove seeds and fibrous core using a teaspoon or a paring knife.  

    karela gosht recipe step 2
    Cut the bitter gourd and remove the seeds.

    Step 3:

    Sprinkle 1 teaspoon salt over the peeled bitter gourds, toss together to mix evenly and keep it in sunlight for an hour, it will help to reduce its bitterness.

    karela gosht recipe step3
    Sprinkle Salt and keep it in sunlight

    Step 4: 

    After one hour, You would see salt and sunlight is doing its magic and bitter gourd has started perspirating. Now rinse thoroughly with tap water and keep aside for 10 minutes in a strainer to dry access water.

    karela gosht recipe step 4
    Rinse thoroughly with tap water

    Step 5: 

    Now take the bitter gourd and squeeze it in your hands, the juices will come out and try to remove as much bitter juice out of it as possible. Squeeze and  Squeeze…. don’t give up!!!

    karela gosht recipe step 5
    Squeeze and Squeeze…. don’t give up!!!

    Step 6:

    Cut the bitter gourd into cubes, thin slices, rings or lengthwise. (any desired shape or sizes).

    karela gosht recipe step 6
    Cut into your desired shape

    Step 7: 

    Heat some oil and fry the bitter gourd (in batches) on medium heat for few minutes or until golden brown. Remove from the oil, drain and set aside.

    karela gosht recipe step 7
    Fry Bitter Gourd

    Step 8: 

    Heat 1/2 cup oil in a large pot over medium heat. Saute onion until transculant. Add garlic and ginger and cook for 30 seconds or  the garlic aroma to hit its peak.

    karela gosht recipe step 8
    Saute Onions and Ginger & Garlic

    Step 9: 

    When onion starts getting golden add meat and cook on high flame until meat change its color and turned brown, continuously stir.

    karela gosht recipe step 9
    Brown the meat

    Step 10:

    Now add chopped tomatoes and spices (turmeric, red chili, coriander, etc).  Stir and cook on low flame until tomatoes soften.

    karela gosht recipe step 10
    Add Tomatoes and Seasoning

    Step 11: 

    Add 4 cups of water. Heat to boiling, covered with a lid and simmer for 1 hour on low flame or until meat become tender and juicy. 

    karela gosht recipe step 11
    Cook Covered on low flame

    Step 12: 

    When meat gets cooked properly at this stage increase the flame and cook on high flame for 5 to 7 minutes or until oil comes on top and meat is tender fully. Now add leftover 2 onions and fried bitter gourd. Stir and cook on medium flame for 10-15 minutes or until onion turned caramelized and oil  separates.

    karela gosht step12
    Add fried bitter gourd and onions

    Step 13 

    Sprinkle garam masala and add green chillies and adjust seasoning to taste.. Its ready to serve. Take it out in a serving dish. Serve hot with Homemade Chapati or Roti.

    karela gosht step13
    Serve with garm garm (hot) chapati… ENJOY!

    Tip to First timers: Tasting is important before the final dish is served so that you can adjust the flavour. ENJOY 🙂 

    Check it out the Karela Gosht (Meat with Bitter Gourd) recipe and printable version below.

    Do try the recipe, and let me know how you find bitter gourd. Also there are many varieties and I will keep posting new recipes of bitter gourd in future. Till then see ya all!!!


    Put your own spin on it. And lemme know how it turns out. Post a photo on Facebook (Recipestable) or  on Twitter so I can see how lovely yours turn out.


    Happy Cooking!!

    If you like this post, Please Subscribe to my blog and let me know your feedback by commenting below.. I have lots more recipes to share with you.

  • Baked Vegetable Spring Rolls Recipe

    Assalamu alaikum wa rahmatullahi wa barakatuhu!

    In the Name of Allah, Most Gracious, Most Merciful

    I hope you’re well and have had a good start to the week.   I’m sorry to let you worry about me, but these days I’m a bit busy.  As you know study study study. lol 😀 I am madly busy with my assignments. Sorry for this post being late.

    My class got cancelled today. Glad I get a chance to breathe. So I decide to write a post for my lovely reader’s. Last week, I made these Veggie rolls ( Baked Version) to give myself a break from ‎assignment work. They are very easy to prepare and tastes absolutely delicious! I had too much fun making this. 

    baked veggie rolls
    Take a Break and bake Some Veggie Rolls 🙂

    These yummlicious veggie rolls are healthy and very filling. And they smell amazing when they’re baking. They crisped up fine in the oven. The only problem is that three wrappers have 180 calories! What!???? That’s a lot. I ate 3 rolls anyway. 😛 😉 They are ready in only 35 minutes and you can use your favorite veggies.

    Baked Veggie Rolls Recipe
    Photo: Baked Veggie Rolls Recipe

    You could fry these, too, but I was trying to keep them healthy. I hope you all give this Baked Veggie Rolls recipe a try and let me know how they turn out!

    Baked Veggie Rolls 

    So let the fun begin!

    1. First Prepare Veggie Filling: Heat a small amount of oil in a wok over medium heat. Add giner and garlic. Saute until fragrant. Might you think, it’s a stupid instruction, isn’t it? Tell you what, just cook your garlic few seconds until they’re soft-ish.
    2. Now add green peas, red beans and corns. Cook for 2-3 minutes or until they are soft.Add remaining veggies and add a splash of vingear. Stir fry for few minutes. You can add soy sauce or any store bought sauce etc. But I didn’t add it. As I try to avoid artifical ingredients to follow my journey towards clean eating. 🙂
      Sprinkle black pepper, red chili, and maybe a little salt if you need it. If you want to use fresh herbs then I think that would be lovely.
    3. Stir well and Let everything simmer for a couple of minutes, but don’t let everything get overly soft because you still have to stuff and bake your rolls.
    4. Take the mixture into a bowl and let it cool for few minutes. Once everything is cool, you can either proceed to stuffing the rolls, or cover your bowl and put everything in the fridge overnight. If you do refrigerate the veggie mixture, be sure to bring it room temperature before stuffing your rolls.
    5. When you’re ready to stuff your rolls, be sure your stuffing mixture and wrappers are at room temperature. You’ll want a clean work surface for this part and a bowl of water nearby.
    6. Don’t be intimidated by this part. You just want the rolls to hold the yummy stuffing in. They don’t need to be perfect. And, frankly, if someone is going to judge you on how pretty your spring rolls are, then you probably shouldn’t be feeding them. lol 😛
    7. Preheat an oven for 200 degree C and brush a baking sheet with oil.
    8. Place a wrapper out in a diamond shape on your work surface.Put a tablespoons of filling in the center of the wrapper. I under-stuffed these rolls, so they turned out chewier that I would have liked. However, you don’t want to stuff them so full that they split open. It’s a delicate balance.
    9. Bring the bottom point of your wrapper up over the filling and tuck it under as tight as you can. Fold the sides over and shape into a roll.
    10. Moisten the edges of the top flap slightly with water and roll the roll over, pressing the point on the underside of the roll to seal it.
    11. Put on a lightly oiled baking sheet and repeat this method the rest of your rolls.
    12. Lightly brush the tops of the rolls with egg-wash and sprinkle sesame seeds over them.
    13. Bake in the preheated oven for 20 minutes or until they turn golden brown. This took my oven around 22-25 minutes.
    14. You can eat these veggie rolls with tamari or soy sauce, but we prefer sweet and sour sauce.
      Ready !!
    Baked Veggie Rolls Recipe
    Photo: Baked Veggie Rolls Recipe

    Sorry I din’t get step by step picture as I was hungry and on in a hurry to eat 😛

    Check it out the Baked Veggie Rolls Recipe and printable version below!!

    Keep me in your duas please, and have a lovely week,

    Wasalaam!

    If you like this Baked Veggie Rolls Recipe, Please Subscribe to my blog. I have lots more recipes to share with you. And If you make it then let me know your feedback by commenting below.

  • Chicken Vegetable Rolls Recipe

    Chicken Vegetable Rolls

    Who doesn’t love a hot, fried spring rolls? Making them yourself ensures a maximum freshness of flavour. This chicken vegetable rolls recipe is easy to follow and makes a perfect treat for your toddler.

    Chicken Vegetable Rolls Recipe
    Photo: Chicken Vegetable Rolls Recipe

    Bismillah, let’s begin!

    Check it out the Chicken Vegetable Rolls Recipe and printable version below.

     Recipe Note’s:

    Freeze remaining rolls in an airtight container between sheets of baking paper for up to 1 month.


    I have also posted Rainbow Bread Rolls Recipe which is another easiest & tastiest version of making rolls. Do check it out as well.


    Put your own spin on it. And lemme know how it turns out. Post a photo on Facebook (Recipestable) or  on Twitter so I can see how lovely yours turn out.

    Happy Cooking!!

    Keep remember me in your Dua’s and Stay tuned for new content on the blog 🙂

    If you like this post, Please Subscribe to my blog and let me know your feedback by commenting below.. I have lots more recipes to share with you.

  • Healthy Vegetable Fried Brown Rice Recipe

    Healthy Vegetable Fried Brown Rice Recipe

     Vegetable Fried Brown Rice Recipe
    Photo: Vegetable Fried Brown Rice

    The sky is the limit when it comes to preparing fried rice.  Vegetarian Fried Brown Rice  is a popular dish to be sure. But the stuff you get in restaurants is a stroke in a bowl. Not very appetizing if you ask me. While this dish will always be a little high on the sodium scale, homemade and clean eating is the only way to go if you just cannot live without it.

    Vegetable Fried Brown Rice (Clean Eating Version)
    Photo: Vegetable Fried Brown Rice (Clean Eating Version)
     Vegetable Fried Brown Rice (Clean Eating Version)
    Photo: Vegetable Fried Brown Rice (Clean Eating Version)
     Vegetable Fried Brown Rice (Clean Eating Version)
    Photo: Vegetable Fried Brown Rice (Clean Eating Version)

    With this Vegetarian Fried Brown Rice Recipe I use brown rice and a little olive oil to make it healthier and six different types of vegetables.The essence of this dish lays in its versatility. This is really a “left-over” dish. So save yourself some work and wait until you have some cold, cooked  brown rice and fresh veggies in the fridge that you need to use up. This Vegetarian Fried Brown Rice Recipe is perfect for that occasion.  Top with a little Homemade chilli sauce and you’ve got a wonderful dinner!

     Vegetable Fried Brown Rice (Clean Eating Version)
    Photo: Vegetable Fried Brown Rice (Clean Eating Version)

    Check it out the Vegetarian Fried Brown Rice Recipe and printable version below!!

    If you like this Vegetarian Fried Brown Rice Recipe, Please Subscribe to my blog. I have lots more recipes to share with you. And If you make it then let me know your feedback by commenting below.


  • Healthy Breakfast Option: Spinach and Cheese Omelet Recipe (Packed with Nutrients!)

    Spinach and Cheese Omelet

    Add extra nutrients to your breakfast by stirring in chopped fresh spinach, fresh herbs and shredded cheese into your protein-packed omelet. A carb-cutter’s perfect start for the day. Healthy and Nutritious Omelet made with home grown spinach from My Kitchen Garden.

    Spinach and Cheese Omelet Recipe
    Photo: Spinach and Cheese Omelet Recipe

    Freshly picked home grown spinach leaves turn into mouthwatering Omelet. Yes, this Spinach omelet is better than your omelet. Oragnic Eggs, fresh spinach, and CHEESE!!!! Please no drooling on my photo.

    This organic spinach and cheese omelet is full of flavors, it makes a perfect healthy breakfast. Enjoy it!

    Spinach and Cheese Omelette Recipe
    Photo: Spinach and Cheese Omelette Recipe

    Growing your own food isn’t just about saving money, it’s about so much more.I truly believe that as humans we posses an innate desire or need to take a hand-on role in the production of the food we consume. Whether through growing your own, foraging in the wild, hunting or even going to a local farm, knowing exactly where your food comes from provides a deep sense of appreciation for what you eat.

    Spinach and Cheese Omelette Recipe
    Spinach and Cheese Omelette made with Home grown Spinach

    Check it out the Spinach and Cheese Omelette Recipe here!!

    Spinach and Cheese Omelet Recipe

    This organic spinach and cheese omelet is full of flavors, it makes a perfect healthy breakfast. Enjoy it!
    Course Breakfast
    Cuisine American, Pakistani
    Keyword breakfast, cheese, eggs, kids friendly, omelet, Quick and Easy, spinach
    Prep Time 5 minutes
    Cook Time 8 minutes
    Total Time 13 minutes
    Servings 2
    Author Bushra Waheed

    Ingredients

    • 4 organic eggs
    • 1 cup baby spinach leaves chopped
    • 4 tablespoon grated cheddar cheese
    • 2 teaspoon butter or olive oil
    • 1/4 teaspoon pepper
    • salt to taste

    Instructions

    • Beat eggs in a bowl.
    • Stir in the baby spinach.
    • Season with salt and pepper. Mix well.
    • Melt butter in a pan over medium heat.Pour the egg mixture it it. As egg mixture starts to cook, gently lift edges of omelet with a spatula and tilt pan so uncooked egg mixture flows underneath.Cook for 2 minute or until almost set.
    • Sprinkle cheese over the omelet.
    • Fold omelet in half, allowing cheese to melt.
    • Slide cooked omelet onto a serving plate. Delicious Spinach and Cheese Omelet is ready to serve.

    Notes

    Serve with buttered toast and green smoothie.


    If you like Spinach and Cheese Omelet Recipe and make it then let me know your feedback by commenting below.And if you know more innovative ways in which we can utilize this mouth watering Spinach and Cheese Omelet, do share with us and we would be glad to give it a try.

  • Crunchy Vegetable Nuggets Recipe

    Crunchy Vegetable Nuggets

    Are you looking for a healthy alternative for processed chicken nuggets? This Crunchy Vegetable Nuggets Recipe is sure to be a favorite for your kids.

    Crunchy Vegetable Nuggets Recipe
    Photo: Crunchy Vegetable Nuggets Recipe

    These Vegetable Nuggets are crispy from the outside and soft from inside comprising of different flavours of many vegetables, cheese and herbs. This is the best way to turn vegetables into tiny kid-friendly nuggets. Making homemade veggie nuggets isn’t hard and beat the store-bought.

    Crunchy Vegetable Nuggets Recipe
    Photo: Crunchy Vegetable Nuggets Recipe

    You can serve Vegetable Nuggets with tea in the evening or as a starter to your guests. Do try it!!
    Check it out the Crunchy Vegetable Nuggets Recipe and printable version below!!

    Crunchy Vegetable Nuggets

    Are you looking for a healthy alternative for processed chicken nuggets? This Crunchy Vegetable Nuggets Recipe is sure to be a favorite for your kids.
    Prep Time 20 minutes
    Cook Time 10 minutes
    Total Time 30 minutes
    Servings 6
    Author Bushrah | Recipestabale

    Ingredients

    • 2 boiled potatoes
    • 1/2 cup grated carrots
    • 1/4 cup sweet corn
    • 1/4 cup boiled green peas
    • 1/4 cup green beans trimmed and boiled
    • 1/4 cup cheese grated
    • 1/2 teaspoon mixed herbs basil, parsley
    • 2 tablespoon chopped coriander leaves
    • 1/2 teaspoon black pepper
    • Salt To Taste
    • 1 egg lightly beaten
    • 2 tablespoon plain flour
    • 2 tablespoon cornflour
    • 1/2 cup bread crumbs
    • Oil for deep frying

    Instructions

    Directions

    • In a large bowl, combine together the boiled potatoes, grated carrots, beans, green peas and sweet corns.
    • Season with herbs, salt and pepper.
    • Add corainder leaves and cheese. Mix until well combined.
    • Now add add plain flour,cornflour in it.
    • Shape into nuggets.
    • Place bread crumbs in a shallow bowl.
    • Dip vegetable nuggets in egg then coat with bread crumbs.
    • Heat oil in a deep pan over medium heat.
    • Deep fry nuggets for 2-3 minutes or until golden brown.
    • Remove from the oil and absorbent on kitchen paper.Crunchy Vegetable Nuggets are ready to serve. ENJOY!!

    Notes

    Serving Suggestions:
    Serve with tomato ketchup or your favorite dipping sauce.

    Note: For a healthier version of these nuggets, you can bake them. After you bread them, lay them out on a baking sheet and drizzle with olive oil. They will probably need to bake at 350-400 degrees F. for 15-20 minutes to get nice and crispy.

    I have also posted Chicken Nuggets Recipe which is another quick version of making Nuggets. Do check it out as well.

    [divider]

    If you like this Crunchy Vegetable Nuggets Recipe,Please Subscribe to my blog. I have lots more recipes to share with you. And If you make it then let me know your feedback by commenting below.

  • Ramadan Special: Achari Aloo Samosa Recipe for Iftar

    Achari Aloo Samosa

    Achari Aloo Samosa is a special appetizer to give you a combo taste of aloo samosa and achar(pickle).Very easy and quick Achari Aloo Samosa recipe. Don’t wait and must try my Achari Aloo Samosa recipe and don’t forget to share your experience with us!.

     Achari Aloo Samosa Recipe
    Photo: Achari Aloo Samosa Recipe

    Check it out the Achari Aloo Samosa Recipe here!!

    Achari Aloo Samosa Recipe

    Course Appetizer, Snack
    Cuisine Indian, Pakistani
    Keyword fried food, Iftar Recipes, potato, Ramadan, samosa
    Prep Time 20 minutes
    Cook Time 10 minutes
    Total Time 30 minutes
    Servings 12
    Author Bushra Waheed

    Ingredients

    • For Filling:
    • 4 boiled potatoes
    • 1 small onion minced
    • 2 tablespoon fresh coriander leaves
    • 2 tablespoon chopped mint leaves
    • 2 green chilies finely chopped
    • 1 tablespoon achar masala
    • 1 teaspoon lemon juice
    • 1 teaspoon dry mango powder
    • 1 teaspoon crushed red chili
    • salt to taste
    • For Samosa
    • samosa wraps as required
    • oil for frying

    Instructions

    • Mash potatoes in a large bowl.
    • Add onion, fresh coriander, mint, green chilies, and lemon juice.
    • Season with achar masala, dry mango powder, red chili and salt. Mix until well combined.
    • Place a samosa wrap on a clean, dry surface and put a portion of the potato filling in one corner of the samosa patti and fold into a triangle.
    • Apply a little water at the edges and seal it.
    • Repeat with the remaining wraps and stuffing to make more samosas.
    • Heat the oil in a pan over medium heat.
    • Deep-fry the samosas in batches till they turn golden brown in colour from all sides.
    • Drain on absorbent paper. Achari Aloo Samosa is ready to serve. ENJOY!

    Notes

    Serve with mint chutney.

    If you like Achari Aloo Samosa Recipe and make it then let me know your feedback by commenting below.And if you know more innovative ways in which we can utilize this mouth watering Achari Aloo Samosa, do share with us and we would be glad to give it a try.