In a bowl, combine together flour, salt, sugar, Instant yeast and oil.
Knead a soft dough with lukewarm water.
Leave it to rise for 30 minutes.
Preheat oven to 200 degree C.
Grease a pizza pan with butter.
Divide pizza dough into 3 equal portions.
Roll pizza dough into 3 circles size of a quarter plate.
On one half of each circle sprinkle cheese, tomato, onion, capsicum and shredded chicken Tikka.
Sprinkle oregano over it.
Top with grated cheese.
Brush the edges of each pizza base with oil.
Fold the plain half over to form a semi circle.
Press the edges firmly.
Place pizza pockets on greased pizza pan.
Brush with oil.
Bake for 20 minutes or until golden brown.
Cut into half.
Pizza Pockets are ready to serve.
Notes
Serving Suggestions: Serve with Chili Garlic sauce.
I have also posted Homemade Pizza Rolls Recipewhich are another easiest & tastiest version of making Pizza at home. Do check it out as well. It’s finger lickin’ good. You’ll be coming back for more.
Put your own spin on it. And lemme know how it turns out. Post a photo on Facebook (Recipestable) or on Twitter so I can see how lovely yours turn out.
There are many ways to include cheese in your meals and here is one chatpata way _ that of cheese chaat. Cheese Chaat is an easy and quick recipe that is prepared with grated cheese, potatoes, sev, onion, sweet chutney and chaat masala.
Check it out Cheese Chaat recipe here!
Prep Time: 10 minutes
Servings: 4
Ingredients
2 boiled potatoes, peeled & cubed
1 small onion, chopped
1 tomato, chopped
1 cup cheddar cheese, shredded
1/4 cup sev
2 tbsp lemon juice
2 tbsp sweet chutney
1 tbsp green chutney
1 tsp chaat masala powder
salt according to taste
Few coriander leaves, for garnishing
Directions:
Step 1
Place the potatoes, tomatoes, and onions in a large bowl.
Step 2
Stir in the sweet chutney, green chutney and lemon juice.
Step 3
Season with salt and chaat masala. Toss to coat evenly.
Step 4
Top with sev and cheese.
Step 5
Garnish with coriander leaves. Cheese Chaat is ready to serve. Enjoy!!
Today afternoon for Lunch, I was getting [highlight]chocolate cravings[/highlight]. So, I decided to make stuffed Chocolate Paratha…. sounds yummy. This Chocolate Paratha is healthy, yummy and delicious.
Photo: Chocolate Paratha Recipe
I have used dark melted chocolate and walnuts (to add some crunch) as I am a Walnut’s lover. You could use grated chocolate for this recipe.You can have this chocolate treat whenever you like; remember to have it in moderation as part of a healthy diet.
Photo: Chocolate Paratha Recipe
Do try thisrecipe, You’s kids will just love them. This [highlight]Chocolate Paratha[/highlight] can be great as snack, quick meals and lunch box. It’s easy to make and you can make them any time of the day.[highlight]Chocoholics [/highlight]will love this sweet treat.
Photo: Chocolate Paratha Recipe
Treat your family with this yummy Chocolate Paratha. Better than store bought junk. All you need to make this tasty paratha is chocolate, flour, milk, and some walnuts. Really that’s it… ok a little bit of butter too 🙂 Goes great with a cup of coffee and some peanut butter.
Check it out the Chocolate Paratha recipe and printable version below:
Treat your family with this yummy Chocolate Paratha. Better than store bought junk. All you need to make this tasty paratha is chocolate, flour, milk, and some walnuts.
Prep Time 20 minutesminutes
Cook Time 20 minutesminutes
Total Time 40 minutesminutes
Servings 6
Author Bushrah | Recipestable
Ingredients
500gm Wheat flour
1cupChocolate
1/2cupwalnutscrushed
Milk for kneading
Ghee or oil for cooking
1/4cuppeanut butterOptional
Instructions
Directions
Place flour in a large bowl. Knead a soft dough with milk.
Keep aside.
Melt chocolate in a double boiler.
Stir in the walnuts.
Make 12 small balls from the dough.
Roll out into round shape chapati.
Spread chocolate mixture over a chapati.
Cover with second chapati.
Seal edges.
Heat a griddle or tawa.
Put paratha on the griddle, apply ghee over it.
Cook on low flame for 2 minutes or until lightly browned.
Take it out in a serving plate.
Drizzle with chocolate syrup. Delicious Chocolate Paratha is ready to serve.ENJOY!!
Notes
Serving Suggestions: Serve with Jam or jellies or Peanut butter.
If you like this Chocolate Paratha Recipe, Please Subscribe to my blog. I have lots more recipes to share with you. And If you make it then let me know your feedback by commenting below.
Simple and fun to make, these fish sticks are bound to become one of your family’s favorite quick dinners.
Kids will love this homemade version of finger fish, and they can even help make them too, from Recipestable.com.
Photo: Finger Fish Recipe
Bismillah, let’s get started!
Check it out the Finger Fish Recipe and printable version below!
Rinse and drained fish fillets then cut the fish into finger shaped pieces.
Place the fish in a bowl, add soy sauce, lemon juice, mustard powder, red chili, salt and pepper.
Marinate fish for at least 2 hours.
Place the flour, eggs and bread crumbs in 3 separate bowl.
Roll each fish finger in flour, then dip in egg and again roll in breadcrumbs properly. Place them in a single layer on flat dish.
Heat oil in a frying pan over a medium heat. Deep fry the finger fish for 8-10 minutes or until they turn golden brown.
Drain on paper towel. Finger fish is ready to serve.
Notes
Serving Suggestions: Serve with tartar Sauce.
I have also posted Fish Biscuits Recipewhich is another easiest & tastiest version of making Finger Fish at home. Do check it out as well. It’s finger lickin’ good. You’ll be coming back for more.
Put your own spin on it. And lemme know how it turns out. Post a photo on Facebook (Recipestable) or on Twitter so I can see how lovely yours turn out.
For all the vegetarians out there! Do you feel left out when you see everyone enjoying meaty seekh kebabs, but you cannot since your vegetarian? No worries, because you too can enjoy deliciously grilled seekh kebabs prepared with strictly vegetables by following this scrumptious recipe.
Bismillah, Let’s get started!
Check it out the Potato Cheese Seekh Kabab recipe and printable version below.
Add rice flour, mint leaves, red chili, bread slices, black pepper, green chilies, seekh kabab Masala and salt.
Add egg white and cheese mix well.
Make seekh kababs out of this mixture.
Cook on a hot greased grill for 4-5 minutes or until well done. Delicious Potato Cheese Seekh kabab is ready to serve.
Notes
Serving Suggestions: Serve hot with paratha and mint chutney .
Put your own spin on it. And lemme know how it turns out. Post a photo on Facebook (Recipestable) or on Twitter so I can see how lovely yours turn out.
Happy Cooking!!
If you like this post, Please Subscribe to my blog and let me know your feedback by commenting below.. I have lots more recipes to share with you.
Deep fry potatoes on medium flame for 10-15 minutes or until golden and crispy.
Curly Fries are ready to serve.
Notes
Serving Suggestions: Serve with Tomato ketchup.
I have also posted Smiley Face Fries Recipewhich is another easiest & tastiest version of making Crispy Fries at home. Do check it out as well. It’s finger lickin’ good. You’ll be coming back for more.
Put your own spin on it. And lemme know how it turns out. Post a photo on Facebook (Recipestable) or on Twitter so I can see how lovely yours turn out.
In a food processor or a chopper, add onion, capsicum, red chilies, coriander, green chilies and garlic.
Process until well combined.
Spread this batter on chicken strips.
Season with salt and black pepper.
Mix well.
Marinate for 30 minutes then add beaten eggs, flour, corn flour, semolina and 4 tbsp oil in it.
Toss well to coat evenly.
Heat oil in a pan.
Deep fry chicken strips for 8-10 minutes or until crispy and golden.
Spicy Chicken Finger is ready to serve.
ENJOY!!
Notes
Serving Suggestions: Serve with Chili Garlic Sauce.
I have also posted Nutty Baked Chicken Fingers recipewhich is another easiest & tastiest version of making Chicken Fingers at home. Do check it out as well. It’s finger lickin’ good. You’ll be coming back for more.
Put your own spin on it. And lemme know how it turns out. Post a photo on Facebook (Recipestable) or on Twitter so I can see how lovely yours turn out.
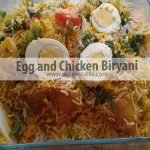
Biryani: Whenever we hear this word it always gives us a mouth watering feeling. Kids or Adult, boys or girls, Biryani always stands hot favorite for everyone. But its not always possible to go for outside dining. But does that mean we have to compromise with our favorite food? no way.Here is a very simple and quick egg and chicken biryani recipe for you.
Photo: Egg and Chicken Biryani Recipe
This Egg and Chicken Biryani recipe is a customized version of Biryani, mostly in Pakistan you get mutton biryani, beef biryani and chicken biryani, so I tried to make something innovative, so here is Egg and Chicken Biryani with potatoes. Do try this Egg and Chicken Biryani recipe and I am sure that you are going to love this one.
Photo: Egg and Chicken Biryani Recipe
Believe me this is the world’s tastiest biryani, I am eating it right now and the wonderful flavours that are coming are forcing me to eat it more, its lovely,do try this if you really want to enjoy your day. It’s great as leftovers, too!
Check it out the Egg and Chicken Biryani Recipe and printable version below!!
Do try this Egg and Chicken Biryani recipe and I am sure that you are going to love this one. Believe me this is the world’s tastiest biryani, I am eating it right now and the wonderful flavours that are coming are forcing me to eat it more
Prep Time 30 minutesminutes
Cook Time 45 minutesminutes
Total Time 1 hourhour15 minutesminutes
Servings 6
Author Bushrah | Recipestable
Ingredients
750gm Basmati Rice
500gm chicken
500gm potatoes
1cupfried onion
1cupplain yogurt
1cupoil
1tbspginger garlic paste
1bunch of mint leaves
4eggshard boiled
6green chiliesthinly sliced
6dried plums
1star anise
1cinnamon stick
1teaspoonhot spices powder
2teaspoonred chili powder
1teaspoonblack cumin
1teaspoonblack peppers
1teaspoonsalt
1/2teaspoonyellow food color
Few drops biryani essence
Instructions
Directions
Rinse rice with few changes of water and soak for 30 minutes.
Then boiled rice and drain all excess water. Set aside
Place chicken in a large bowl. Add yogurt, black cumin, black pepper, hot spices powder, plums, red pepper powder, star anise, cinnamon stick, ginger garlic paste, and few drops of biryani essence.
Mix well and marinate for 30 minutes.
Heat oil in a cooking pot. Fry potatoes for 10-12 minutes.Remove from the oil and keep aside.
Now add marinated chicken. Cover and let it simmer for 20 minutes or until chicken is tender.
Add potatoes and cook for 5-8 minutes or until tender.
Now take a heavy bottom skillet, layer rice, chicken masala, fried onions, mint leaves, green chilies, yellow color and boiled eggs.
Cover the skillet and cook on low flame for 20 minutes or until done.
Stir well and dish it out. Egg and Chicken Biryani is ready to serve.
I have also posted Boneless Plain Biryani recipe which is another easiest version of making Biryani. Do check it out as well.
[divider]
If you like this Egg and Chicken Biryani Recipe, Please Subscribe to my blog. I have lots more recipes to share with you. And If you make it then let me know your feedback by commenting below.
In a small bowl, combine together orange juice, black salt, chaat masala powder, caster sugar and lemon juice.
Cut all fruits into small cubes then place in a bowl.
Pour orange juice mixture over it.
Mix well.
Juicy Fruit Chaat is ready to serve. ENJOY!
Notes
Serving Suggestions: Serve chilled.
Put your own spin on it. And lemme know how it turns out. Post a photo on Facebook (Recipestable) or on Twitter so I can see how lovely yours turn out.Put your own spin on it. And lemme know how it turns out. Post a photo on Facebook (Recipestable) or on Twitter so I can see how lovely yours turn out.
Happy Cooking!!
If you like this Juicy Fruit Chaat Recipe, Please Subscribe to my blog. I have lots more recipes to share with you. And If you make it then let me know your feedback by commenting below.
A mouth-watering mince cutlets with a delicate combination of potato, mince(keema), and spices. Its a perfect side dish or snack for your family. Check it out the Keema Cutlet recipe here!!
Prep Time: 25 minutes
Cook Time: 20 minutes
Servings: 6
Ingredients
500 gm Mutton Keema
2 lb potatoes
4 onions, chopped thinly
4 cloves
4 cinnamon sticks
4 cardamoms
8 garlic flakes
Small piece ginger
2 tsp poppy seeds
2 eggs
salt, turmeric, red chilli powder
4 tsp besan flour
Oil for deep frying
Few coriander leaves and curry leaves, finely chopped
Directions:
Step 1
Boil potatoes, peel the skin and mash the potatoes.
Step 2
Grind ginger and garlic to fine paste. Grind cloves, cinnamon, cardamoms and poppy seeds.
Step 3
Add this to mashed potato mixture then add coriander leaves and curry leaves and mix well.
Step 4
Wash keema.
Step 5
Add onions, salt, chilli powder and turmeric to keema, mix well add some water and cook.
Step 6
When cooked grind this and add ginger-garlic paste and mashed potato mixture to it.
Step 7
Take besan flour and add some water and beat eggs in that and mix well.
Step 8
Heat oil in a shallow pan over medium heat. Take Keema mixture and make small balls.
Step 9
Take each ball and dip in the besan flour mixture and put them in oil and fry until golden brown.
Step 10
Deep fry all the keema balls. Keema Cutlet is ready to serve.
Place potatoes, chicken and cheese in a large bowl. Season with salt and pepper. Mix until well combined. Shape into 12-14 cutlets.
Step 2
Heat oil in a frying pan over medium heat. Wrap noodles around the each cutlet then dip in the egg.
Step 3
Shallow fry Noodles Wrapped cutlets until crispy and golden brown. Remove from the oil and drain on paper towel. Noodles Wrapped Cutlets are ready to serve.
[/tab] [tab]
Serve with Tomato Ketchup or sweet and sour sauce.
[/tab] [/tabs]
If you like Noodles Wrapped Cutlets Recipe and make it then let me know your feedback by commenting below.And if you know more innovative ways in which we can utilize this mouth watering Noodles Wrapped Cutlets, do share with us and we would be glad to give it a try.
This Potato Chicken Balls recipe gives a unique twist to the general way the potatoes are cooked. A great way to use leftovers. My family love these for lunch with a simple tossed salad.
Photo: Potato Chicken Balls Recipe
Check it out the Potato Chicken Balls Recipe here!!
Season with salt and pepper. Mix well and make small balls of this mixture.
Step 3
Dip in egg then coat it in bread crumbs.
Step 4
Heat the oil and fry them until golden brown.
Step 5
Remove from the oil and drain on kitchen paper. Potato chicken balls are ready to serve. ENJOY!!
[/tab] [tab]
Serve hot with ketchup.
[/tab] [/tabs]
If you like Potato Chicken Balls Recipe and make it then let me know your feedback by commenting below.And if you know more innovative ways in which we can utilize this mouth watering Potato Chicken Balls, do share with us and we would be glad to give it a try.
Place egg, corn, cracker crumbs, sugar and baking powder in a large bowl. Mix until well combined.
Step 2
Heat oil in a deep skillet over medium heat.
Step 3
Drop batter by rounded spoonful.
Step 4
Fry for 1 minutes on each side or until golden brown.
Step 5
Remove from the oil and drain on paper towels. Fried Corn Balls are ready to serve.
[/tab] [tab]
Serve warm.
[/tab] [/tabs]
If you like Fried Corn Balls Recipe and make it then let me know your feedback by commenting below.And if you know more innovative ways in which we can utilize this mouth watering Fried Corn Balls, do share with us and we would be glad to give it a try.
These potato cutletsare full of flavors. The mint in it simply takes up the mellow taste of potatoes. These Sindhi aloo tikki makes a great “naan kebab” snack and is a great companion of rice and lentils.
Photo: Sindhi Aloo Tikki Recipe
Sindhi Aloo Ki Tikki is everyone’s favorite. Its simple enough to make and a lot simpler to disappear.
Photo: Sindhi Aloo Tikki Recipe
These potato cutlets are full of flavors. The mint in it simply takes up the mellow taste of potatoes. These Sindhi aloo tikki makes a great “naan kebab” snack and is a great companion of rice and lentils. Do try this Sindhi Aloo Ki Tikki Recipe, you’ll love it.
Photo: Sindhi Aloo Tikki Recipe
Check it out the Sindhi Aloo Tikki Recipe and printable version below!!
Soak 4 slices of bread in water then gently squeeze out the water.
Place potatoes and bread slices in a large bowl. Slightly mash the boiled potatoes, add the spices and salt. Now add fresh coriander, mint, green chilies and garlic.
Mix well.
Shape into kebabs.
Dip tikki in egg then fry until golden brown. Sindhi Aloo Tikki is ready to serve.
Notes
Serving Suggestions: You can serve Sindhi Aloo Tikki along with Punjabi Dhaba Dal or green chutney.
I have also posted Sesame Potato Cutlets Recipewhich is another easiest & tastiest version of making cutlets. Do check it out as well.
Put your own spin on it. And lemme know how it turns out. Post a photo on Facebook (Recipestable) or on Twitter so I can see how lovely yours turn out.
Happy Cooking!!
If you like this post, Please Subscribe to my blog and let me know your feedback by commenting below.. I have lots more recipes to share with you.
I Love Pizza.But I never buy frozen pizza.Why?? Because I have found several alternative options that are fresher, tastier, healthier, and often cheaper than frozen grocery store pizza. Pita bread pizza is one of those options.
Using Pita Bread As Pizza Crust
There are typically many different kinds and brands of pita bread in the grocery store. It’s a cheap food item that can be used in many different ways, from making sandwiches, wraps to homemade pita chips.
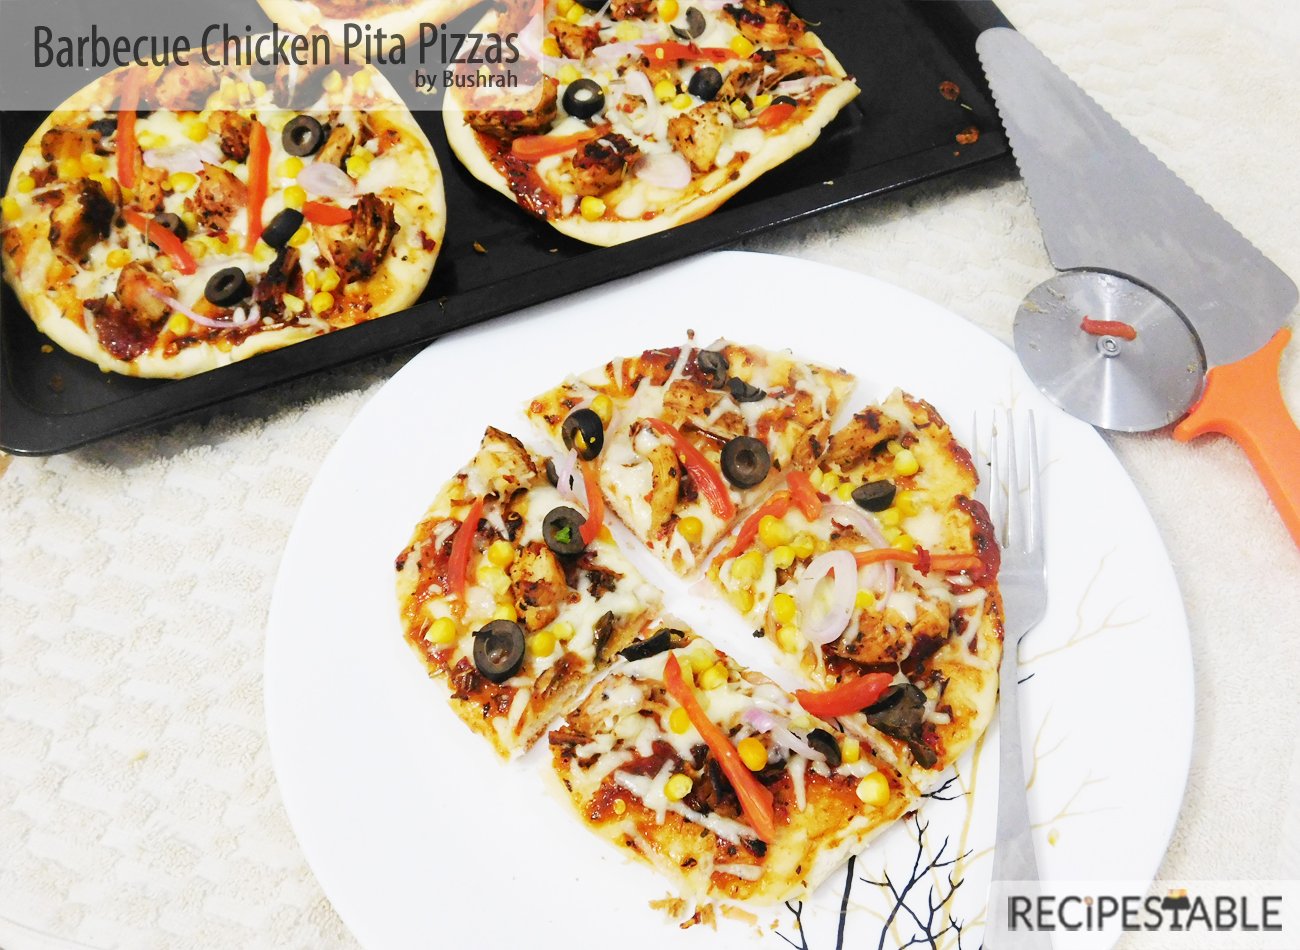
I made these Pita Pizzas on a rainy Sunday Evening. You know those weekends when you’re feeling slightly lazy, but still want a homemade meal, and something that is special, but not too much work? Anyone with me? Well, it was one of those days and this simple Barbecue Chicken Pita Pizzas recipe came in really handy especially with ready made pita bread (or you could make your own).
Photo: Barbecue Chicken Pita Pizzas
Indulge your love for pizza with these Pita pizza’s!! If you prefer a crisp pizza crust, heat the pita bread in the oven for a few minutes before adding toppings. The pizzas in the photo above are topped with tomato sauce, tomato, mushrooms, onion,green pepper, Barbecue Chicken, and cheese.
Let’s get started !
Ingredients you will need:
pita bread
BBQ Chicken(Tikka)
Cheddar Cheese
Barbecue Sauce
Green Chilies
Mushrooms
Tomato
Green Pepper
Onion
Bismillah, let’s begin!
Check it out the Barbecue Chicken Pita Pizzas recipe and printable version below!!
An easy to make BBQ flavor pizza recipe with chicken and barbecue sauce; top with lots of cheese , mushrooms and veggies. Enjoy the tangy taste of this pita pizzas. Simple and Flavorful.
If you like this Barbecue Chicken Pita Pizzas Recipe, Please Subscribe to my blog. I have lots more recipes to share with you. And If you make it then let me know your feedback by commenting below.