Blog

  • Chapli Kebab Pizza Recipe

    Chapli Kebab Pizza Recipe

    A delicious and easy to make pizza with crispy, juicy chapli kebab’s and melty mozzarella cheese! It is sure to be a hit!

    Chapli Kebab Pizza Recipe

    A delicious and easy to make pizza with crispy, juicy chapli kebab’s and melty mozzarella cheese! It is sure to be a hit!
    Prep Time 40 minutes
    Cook Time 15 minutes
    Total Time 55 minutes
    Servings 8
    Author Bushra Waheed

    Ingredients

    For Pizza Dough

    • 2 cups plain flour
    • 1 egg lightly beaten
    • 4 tablespoon oil
    • 1-1/2 teaspoon dry instant yeast
    • 1/2 teaspoon salt
    • 1/2 teaspoon sugar
    • 1/2 cup warm milk

    For Pizza Topping

    • 8 leftover chapli kebab’s
    • 1 cup pizza sauce or Chili Garlic Sauce
    • 1/2 cup cheddar cheese shredded
    • 1/2 cup Mozzarella Cheese shredded
    • 1/2 teaspoon dried basil
    • 1/2 teaspoon dried oregano
    • fresh coriander leaves or parsley for topping

    Instructions

    To Make Pizza Dough

    • In a large bowl, add yeast and sugar.
    • Pour the lukewarm milk and let it stand for about 10 minutes or more until it becomes frothy.
    • Place flour and salt in another large bowl.
    • Add the yeast mixture and mix well until well combined.
    • Now add the oil and knead well till you get a soft ball of dough.
    • Cover the bowl with a wet cloth or a plastic wrap and keep in a warm place for 1 hour or until the dough is rise and volume is doubled.

    To Make Pizza

    • Once it has doubled, turn the dough onto a well floured surface, pat down and divide into eight small balls.
    • Preheat oven at 180 degree C.
    • Roll dough into pizza crust’s.
    • Transfer to a mini Pizza pans or baking sheets.
    • Spread Pizza sauce or Chili Garlic Sauce evenly.
    • Arrange chapli kebab’s on top of the sauce.
    • Sprinkle the dried basil and oregano.
    • Top with cheddar and Mozzarella cheese.
    • Sprinkle coriander fresh leaves.
    • If needed, you can sprinkle a bit more cheese.
    • Bake, in the preheated oven, for 15 minutes or until the crust turn brown and cheese melts.
    • Remove the pizza pans from the oven.
    • Slices each into halves and serve warm. ENJOY!!

    Notes

    Serving Suggestions:
    Serve alone as an appetizer, or accompany with a light pasta or salad.
  • Blogiversary Week: Some of My Favorite Dishes Thus Far

    Blogiversary Week: Some of My Favorite Dishes Thus Far

    Happy Blogiversary!

    It’s been Five years since I started this blog, and I wanted to take the opportunity today to look back at some of my favorite dishes I’ve posted through the years. These don’t fit into any one category or any one theme; they’re just things I love and would eat 24-7 if given the opportunity.

    Thank you guys for being a part of things around here for all these years. I’ve enjoyed blogging so very much, and you guys have been wonderful.

    my-fav-dishes

    Here are some of my favorites. Click on either the photo or link below it to be taken to the step-by-step. (Warning: I’ll start with the oldest recipes and work my way up…so some photos may be very old and grody-looking. My photography has been part of the process!)

    I’m sharing a lot of recipes here…but there’ll be no more photos than my average cooking post! Har.

    Homemade Pizza Rolls

    Homemade Pizza Rolls
    Homemade Pizza Rolls

     They define me and complete me.

    Strawberry French Toast Roll-Ups

    Strawberry French Toast Roll Ups recipe
    Photo: Strawberry French Toast Roll Ups recipe

    The perfect quick dessert! (Drizzle on caramel sauce instead of powdered sugar if you’re feeling particularly naughty.)

    Restaurant Style Lahori Mutton Karahi 

    Restaurant Style Lahori Mutton Karahi Recipe
    Photo: Restaurant Style Lahori Mutton Karahi

    Being a Lahori, probably one of my most habit-forming recipes. There’s no going back from here.

    25 Minute Chicken and Noodles

    25 Minute Chicken and Noodles
    Photo: 25 Minute Chicken and Noodles

    One of the simplest recipes on this site, it’s also one of the most delicious. You won’t believe the flavor, and you’ll make it all summer long.

    Perfect French Fries

    Perfect French Fries
    Perfect French Fries

    Dip ’em in a mix of ketchup and mayonnaise if you’ve been good and have exercised all week.

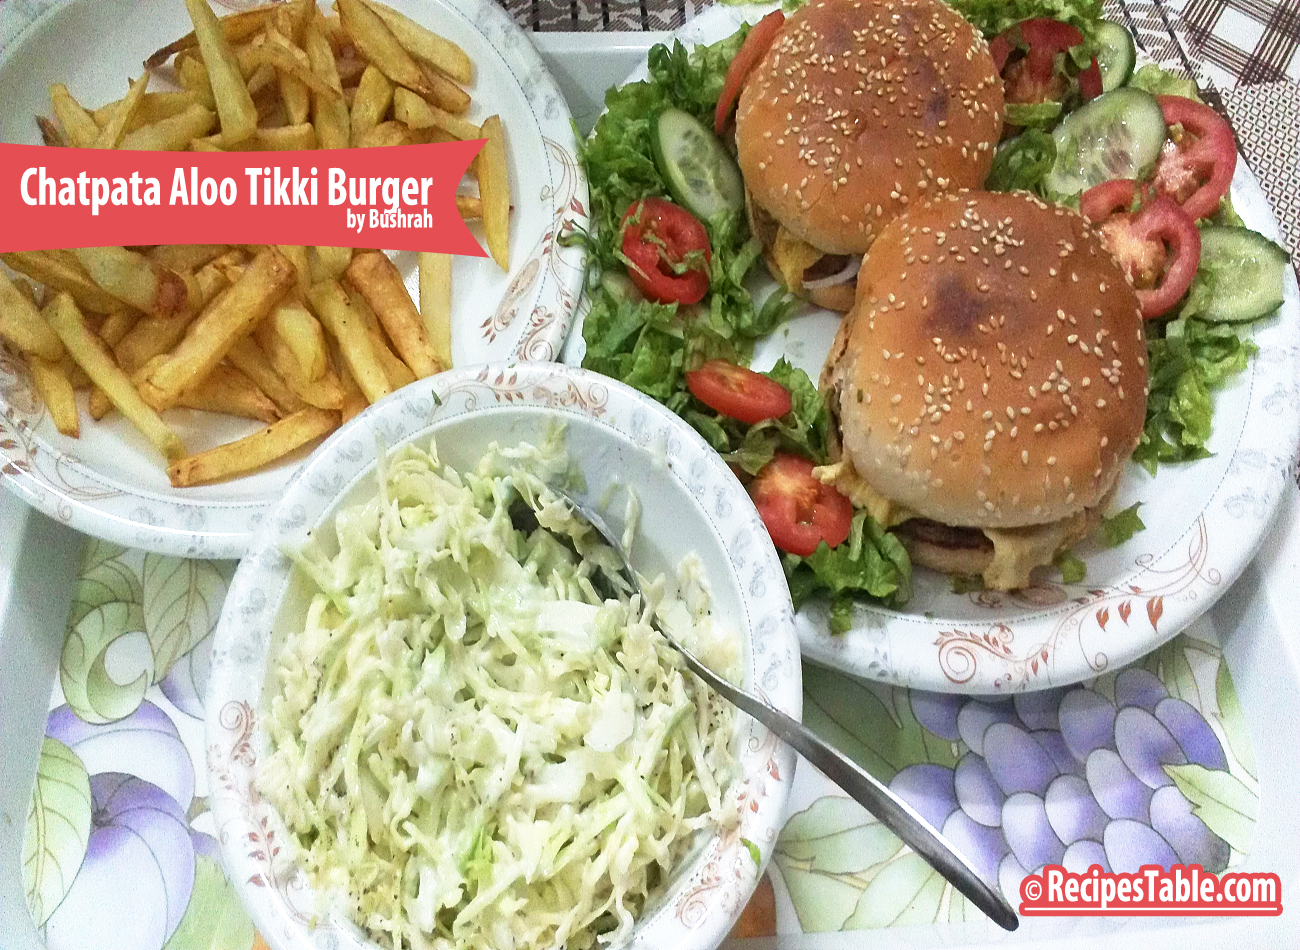
    Chatpata Aloo Tikki Burger

    Chatpata Aloo Tikki Burger Recipe
    Chatpata Aloo Tikki Burger Recipe

    Who doesn’t love this school cafeteria throwback?

    Vegetable Kofta Biryani 

    Vegetable Kofta Biryani Recipe
    Photo: Vegetable Kofta Biryani

    You won’t believe how easy it is. Soooo spicy and flavorful!

    Homemade Veggie Pizza

    Homemade Veggie Pizza
    Photo: Homemade Veggie Pizza

    Me likey. The more veggies, the better.

    Noodles Pakora

    Noodles Pakora recipe
    Photo: Noodles Pakora recipe

    Chicken Roast Burger

    chicken-roast-burger

    NanKhatai (Eggless Buttery Cookies)

    nankhatai1

    My go-to fall recipe.

    Shimla Mirch Qeema 

    Shimla Mirch Qeema (Mince with capsicum)
    Photo: Shimla Mirch Qeema (Mince with capsicum)

    This is a wonderful, easy weeknight meal that is ready in under 30 minutes, and you only have to dirty one pan!

    Clean Eating Salmon Fish Fry
    Photo: Clean Eating Salmon Fish Fry

    Crunchy Chicken Pakora

    Crunchy Chicken Pakora recipe
    Photo: Crunchy Chicken Pakora recipe

    Baby Chicken Bread

    Baby Chicken Bread
    Photo: Baby Chicken Bread

    And, from last week, Baby Chicken Bread. I think that’s as good a place as any to end this roundup!

    Hope you find a couple of new things to make this week.

    Thanks again for being here, guys.

    I love ya,
    Bushrah!

  • Blogiversary Ask Me Anything (& a Giveaway)

    Blogiversary Ask Me Anything (& a Giveaway)

    Aslam-o-Alakum everyone!

    So my 5 year blogiversary is coming up in like a week. Yes,I remember tons of random dates dates if something significant happened on that day, ok don’t judge me..😉
    Anyway. So I wanted to do something awesome for my Blogiversary.

    Here is what I want to do:

    Blogiversary Ask Me Anything

    I’ll be making my 5 year blogiversary video soon! What is it you really want to know about me???

    In the comments below, ask me anything you want. Blog related, advice, my favorite things. I will chose 15 questions (or more depending on how many are asked) and I will feature them in my Blogiversary blog post.

    Also… There will be a surprise gift from me. The winner will be picked from the list of people who ask quality and interesting questions. I will notify you through e-mail (if it’s on your blog), or I will comment to let you know.

    *The giveaway will end on October 24th (12 pm Pacific Time).

    ASK AWAY! and Have Fun!

  • 25 Minute Chicken and Noodles Recipe

    25 Minute Chicken and Noodles Recipe

    I’m back with another post on Light Meal On Thursday. Last Thursday happened to be my brother’s birthday so there was definitely no light eating on that day, hence did not post a light meal.

    Quick & Light Neal – 25 Minute Chicken and Noodles 

    Today’s recipe is 25 Minute Chicken and Noodles.  It’s an ideal meal on lazy days or when one wants a light meal. Just make this and one is sorted.

    25 Minute Chicken and Noodles
    Photo: 25 Minute Chicken and Noodles

    I really hesitated on adding this recipe to the blog.  It’s really very simple and seems like something everyone already makes.  Then I remembered that my blog is not just for my readers, but also a record of recipes I make frequently.  This is one of family favorites(especially my nano _grandma)!  

    25 Minute Chicken and Noodles

    I’m not going to lie. But when I made this Chicken and Noodles for the family and grandma… they devoured it. I’m NOT KIDDING. I was SHOCKED. They were begging for me. I ended up with NO leftovers. HUH?

    And the best part? The entire recipe took 25 minutes to make. Enough yapping…Hope you enjoy!

    25 Minute Chicken and Noodles
    Photo: 25 Minute Chicken and Noodles

    A quick and delicious one pot recipe with chicken broth, chicken, noodles and healthy vegetables. This quick and easy skillet dish features all your favorite ingredients from chicken noodle soup, but without the soup. It’s a hearty meal perfect for a busy day. You can make a delicious, family-friendly dinner in just 25 minutes. 

    Bismillah, Let’s get started!!

    Check it out the 25 minute Chicken and Noodles recipe and printable version here!!

     Put your own spin on it. And lemme know how it turns out by sharing a picture  on Instagram, Facebook (Recipestable) or Twitter with this hashtag #Recipestable so I can see how lovely yours turn out.


    Happy Baking!!

    If you like this post, Please Subscribe to my blog and let me know your feedback by commenting below.. I have lots more recipes to share with you.

  • 25-Minute Chicken and Noodles Recipe

    25-Minute Chicken and Noodles Recipe

    25-Minute Chicken and Noodles Recipe

    Cook Time 25 minutes
    Total Time 25 minutes
    Servings 4
    Author Bushra Waheed

    Ingredients

    • 2 cups cubed cooked chicken
    • 1 cup chicken broth
    • 2 cups vegetables my fav red pepper, green onions, carrots, green pepper etc
    • 1 packet noodles
    • 2 tablespoon soy sauce
    • 1 tablespoon hot pepper sauce
    • 1 tablespoon sesame oil
    • 1/2 tsp dried basil leaves crushed
    • 1/2 tsp ground black pepper
    • 1/4 teaspoon white pepper
    • salt to taste

    Instructions

    • Heat oil in a large skillet over medium heat.
    • Add chicken and stir fry for 5 minutes or until no longer pink and all juices run clear.
    • Stir in the chicken broth and cook for 10 minutes or until chicken is tender.
    • Season with basil and pepper.
    • Stir in noodles. Bring to a boil then reduce heat to low. Cover and simmer for 5-7 minutes or until done and most of the liquid is absorbed.
    • Sprinkle soy sauce and hot pepper sauce.
    • Add vegetables and stir well.25-Minute Chicken and Noodles are ready to serve. Enjoy!
  • Baby Chicken Bread Recipe

    Baby Chicken Bread Recipe

    The recipe I am sharing today is a Family FAVORITE. All families have certain dishes they love to cook and eat. Mine goes gaga for these baby Chicken Breads! Put 12 dozen in front of them and they’ll still demand more. I am sure you will face the same situation with your siblings, cousins, random guests when you try these magical Baby Chicken Bread. (unless they are gluten intolerant. Oops)

    I thought, I would share this FAMILY FAVORITE with everyone since so many Friends nd ClassFellows have asked for this recipe. Enjoy!

    Baby Chicken Bread
    Photo: Baby Chicken Bread

    Baby Chicken Bread

    Chicken bread is a classic of Pakistani bakeries and we served it at most of the tea parties as a staple here. This simple yet delicious bread is easy to make and full of flavor.

    All you really need is a few basic ingredients: salt, flour, baking soda and yeast etc. The “trick” to achieving a perfect texture is not to over knead the dough and don’t over bake, as this will make it tough & hard, ugh not good! Brush with egg wash. Sprinkle a few sesame seeds. And voila! It’s ready to go in the oven for 25 minutes. 

    Baby Chicken Bread recipe
    Photo: Baby Chicken Bread

    On weekend night, I decided to bake chicken bread from scratch and Just for a twist I made  them in baby sizes.

    Don’t ask me why I do these things. I’m not quite sure myself.

    But you have to admit….they’re pretty darn cute.

     Baby Chicken Bread
    Photo: Baby Chicken Bread

    So now that my kitchen is covered with Baby Chicken Breads, what should I do with them?
    Of course, slathering them with hot pepper sauce and taking a big bite doesn’t count. I already did that. Twice.

    Baby Chicken Bread
    Photo: Baby Chicken Bread

    This recipe is especially handy because it makes A LOT of Baby Chicken Breads (1-1/2 dozen to be exact). So they are the perfect, fuss-free party food. Easy to make, fun to eat.

    Bismillah, Let’s get started!

    Check it out the Baby Chicken Bread recipe and printable version below.


    Baby Chicken Bread Recipe

    Chicken bread is a classic of Pakistani bakeries and we served it at most of the tea parties as a staple here. This simple yet delicious bread is easy to make and full of flavor.
    Prep Time 20 minutes
    Cook Time 25 minutes
    Total Time 45 minutes
    Servings 16
    Author Bushra Waheed

    Ingredients

    For Baby Chicken Bread Dough

    • 4 cups plain flour
    • 1 tablespoon instant yeast
    • 2 tablespoon dry powdered milk
    • 1 teaspoon salt
    • 1 teaspoon castor sugar
    • 4 tablespoon oil
    • 1 egg plus one for glazing

    For Baby Chicken Bread Filling

    • 2-1/2 cups boiled chicken shredded
    • 1 large onion finely chopped
    • 1 teaspoon salt
    • 1 teaspoon black pepper
    • 1 teaspoon garam masala powder
    • 1/2 cup coriander leaves
    • 4 green chilies finely chopped
    • 1 cup milk
    • 2 tablespoon plain flour
    • 2 tablespoon butter
    • sesame seeds & flax seeds as required

    Instructions

    To Make the Baby Chicken Bread Dough

    • In a large mixing bowl combine the plain flour, salt, castor sugar, dry milk powder, instant yeast, oil and egg.
    • Slowly mix in the lukewarm water with your hands till all the ingredients are mixed well and dough starts to form.
    • Knead the dough for 5-7 minutes on a floured surface till the dough becomes smooth and is no longer sticky.
    • Bang the dough on the floured surface 7-8 times for elasticity.
    • Shape the dough in a large ball add place in a greased bowl.
    • Brush the top lightly with some oil.
    • Cover with a kitchen cloth and let the dough to rise somewhere warm until doubled in size, around 1 hour.

    To make the Chicken Filling

    • Meanwhile, Melt butter in a frying pan over medium heat.
    • Fry onion till soft and translucent.
    • Now add 2 tablespoon plain flour and stir well.
    • Season with salt , black pepper and garam masala powder.
    • Stir in the milk and cook for 2-3 minutes or until thickened.
    • Stir in the shredded chicken add chopped green chillies and coriander leaves.
    • Remove from the heat and let it cool completely.
    • Punch the dough to release air.
    • Preheat oven at 200 degree C.
    • Now divide the dough into 14-16 parts depending on how small you want the baby chicken bread to be.
    • Roll each piece of dough to a rectangular shape.
    • Snip the sides with a sharp knife and put chicken filling in the center.
    • Fold each side so they overlap each other (like a braid) the filling will show slightly but that’s ok.
    • Brush top with beaten egg.
    • Sprinkle sesame seeds and flex seeds.
    • Bake, in the preheated oven, for 25-30 minutes or until its turn golden brown.
    • Right after taking out of the oven apply butter well on whole bread and let it rest covered with a cloth for 2-3 minutes to soften the bread completely.
    • Delicious Baby Chicken Breads are ready to serve.

    Notes

    Serving Suggestions:
    Voila! Enjoy your delicious bread with hot tea to the loving and deserving.


     Recipe Tip’s:

    1. I always make big batches of chicken bread at a go and then wrap them well in foil, then put them in some sort of a cellophane bag and tie it up tight and freeze.
    2. They can keep up to 4 weeks! When you need one, you just thaw it out overnight in the fridge or keep it out on the counter until it’s thawed out, then unwrap and then splash a little bit of water using your fingertips on it and put it in the oven for about 5 minutes to freshen it back up. Becomes as good as new! 

    Put your own spin on it. And lemme know how it turns out by sharing a picture  on Instagram, Facebook (Recipestable) or Twitter with this hashtag #Recipestable so I can see how lovely yours turn out.


    Happy Baking!!

    If you like this post, Please Subscribe to my blog and let me know your feedback by commenting below.. I have lots more recipes to share with you.

  • Homemade Veggie Pizza Recipe

    Homemade Veggie Pizza Recipe

    We’ve entered the season of warm comfort food. Soups, Stews, roast meat, etc. And sometimes all that heavy food seems . . . well . . . heavy. 

    Homemade Veggie Pizza

    Just about everyone loves pizza, myself included. However, traditional restaurant pizza is generally made with refined (white) flour, and loaded with saturated fat and sodium – things that can quickly lead to weight gain and harm your health. To make pizza something I can feel good about eating regularly, I’ve found ways to make my own healthier versions. The key is using whole grains, less cheese and loading up on lots of healthy veggies and herbs. Also eating produce that’s in season helps you save money and also ensures you are getting a good variety of foods and nutrients.

    homemade-veggie-pizza3

    This pizza included some of my favorite veggies and herbs: carrots, red onion, broccoli, corn, green or red pepper, olives and fresh basil.  The ingredients only required about 20 minutes of prep time, starting with chopping the veggies and tossing them in a little olive oil for roasting.  Adding a fresh herbs to the veggies adds nice flavor (and makes your kitchen smell amazing during cooking!).

    In addition to its great taste, winter veggies especially broccoli  is  the good sources of dietary fiber and rich in magnesium. Broccoli is loaded with antioxidants, fiber, and numerous vitamins and minerals including magnesium, fol-ate and fiber which are good for health.

    Homemade Veggie Pizza

    While my super-food veggies were roasting I gathered and prepped my other ingredients. The dough only required a thin spread of pizza sauce and cheese to provide creamy texture and cheesy flavor.

    The veggies were done once they were slightly crisped and fork-tender, and I spooned them over the dough. I finished the pizzas off by topping them with the Mozzarella cheese, olives and a sprinkle of herbs.

    Homemade Veggie Pizza
    Photo: Homemade Veggie Pizza

    The last step involves popping the pizzas in the oven – I chose to make veggie pizzas  in individual mini pizza pans. They only needed about 15 minutes to cooked the dough and for the cheese to melt. I loved the contrast of the cheese, olives and herbs with the crunch from the veggies on this flavorful pizza!

    Homemade Veggie Pizza
    Photo: Homemade Veggie Pizza.. Yum 

    If you need a lighter dish, that doesn’t skimp on flavor, try this Homemade Veggie Pizza recipe. It’s fresh, full of flavor, and won’t weigh you down like the winter comfort food can.  Pizzas like this can be enjoyed as a quick and easy lunch or dinner, and make a tasty addition to a healthy diet. Enjoy! 

    Photo: Homemade Veggie Pizza
    Photo: Pizza loaded with cheese and veggies ♥

    Recipe Tip’s:

    1. Feel free to play around a bit with the ingredients in this recipe if you make it yourself.
    2. Add nuts (walnuts, pumpkin seeds), more veggies, would be great, and you could also skip the cheese all-together and instead use the ricotta cheese as the sauce/base.

    Bismillah, Let’s get started!

    Check it out the Homemade Veggie Pizza Recipe and printable version below.

    What other winter-veggies would you try on a pizza?

    Put your own spin on it. And lemme know how it turns out. Post a photo on Facebook (Recipestable) or  on Twitter so I can see how lovely yours turn out.


    Happy Cooking!!

    If you like this post, Please Subscribe to my blog and let me know your feedback by commenting below.. I have lots more recipes to share with you.


  • Homemade Veggies Pizza Recipe

    Homemade Veggies Pizza Recipe

    If you need a lighter dish, that doesn’t skimp on flavor, try this Homemade Veggie Pizza recipe. It’s fresh, full of flavor, and won’t weigh you down like the winter comfort food can.

    Homemade Veggies Pizza Recipe

    If you need a lighter dish, that doesn’t skimp on flavor, try this Homemade Veggie Pizza recipe. It’s fresh, full of flavor, and won’t weigh you down like the winter comfort food can.
    Prep Time 1 hour
    Cook Time 20 minutes
    Total Time 1 hour 20 minutes
    Servings 8
    Author Bushra Waheed

    Ingredients

    Whole Wheat Pizza Dough

    • 2-3/4 cups white whole wheat flour or regular whole wheat flour
    • 1 cup water heated to 110 degrees (very warm, almost too hot for comfort)
    • 1 sachet about, 2-1/4 teaspoons instant yeast
    • 1 tablespoon dry milk powder
    • 1 tablespoon sugar
    • 1 tablespoon olive oil
    • 1 teaspoon salt

    Pizza Sauce

    • 1 cup pizza sauce (organic if possible)

    Other Ingredients

    • 1 cup broccoli florets
    • 1/2 cup boiled green peas
    • 1/2 cup sweet corns optional
    • 1 red bell pepper cut into small cubes
    • 1 green bell pepper cut into small cubes
    • 1 carrot cut into small cubes
    • 1 red onion cut into cubes

    Pizza Topping

    • 1-1/2 cup Mozzarella Cheese grated
    • green olives as required
    • fresh or dried herbs i used parsley & basil

    Instructions

    • Whisk water, sugar, oil and yeast in a liquid measuring cup or small bowl. Allow yeast to proof for 5 minutes. It should puff up some by then.
    • Pulse flour, dry milk powder and salt in food processor until combined. While running the food processor, slowly pour in the water mixture and process until a shaggy ball forms, about 1 minute.
    • Dump the dough onto a floured work surface and quickly knead dough a few times until it comes together.
    • Apply some olive oil all over the dough.
    • Cover loosely and keep in a large bowl at room temperature for 1 hour or until the dough will double up and nicely leaven.
    • Meanwhile, toss vegetables in a little olive oil.
    • Add your favorite herbs seasoning and roast 1-2 minutes or until crisp-tender and keep aside.
    • Preheat oven at 200 degree C.
    • Now divide dough into 8 equal balls.
    • Flatten the each ball evenly.For best results, roll the dough out about as thin as reasonably possible.
    • Aim for even thickness rather than a perfectly round shape.
    • Roll out all balls and transfer them into small pizza pans (if your baking pan isn’t non-stick, lightly grease it with cooking spray).
    • Brush the outer 1-inch of the dough with a light coating of olive oil.
    • Spread the pizza sauce on the mini pizza’s.
    • Sprinkle half of the cheese over the pizza sauce.
    • Add vegetables and sprinkle remaining cheese on pizza’s.
    • Top with olives and fresh or dried herbs.
    • Bake on the middle rack until the crust turn lightly golden and cheese is melted & bubbly, about 20 minutes.
    • Remove from the oven and sprinkle some fresh basil and parsley over them.
    • Your Homemade Veggie Pizza is ready to serve. ENJOY!!

    Notes

    Serving Suggestions:
    Serve hot with your favorite dipping sauce.
  • Pulled Chicken Sandwiches Recipe

    Pulled Chicken Sandwiches Recipe

    Pulled Chicken Sandwiches Recipe

    Prep Time 10 minutes
    Cook Time 25 minutes
    Total Time 35 minutes
    Servings 4
    Author Bushra Waheed

    Ingredients

    For Chicken

    • 500 gm boneless chicken thighs
    • 1 teaspoon grated ginger
    • 1 teaspoon garlic minced
    • 1 teaspoon hot sauce
    • 1 teaspoon paprika
    • 1 teaspoon cumin powder
    • 1/4 teaspoon freshly ground black pepper
    • salt to taste
    • cooking spray

    For Sauce

    • 1 small onion minced
    • 2 teaspoons canola oil
    • 1 tablespoon dark brown sugar
    • 1 teaspoon red chili powder
    • 1/2 teaspoon garlic powder
    • 1/2 teaspoon mustard powder
    • 1/4 teaspoon ground allspice
    • 1/8 teaspoon crushed red chili
    • 1/2 cup tomato ketchup
    • 2 tablespoons apple cider vinegar

    Remaining ingredients

    • 4 burger buns toasted
    • 4 slices Mozarella cheese
    • 1/4 cup cheddar cheese grated
    • ice burg leaves
    • tomato slices
    • olives as required

    Instructions

    To Make Chicken

    • Preheat oven to 200 degrees C.
    • Place chicken in a large bowl. Add ginger, garlic, hot sauce, paprika powder, cumin powder, black pepper and salt.
    • Rub evenly over the chicken.
    • Place chicken on an oven grill rack coated with cooking spray, and bake 20 minutes or until the chicken is nicely browned.
    • Let stand for 5 minutes.
    • Remove chicken from the oven and shred with two forks and set aside.

    To Prepare Sauce

    • While chicken cooked, heat oil in a small saucepan over medium heat.
    • Add onion and cook for 5 minutes or until translucent or, stirring occasionally.
    • Stir in brown sugar, chili powder, garlic powder, mustard powder, allspice and red chili.
    • Cook for 30 seconds then stir in the apple cider vinegar and tomato ketchup.
    • Bring to a boil.
    • Reduce heat to medium low and let it simmer for 10 minutes or until slightly thickened.
    • Now Stir in chicken and cook 2 more minutes.

    To Make Pulled Chicken Sandwiches

    • Place iceberg lettuces and mozzarella slices on the bottom half of each bun.
    • Divide chicken mixture into 4 equal portions and put it on cheese slices.
    • Top each bun with grated cheese, tomato slices and olives.
    • Cover with remaining bun. Delicious Pulled Chicken Sandwiches are ready to serve. ENJOY

    Notes

    Serve on buns, over fresh greens, or on top of a baked potato for a filling dinner. enjoy 🙂
  • Pulled Chicken Sandwiches Recipe

    Pulled Chicken Sandwiches Recipe

    If I ask what my brother wants for dinner, more than likely he will say “sandwiches/burgers.” This recipe is a twist on the usual burgers and packs a big taste punch with the pulled chicken, cheese and barbecue sauce. If you’re anything like me then a burger needs to be covered in cheese, ice-berg leaves, and many slices of olives and tomatoes.

    Pulled Chicken Sandwiches Recipe
    Photo: Pulled Chicken Sandwiches

    Next time you’re craving a burger or sandwich, give this recipe a shot. It will become your new favorite! Your Dinner guests are guaranteed to be impressed with this deceptively easy Pulled Chicken Sandwich recipe, which includes a few-ingredient rub and a simple 15-minute sauce that comes together while the chicken oven baked. 

    Did I mention these sandwiches are braised in a special sweet and tangy sauce? Yep! It gives the chicken a deep, rich flavor that intensifies with age, so you can make the chicken a day ahead and your sandwiches will taste even better! Perfection!

    pulled Chicken Sandwiches recipe
    Photo: Pulled Chicken Sandwiches

    You can serve this chicken in many ways, but I made them in sandwich form because, honestly, what man can resist a toasty bun piled high with tender, juicy pulled chicken, oodles of caramelized onions, tangy barbecue sauce and melty cheese? I can’t think of one! You can serve this on a sandwich as I did, or you can serve on tacos, nachos and burritos, Ole! I’m already thinking of the delicious ways I plan to use this in the future.

    Photo: Pulled Chicken Sandwiches
    Photo: Pulled Chicken Sandwiches


    Bismillah, Let’s get started!

    Check it out the Pulled Chicken Sandwiches recipe and printable version below.

    Pin it For Later

    Pin it for later

    Put your own spin on it. And lemme know how it turns out. Post a photo on Facebook (Recipestable) or  on Twitter so I can see how lovely yours turn out.


    Happy Cooking!!

    If you like this post, Please Subscribe to my blog and let me know your feedback by commenting below.. I have lots more recipes to share with you.

  • Sweet and Sour Chicken with Noodles Recipe (30 Minute Meal)

    Sweet and Sour Chicken with Noodles Recipe (30 Minute Meal)

    Sweet and Sour Chicken with Noodles

    An easy and delicious weeknight meal loaded with healthy ingredients. A one-pan, 30 minute chicken stir fry recipe.This quick and easy sweet and sour chicken with noodles will be ready to eat in less than 30 minutes.

    sweet-sour-chicken-with-noodles

    Sweet and sour Chicken is one of the most popular Chinese dishes and My family is a big fan of sweet and sour chicken so I thought I would try this recipe with noodles. It was a huge hit in our house and even they ate tons of it! Definitely a keeper for a easy go to dinner meal.

    sweet-sour-chicken-with-noodles1

    This Sweet and Sour Chicken recipe is super easy to make. All you will need is one wok or a skillet, and all of the ingredients listed below. It takes about 30 minutes to make this mouthwatering dish. Delicious dinner made in no time!

    Tender, juicy pieces of chicken in a tangy sweet and sour sauce with pineapple chunks, onion and peppers, served on a Bed of Noodles.

    Bismillah, Let’s get started!

    Check it out the Sweet and Sour Chicken with Noodles recipe and printable version below.

     If you make this recipe, I’d love to see pics of your creations on Instagram, Facebook and Twitter! Hashtag them #recipestable.


    Put your own spin on it. And lemme know how it turns out. Post a photo on Facebook (Recipestable) or  on Twitter so I can see how lovely yours turn out.


    Happy Cooking!!

    If you like this post, Please Subscribe to my blog and let me know your feedback by commenting below.. I have lots more recipes to share with you.

  • Sweet and Sour Chicken with Noodles

    Sweet and Sour Chicken with Noodles

    This Sweet and Sour Chicken recipe is super easy to make. All you will need is one wok or a skillet, and all of the ingredients listed below. It takes about 30 minutes to make this mouthwatering dish. Delicious dinner made in no time!

    Sweet and Sour Chicken with Noodles

    This Sweet and Sour Chicken recipe is super easy to make. All you will need is one wok or a skillet, and all of the ingredients listed below. It takes about 30 minutes to make this mouthwatering dish. Delicious dinner made in no time!
    Prep Time 5 minutes
    Cook Time 25 minutes
    Total Time 30 minutes
    Servings 6
    Author Bushra Waheed

    Ingredients

    • 6 boneless chicken breast halves cut into 1-inch pieces
    • 2 tbsp cornstarch
    • 2 tbsp vegetable oil
    • 1 egg white
    • 1 tsp white pepper
    • 2 tbsp ginger & garlic grated
    • 1 can pineapple chunks drained
    • 1 red bell pepper cut into 1- inch cubes
    • 1 green bell pepper cut into 1- inch cubes
    • 1 onion cut into cubes
    • salt to taste

    For Sweet and Sour Sauce

    • 2 tbsp soy sauce
    • 2 tbsp pure honey
    • 1/2 cup white vinegar
    • 1/2 cup tomato ketchup
    • 1/2 cup pineapple juice
    • 1/4 tsp salt
    • boiled noodles to serve

    Instructions

    Method

    • In a bowl, combine the soy sauce, honey , vinegar, tomato ketchup, pineapple juice and salt.
    • Whisk well and set aside.

    To make Sweet and Sour Chicken

    • Rinse Chicken and pat dry.
    • In a medium bowl, add chicken ,cornstarch, egg white, salt and pepper. Mix well.
    • Stir to coat the chicken evenly. Marinate for 30 minutes at room temperature.
    • Heat a large nonstick pan over high heat until blazing hot.
    • Add 1 tbsp of oil and swirl to coat.
    • Add the coated chicken to the pan and spread the chicken in form of one layer.
    • Let the chicken fry, don’t touch for 1 -2 minutes or until the bottoms are browned.
    • Turn and fry the other side of chicken for more 1-2 minutes.
    • Once the chicken is cooked, remove from the pan and set aside.
    • Heat the remaining 1 tbsp oil in the pan over medium heat.
    • When the oil heat up, then add grated ginger & garlic, red bell pepper, green bell pepper.
    • Stir fry for 1-2 minutes then add pineapple chunks and sweet and sour sauce.
    • Turn the heat to high.
    • Bring to boil then add the chicken and simmer on low heat for 2-3 minutes or until the chicken is cooked thoroughly. Sweet and Sour Chicken is ready to serve!

    Notes

    Serve over boiled noodles.
  • Pakistan Independence Day Cake Recipe

    Pakistan Independence Day Cake Recipe

    Happy Independence Day, Pakistan!

    Pakistan Independence Day Cake

    As the whole Pakistan is celebrating Independence Day today, desserts and sweets are must in your cooking list. But what if you are planning to make a Pakistan Independence Day Cake with green topping and White layers to celebrate the national event.

    Pakistan Independence Day Cake
    Pakistan Independence Day Cake

    Here’s a recipe for Pakistan Independence Day Cake!

    LONG LIVE PAKISTAN

  • Pakistan Independence Cake Recipe

    Pakistan Independence Cake Recipe

    As the whole Pakistan is celebrating Independence Day today, desserts and sweets are must in your cooking list. But what if you are planning to make a Pakistan Independence Day Cake with green topping and White layers to celebrate the national event.

    Pakistan Independence Cake Recipe

    As the whole Pakistan is celebrating Independence Day today, desserts and sweets are must in your cooking list. But what if you are planning to make a Pakistan Independence Day Cake with green topping and White layers to celebrate the national event.
    Prep Time 40 minutes
    Cook Time 25 minutes
    Total Time 1 hour 5 minutes
    Servings 8
    Author Bushra Waheed

    Ingredients

    • 1 cup plain flour
    • 1 teaspoon baking powder
    • pinch of salt
    • 4 eggs
    • 1 cup castor sugar
    • 1/2 cup butter
    • 2 tablespoon milk
    • 1 teaspoon vanilla essence

    For Filling

    • 2 cups Whipped cream (400 ml)
    • 2 tablespoon Icing sugar
    • 1 cup Pineapple chunks
    • Pineapple juice as required.
    • few drops of vanilla essence

    For topping

    • one packet banana jelly
    • whipped cream as required

    Instructions

    To Make Cake Sponge

    • Prepare your cake pan by lining it with grease proof paper and greasing it to make sure the cake doesn’t stick. I used an 8 inch pan. You can use a slightly smaller one if you want a higher cake.
    • Preheat oven at 170 degree C.
    • In a small bowl, sieve the flour, baking powder and salt, twice or thrice time to aerate it. keep aside.
    • Put the eggs in a big glass bowl, then add the sugar.
    • Beat the eggs for 2-3 minutes.
    • Then add butter and whisk till light and fluffy, about 5 minutes.
    • The eggs will have started expanding from the beating. Keep beating for about 4 minutes until the egg mixture resembles cream. The beaters should leave streaks in the mixture as you whip, like how whipping cream looks at the ‘soft peak’ stage.
    • Once you have reached this consistency, remove the beaters and use a whisk.
    • Whisk the egg mixture for a few seconds.
    • Using a spatula, GENTLY fold the flour in using 30 strokes or less.
    • Don’t over mix.
    • When the flour is mixed, add warm milk.
    • Stir in the vanilla essence.
    • Now fold again no more than 50 times or less until the batter is well combined and shiny.
    • Pour into the prepared pan.
    • Pick and drop the pan twice to remove any excess air bubbles.
    • Then bake, in the preheated oven, for 23-25 minutes or until toothpick insterted near the center comes out clean.
    • Again pick and drop the pan twice to prevent it from shrinking as it cools.
    • Now turn the pan over on a cake rack but do not remove the pan.
    • Let the pan cool down until it is easy to handle with your hands without getting burnt.

    To Make Cake Filling

    • Meanwhile, whip your cream with 2 icing sugar.
    • Stir in the vanilla essence.
    • Adjust sweetness to your taste and keep aside.

    To Assembling the Cake

    • Remove the pan from the cake and peel the greaseproof paper. cut the cake horizontally into half.
    • Drizzle pineapple juice syrup all over the cut halves to moisten the cake.
    • Then spread the whipped cream evenly.
    • Add pineapple chunks.
    • Cover them with more cream, put the second half of the cake and cream the top.
    • Place in the refrigerator for 2 hours or until the cream sets.
    • Meanwhile, make jelly in the warm water and slightly pour over the cake (1/3 side).
    • Make a moon and star shape with leftover whipped cream.
    • Put in the refrigerator for few hours or until chilled.
    • Enjoy your delicious Independence day cake 🙂

    Notes

    Important Tips:
    If you over mix the flour mixture or fold too vigorously, you will lose all the air that has built up in the eggs, so be gentle in folding.
  • The Best Creamed Peas Recipe

    The Best Creamed Peas Recipe

    Creamed Peas 

    Everything’s better with cream…especially vegetables.Vibrant green peas simmer in a simple sauce of milk, flour, and butter in this quick side dish. 

    The Best Creamed Peas
    The Best Creamed Peas

    In my search for a good creamed peas recipe, I found many, but none that quite matched what I wanted. So I took to my own creativity and came up with this absolutely fabulous and The Best Creamed Pea recipe. My family love it so much and we have this on the side quite often. And I double this every time, and not a single pea is left! Alhumdulillah 🙂

    The Best Creamed Peas
    The Best Creamed Peas

    Do try this recipe, these Creamed Peas can become your ultimate side dish.

    Bismillah, Let’s get started!

    Check it out the Creamed Peas recipe and printable version below.

    Recipe Note’s:

    Don’t over cook the peas. Soggy peas will ruin this dish. You want them tender but firm.


    Put your own spin on it. And lemme know how it turns out. Post a photo on Facebook (Recipestable) or  on Twitter so I can see how lovely yours turn out.


    Happy Cooking!!

    If you like this post, Please Subscribe to my blog and let me know your feedback by commenting below.. I have lots more recipes to share with you.

  • Creamed Peas Recipe

    Creamed Peas Recipe

    Vibrant green peas simmer in a simple sauce of milk, flour, and butter in this quick side dish.

    Creamed Peas Recipe

    Vibrant green peas simmer in a simple sauce of milk, flour, and butter in this quick side dish.
    Prep Time 5 minutes
    Cook Time 15 minutes
    Total Time 20 minutes
    Servings 4
    Author Bushra Waheed

    Ingredients

    • 1-1/2 cup green peas boiled
    • 2 tablespoon butter
    • 1 tablespoon all-purpose flour
    • 2 tablespoon heavy cream
    • 1/4 cup milk
    • 1/2 teaspoon white sugar
    • a pinch of pepper
    • salt to taste

    Instructions

    Method

    • Melt butter in a saucepan over low heat and whisk in flour until well blended and smooth.
    • Now very gradually stir in the milk. When milk is combined, add sugar, salt and pepper.
    • Cook and stir for few minutes or until sauce begins to boil.
    • keep stirring for 1-2 minutes then add green peas and stir. Cover pan and allow to simmer for 2 minutes over medium heat or until sauce is thickened.
    • Reduce heat to medium low then stir in heavy cream.
    • Cook over medium-high heat until for 1 minutes or until thick and bubbly.
    • Remove from the heat and dish it out. Delicious Creamed Peas are ready to enjoy 🙂

    Notes

    Serving Suggestions:
    Serve with grilled Kabobs.