aaa
Category: Uncategorized
-
Flavorful Fusion: Chicken Pakora Burger Recipe – A Ramadan Special
Time to twist up the classic burger.
Ramadan brings with itself some seasonal treats. The most favorite treat is: pakoray. They are hot, spicy and crispy; although they are fried, we all love the calories 🤤In this post, I’ll share a fusion burger recipe that combines the best of Pakistani and Western flavors. What better way to break your fast than with a juicy, crispy, and flavorful Chicken Pakora Burger? A soft fluffy bun, sprinkled with ample sesame seeds, layered with mayonnaise, lettuce, onion rings and a very special green chutney (that’s one of the key elements and it tastes amazing) a crispy/ spicy chicken patty and pakoray 🤩 Now if reading all this isn’t making you drool I don’t know what else will.
What is Chicken Pakora?
If you’ve never had a Chicken Pakora, its a popular Pakistani street food made with marinated chicken pieces coated in a spicy chickpea flour batter, deep-fried to perfection. It’s crunchy on the outside, tender on the inside, and full of flavor. We usually eat them with mint or tamarind chutney.
Except this time, we piled it on top of a burger, with Mayo and tangy Mint Mango Chutney. The rice flour gives the pakora a more crunchy texture that fills you up.
A perfect appetizing, snack lunch or you can have them for dinner like me. . . I love pakoras! I could have them every single day and not get tired of them. . because their so spicy, crunchy and appetizing. . I usually make them with anything
Prefer to Watch instead of Read ?
The first bite into these is the best part! Hearing the crunch of the pakora as you bite into it is so satisfying, then followed by the cool texture of the herbed cream cheese is the best! I added quick-pickled onions with cumin seeds as well because you all know by now that cumin is my favourite spice, so of course I’m going to add it anywhere that I can!
Why You’ll Love This Recipe
- Crispy, Crunchy, Juicy: The combination of crunchy pakora, juicy chicken, and soft bun is a match made in heaven!
- Unique & Flavor Fusion: The use of chicken pakora as a burger patty adds a creative spin to traditional burgers.
- Easy to Make: This recipe is surprisingly easy to prepare and cook.
- Versatile: Customize with your favorite toppings and sauces to create your perfect burger.
- Perfect for Sharing: Double or triple the recipe for a crowd-pleasing appetizer or main course
- Perfect for Any Occasion: Whether it’s a quick weeknight dinner or a special occasion, this recipe is sure to impress.
Bismillah let’s get started.
Ingredients in Chicken Pakora Burger Recipe?
Ist Gather Your Equipment’s:
How to Make this Chicken Pakora Burger
I tried to keep the toppings simple and easy so that the flavours of the pakora and mint mango chutney really come through. You can add tamarind chutney or some slices of raw mango to the burger would be really good too!
Frequently Asked Questions About Chicken Pakora Burger
What is Chicken Pakora?Chicken Pakora is a popular Pakistani street food made with marinated chicken pieces coated in a spicy chickpea flour batter, deep-fried to perfection.
Can I use store-bought chicken pakora mix?Yes, you can use store-bought chicken pakora mix, but homemade batter gives a more authentic flavor and texture.
What type of bun is best for the Chicken Pakora Burger?Soft, lightly toasted sesame seed buns works best.
Can I bake the chicken pakora instead of frying?Yes, you can bake or air fry the chicken pakora in a preheated oven at 400°F (200°C) for about 25-30 minutes, or until crispy and golden brown.
How can I make the pakoras less oily?Drain the pakoras on paper towels after frying and avoid overcrowding the pan.
Can I customize the toppings?Absolutely! Feel free to add or subtract toppings to your liking, such as lettuce, tomato, pickles, or jalapeños.
How do I make the mint chutney?Mix together mint, raw mango, cumin, crushed red chili, salt, sugar (optional) and lemon juice. Refrigerate for at least 30 minutes before serving.
Can I reheat the chicken pakoras?Reheating pakoras might make them soggy. It’s best to enjoy them fresh.
Is the Chicken Pakora Burger spicy?The level of spiciness depends on the amount of red pepper used in the marinade and batter. Adjust to your desired level of heat.
Can I use different types of meat?Yes, you can experiment with fish, or vegetables like cauliflower or eggplant for a vegetarian option. Adjust the marinade and cooking time accordingly.
Can I use a different flour for the pakoras?While gram flour is traditional, you can experiment with other flours like chickpea flour or rice flour.
Q: What can I serve with the Chicken Pakora Burger?The pakora burger pairs well with fries, potato wedges, or a refreshing salad.
Recipe Notes:
- Adjust the spice level according to your preference.
- For a richer flavor, marinate the chicken overnight.
- Serve the burgers immediately for the best taste and texture.
Serving Suggestions:
- Pair the Chicken Pakora Burger with a side of fries or potato wedges or fresh salad.
- Serve with a refreshing mint and cucumber raita for a cooling contrast.
- Enjoy the burger with a glass of your favorite chilled beverage.
Check it out The Chicken Pakora Burger Recipe and printable version here!!
Chicken Pakora Burger Recipe
Ingredients
For Chicken Pakora Marination:
- 2 chicken breast boneless
- 4 tbsp vinegar
- 2 tbsp garlic powder
- 2 tbsp soy sauce
- 2 tbsp chicken powder
- 1 tbsp red chili powder
- salt to taste
For Coating:
- 1/2 cup chickpea flour (besan)
- 1/2 cup plain flour (maida)
- 1/2 cup corn flour
- 1/2 cup rice flour
- 2 eggs lightly beaten
For Frying
- Oil for deep frying
For Burgers
- 4 burger buns
- 1 red onion cut into rings
- 1 tomato cut into rounds
- 1 cucumber cut into rounds
- 1/2 cup <a href="#">green chutney</a>
- 1/4 cup mayonnaise
- chili garlic sauce
DID YOU MAKE THIS RECIPE?
Tag @recipestable on Instagram so we can admire your masterpiece! 🌟Extra Bonus Tips:
- For an extra crispy coating, chill the coated chicken pieces in the refrigerator for 30 minutes before frying.
- Use a thermometer to ensure the oil reaches the perfect frying temperature (350°F/175°C).
- Don’t overcrowd the frying basket, fry in batches for even cooking.
- For a spicy kick, add a few dashes of hot sauce to the marinade or batter.
- Experiment with different seasonings in the batter, like garam masala or smoked paprika, for a unique flavor.
- Serve immediately and enjoy the crunch!
Want more Pakora Inspiration?
Here are some other pakora on my blog:
- Potato Egg Pakora Bites Recipe (Family Favorite Snack)
- The Perfect Party Appetizer: Sesame Chicken Pakora Recipe
- Skip the Chips: Make Noodles Pakora – The Satisfying Snack!
- Restaurant-Style at Home: Crispy Fish Pakora Recipe (Ready in Minutes!)
Hope you enjoyed this flavorful fusion and are having a great Summer. Let me know in the comments below: What are your favorite pakora recipes? I’d love to hear about your crispy and flavorful creations!
Happy Cooking!
-
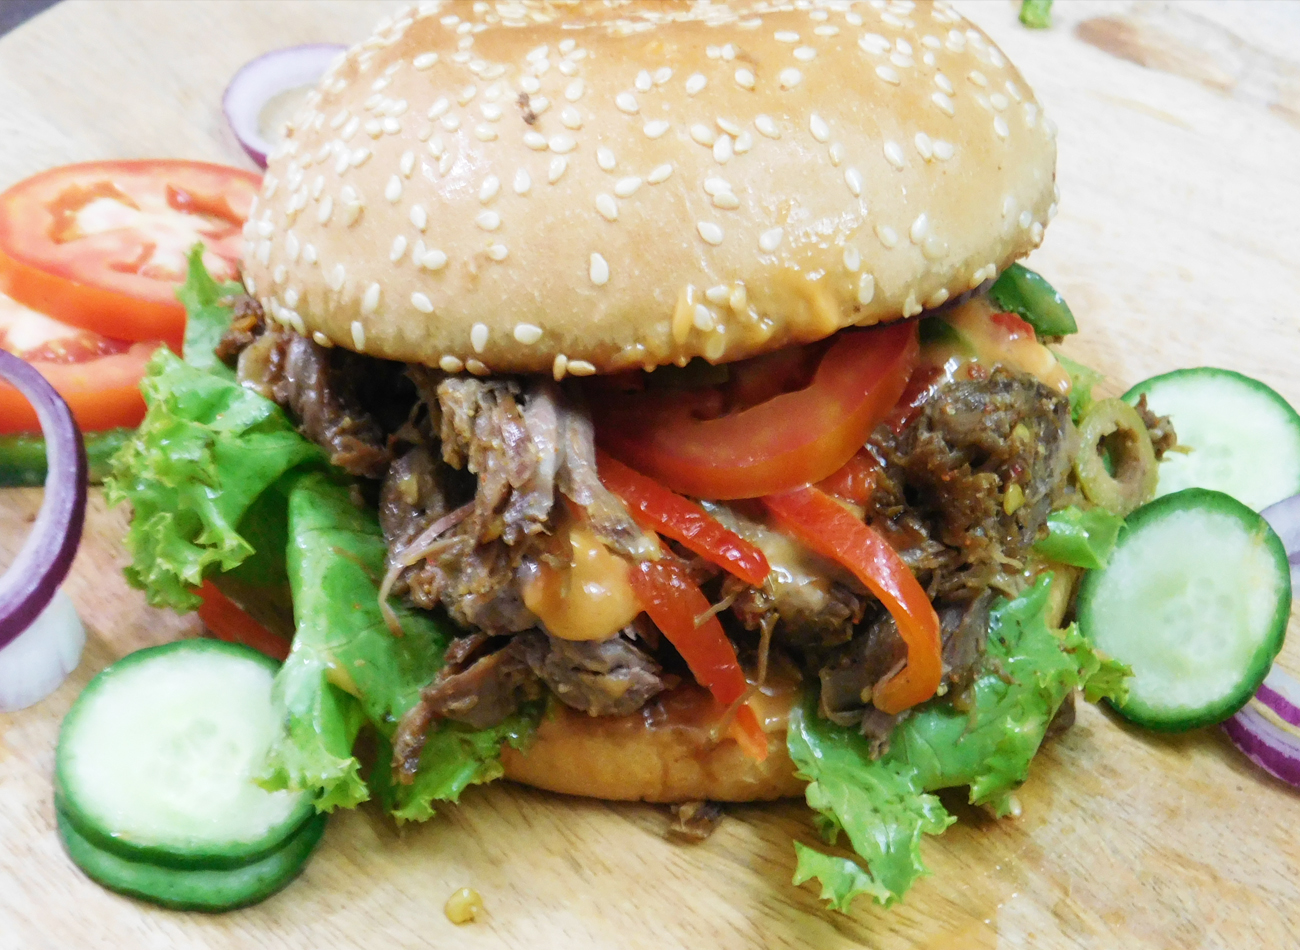
Best Ever Roasted Lamb Burgers Recipe
Do something different on burger night…take it to another level ! If you've made roast lamb but don't know what to do with the leftovers, then make this best Ever Roasted Lamb Burgers Recipe. This burger is next-level!
Best Ever Roasted Lamb Burgers Recipe
Do something different on burger night…take it to another level ! If you've made roast lamb but don't know what to do with the leftovers, then make this best Ever Roasted Lamb Burgers Recipe. This burger is next-level!Servings 2Ingredients
- 2 burger buns
- 350 gm lamb roast cooked for recipe click here
- 1 onion cut into rings
- 1 cucumber cut thin slices
- 1 to mato cut into thin slices
- 1/2 red pepper cut into thin slices
- 1/2 green pepper cut into thin slices
- salad leaves
For Sauce:
- 1 tbsp ketchup
- 2 tbsp chili garlic sauce
- 2 tbsp mayonnaise
- 1 tbsp chopped red bell pepper
Instructions
- Preheat the leftover lamb roast and roughly shred the meat with a fork.
- Cut the burger buns into halves and toast them.
- In a small bowl, mix together the ketchup, chili garlic sauce, mayonnaise and chopped red bell pepper.
- Set aside.
- Spread the sauce over the bottom of bun.
- Arrange the salad leaves evenly on the burger bun.
- Top the base of the burgers with shredded meat and sliced onions, tomato slice, cucumber.
- Add a tablespoon of prepared sauce to each burger.
- Top with the red and green bell pepper slices and cover with other half of the burger.
- Cut into halves.
- Best Ever Roasted Lamb Burgers are ready to serve.
Notes
Serve warm with chips. -

Seekh Kebab Pizza Bites Recipe
These easy Seekh Kebab Pizza Bites are a great way to serve pizza for appetizers…with a desi twist and its taste amazing. Do try it!
Seekh Kebab Pizza Bites Recipe
These easy Seekh Kebab Pizza Bites are a great way to serve pizza for appetizers…with a desi twist and its taste amazing. Do try it!Servings 12Ingredients
- 1 ball of prepared Pizza Dough homemade or store bought, cut into twelve 2.5 inch circles
- 12 leftover Seekh Kebabs
- 2 tablespoons chopped onion
- 2 tablespoons chopped green bell pepper
- 1 cup Pizza Sauce
- 1/2 cup cheddar cheese grated
- 1/4 cup finely shredded mozzarella cheese
- Italian herb Seasoning for topping
- 1 teaspoon oil for greasing
Instructions
- Preheat oven to 180 degree C.
- Lightly grease a 12-cup muffin pan with nonstick cooking spray, butter or olive oil.
- Cut each Seekh Kebab into four pieces and set aside.
- Divide pizza dough into 12 equal portions and place one pizza circle into the bottom of each greased muffin cup, making sure that the edges do not curl in to block the opening of the “cups”.
- Fill with 1 teaspoon of pizza sauce, then stuff with your seekh kebabs, cheddar cheese, green pepper and onion toppings.
- Top with a generous pinch of shredded Mozzarella cheese, and a sprinkle of Italian seasonings.
- Repeat with remaining pizza cups.
- Bake 15-20 minutes or until the dough is golden brown and cheese is melted.
- Remove from the oven and allow to rest about 3–5 minutes before serving.
- Delicious Seekh Kebab Pizza Bites are ready to serve.
- Serve immediately.
Notes
Serve with Chili Garlic Sauce along with some fresh salad. -

Restaurant Style Hot and Sour Noodles Recipe
This Restaurant Style Hot and Sour Noodles Recipe makes a bright and healthy dinner for a small family. There are layers and layers of flavors in these easy noodles that are ready in 30 minutes.
Restaurant Style Hot and Sour Noodles Recipe
This Restaurant Style Hot and Sour Noodles Recipe makes a bright and healthy dinner for a small family. There are layers and layers of flavors in these easy noodles that are ready in 30 minutes.Servings 2Ingredients
- 1/2 packet Egg Noodles boiled
- 1 medium onion cut into cubes
- 1 large tomato de-seeded and cut into cubes
- 1 green bell pepper shimla mirch, cut into cubes
- 4 tablespoon Olive oil
- 1 teaspoon chopped ginger
- 1 teaspoon chopped garlic
Ingredients for Marination:
- 250 gm boneless chicken cut into cubes
- 1 teaspoon ginger garlic paste
- 1 egg white
- 2 tablespoon Cornflour
- 1 tablespoon soy sauce
- 1 tablespoon Chili Sauce
- 1 tablespoon Vinegar
- 1 teaspoon red pepper crushed
- salt to taste
Ingredients For Sauce:
- 1/2 cup water
- 1/2 cup tomato ketchup
- 2 tablespoon hot pepper Sauce
- 1 tablespoon soy sauce
- 1 tablespoon Vinegar
- salt and Pepper to taste
- chili flakes optional
- black olives optional
Instructions
- Cut all vegetable into cubes and keey aside. Then cut the chicken into cubes and marinate with ginger garlic paste, egg white, Cornflour, soy sauce, chili sauce, vinegar, red pepper and salt. Mix well and keep aside.
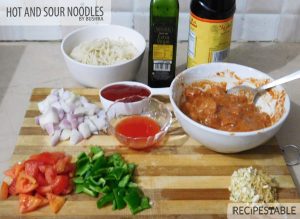
- Bring a large pot of salted water to a boil. Cook egg noodles for 5-7 minutes, until they reach desired consistency. Drain the noodles. Rinse in a bowl of cold water and drain again. Keep aside.
- Heat 4 tbsp olive oil in wok or large frying pan over a medium to high heat.

- Fry marinated chicken pieces for 8-10 minutes or until cook from inside and golden brown from outside.

- Remove from the oil and keep aside.

- Now saute chopped ginger garlic in the remaining oil for 30 seconds or until aromatic.

- Add half cup of water, hot pepper sauce, soy sauce, and chili flakes. Let it simmer for 2 minutes or until all water dries up.

- Add the onion and keep stirring on high flame. Season with salt and pepper.

- Add capsicum and stir fry together for 1 minute then add tomato and turn the heat on high.

- Add the tomato ketchup and vinegar, continue to stir fry for 1 minute.

- Adjust the seasoning to taste and add fried chicken.

- Toss in the noodles,breaking up the clumps as you drop them in and continue to stir fry for 30 seconds.

- Pour in 2 tablespoons of water and let it steam up through the ingredients ,helping to cook the veg and to warm the noodles through.

- Remove the pan from the heat.Sprinkle some chili flakes over it and top up with olives.

- Serve up straight away to appreciate the kick. ENJOY!!

Notes
- To make non-sticky noodles, do not overcook them in step-2. Cook them until they are cooked but not mushy. Do not forget to pour cold water over noodles after cooking to remove excess starch.
- This is my absolute favorite ingredients combination, but feel free to use any vegetables or protein that you have on hand. Instead of chicken, you can use firm tofu to make it vegetarian. You can also use prawns or thinly sliced beef.
- As for the vegetables, don’t omit the crispy onion and capsicum. For variation, add baby corns, red and yellow capsicum, mushrooms or any other vegetables of your choice.
- You can use either green chilli sauce or hot pepper sauce sauce per your preference. Hot Pepper sauce sauce will help you get the typical restaurant color.
- Adjust quantity of hot sauce and soy sauce per your taste. Do not add more soy sauce as it tastes bitter and it will change the taste of noodles.
- All vegetables and noodles must be tossed over over high-flame to get restaurant like taste and texture.
- This dish is not very good after reheating because the noodles absorb the sauce and become mushy and the whole dish is just a little dry. If you want to make it ahead, store the sauce separately and combine only before serving.
-

Low Carb Egg In a Hole Recipe
Whether you call it Egg in a Hole, Egg in a Basket or Egg in a Boat, this easy healthy breakfast is sure to delight. Serve with a side of fruit for a wholesome, satisfying start to the day.
Low Carb Egg In a Hole Recipe
Whether you call it Egg in a Hole, Egg in a Basket or Egg in a Boat, this easy healthy breakfast is sure to delight. Serve with a side of fruit for a wholesome, satisfying start to the day.Servings 1Ingredients
- 1 slice Multigrain bread (You can use your favorite kind of bread)
- 1/4 cup Mince Kabab (You can get recipe from here )
- 1 teaspoon olive oil
- 1 whole egg
- few red pepper flakes
- a pinch of dried basil optional
- a pinch of salt
- Optional: shredded cheese I like cheddar
Instructions
- Take a thick slice of bread (I like the multigrain bread because of its texture and flavor, but you can use whole wheat or white bread).
- Cut the middle of the bread from the slice leaving a ½-inch (1 cm) border of crust.
- Stuff the bread slice hole with some Mince Kabab filling.
- Heat a frying pan over medium-high heat.
- Put your bread over it and cook on the mince side.
- Cover and let it cook until it is light golden, a couple minutes.
- Flip your bread slice.
- Now with a spatula or spoon make a hole inside of the bread.
- Then carefully crack your egg into the hole on top of the mince topping to make sure the egg does not spill over.
- Season with salt and red pepper and a sprinkle of basil.
- Cover the pan and Cook until the egg is pretty set on the bottom, another minute or so.
- Cook until the other side of the egg white is set but the middle is still runny.
- You can add some cheese.
- Transfer to a plate.
- Your Delicious Egg-in-a Hole is ready to eat.
- Enjoy!
Notes
Enjoy it with a cup of Lemongrass Tea. -
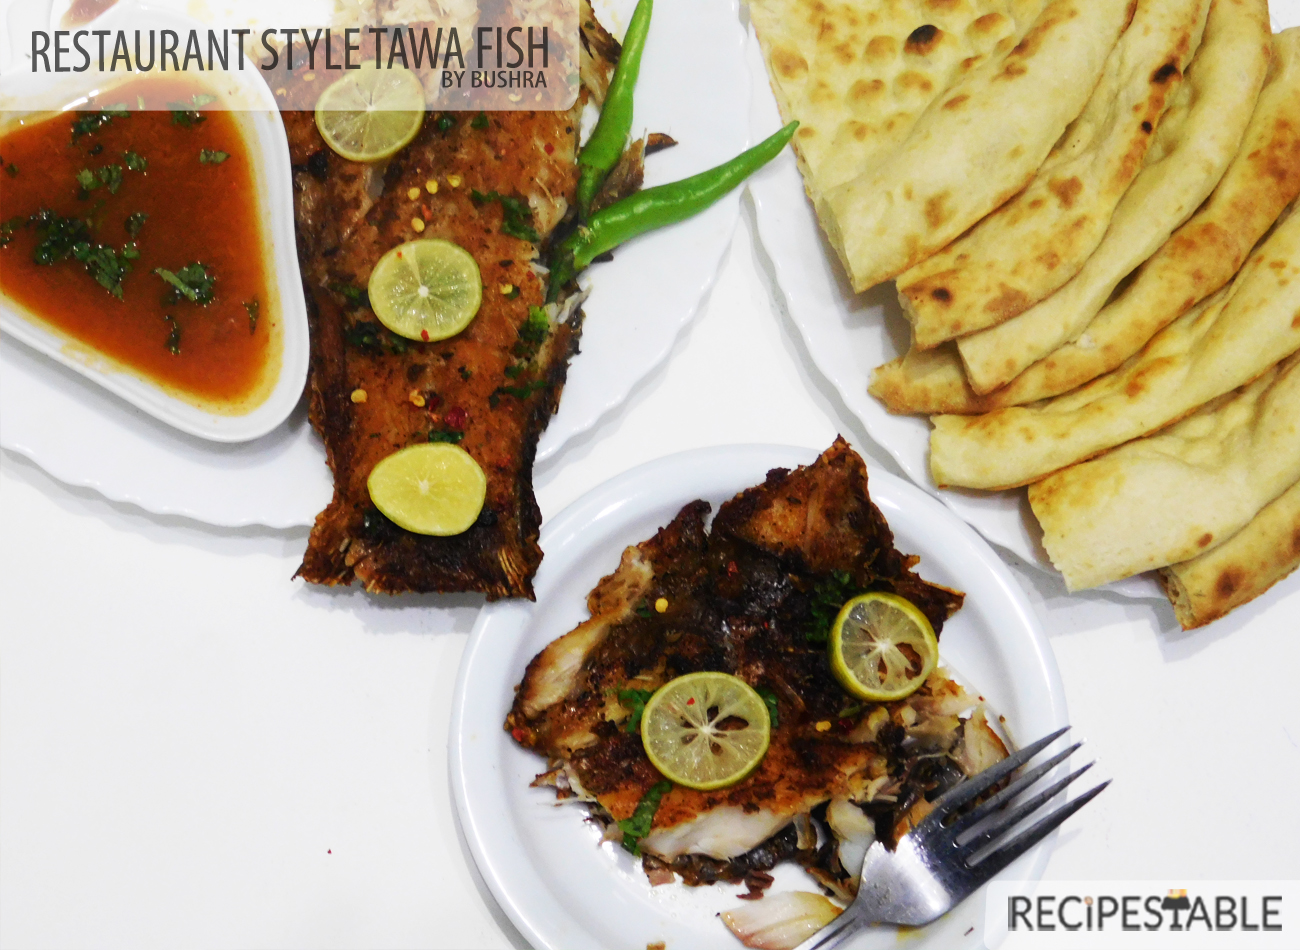
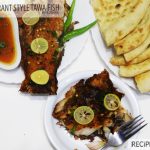
Restaurant Style Tawa Fish Recipe
A blast of heat in a griddle pan (tawa) and a basting of mustard oil does wonders for plain fish fillets. Give this Restaurant Style Tawa Fish Recipe a try, it’s cheaper to make at home and tastes so much better!
Restaurant Style Tawa Fish Recipe
A blast of heat in a griddle pan (tawa) and a basting of mustard oil does wonders for plain fish fillets. Give this Restaurant Style Tawa Fish Recipe a try, it’s cheaper to make at home and tastes so much better!Servings 6Ingredients
- 1-1/2 kg Fish Fillets
- 4 tbsp Lime Juice (Khatti)
- 2 tbsp Lemon Juice (limo)
- 1 tbsp ginger paste (adrak paste)
- 2 tbsp garlic paste (lehsan paste)
- 2 tbsp crushed red chili (Kutti Lal Mirch)
- 1 tbsp coriander powder (sukha Dhainya)
- 1 tbsp cumin seeds (crushed zeera)
- 1 tbsp all spice powder ( garam masala)
- 1/2 teaspoon turmeric powder (optional)
- 1/2 teaspoon carom seeds ( ajwain)
- salt to taste
- 2 tbsp plain flour
- 1 tbsp rice flour
- 1 tbsp water
- oil for shallow frying
- chaat masala for sprinkling
For Garnishing:
- Lemon Slices
Instructions
- Cut off the fish head off directly behind the gills, if desired.
- Now rinse he fish of, inside and out, in cool water then cut fish into halves, lengthwise.
- Pat fillets dry with a paper towel.
- Sprinkle lime juice and lemon juice over the fish.
- Put salt and ginger-garlic paste on the fish.
- In a small bowl, mix together the rice flour, plain flour, red chili, coriander powder, cumin powder, all spice powder, turmeric powder, carom seeds (ajwain) with 1 tablespoon water and make a smooth paste.
- Dab this paste onto fish and refrigerate for 6 hours or preferably overnight. Remove from the fridge and strain excess water.
- Heat a large griddle (tawa) or cast-iron pan over high heat.
- Remove from the fridge and strain excess water.
- Heat a large griddle over medium heat.
- When the pan is hot, add the mustard oil ( you can use any cooking oil).
- Put the fish on the griddle, skin side down (if applicable), laying them down away from your body.
- If fish fillets have skin, press down gently with a spatula for about 20 seconds to prevent curling.
- Lower heat to medium and let sizzle until fish is crispy, golden and caramelized around edges, about 5-7 minutes.
- Carefully flip fillets and add some mustard oil to the griddle.
- Tilt the griddle slightly to let the mustard oil pool at one end.
- Use a spoon to baste the fish with the mustard oil.
- Continue basting until golden all over and cooked through, 2-3 minutes more, depending on the thickness of your fish.
- Take it out in a serving platter when crispy and golden brown from outside and cooked from inside.
- Sprinkle chaat masala and lemon juice over it.
- Garnish with Lemon slices.
- Your Restaurant Style Tawa Fish is ready to eat. ENJOY!!
Notes
Serve hot with naan, Laccha onion, apricot chutney and lemon wedges to add more taste. -

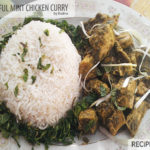
The Flavorful Mint Chicken Curry Recipe
The Flavorful Mint Chicken Curry Recipe
Servings 3Ingredients
- 500 gm boneless chicken breast
- 5 garlic cloves
- 1- inch piece of ginger
- 2-3 green chilies
- 1/2 cup plain yogurt
- 1/2 cup fresh mint leaves
- 1/4 cup fresh coriander leaves
- 1/2 teaspoon cumin powder
- 1/2 teaspoon coriander powder
- 1/4 teaspoon cayenne pepper optional
- salt to taste
- 1 teaspoon lemon juice
- 2 tablespoon cooking oil
Instructions
- Cut chicken breast into bite sized pieces.
- In a blender, Make a smooth paste of yogurt, mint leaves, coriander leaves, green chilies, ginger and garlic.
- Take it out in a mixing bowl, Add lemon juice, cumin powder, coriander powder, cayene powder and salt. Give it a good stir and get the chicken pieces coated evenly.
- Marinate chicken at least for 30 minutes to blend flavors.You can marinade the chicken for a few hours or even overnight. If you really are in a rush, you can even cook the chicken straight away
- Cover the bowl tightly with clingfilm.
- Heat oil in a deep wok or pan.
- Then add the marinated chicken along with the marination.
- Cook for 10 minutes on medium flame.
- Chicken will release lot of juices. So, after 10 minutes cook the chicken on its own juices for another 15 minutes or until it becomes tender.
- If curry becomes dry add a splash of water.
- Increase the flame and cook on high flame for 2-3 minutes until curry is thickened.
- Taste and adjust the seasoning and turn off the flame. (Do not over cook)
- Dish it out and Serve Mint Chicken Curry with Rice.
-

UNBELIEVABLY AWESOME BBQ CHICKEN PIZZA RECIPE
UNBELIEVABLY AWESOME BBQ CHICKEN PIZZA RECIPE
Ingredients
- 2 cups BBQ chicken chunks cooked
- 1 teaspoon extra-virgin olive oil plus more for brushing
- 1/2 pound prepared pizza dough , at room temperature
- 1/2 cup dark barbecue sauce
- 1/2 cup cheddar cheese grated
- 1 cup mozzarella cheese grated
- 1 small onion thinly sliced or cubed
- 1 small green bell pepper thinly sliced
- jalapeno for topping (optional)
- 1/2 teaspoon dried basil
- 1/2 teaspoon dried oregano
Instructions
- Cut the chicken chunks into small pieces.
- Heat the oil in a skillet over medium high heat.
- Add the chicken chunks and sauté until the edges begin to brown, about 10 minutes.
- Position racks in the upper third and middle of the oven.
- Place a pizza stone or inverted baking sheet on the top rack and preheat the oven to 180 degrees C for at least 20 minutes.
- Meanwhile, layout a sheet of parchment paper and brush with olive oil.
- Divide dough into two equal parts and transfer it onto a dry surface.
- Roll and shape the dough into a 9-inch triangle, stretching it with our hands as needed.
- Lightly brush the dough with olive oil.
- Spread about the 1/4 cup of BBQ sauce over each pizza.
- Sprinkle the shredded cheddar cheese atop the sauce.
- Top with cooked chicken chunks.
- For a pleasantly crisp touch, spread the uncooked onions and green bell pepper over the chicken mixture. If you prefer onions that are completely cooked, sauté them all with the chicken.
- Sprinkle Mozzarella cheese oregano and dried basil over them.
- Top with jalapoens.
- Bake the pizzas for about 15-18 minutes, until the crust(s) are golden and cheese melts and the topping is bubbling.
- Remove from the oven, and cut into pieces.
- Unbelieveably Awesome BBQ Chicken Pizza is ready to serve.
- Garnish with snipped fresh basil, if desired.
- Serve warm or hot!
Notes
Serve with some fresh salad and your favorite dipping sauce. -

Finger Lickin’ Butter Chicken Pasta Recipe
Take the classic Pakistani favorite Butter Chicken (Murgh Makhani), and pair it with delicious pasta to create this ultimate weeknight meal. It is SUPER delicious, rich, creamy and addictive and is very easy to make. Sprinkle some extra chilies to add a kick and treat your family to a lip-smacking dinner that will be ready in just under 30 minutes.
Finger Lickin’ Butter Chicken Pasta Recipe
Take the classic Pakistani favorite Butter Chicken (Murgh Makhani), and pair it with delicious pasta to create this ultimate weeknight meal. It is SUPER delicious, rich, creamy and addictive and is very easy to make. Sprinkle some extra chilies to add a kick and treat your family to a lip-smacking dinner that will be ready in just under 30 minutes.Servings 4Ingredients
- 2-1/2 cups Butter chicken curry for recipe click here
- 1 packet (about 200 gm ) noodles or pasta of your choice
- 2 green chilies thinly sliced ( optional)
- few Coriander leaves for garnishing
- red pepper flakes
- salt to taste
Instructions
- Bring a pot of salted water to boil.
- Add pasta and cook for 7-10 minutes or until al dente.
- Drain and keep aside.
- Meanwhiile, prepare butter chicken according to the recipe instructions (for reciep click here).
- Add pasta to the prepared butter chicken(murgh makhani).
- Toss to coat evenly.
- Heat through.
- Sprinkle red pepper flakes over it.
- Garnish with green chilies and coriander leaves.
- Dish it out.
- Finger Linkin’ Butter Chicken is ready to serve.
-
The Surprising Superfruit That Will Jazz Up Your Snack Routine
What if I told you about a super fruit that you can find at almost any corner store, that won’t break the bank, and you can toss straight in your bag as you head out the door? Not only does this wonder food actually exist, but chances are you’ve eaten it before—many times.
Yes, I’m talking about…apples.
You read that right. The simple fruit you’ve eaten since the days when mom packed your lunch deserves a second look—and a starring role in your snack routine. In addition to being sweet and delicious, apples serve up many serious, science-backed health benefits. Especially when it comes to red-skinned varieties, which are loaded with antioxidant compounds. They’re also irresistibly crisp and juicy.
Here are five reasons why they make the best between-meal nibble, along with some satisfying ways to serve them.
1. They’ll curb your cravings without spiking your blood sugar.
If apples came with a label it might read: “Keeps your sweet tooth happy—without making your body feel crappy!”
A little corny, maybe, but it’s true.
While those cookies might seem like a good idea mid-afternoon when you hit a slump, an hour later your energy is lagging again and you’re addicted for another treat. That’s not the case with apples, whose natural sugars come packaged with fiber to slow your body’s absorption of the sugars to give you energy that lasts.2. They’ll fill you up for real.
Speaking of fiber, apples have more than almost any other fruit, according to the Mayo Clinic. A medium apple with the skin packs nearly 5g (around 20% of what you need in a day). And that roughage digests slowly and takes up lots of space in your stomach—so you fill up quickly and stay satisfied.
3. And speaking of weight, they might help you lose a little.
In addition to the ability to fight junky cravings and fill you up, apples are packed with polyphenols that research suggests could fight fat. Add it all up, and it’s no wonder that making these fruits your go-to snack could help you reach your weight-loss goals. In fact, one study published in the journal Appetite found that overweight women who added three apples a day to their usual diet lost an average of 2 pounds over 10 weeks.
4. They’ll keep the doctor away (really).
Diets rich in high-fiber foods like fruits, vegetables, whole grains, and beans are tied to a lower risk for heart disease, type 2 diabetes, and even breast and colorectal cancers.
And apples are a particularly good choice, especially the skins, contain polyphenols and antioxidants that are known for protecting against oxidative stress associated with chronic diseases. Red apples, in particular, boast a range of health-boosting compounds such as hydroxycinnamates, flavanols, and anthocyanins, research shows.
In other words? It’s more than worth your while to have one a day.5. They’re the little black dress of your snack stash.
Since apples come naturally packaged and can sit at room temperature, they’re the snack that works any place, anytime. And when it comes to picking healthy snacks, that matters a whole lot. Apples are not only incredibly delicious, but they are also the perfect size for snacking so there are no leftovers and they keep incredibly well in the fridge so there is less spoilage.
Best of all? You’ve got sky-high versatility when it comes to serving ideas. While sometimes a crunchy apple, plain and simple, is all you need to hit the spot, pairing your apple with some protein and healthy fat makes it more filling—and keeps things interesting on the flavor front. I am a big fan of crunchy juicy apples, their balanced, tangy-sweet flavor goes with just about everything.
Interested in adding more apples into your snack routine? Here are some tasty ideas to try:
To discover more apple recipe click here!!
-

Quick and Easy Ten Minute Naan Pizza Recipe
Yes, This naan bread pizza takes just 10 minutes to make from start to finish – a great quick and easy weeknight meal the whole family will love!
Quick and Easy Ten Minute Naan Pizza Recipe
Yes, This naan bread pizza takes just 10 minutes to make from start to finish – a great quick and easy weeknight meal the whole family will love!Servings 2Ingredients
- 2 Naan Breads
- 1/2 cup grilled chicken cut into strips
- 4 tbsp pizza sauce
- 1/2 small onion thinly sliced
- 1/2 small green pepper thinly sliced
- 4 black olives sliced
- 2 tbsp sweet corn optional
- 1/4 cup mozzarella cheese grated
- 1/4 cup Cheddar cheese
- 1 tsp dried oregano
- 1 tsp dried basil
- 1 tsp olive oil
- red pepper flakes to taste
Instructions
- Preheat the oven to 200º C.
- Place naan breads on a lined baking sheet. Sprinkle some olive oil on them.
- Spread Pizza Sauce over the naan breads. Sprinkle some oregano and basil.
- Then top with the grilled chicken, veggies (like onion, green pepper, sweet corn, olives).
- Sprinkle mozzarella and cheddar cheese over them.
- Cook in the oven for about 5-7 minutes or so, until the cheese is melted and bubbling.
- Sprinkle over some basil leaves (if you like) and serve hot.
Notes
Serve with your favorite dipping sauce. -
Chocolate Buzz Milkshake Recipe
Chocolate Buzz Milkshake Recipe
Servings 2Calories 237kcalIngredients
- 5 ice cubes
- 1 fluid ounce espresso coffee
- 1 cup milk
- 3/4 cup chocolate ice cream
- 2 tbsp chocolate syrup
- 2 tsp instant hot chocolate mix
Instructions
- Place milk, ice cubes and espresso in a blender. Process until smooth.
- Stop blender. Add ice cream, chocolate powder and chocolate syrup. Process again until well blended.
- Pour into 2 tall glasses. Top with chocolate syrup. Delicious Chocolate Buzz Milkshake is ready now. Serve immediately.
Notes
Serve immediately. -

Simple Chicken Biryani recipe
THIS IS AN EASY BIRYANI WHICH MADE WITH CHICKEN, RICE, SPICES AND CHICKEN STOCK. PAKISTANI/INDIAN SPICES CREATES AN AWESOME AND TEMPTING FLAVOR AND AROMA IN BIRYANI. GOES WELL WITH RAITA OR SALAD.
Simple Chicken Biryani recipe
THIS IS AN EASY BIRYANI WHICH MADE WITH CHICKEN, RICE, SPICES AND CHICKEN STOCK. PAKISTANI/INDIAN SPICES CREATES AN AWESOME AND TEMPTING FLAVOR AND AROMA IN BIRYANI. GOES WELL WITH RAITA OR SALAD.Servings 8Ingredients
- 750 gm boneless chicken breasts, cut into large pieces
- 3-1/2 cup chicken stock
- 1-1/2 cups basmati rice, washed and soaked
- 1 onion, sliced thinly
- 2 garlic cloves crushed
- 2 tbsp olive oil
- 1 tbsp grated ginger
- 1 tbsp garam masala
- 2 tsp ground cumin
- 1/2 tsp ground turmeric
- fresh coriander
Instructions
- Place chicken in a large bowl. Add cumin, garam masala and turmeric. Toss to coat.
- Heat 1 tablespoon olive oil in a deep skillet or dutch oven. Place chicken to the skillet.
- Cook for 5 minutes or until lightly browned.
- Take it out in a dish and set aside.
- Heat remaining oil in the same skillet.
- Saute onion, ginger and garlic in hot oil.
- Cook for 3-4 minutes or until lightly golden.
- Add rice and cook for 2 minutes. Return chicken to the skillet.
- Add chicken stock and gently stir. Bring to a boil then reduce heat to low.
- Cover with a lid and simmer for 25-30 minutes or until the rice is tender and all water dries up. Let stand for 10 minutes.
- Sprinkle with coriander. Simple Chicken Biryani is ready to serve.
Notes
Serve with Cumin yogurt or salad. -
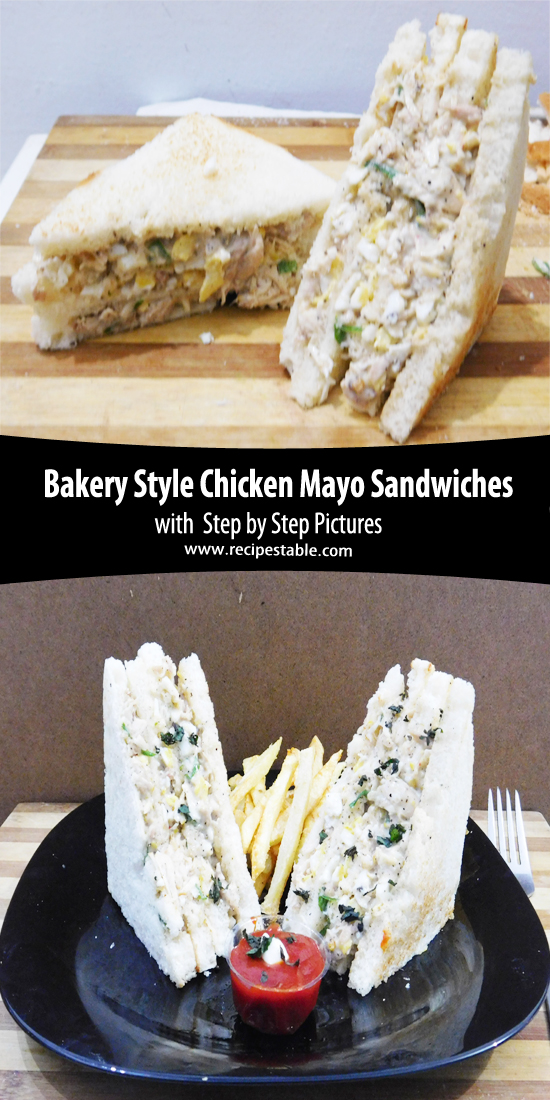
Bakery Style Chicken Mayo Sandwiches
Bakery Style Chicken Mayo Sandwiches
Servings 2Ingredients
- 4 bread slices
- 1/2 cup boiled Chicken (shredded)
- 2 lettuce leaves
- 4 tablespoon mayonnaise
- salt and pepper to taste
Instructions
- In a large bowl, combine together the shredded chicken and mayonnaise.
- Now add lettuce leaves.
- Season with salt and pepper.
- Mix until well combined.
- Toast bread slices and cut out their edges if you want otherwise you can use as it is.
- Place a slice bread in a clean-surface and spread the chicken mayo filling on it.
- After filling, take another bread slice and put it on the above of filling.
- Repeat again and make three layers withit.
- After that, put the forth one slice of bread on the third layer of filling and lightly press to complete the sandwich.
- Now Secure with wooden picks and cut the sandwich diagonally and following the same process prepare rest of the Sandwiches.
- Your Bakery Style Chicken Mayonnaise sandwiches are ready to serve. ENJOY!!
Notes
Serving Suggestions:
You can serve with french fries and your favorite dipping sauce.