Tag: 30 minute meals

  • Creamy Cucumber Pasta Salad Recipe

    Creamy Cucumber Pasta Salad Recipe

    This post may contain affiliate links. Please read my disclosure policy.

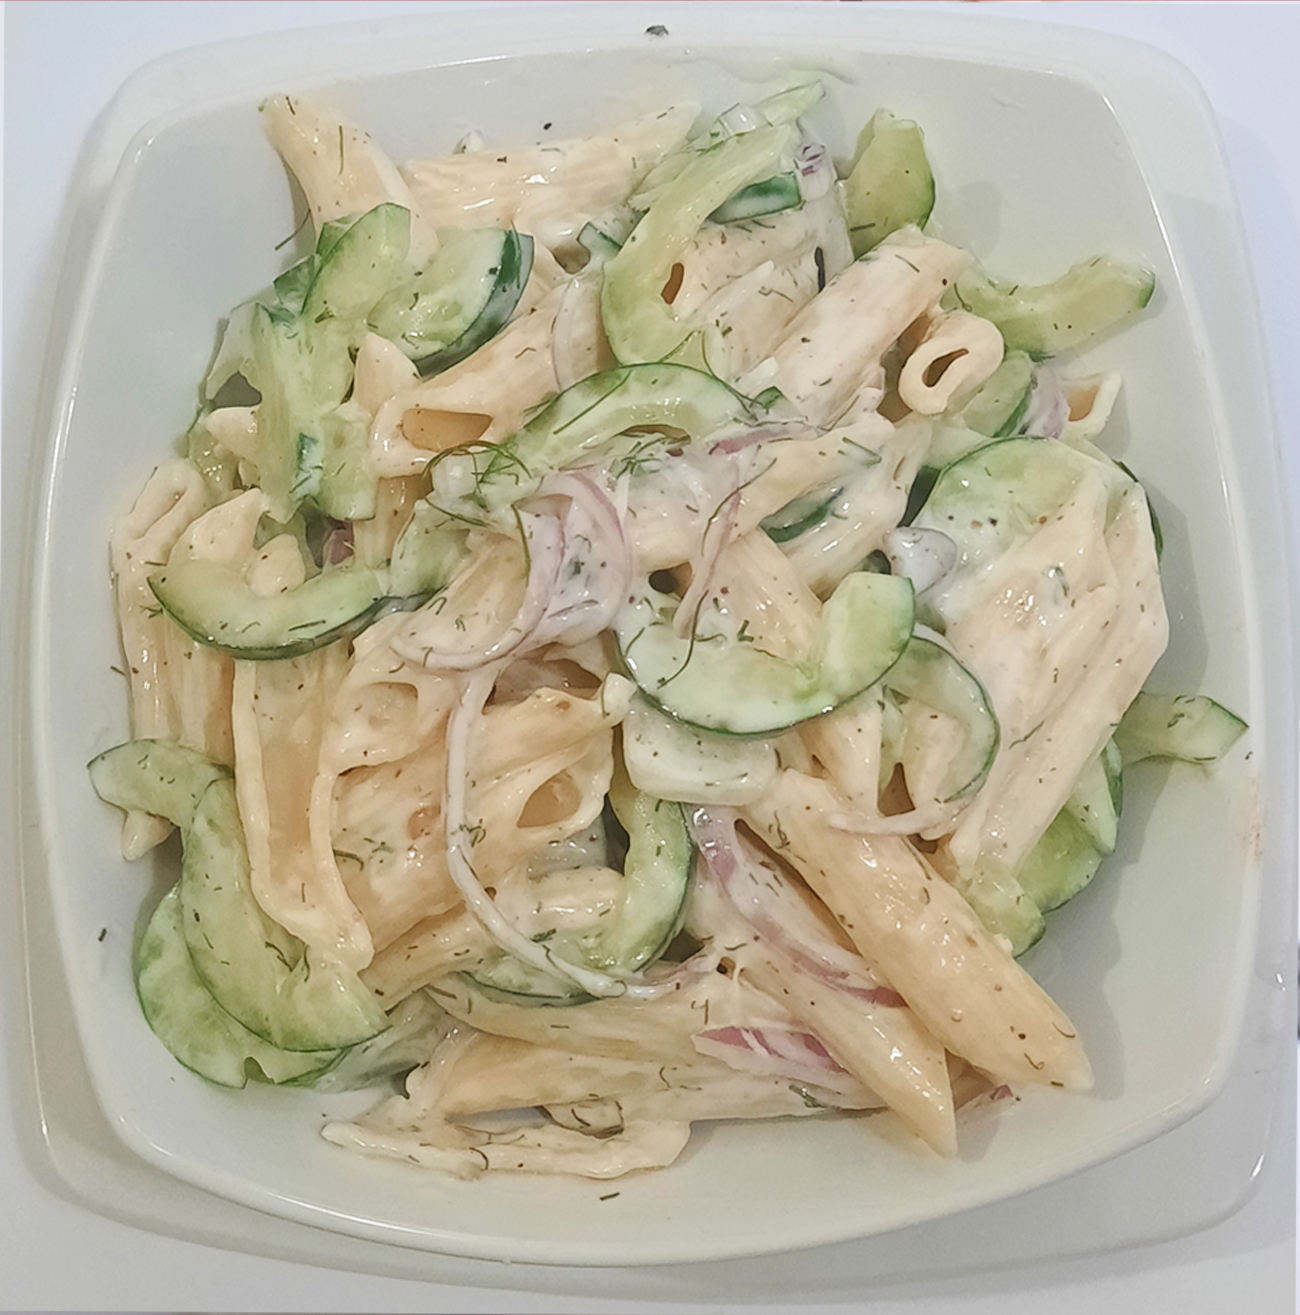
    This quick and easy Creamy Cucumber Pasta Salad combines a creamy dressing – like a mixture of Greek yogurt or sour cream – with freshly sliced cucumbers and red onions along with plenty of chopped dill! It’s the perfect unique pasta salad recipe for your next barbecue party.
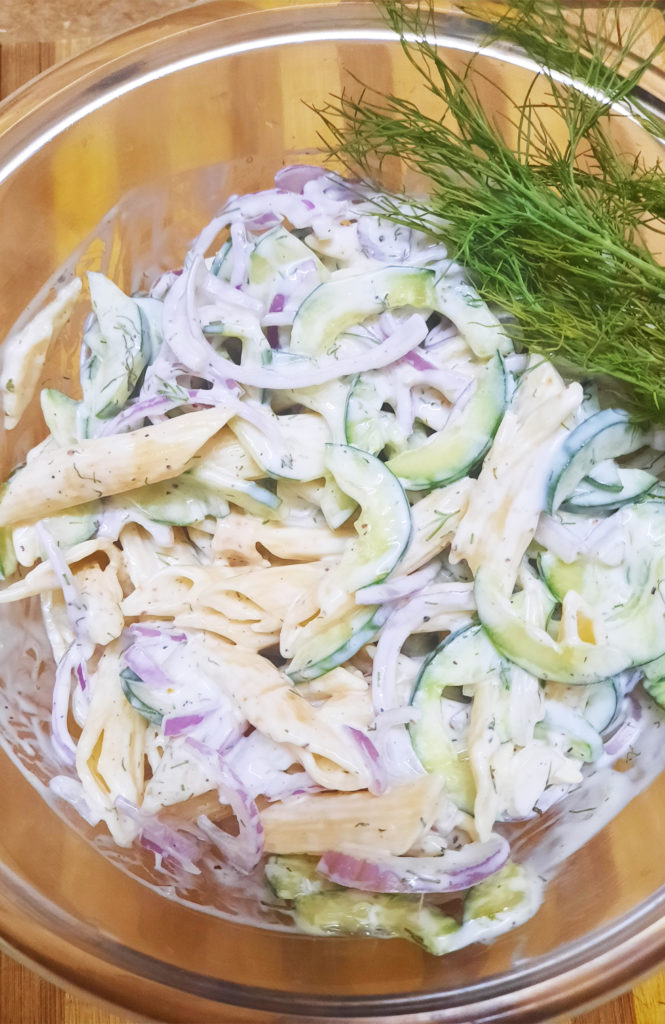
    This quick and easy Creamy Cucumber Pasta Salad combines a creamy dressing - like a mixture of Greek yogurt or sour cream - with freshly sliced cucumbers and red onions along with plenty of chopped dill! It's the perfect unique pasta salad recipe for your next backyard barbecue.
    Creamy Cucumber Pasta Salad Recipe

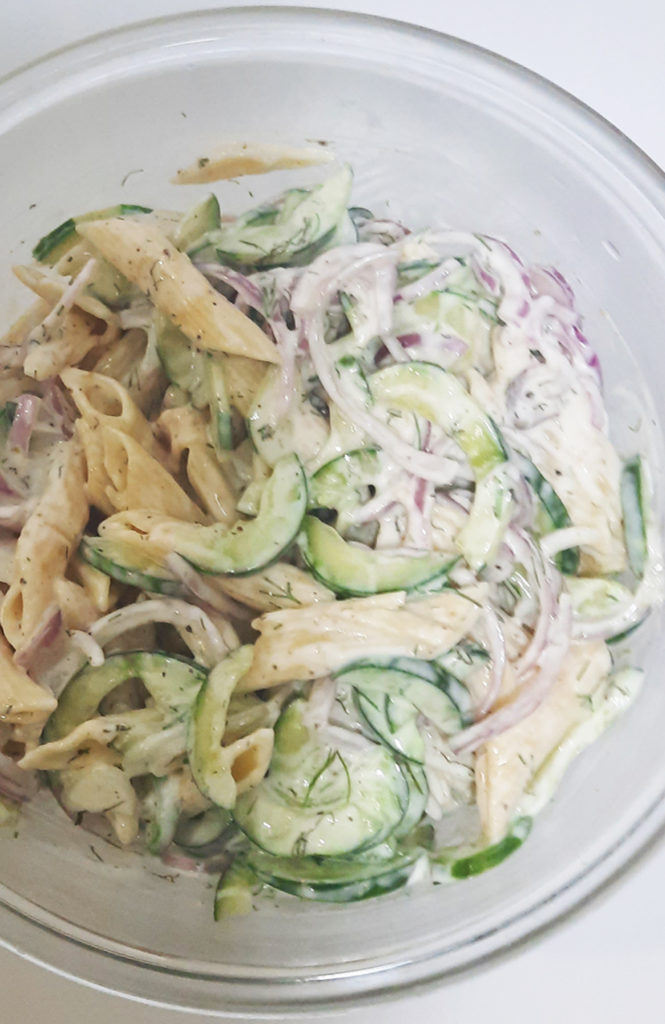
    Loaded with tender pasta, crisp juicy cucumbers, fresh dill and red onion, this dish will be the hit of every get together. And it comes together within just few minutes and it’s incredibly delicious! The dressing in this salad doesn’t have a lot of ingredients, but that’s really the beauty of this recipe! The fresh Greek yogurt adds a little zip to the dressing while the dill adds summery freshness complementing the cucumber and cooked pasta perfectly! 
    Creamy Cucumber Pasta Salad Recipe
    Creamy Cucumber Pasta Salad Recipe

    If you have access to fresh dill, it really makes a huge difference in this salad.

    Ingredients in Creamy Cucumber Pasta Salad Recipe?

    • Pasta: penne or rotini pasta
    • Cucumbers: fresh long English cucumbers work the best for this recipe
    • Onion: red onion (can sub white for less of a “bite”)
    • Dressing: sour cream or Greek yogurt and vinegar
    • Herb: fresh dill
    • Spices: salt and pepper

    Ist Gather Your Equipment’s:

    How to Make this Creamy Cucumber Pasta Salad:

    This is such an easy recipe, y’all. Seriously. Yes to Summer recipes that don’t require hardly any effort!

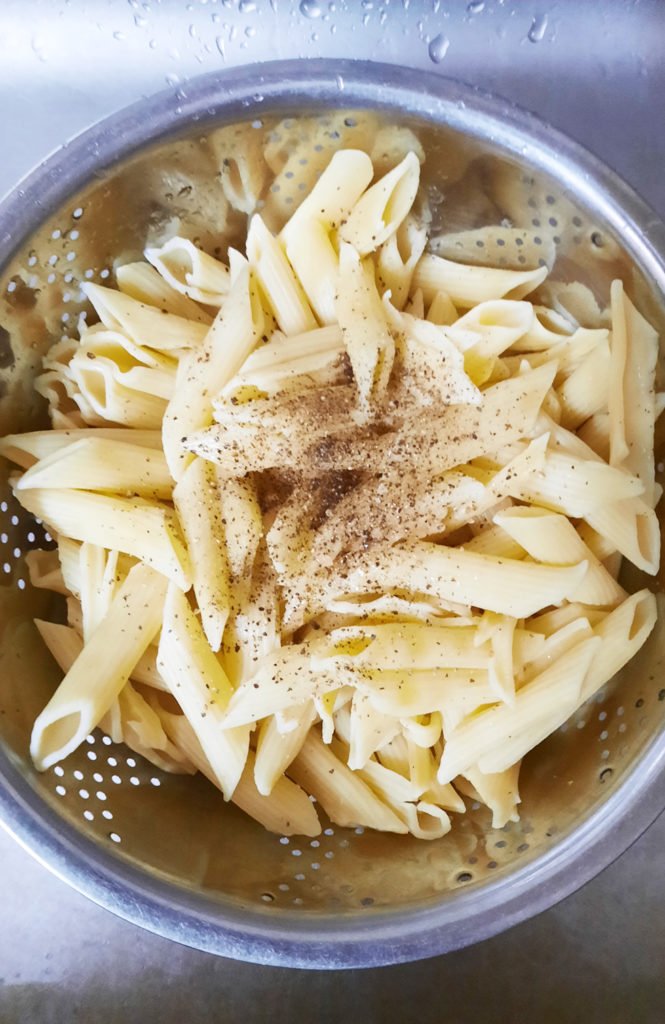
    1. First, begin by cooking your pasta according to the box instructions! Make sure to salt your water and cook the pasta until al dente. Once it’s done, let it cool! If desired, rinse cold water over top to stop the cooking and speed up the cooling process.
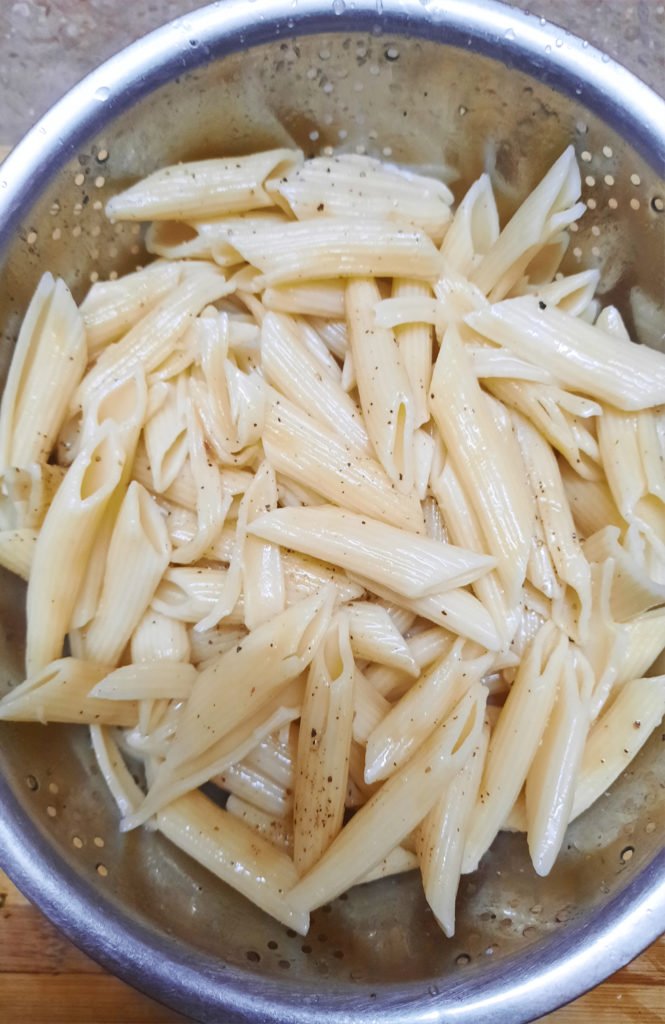
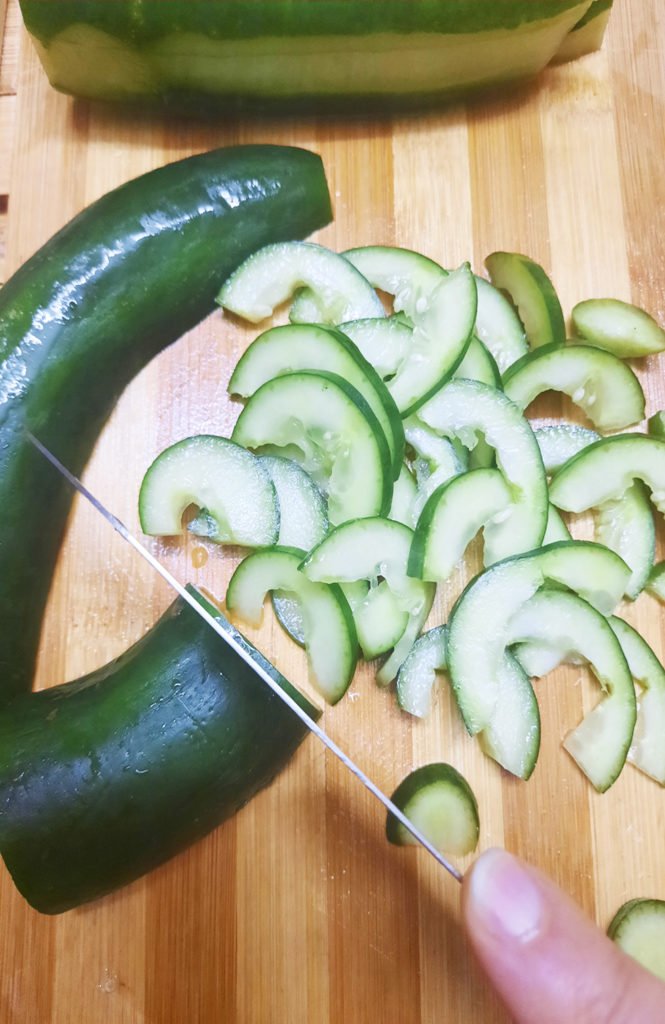
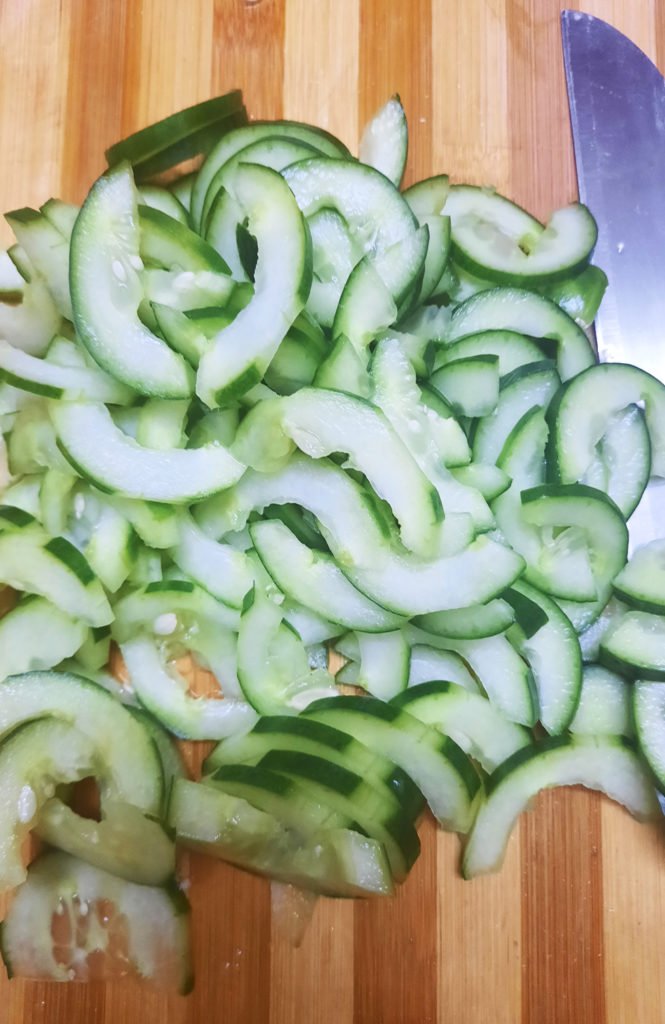
    2. While the pasta is cooling off, slice up your cucumber! Slice it in half lengthwise and then slice very thin slices of cucumber.
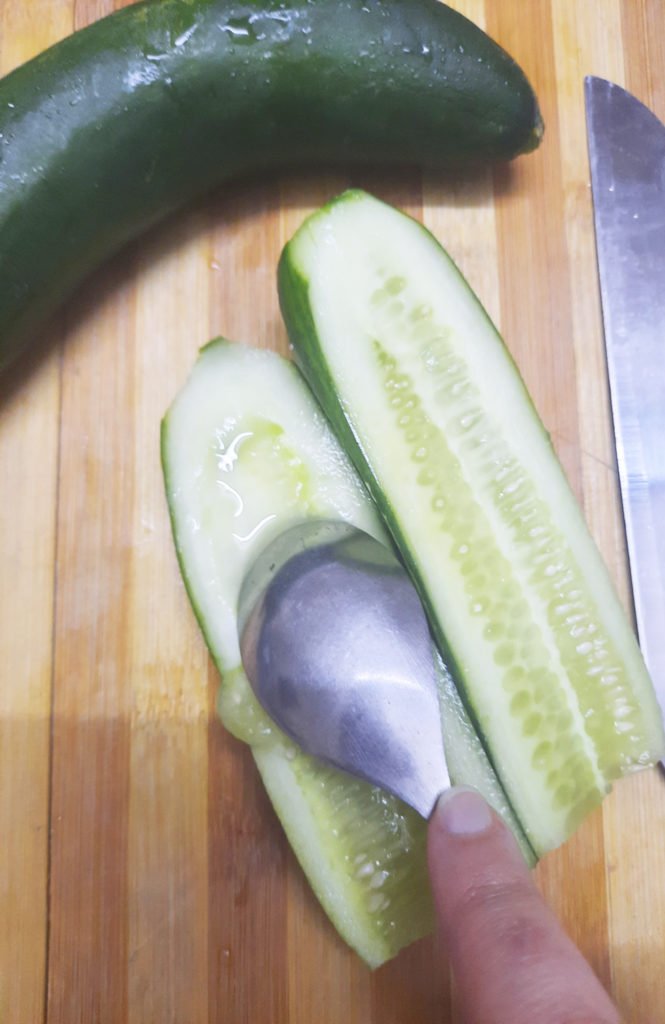
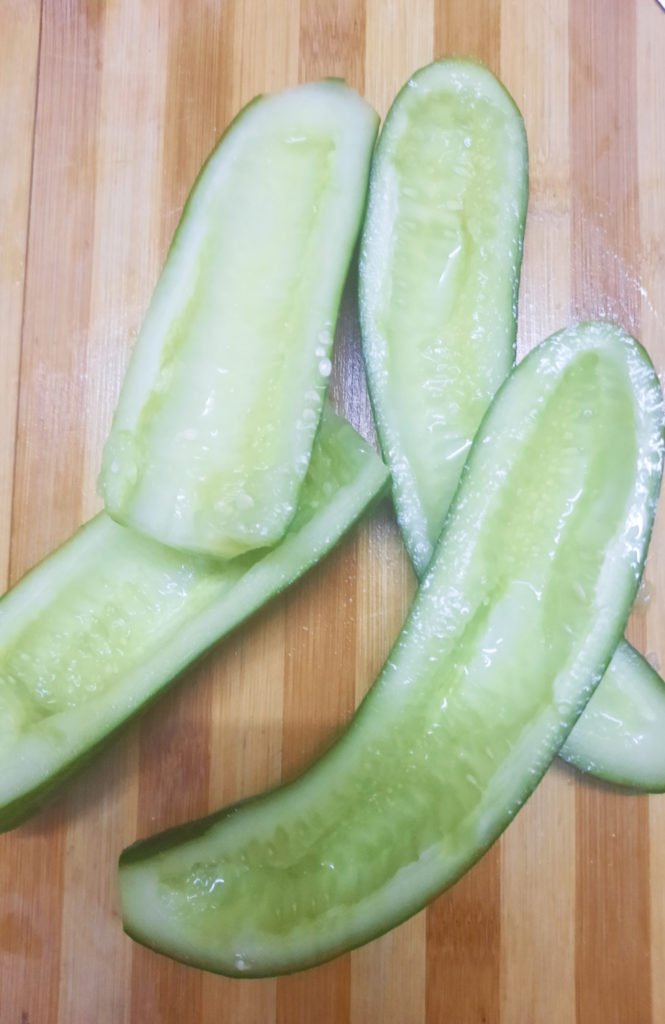
    3. Do the same thing with the red onion! Thin slices go a long way here, folks! While it’s not required, soaking the onions in cold water for a few minutes takes just a little bit of bite out of them.  .
    4. Next, mix together the delicious Greek yogurt dill dressing! Combine the Greek yogurt with the dill, vinegar, salt (i added the pink salt) and pepper. Mix until deliciously thick and creamy. Set this aside.
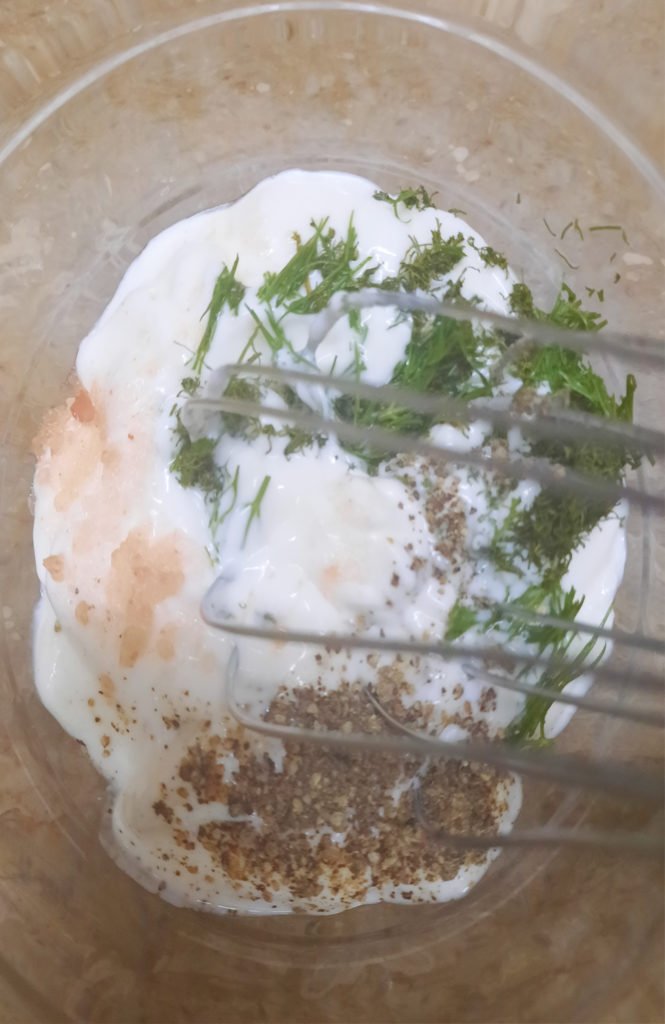
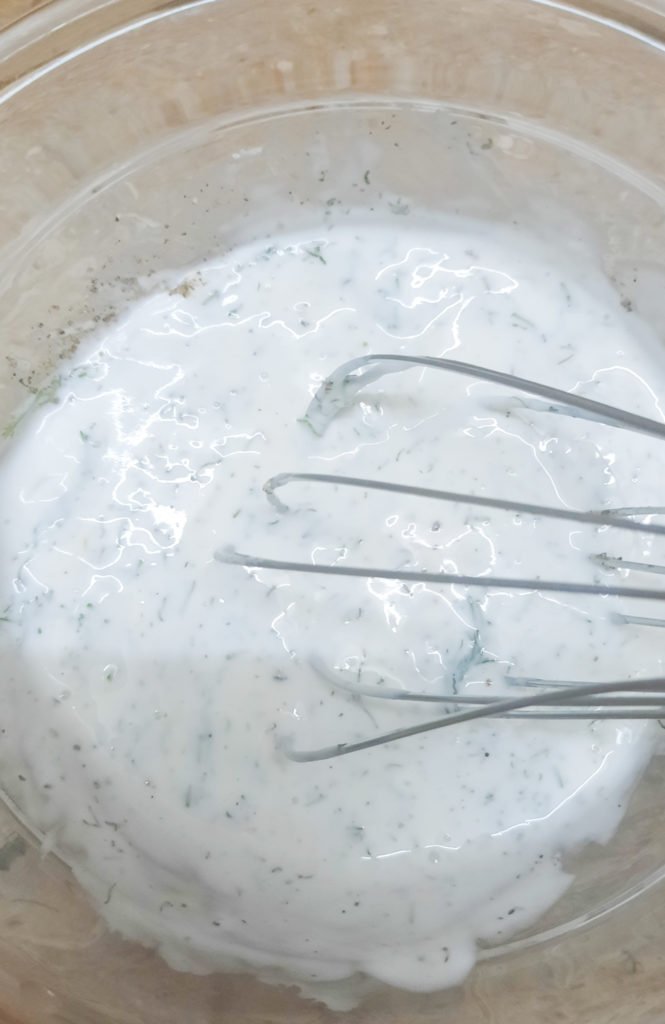
    5. In a large bowl, add your cooled off pasta. On top, add your cucumbers, onions and all of the Greek yogurt dressing! Mix together gently until fully combined.
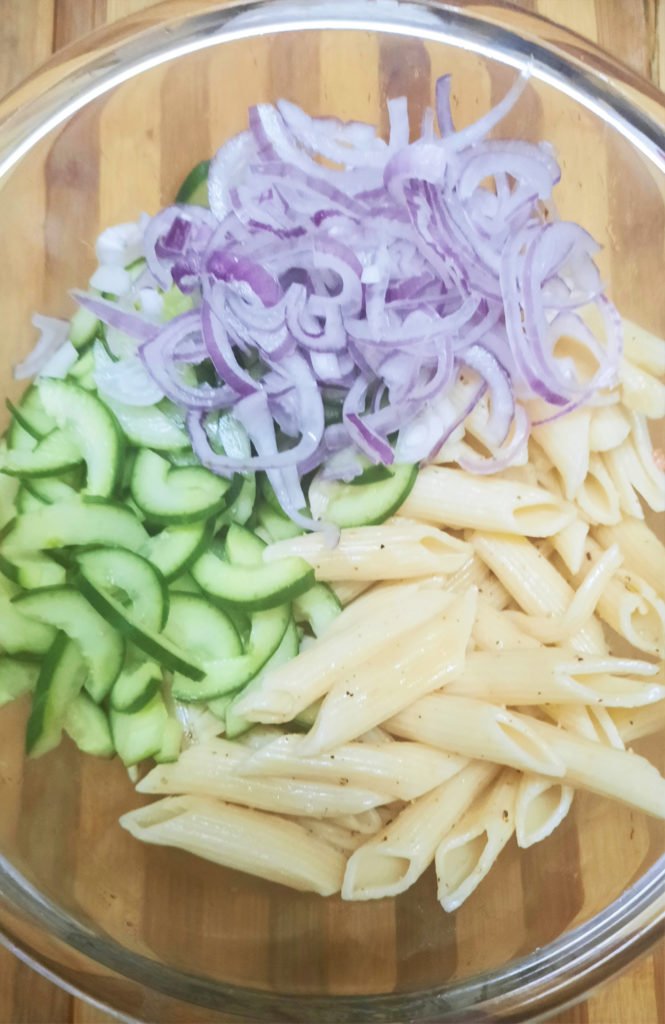
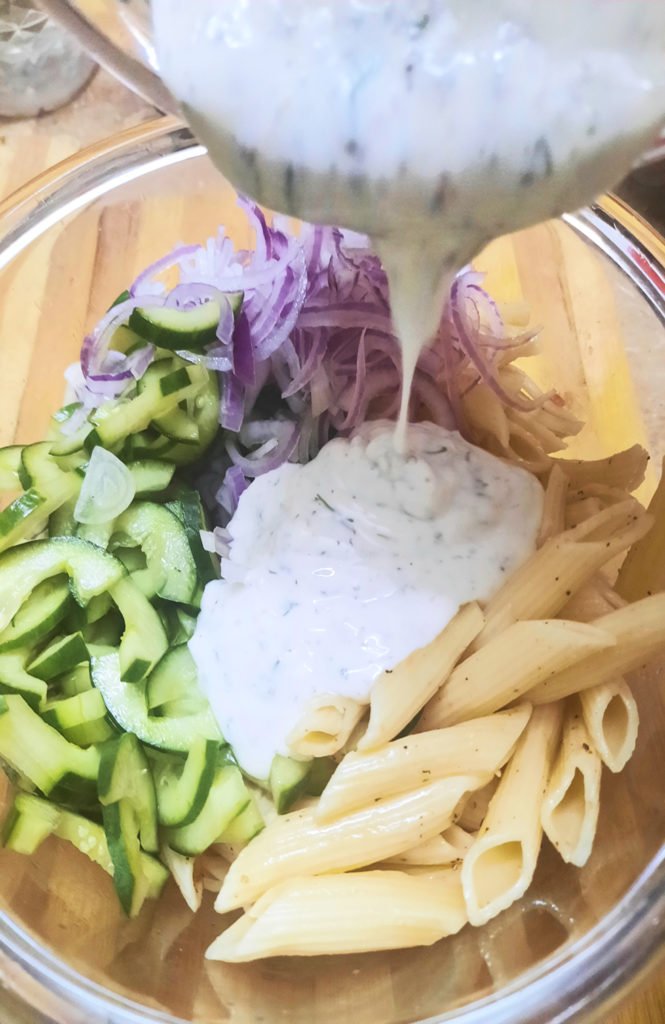
    6. Taste and adjust the seasoning if necessary. I always love garnishing with a big pinch of extra dill – it makes it taste extra fresh and adds an amazing pop of flavor.
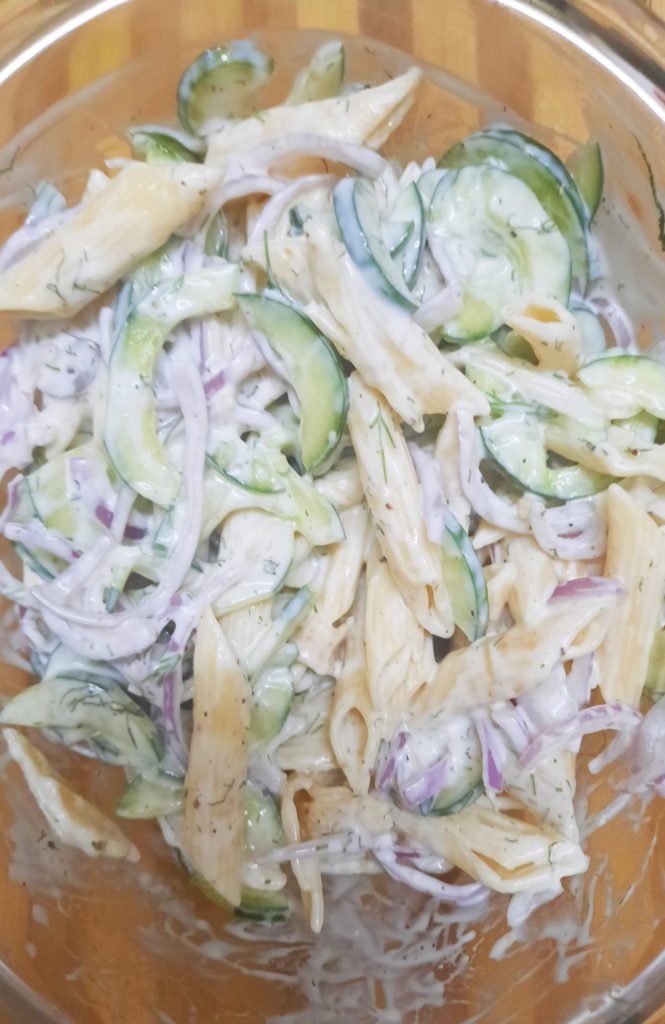
    7. Let it sit in the fridge for about 20-30 minutes to make sure all of the flavors can melt together and it can stay cold! Enjoy when chilled and eat up! 🙂


    Note: If possible try to toss this at least 1 hour before serving to allow the flavors to blend.

    Bismillah let’s get started.
    Check it out The Creamy Cucumber Pasta Salad Recipe and printable version here!!

    Creamy Cucumber Pasta Salad Recipe
    This quick and easy Creamy Cucumber Pasta Salad combines a creamy dressing – like a mixture of Greek yogurt or sour cream – with freshly sliced cucumbers and red onions along with plenty of chopped dill! It’s the perfect unique pasta salad recipe for your next backyard barbecue.
    Keyword 30 minutes meals, cucumber, greek yogurt, Pasta, pasta salad, salad, summer salad, veggie salad
    Prep Time 10 minutes
    Cook Time 10 minutes
    Total Time 20 minutes
    Servings 6
    Author Bushra Waheed

    Ingredients

    For Pasta Salad:

    • ½ pound medium sized pasta such as penne or rotini
    • 2 large English cucumber thinly sliced
    • 1 medium red onion thinly sliced

    For Salad Dressing:

    • 1 cup sour cream or whole fat plain Greek yogurt can substitute mayo if desired
    • 2 tbsp. fresh chopped dill
    • 2 tsp vinegar
    • 1/2 tsp salt
    • 1/2 tsp pepper

    For Garnishing

    • fresh dill

    Instructions

    • Cook pasta according to package directions, until al dente. Drain and drizzle with oil and sprinkle with a couple pinches of salt and pepper. Toss to coat evenly and let it cool.
    • While the pasta is cooling, Thinly slice onion and place in a bowl of cold water. (see note)
    • Slice the cucumber in half lengthwise and remove seeds using a spoon then dice it into thin slices.

    To Make The Salad Dressing:

    • In a small bowl, mix the sour cream or Greek yogurt along with the vinegar, fresh dill, salt and pepper. Mix until fully combined. Taste and adjust seasoning if needed.

    To Make The Creamy Cucumber Pasta Salad:

    • In a large bowl, add the cooled rigatoni pasta. Top with the fresh sliced cucumber and red onion.
    • Pour dressing over pasta and toss to combine.
    • Place in the refrigerator for 20-30 minutes to let the pasta salad cool off and for the flavors to meld together.
    • When serving, if desired, add a large handful of dill on top for garnish and an extra pop of flavor!
    • Delicious Creamy Cucumber Pasta Salad is ready to serve. Enjoy!

    Notes

    Soaking the onions in cold water is optional but takes a bit of the “bite” out of the onion.
    Serving Suggestions:
    Goes great with BBQ Chicken Wings.

    Want more Pasta Salad Inspiration? 

    Here are some other Pasta Salad recipes on my blog:

    Hope you guys loved this one and are having a great Summer. Let me know what your favorite garden produce is this time of year in the comments below! 

    Pin it For Later

    Put your own spin on it. And lemme know how it turns out and do take a few seconds to rate it! I would love to see your recreations so tag me on instagram @recipestable or Facebook (Recipestable) or on Twitter so I can see how lovely yours turn out.
  • Simple & Refreshing Apple Orange Salad Recipe (Healthy & Easy!)

    Simple & Refreshing Apple Orange Salad Recipe (Healthy & Easy!)

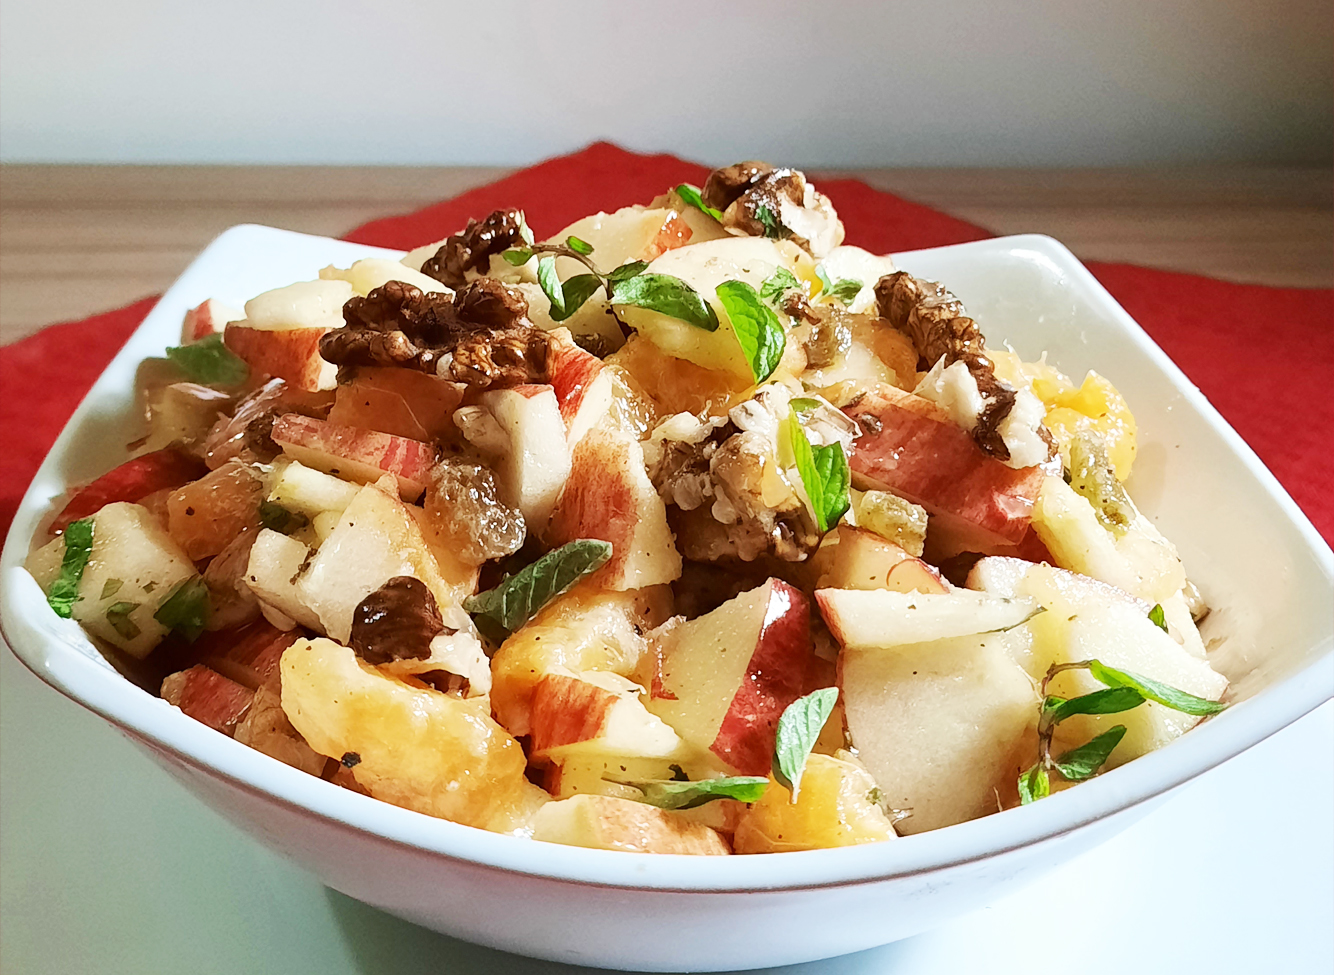
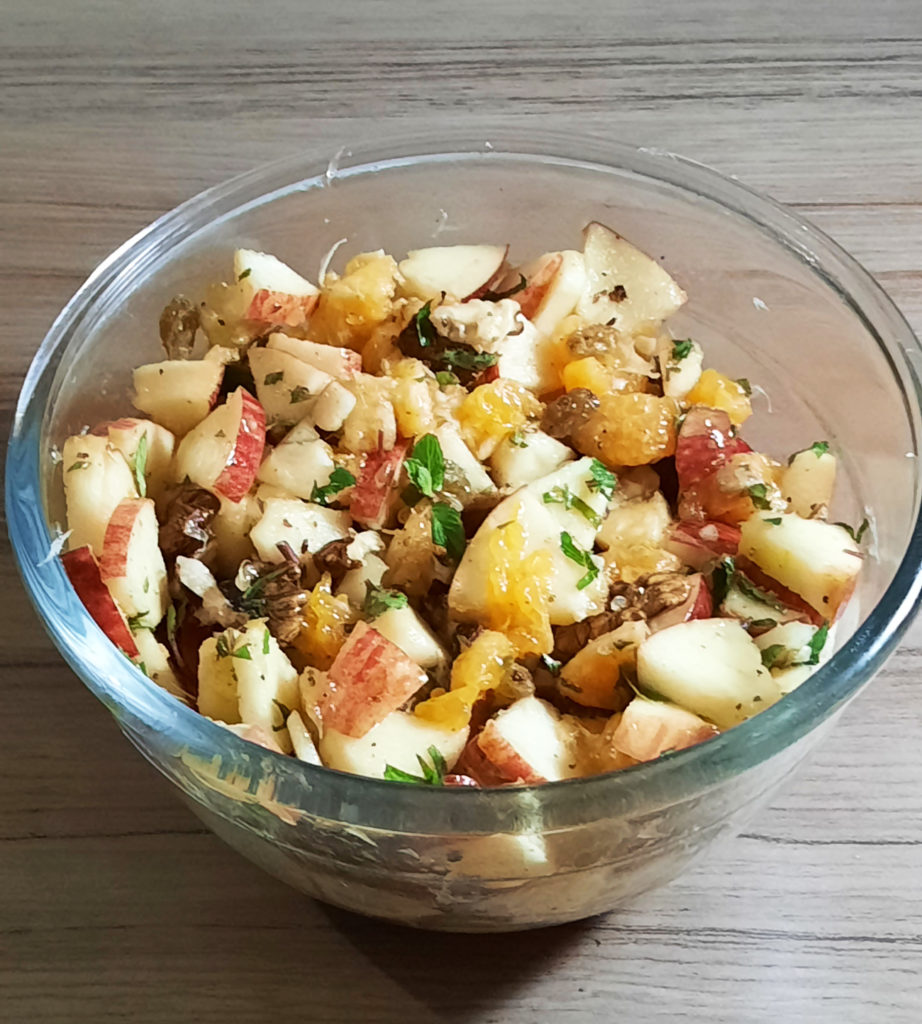
    A light, refreshing Apple and Orange Salad recipe loaded with apples, oranges, raisins and walnuts with a flavorful dressing – perfect as an appetizer or entree!The flavors of the apples, oranges, walnuts and raisins are so clean and fresh. It never fails to please.

    Feel-Good Apple and Orange Salad Recipe
    Feel-Good Apple and Orange Salad Recipe

    This year, I decided to try more salad recipes to stick to healthy diet. This was the first one on the list and it turned out excellent. Although I had it for lunch, I don’t know if I would recommend this for a main course, but definitely a great dinner salad.

    Feel-Good Apple and Orange Salad Recipe

    Ingredients in Apple and Orange Salad Recipe?

    With only few ingredients, it’s quick and easy to make. The only tricky part is cutting the oranges.

    1. Fruit: Apples & Oranges
    2. Dry Fruit: Raisins & Walnuts
    3. For Garnishing: Mint Leaves
    4. For dressing: Vinegar, Olive Oil, Orange or mosambi juice salt and pepper

    Feel-Good Apple and Orange Salad Recipe
    Feel-Good Apple and Orange Salad Recipe

    How to Make this Apple and Orange Salad:

    This apple and orange salad is super easy to make. To make this salad, simply:

    1. Prepare the salad dressing: To make the salad dressing recipe, just whisk all of the ingredients together in a bowl (or shake them up in a mason jar) until combined.
    2. Fruit Cutting: Next you need to peel an orange and cut it in small pieces. Then Core the apples and cut them in small pieces as well, equal to the orange pieces.
    3. Toss all of your salad ingredients together: Add the oranges and apples to the bowl with raisins and add about 2/3 of a cup of roughly chopped walnuts to the salad. Drizzle evenly with the dressing, then toss lightly until combined and voila!!
    4. And…serve!  Sprinkle fresh mint leaves and enjoy!  🙂
    Feel-Good Apple and Orange Salad Recipe

    Other variations to this Apple and Orange Salad recipe

    1. You can add Pecan or roasted almonds in place of Walnuts.
    2. You can use ground Cinnamon to spice up your Salad.
    3. You can also add some honey to sweeten your Salad as per your taste.
    Feel-Good Apple and Orange Salad Recipe
    Apple and Orange Salad Recipe

    Bismillah let’s get started.
    Check it out The Simple & Refreshing Apple Orange Salad Recipe and printable version here!!

    Apple Orange Salad Recipe (Healthy & Easy!)

    A light, refreshing Apple and Orange Salad loaded with apples, oranges, raisins and walnuts with a flavorful dressing – perfect as an appetizer or entree!
    Keyword 30 minutes meals, apple, clean eating, fruit, fruit salad, healthy, Lunch, orange, Ramadan, salad, walnuts
    Prep Time 15 minutes
    Total Time 15 minutes
    Servings 4
    Author Bushra Waheed

    Ingredients

    For Salad Dressing:

    • 1 tbsp olive oil
    • 1 tbsp vinegar
    • 4 tbsp orange juice freshly squeezed
    • 1/4 tsp salt
    • 1/4 tsp black pepper freshly ground

    For Salad:

    • 2 oranges peeled, seeded, sectioned and chopped
    • 3 red apples cored and cut into small pieces
    • 1/2 cup raisins
    • 1/2 cup walnuts roughly chopped
    • few mint leaves chopped (optional)

    Instructions

    • In a large bowl, whisk the olive oil, vinegar, orange juice, salt and black pepper.
    • Set it aside.
    • Peel the orange and cut it into small pieces.
    • Core the apples and cut them in small pieces.
    • Add the oranges, apples, walnuts to the bowl with raisins.
    • Toss everything together very well.
    • Adjust the seasoning.
    • If desired, garnish with fresh mint leaves.
    • Delicious Apple and Orange Salad is ready to serve.
    • Enjoy!

    Notes

    Want more Salad Inspiration? 

    If you’re looking for more side salad inspiration, here are a few more of my faves:

    Hope that you all enjoy this one as much as we have!  Enjoy:)

    Pin It For Later

    Feel-Good Apple and Orange Salad Recipe
    Feel-Good Apple and Orange Salad Recipe

    What are your favorite salads? Leave me a comment below to inspire my next salad recipe!

  • Lamb Corn Fritters Recipe

    Lamb Corn Fritters Recipe

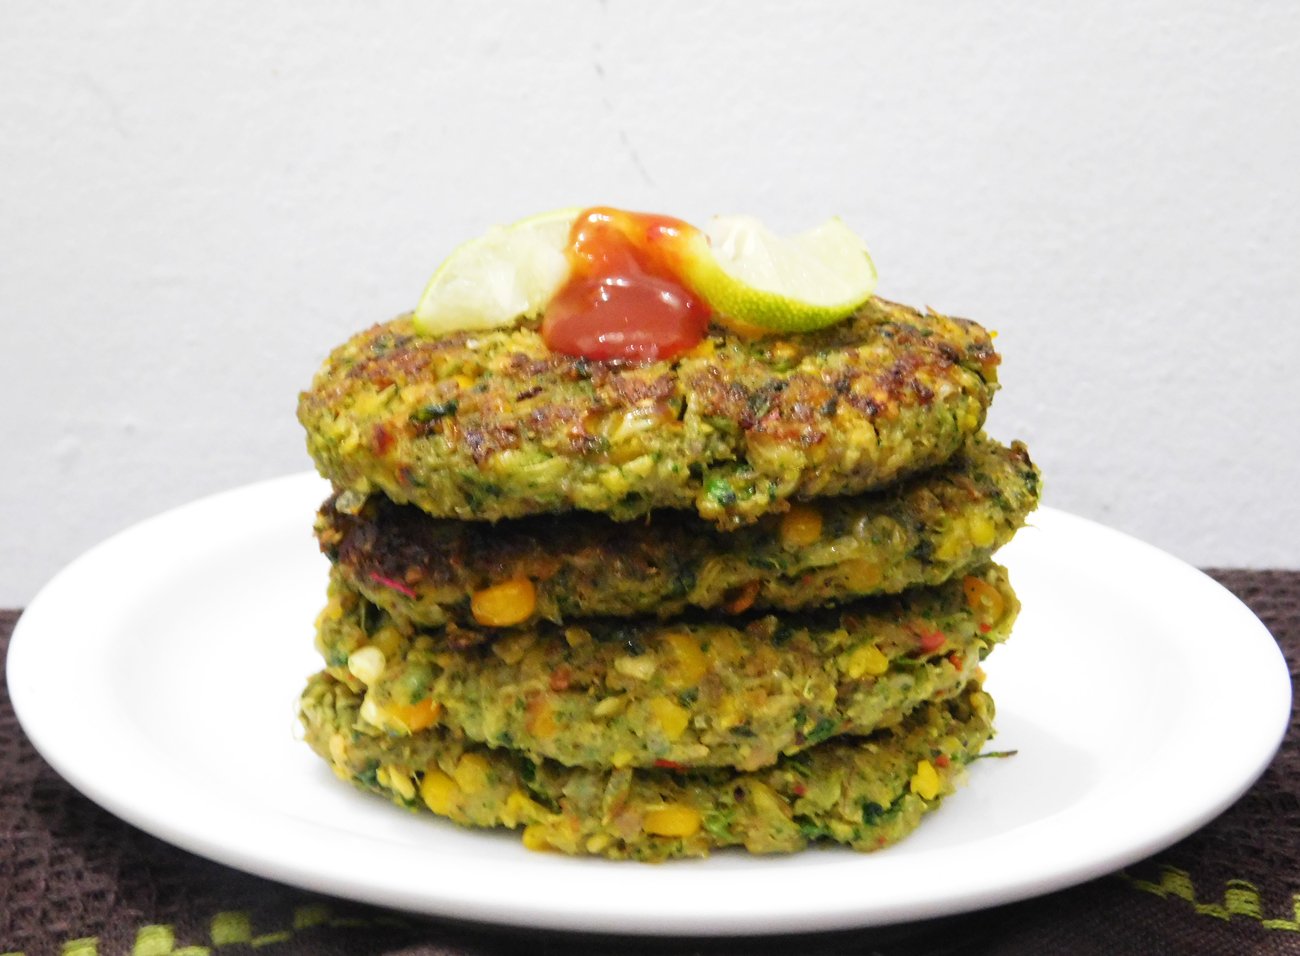
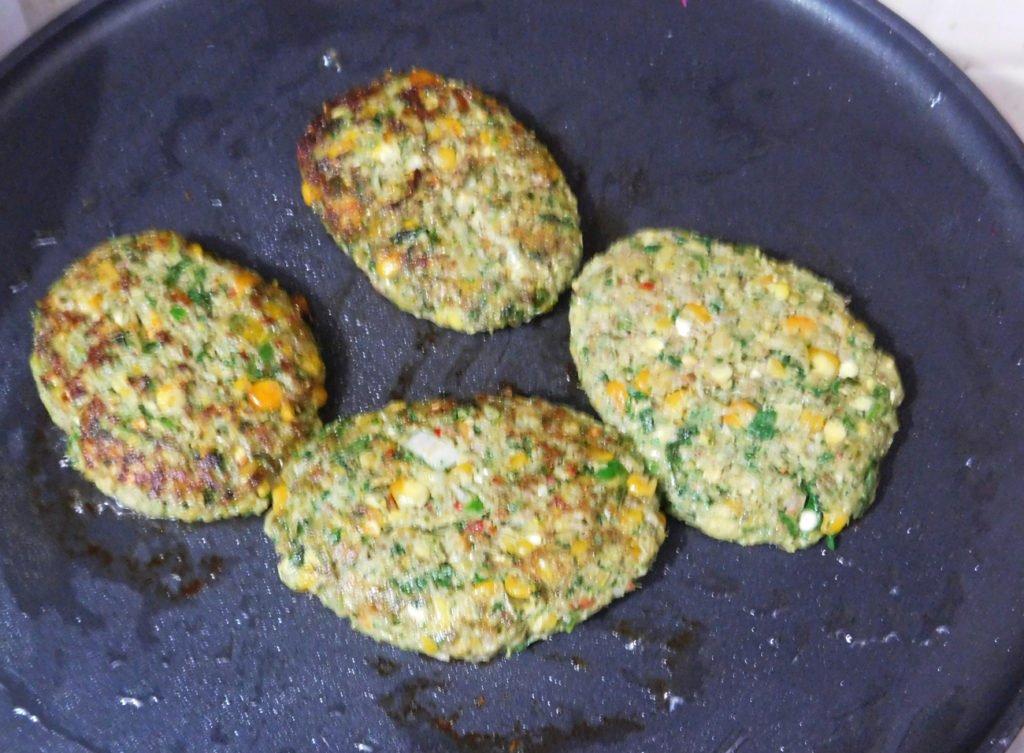
    Imagine if you will that a lamb meat patty married a corn fritter and they had babies = Lamb corn Fritters. I’m not sure why I hadn’t thought of this sooner. They are healthier than regular lamb fritters; being half meat and half veggie and they are super juicy and flavorful.

    Lamb Corn Fritters Recipe

    Here’s a healthy recipe for Lamb Corn Fritters – without deep frying! Because nobody likes soggy fritters. And nobody wants to deal with a vat of oil tonight! Dinner really doesn’t get any easier than this! These Lamb Corn Fritters are so easy, you can practically whip up these juicy fritters in no time!

    These fritters are ideal to make with fresh corn cut off the cob, but can be made with canned or frozen corn. Serve for breakfast, lunch, dinner!

    Lamb Corn Fritters Recipe
    Lamb Corn Fritters Recipe

    What you need to make really great, Lamb Corn Fritters

    Here’s what you need to make these Lamb Corn fritters:

    Ground Lamb: I like to grind my lamb at a ratio of about 80% lean. I feel this brings out the most flavor. The best places to buy fresh ground lamb is your local butcher shop. If you want to use lamb, ask your butcher to grind it for you or, to make your own ground lamb, start with a lean cut. You can also use lean ground beef or turkey instead.
    Corn: as noted above, fresh is better for both flavor and crispiness. But canned and frozen work too, you just need to make an effort to dry it out as much as you can.
    Egg: egg to bind the meat and corns. It will help to get mince to stick together better.
    Ricotta Cheese: – for a good hit of savory flavor AND to make the fritters extra juicy and flavorful!
    Green Masala: Green onion, green chilies and coriander – for a hit of freshness.
    Seasoning: salt, black pepper and red pepper flakes (my fav)
    Olive oil: to sauté

    Lamb Corn Fritters Recipe

    How to make Lamb Corn Fritters

    And here’s how to make them.

    1. Mixing: Place lamb mince and corn in a bowl. Then add 1 lb fresh ground lamb. 1 egg, finely sliced green chilies, green onions, fresh coriander, salt, black pepper, red pepper and 1 cup ricotta cheese. Mix until well combined. Let it rest for 15 minutes.
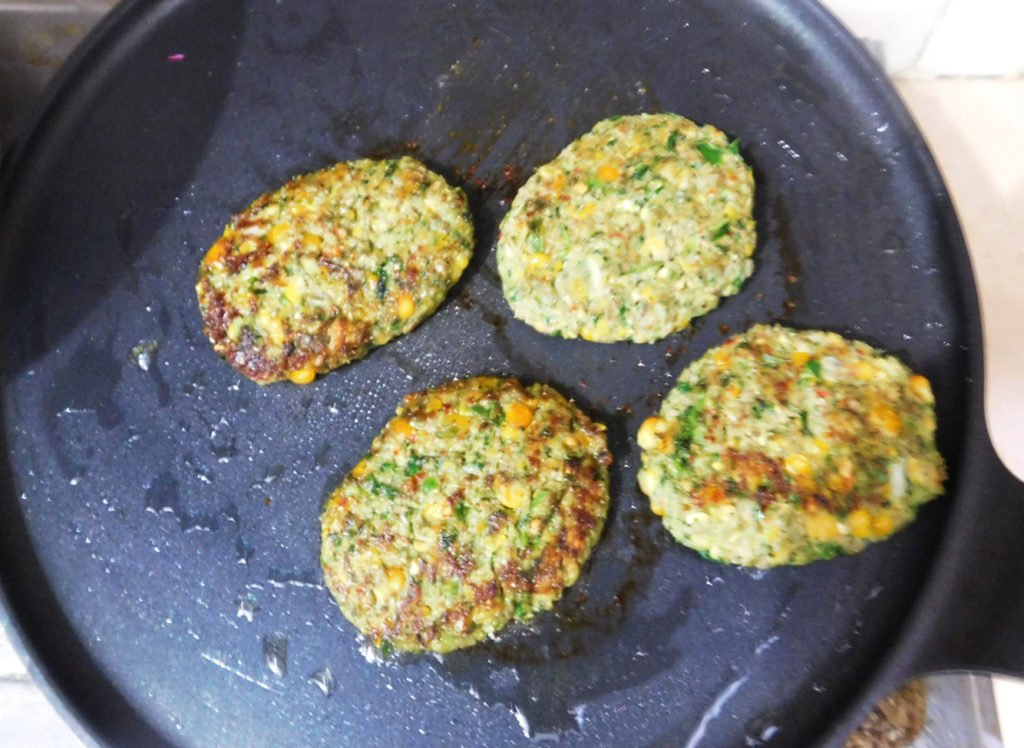
    2. Cooking: Heat a large non-stick skillet over medium heat and add 2 Tbsp. extra light olive oil. Place a heaping tablespoon of the mixture into your hand and form a oval or round shaped patty about 1/3-inch thick. Cook over medium heat uncovered for 5-7 minutes, then flip, cover and cook for another 5 minutes more or until meat cooked through. Add more oil to the pan as needed for subsequent batches.
    3. The fritters take a good 12-15 minutes to cook so they’re golden on the outside and for the raw meat to cook through (remember, these are fritters so they are not very thick).
    4. Pro Tip: You can use an ice cream scooper with a lever to scoop the batter into the pan. Then flatten using a greased spatula! But don’t crowd the skillet, adding more oil to pan if required.
    Lamb Corn Fritters Recipe

    How to serve corn fritters

    Corn fritters is one of those rare foods that truly spans the breakfast-lunch-dinner spectrum! Here’s how to serve it.

    Though having suggested those various ways to serve it, the reality is that you will want to snatch them fresh off the stove, before you’ve even had a chance to plate them up properly. And that’s totally ok too! – Bushra

    Lamb Corn Fritters Recipe

    Bismillah let’s get started.
    Check it out The Lamb Corn Fritters Recipe and printable version here!!

    Want more Fritters recipes? 

    If you’re looking for more fritters inspiration, here are a few more of my faves:

    Hope that you all enjoy this one as much as we have!  Cheers!

    HUNGRY FOR MORE? Subscribe to my newsletter and follow along on FacebookPinterest and Instagram for all of the latest updates.

    Pin it For Later

    Lamb Corn Fritters Recie
  • Best Ever Roasted Lamb Burgers Recipe

    Best Ever Roasted Lamb Burgers Recipe

    Do something different on burger night…take it to another level ! If you’ve made roast lamb but don’t know what to do with the leftovers, then make this best Ever Roasted Lamb Burgers Recipe. This burger is next-level!

    Best Ever Roasted Lamb Burgers Recipe
    Best Ever Roasted Lamb Burgers Recipe

    Who said that roasted lamb is just a one-hit wonder, right? You can pretty much reuse the leftovers from a roasted lamb dinner for a couple or more days in the week. There are plenty of fantastic ways to revamp leftover roast and give them delicious, new life! The simplest way to revamp leftover roast is to make tasty Roasted Lamb Burgers!

    In essence, some of the leftover roasted lamb might get a bit dry if you don’t use the leftovers immediately. So shoving those pieces of meat into a burger with a rich sauce is the perfect solution. With this roasted lamb burger recipe, you’ll feel like you’re having a cosy Sunday meal any day of the week you want.

    Best Ever Roasted Lamb Burgers Recipe
    Best Ever Roasted Lamb Burgers Recipe

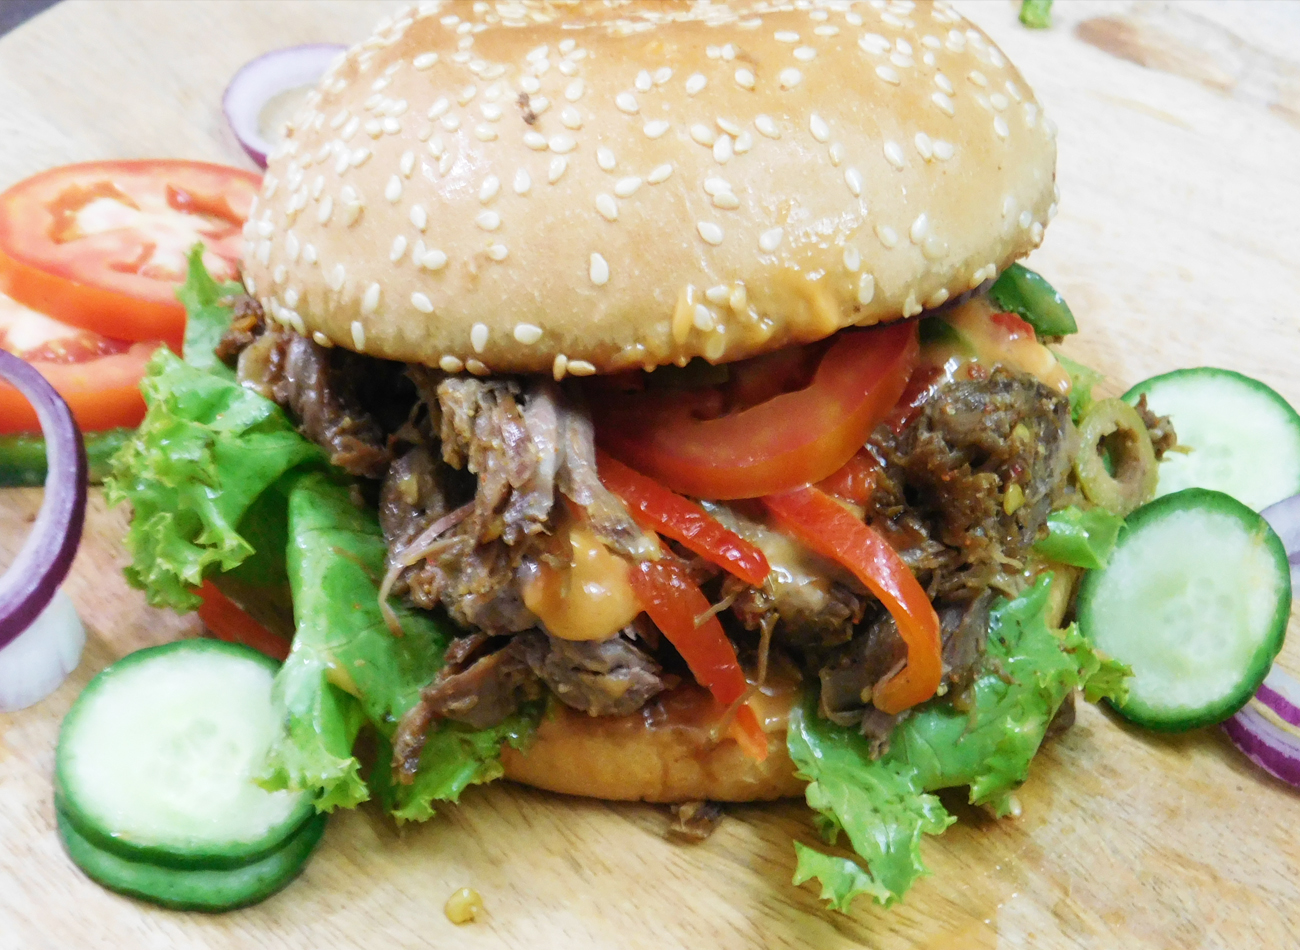
    There’s nothing more satisfying than making a delicious roasted lamb burger. You know the kind….fluffy bun topped with a juicy meat that’s piled high in flavorful toppings?

    Best Ever Roasted Lamb Burgers Recipe
    Best Ever Roasted Lamb Burgers Recipe

    Ingredients in Roasted Lamb Burgers?

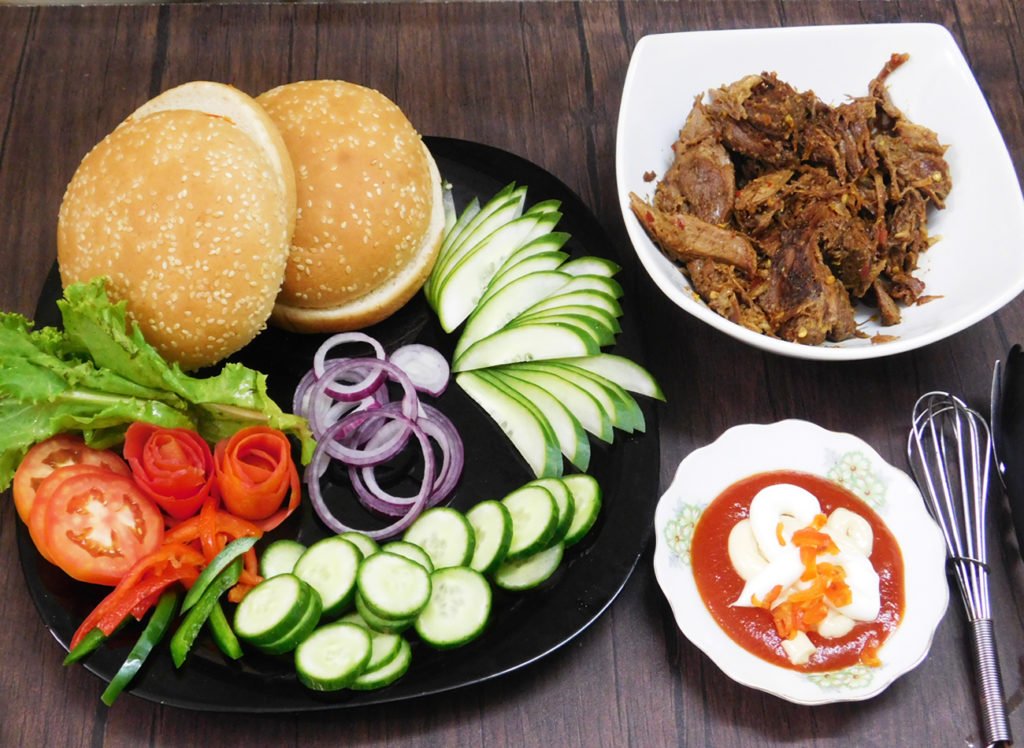
    Take your burger night to the next level with homemade lamb burgers! Not only are these simple to make (they require nothing more than leftover roasted lamb, burger buns, sauce and salad leaves), but the topping possibilities are endless, ensuring a little something for every member of your family!

    Best Ever Roasted Lamb Burgers Recipe
    That’s all you need to make this Best Ever Roasted Lamb Burgers ! Surprisingly simple ?

    This Best Ever Roasted Lamb Burgers Recipe is the EASIEST way to transform your leftover roast into a hearty, scrumptious breakfast/brunch sandwich recipe the next day. Experiment with different sauces or fillings and put your own twist on these burgers. Just make sure that you guard it well if you happen to take it to work. It’s a total standout burger and other colleagues will be eyeing it. Yes, it’s that good!

    How do you make Roasted Lamb Burgers?

    Best Ever Roasted Lamb Burgers Recipe
    Best Ever Roasted Lamb Burgers Recipe

    Dry meat isn’t going to make this roasted lamb burger particularly appetizing. Sure, gravy can fix it to an extent, but not really. Your tender, juicy, succulent meat roast from the previous day quickly turns dry and insipid the next day as you reheat it, and that’s enough to ruin a great burger. So here’s the secret to keeping that lamb roast juicy the following day as well – steam the leftover roast in the oven so that the meat stays tender and juicy without drying up!!

    Gently reheating the lamb roast wrapped in foil or parchment paper is a simple way to ensure that your leftover lamb roast tastes just as good as it did the previous day. These Best Ever Roasted Lamb Burgers are juicy, flavorful and super easy to make. Unexpected, yet super homey and familiar!  You’ll love every bite! Be sure to grab my tips below.

    Best Ever Roasted Lamb Burgers Recipe
    Best Ever Roasted Lamb Burgers Recipe

    What To Serve With Roasted Lamb Burgers?

    These roasted lamb burgers don’t require a whole lot else to serve along, but if you’re stuck for what to serve alongside your roasted and pulled masterpiece? Don’t worry… here’s some delicious recipes for a little divine inspiration:

    • Crunchy Pickled Kachumber Salad– a sumptuous side dish that’s incredibly easy to whip up, pickled salad take minutes to make and taste amazing
    • Smiley Face Fries – serve these wonderful smiley face fries alongside your roasted classic burger. It’s a very easy side to prepare and tastes fantastic.
    • Creamed peas – these are no ordinary peas. If you want your peas to pack a punch, make these creamy peas. Add them to the side of any roast recipe and you won’t go wrong.
    • Herb Roasted Potatoes with Sour Cream – serve up a batch of sweet potato fries on the side to mop up the gravy and sweet spicy liquid
    • Roasted Lemon Potatoes – another easy sweet potato side that would make a perfect pairing with this roast recipe

    Other Extra Additions for this Burger

    • Egg (fried, poached, scrambled, omelet – whatever you like!)
    • Cheese (I didn’t want cheese in mine, but a slice of cheddar would be delicious too)
    • Ice burg leaves
    • carnalized onions
    • jalapeno

    But the bottom line is that you just can’t go wrong with this leftover roasted lamb burger! Steam the meat so that it retains that tender, juicy texture, and then go ahead and add whatever you want to add!

    Best Ever Roasted Lamb Burgers Recipe
    Best Ever Roasted Lamb Burgers Recipe

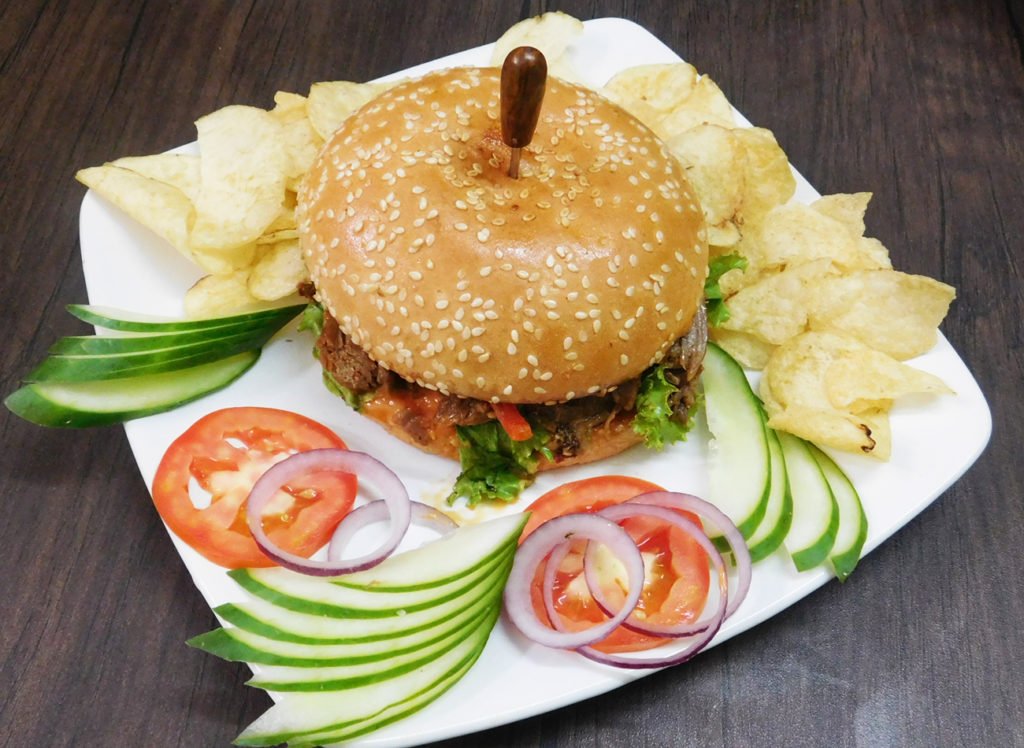
    So, are you ready for the tastiest, most tender melt in your mouth Lamb Burger you’ve ever had? These Roasted Lamb Burgers are, quite simply, sensational.

    Best Ever Roasted Lamb Burgers Recipe
    And that’s it! This Best Ever Roasted Lamb Burgers Recipe is just awesome!

    Bismillah let’s get started.
    Check it out The Best Meatball Pizza Recipe and printable version here!!

    Want more Sandwiches or Burgers Inspiration? 

    Here are some other sandwich recipes on my blog:

    More Luscious Lamb Recipes

    Got a taste for lamb? Check out some more incredible recipes that get the best out of this underrated meat:

    • Roasted Leg of Lamb – fast cooking doesn’t get better than this! Cook up these sensational steaks in less than 20 minutes for a quick and easy Sunday lunch
    • Lamb Karahi  – if you’ve never had lamb karahi, you’re in for a treat. It’s a spicy slow-cooked masterpiece!
    • Kashmiri Lamb Curry – a heavenly Kashmiri style curry that’s hearty and intensely flavored, yet mildly spiced with cumin, cardamom, cinnamon and curry powder.
    • Lamb Champ Pulao – this lamb champ pulao recipe is the ultimate Sunday lunch comfort food!
    • Lamb Leg with Hara Masala – just one mouthful of this amazing recipe will be enough to have you hooked. When it comes to taste, smoked meat is in a different league and this is the perfect recipe for smoking newbies and experts alike.
    • Easy Lamb Jalfrezi – traditional curry recipes like lamb jalfrezi are the perfect way to use up leftover lamb
    • Lamb Cashew Korma – a hearty, nutty stew-like curry that’s super comforting, the lamb is simmered in until tender.
    • Juicy Lamb Tikka Boti – can you believe that you can make a healthy kebab? Here’s the proof. The whole family will love these quick and easy, incredibly tasty kebabs 
    • Lamb Kebab Karahi  – Have you ever made a kebab karahi? If not, this succulent lamb kebab karahi is soon to become a firm favorite of yours!

    If you’re looking for more easy, family friendly dinner ideas, you might also enjoy my Meatball Pizza Recipe or this Restaurant Style Tawa Fish Recipe,  Homemade Lamb Burgers, Flavorful Mint Chicken Curry Recipe and Leftover Mashed Potato Pancakes Recipe are also fun recipes for the family!

    What are your favorite burger toppings? Leave me a comment below to inspire my next burger recipe!

    Put your own spin on it. And lemme know how it turns out and do take a few seconds to rate it! I would love to see your recreations so tag me on instagram @recipestable or Facebook (Recipestable) or on Twitter so I can see how lovely yours turn out.
  • The Best Meatball Pizza Recipe

    The Best Meatball Pizza Recipe

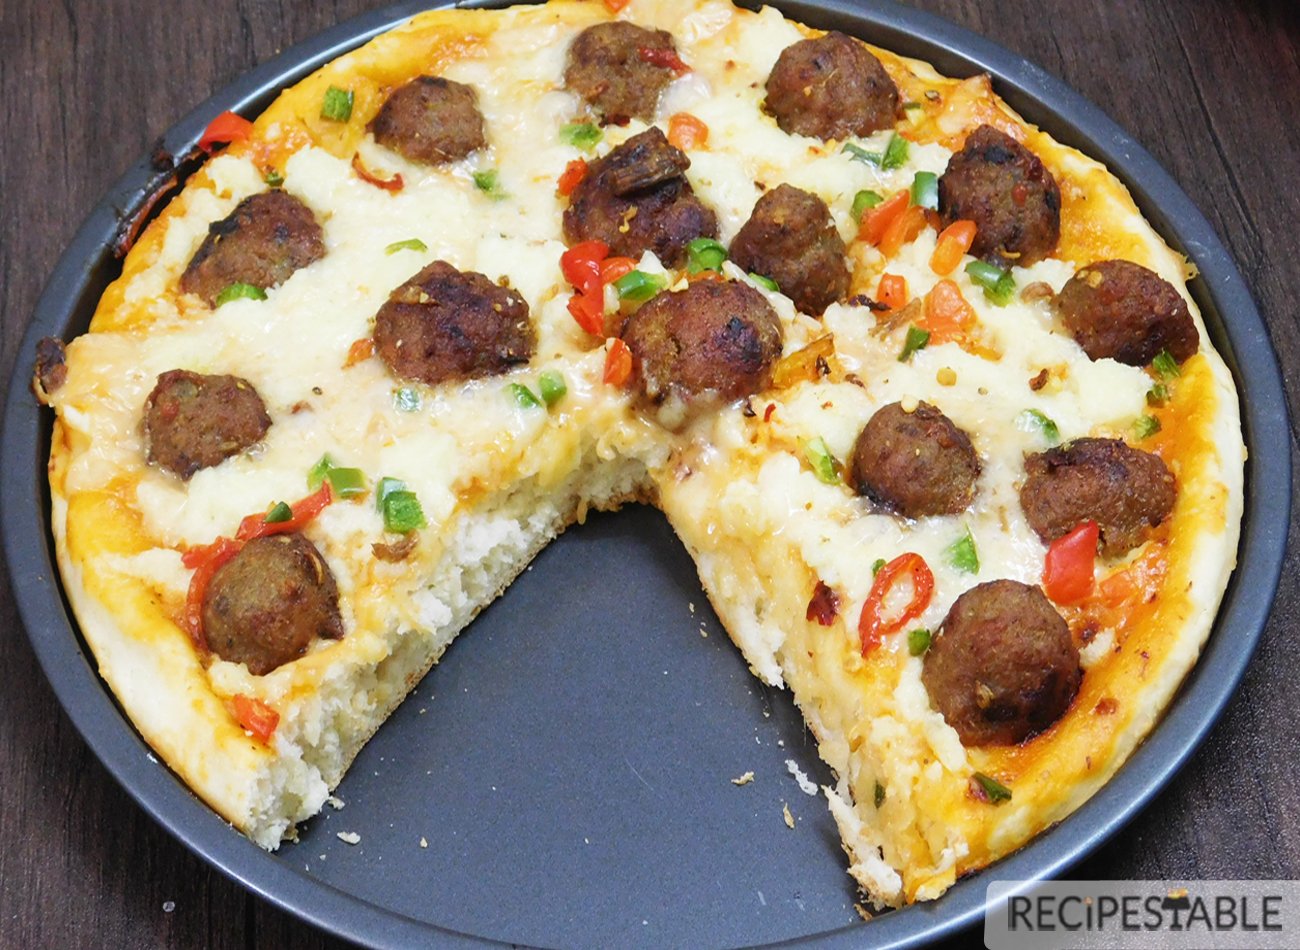
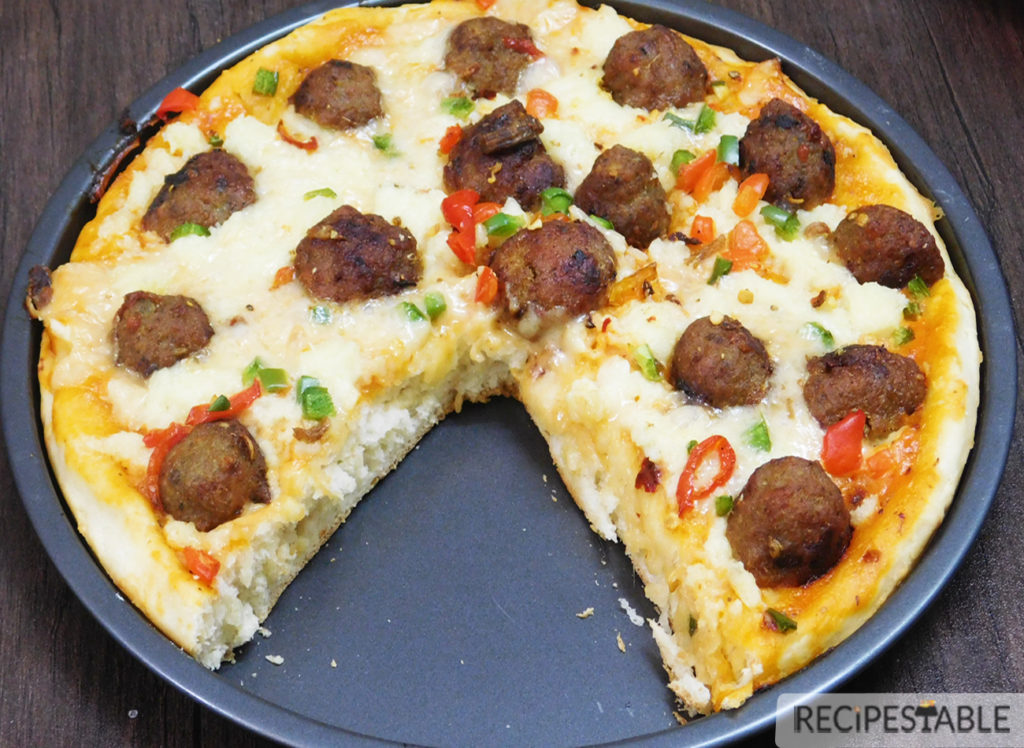
    This meatball pizza, made with a secret sauce, mozzarella cheese, and the surprise element of juicy chicken meatballs piled atop pizza dough, takes homemade pizza to a whole new and indulgent level. That’s better than takeout.

    The Best Meatball Pizza Recipe

    Chewy crust, spicy sauce, meatballs and plenty of melted cheese? Ummmm…. yes, please.

    The Best Meatball Pizza Recipe
    The Best Meatball Pizza Recipe

    Pizza is always a winner in our house and cheesy meatballs are definitely comfort food around here, so we threw together a super easy, super cheesy meatball pizza. Make a big batch of meatballs and freeze in portions along with this fresh pizza dough recipe so you’ll have meatball pizzas ready to go when you want them.

    The Best Meatball Pizza Recipe
    The Best Meatball Pizza Recipe

    You can use frozen meatballs to save on time but you will have to adjust points accordingly, I prefer to make my own and I added a little pizza flare to mine.

    How do you make Meatball Pizza?

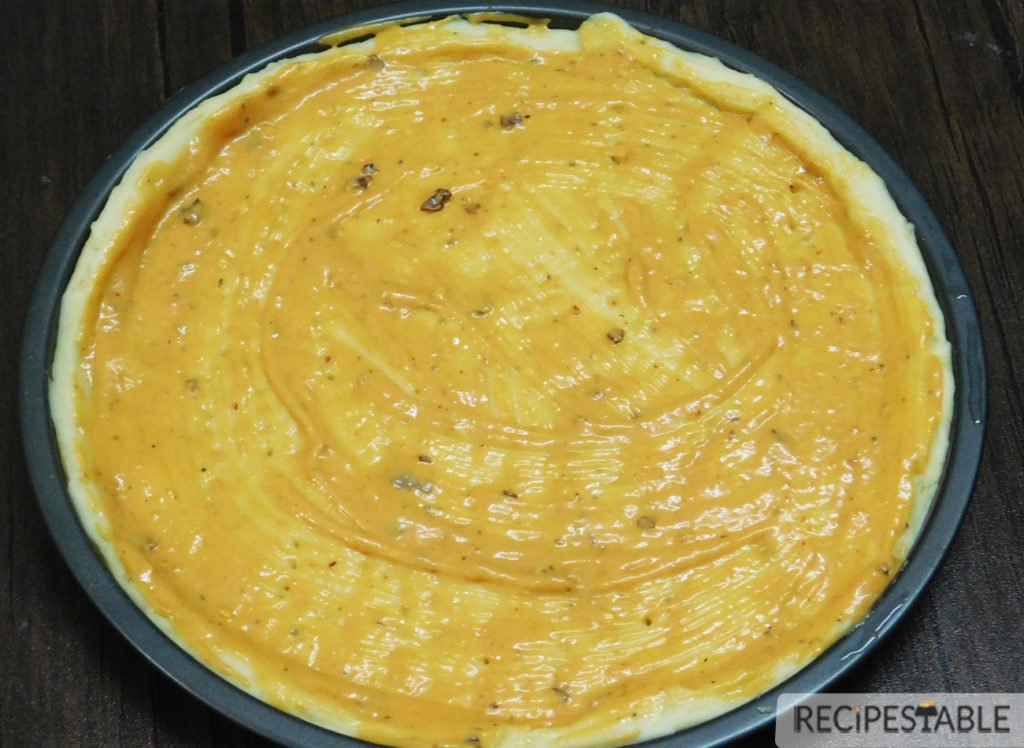
    1. A pizza pan is rubbed with a little bit of oil. Pizza dough is spread into the pan, poked with a fork. Then spread prepared sauce over it.

    Spread pizza sauce over the dough

    2. The topping is assembled by cooking the meatballs in a hot pan.

    The Best Meatball Pizza Recipe
    Meatballs 🙂

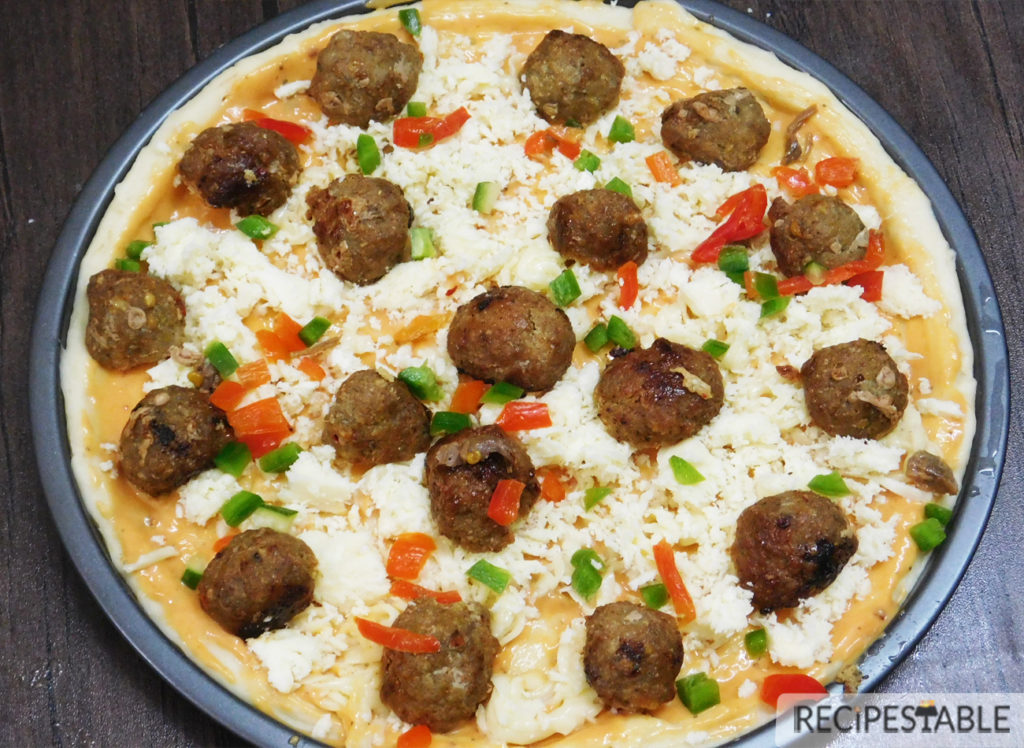
    3. Then pizza dough is topped with the cheddar cheese, meatballs, red and green bell pepper and a generous portion of mozzarella cheese.

    The Best Meatball Pizza Recipe
    Meatball Pizza ready to go in the oven!!

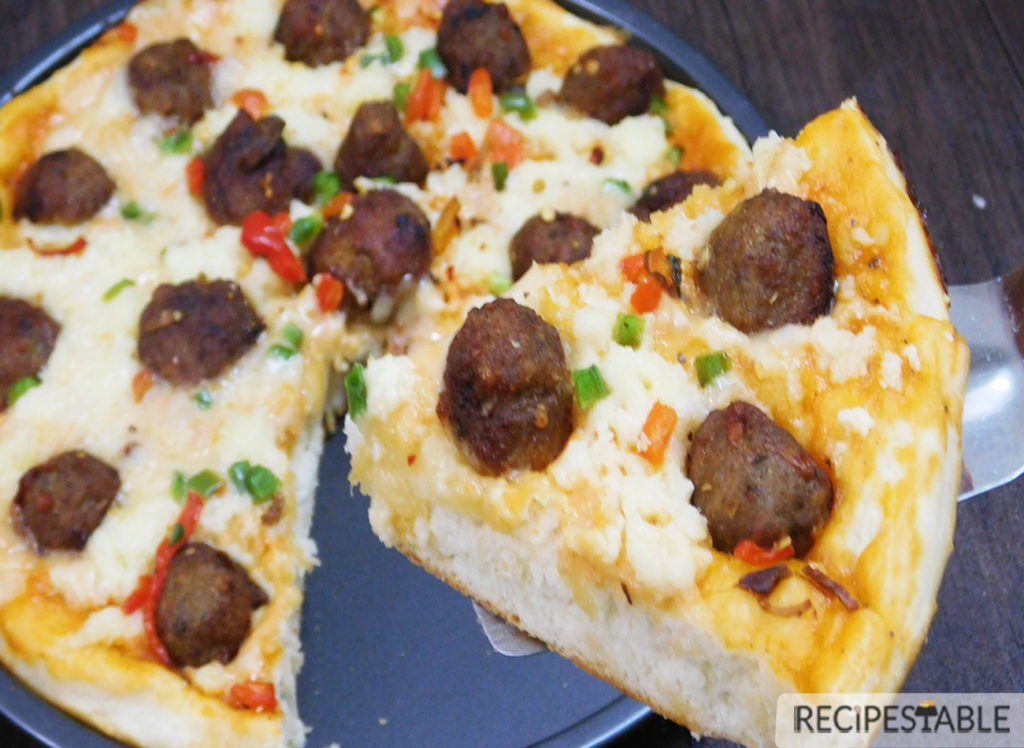
    4. Then baked in the preheated oven until the cheese is golden and crust is cooked! Remove from the oven and cut into the wedges. ENJOY 🙂

    The Best Meatball Pizza Recipe
    The Best Meatball Pizza Recipe

    Where is the best place to buy Pizza dough?

    1. Most markets have some sort of pizza dough that they sell.  You’ll probably be able to find the kind of pizza dough in the can (not my favorite), and some will offer it in a little plastic baggie (probably a better product and likely more fresh).
    2. I do have a tip for the best place to buy pizza dough.  Most pizza restaurants will likely be willing to sell you a ball of their pizza dough.  Just ask!  That’s going to be your best bet for good pizza dough!
    3.  You can also make your own. I have good recipe for Easy Pizza Dough.

    What are the best toppings for pizza?

    1. If you’re a meat lover, you’ll most likely enjoy some sort of meat lover’s pizza like this Meatball Pizza!  BBQ Chicken Pizza is my another favorite. 
    2. And my personal choice for pizza topping is Bell Peppers, Olives and Pineapple.  Chicken Chunks, Sausage are also popular pizza toppings ( but I don’t like it that much).
    3. Some people like to add olives, corn, goat cheese, spinach and more.  The possibilities are endless!

    It’s pretty likely that everyone in your family will enjoy this Meatball Pizza.  It’s a nice, quick and easy dinner for those nights that are crazy!

    Bismillah let’s get started.
    Check it out The Best Meatball Pizza Recipe and printable version here!!

    The Best Meatball Pizza Recipe

    Instead of ordering pizza tonight, try this perfectly pleasing meatball pizza recipe! Great for light dinner or go-with — so simple! So delish!
    Keyword 30 minutes meals, Baking, cheese, chicken mince, Dinner, meatball, Pizza, Quick and Easy
    Prep Time 10 minutes
    Cook Time 25 minutes
    Total Time 35 minutes
    Servings 4
    Author Bushra Waheed

    Ingredients

    For The Meatballs:

    • 500 gm chicken mince
    • 1 bread slice crust removed
    • 1/3 cup warm water
    • 1 large egg white lightly beaten
    • 1 tsp chopped garlic
    • 1 small garlic clove minced
    • 1 tsp onion powder
    • 1 tbsp fresh parsley chopped
    • 1 tbsp fresh basil chopped
    • 1 tsp red pepper crushed
    • freshly ground black pepper to taste
    • salt to taste
    • oil for frying

    For the Meatball Pizza:

    • 1 pound homemade pizza dough for recipe click here
    • 12 meatballs halved and thawed
    • 1/4 cup pizza sauce
    • 2 tbsp mayonnaise
    • 1 cup Mozzarella Cheese shredded
    • 1/4 cup cheddar cheese
    • 1 small green pepper chopped
    • 1 small red pepper chopped
    • few fresh basil optional
    • a pinch of crushed red pepper to add a extra kick
    • and/or other toppings of your choice

    Instructions

    To Make The Meatballs:

    • In a bowl, combine the bread and water. Let stand, turning the bread occasionally to thoroughly moisten it, for 10 minutes.
    • Squeeze the bread gently to remove most of the water.
    • Discard the water. Tear the bread into 1-inch chunks and toss them into a large bowl.
    • Add the chicken mince, ginger, garlic, onion powder, parsley, basil, egg white, red pepper, 1/4 teaspoon salt, and black pepper to taste.
    • Mix thoroughly with moistened hands.
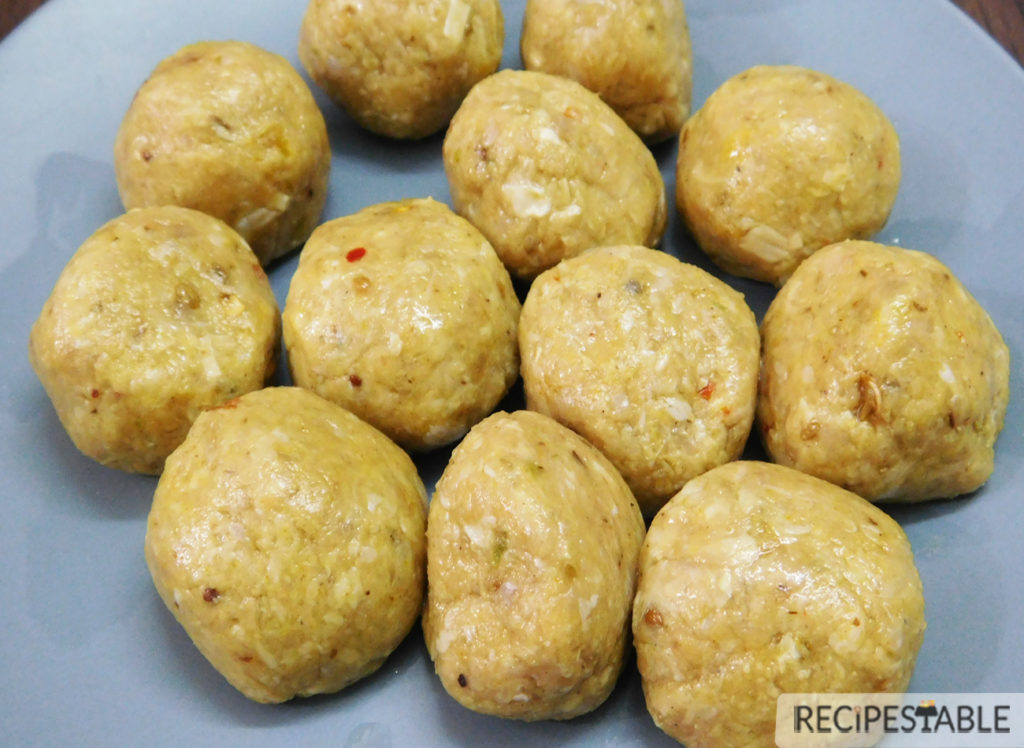
    • Shape the meat mixture into 12 mini balls.
    • Place the meatballs on the lined sheet, cover with plastic wrap, and refrigerate for at least 2 hours or up to overnight.
    • Now heat oil in a frying pan over medium heat and cook meatballs for 6-8 minutes or until golden, flip and cover the pan fry additional 5 minutes to cook from inside(make sure not to over cooked).
    • Remove meatballs from the oil and drain on kitchen paper.
    • Let the meatballs cool slightly and then cut each one in half.
    • Set aside.

    To Prepare the Sauce:

    • In a small bowl, mix together the pizza sauce, mayonnaise, basil and a pinch of crushed red pepper. Set aside.

    To Assemble The Meatball Pizza:

    • Preheat the oven at 180 degre C or 425 F.
    • Drizzle a round pizza pan or a rectangular baking sheet with olive oil or non-stick spray.
    • On lightly floured surface, roll out pizza dough into a 12-inch circle, with a rolling pin.
    • Spread bases evenly with prepared pizza sauce. Scatter evenly with cheddar cheese.
    • Top with meatballs halves and pressing lightly into base. Scatter evenly with Mozzarella cheese.
    • Top with chopped green and red bell pepper.
    • Bake 25 minutes or until the crust is crisp and golden and the cheese is hot and bubbly.
    • Let pizza sit for a few minutes then cut into 4 slices.
    • Delicious Meatball Pizza is ready to serve.
    • ENJOY 🙂

    Notes

    Serve with salad mix.

    Some Useful Tips & Hints:

    1. For make-ahead meatballs, you can make the meatballs up to the end of step 1 and freeze them layered between baking paper in an airtight container. Store them for up to 2 months. Defrost in the fridge overnight and continue recipe from step 2.
    2. Chicken mince is easily available at major supermarkets or local butchers.
    3. Use a store-bought pizza base for quicker version.
    4. You can add your favorite herbs and spices for a spicy version.

    Want more Pizza Inspiration? 

    Here are some other pizza recipes on my blog:

    If you’re looking for more easy, family friendly dinner ideas, you might also enjoy my The Best and Easiest Spaghetti Meatballs Recipe or this Butter Chicken Pasta,  Homemade Lamb Burgers and Keema Macaroni are also fun recipes for the family!

    Put your own spin on it. And lemme know how it turns out and do take a few seconds to rate it! I would love to see your recreations so tag me on instagram @recipestable or Facebook (Recipestable) or on Twitter so I can see how lovely yours turn out.

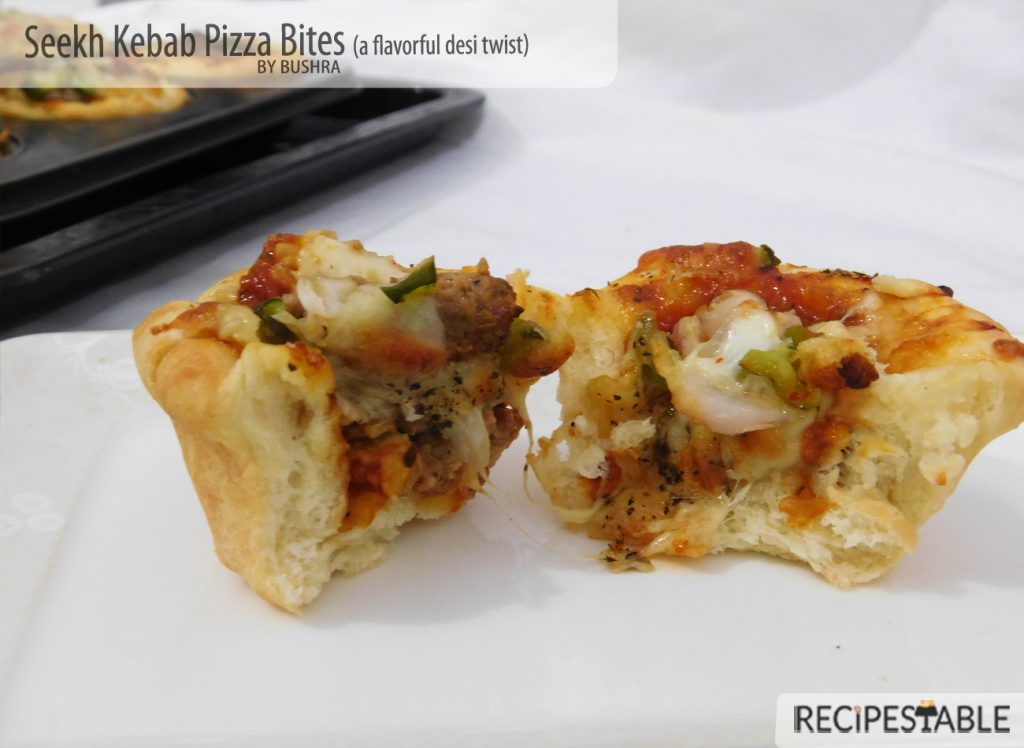
  • Seekh Kebab Pizza Bites Recipe (A Flavorful Desi Twist)

    Seekh Kebab Pizza Bites Recipe (A Flavorful Desi Twist)

    Craving pizza but your taste buds is calling for some desi twist?

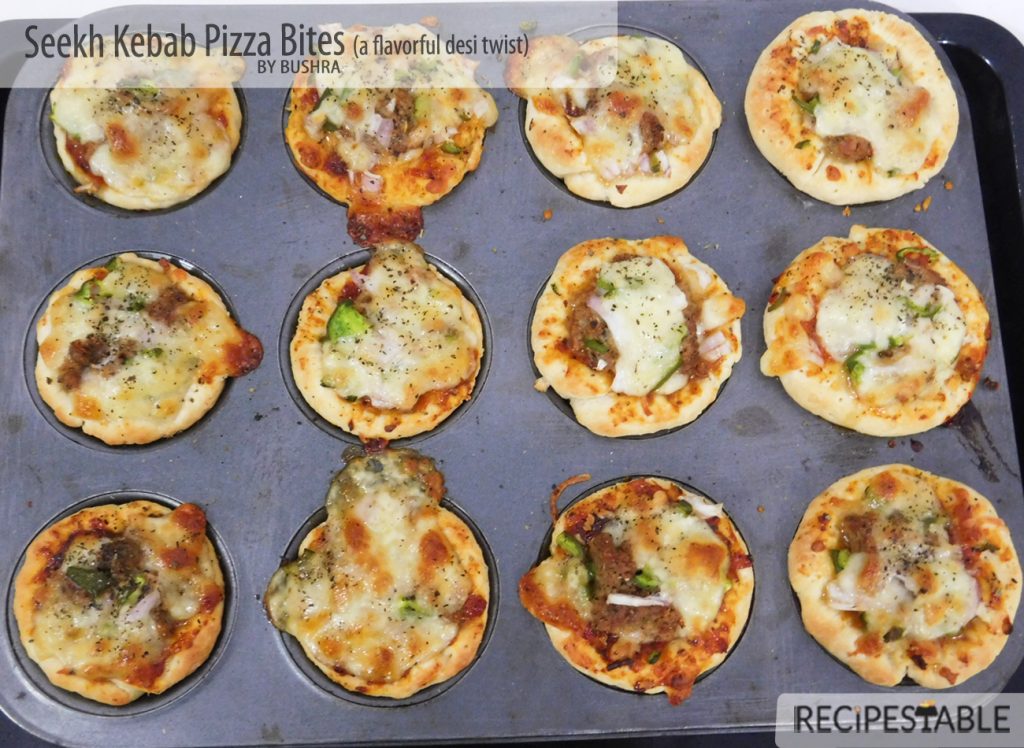
    Satisfy your cravings with these Seekh Kebab Pizza Bites that are ready in 30 minutes or less and featuring everyone’s favorite flavor combo: Pizza, Seekh Kebab and  cheesy goodness—are sure to be the talk of the party.

    A Flavorful Desi Twist - Seekh Kebab Pizza Bites Recipe
    A Flavorful Desi Twist – Seekh Kebab Pizza Bites Recipe

    You all know I love pizza, and I couldn’t go too long without experimenting different pizza toppings. (For you newbies, they happen to be one of my favorite finger food!) These days pizzas come with many desi variations like butter chicken, spicy tikka or seekh kebabs.

    Seekh Kebab Pizza Bites (A Flavorful Desi Twist)

    So, Today why not take the classic Italian and make them unabashedly Pakistani ?

    Creativity, especially when it comes to food has absolutely no limits. There are some flavor combinations that are so brilliant —like seekh kebabs, pizza sauce, and cheese. All three of these offer undeniable flavor on their own, but when paired together, the result is nothing less than perfect. So, I changed the shape of pizza and turned it everyone’s favorite pizza ingredients into these cute little “Seekh Kebab Pizza Bites”!

    The smokiness of seekh kebabs, the sharp flavor of cheddar, the cheesy goodness of Mozzarella and the zest of pizza sauce combine like they were always meant to be together. All this ohso yummy !

    Seekh Kebab Pizza Bites Recipe
    Seekh Kebab Pizza Bites Recipe

    Does your family love pizza as much as mine does?

    Then this weekend, try something new : “Seekh Kebab pizza Bites”! These adorable little pizza bites are yours to enjoy. And let me tell ya – they will easily disappear quickly!

    Seekh Kebab Pizza Bites Recipe
    These Seekh Kebab Pizza Bites make a fun and delicious way to serve everyone’s favorite pizza! 

    Ingredients in Seekh Kebab Pizza Bites?

    To make these seekh kebab pizza bites, you’ll need pizza dough, pizza sauce, leftover seekh kebabs, onion, green bell pepper, Cheddar & Mozzarella cheese and Italian seasoning.

    Seekh Kebab Pizza Bites Recipe
    Seekh Kebab Pizza Bites Recipe

    How to make the Seekh Kebab Pizza Bites

    First I line up the muffin pan with homemade pizza dough and cut it into round circles (No need to be extremely accurate with the measurements).  I just wanted the pizza bites to be about the same size. Then I top it with the pizza sauce. I always keep a jar of homemade pizza sauce in my pantry to make these kinds of easy pizzas at a moment’s notice. Next is the cheese then the leftover seekh kebabs with onion and peppers then sprinkle herb seasoning and bake at 180 degree C for 10-15 minutes!

    These couldn’t be more simple.

    Seekh Kebab Pizza Bites Recipe
    Seekh Kebab Pizza Bites Recipe

    Once they have cooked, I remove them from the oven and allow them to cool enough so that they can be safely eaten, about 5 minutes and serve.

    Voila!!!

    Make-Ahead Seekh Kebab Pizza Bites Recipe

    They also make a great make-ahead meal or snack!

    Seekh Kebab Pizza Bites Recipe
    Seekh Kebab Pizza Bites Recipe

    How to Freeze Seekh Kebab Pizza Bites

    Once they have cooled completely, place them onto a sheet pan and allow them to flash freeze for about 30 minutes. Then, package them in freezer-safe zip top bags or containers for up to 2 weeks. To serve from frozen, just thaw overnight in the refrigerator and then reheat in the oven for about 10 minutes until heated throughout.

    Extra Bounce Tip:

    The fun thing is that they are completely customizable. And if you have kids around, or want to get friends involved in customizing their own, these are a great idea for a make-your-own-appetizer set up. Everyone will love tossing in their favorite toppings.

    Seekh Kebab Pizza Bites Recipe
    Seekh Kebab Pizza Bites Recipe

    Definitely a fun twist on serving pizza.  And in my opinion, much cuter — which is of course the bigger issue. enjoy 🙂

    Bismillah let’s get started.
    Check it out Seekh Kebab Pizza Bites Recipe and printable version here!!

    Want more Pizza Inspiration? 

    Here are some other pizza recipes on my blog:

    Put your own spin on it. And lemme know how it turns out and do take a few seconds to rate it! I would love to see your recreations so tag me on instagram @recipestable or Facebook (Recipestable) or on Twitter so I can see how lovely yours turn out.

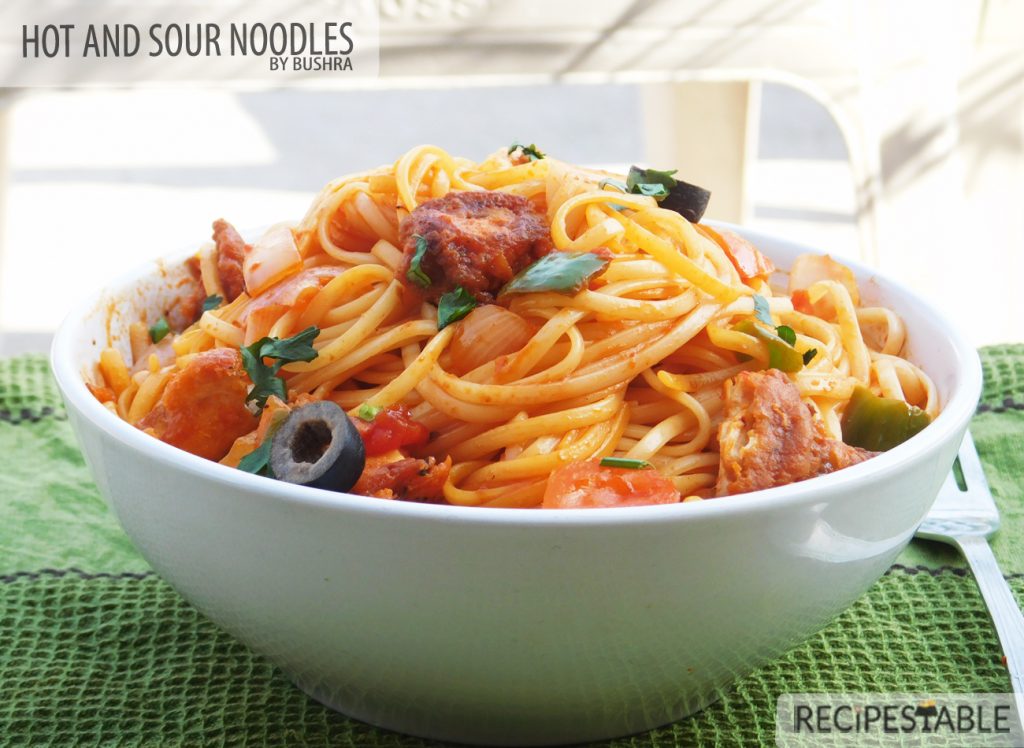
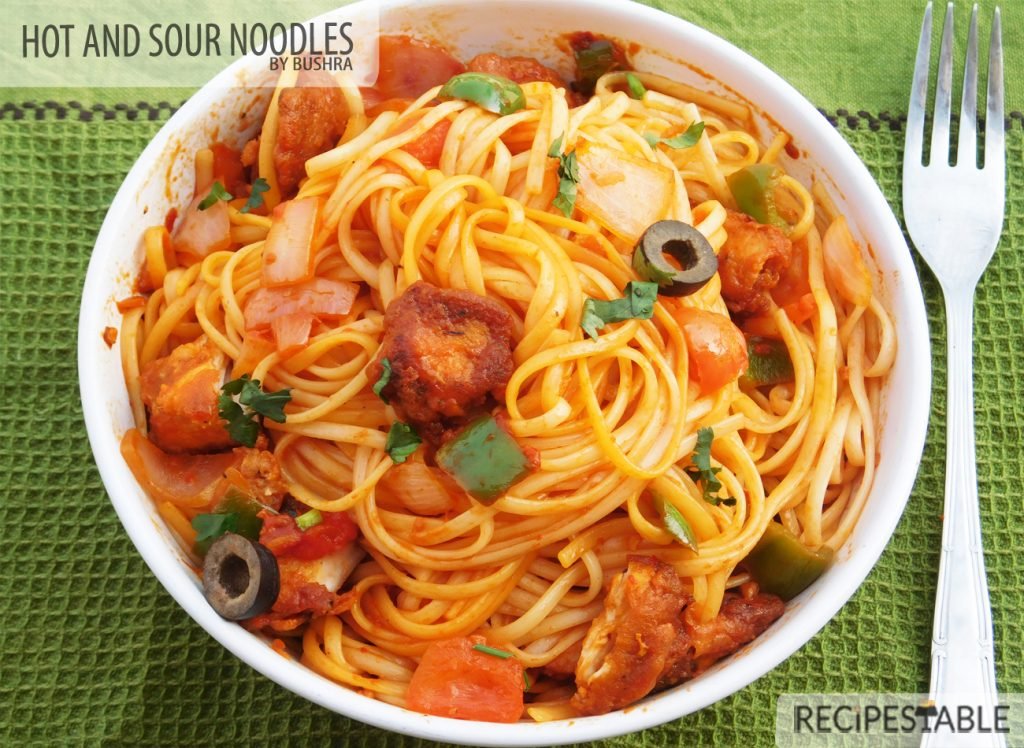
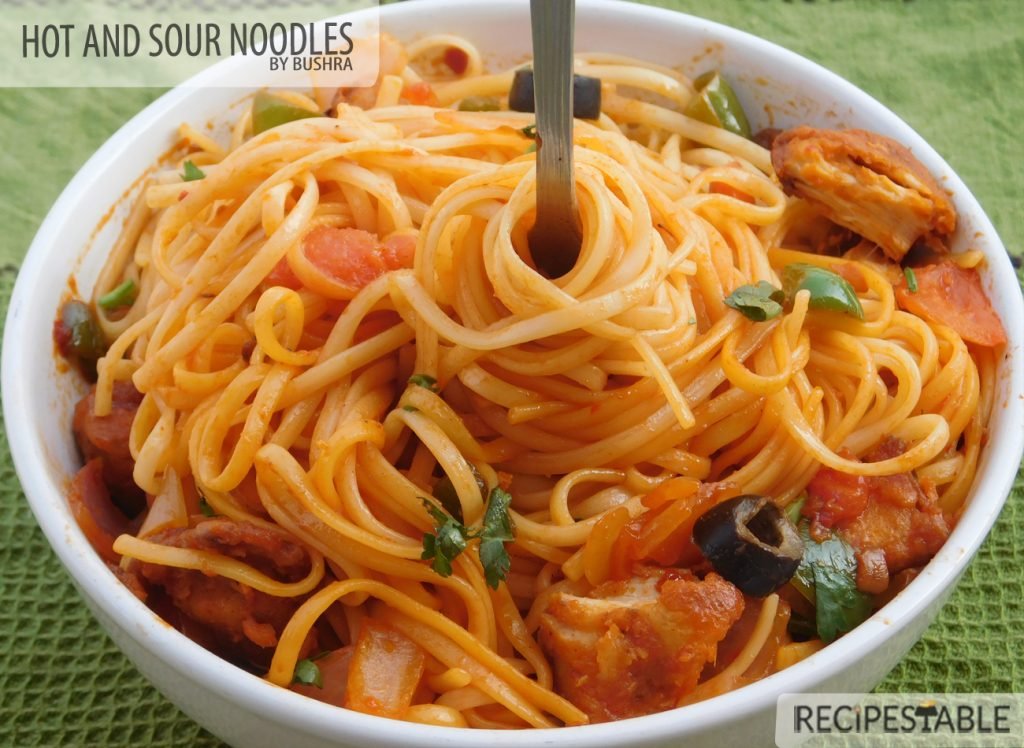
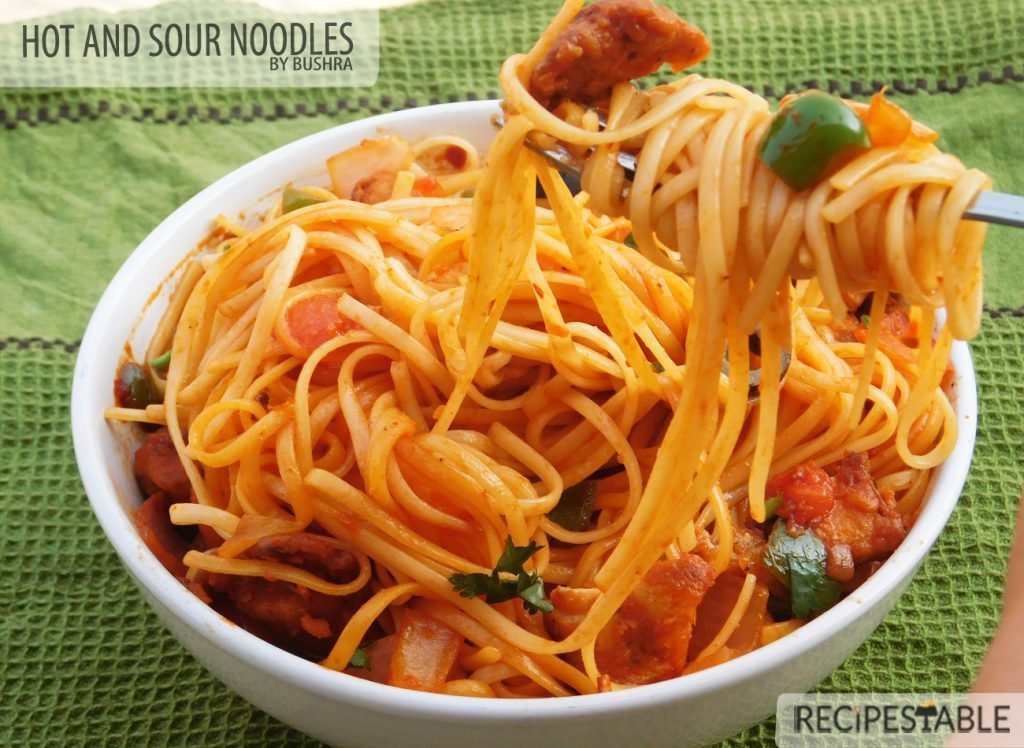
  • Hot and Sour Noodles Recipe – Just Like the Restaurants Make It

    Hot and Sour Noodles Recipe – Just Like the Restaurants Make It

    Who needs takeout when homemade tastes better and you’re in control of the ingredients. Next time when you crave Chinese food, instead of take-out, make this quick, easy and Incredibly delicious hot and sour noodles. Perfect comfort food and a a hearty meal, full of veggies, egg noodles and fried chicken, that’s ready in under 30 minutes!

    Hot and Sour Noodles Recipe
    Hot and Sour Noodles Recipe – Just Like the Restaurants Make It

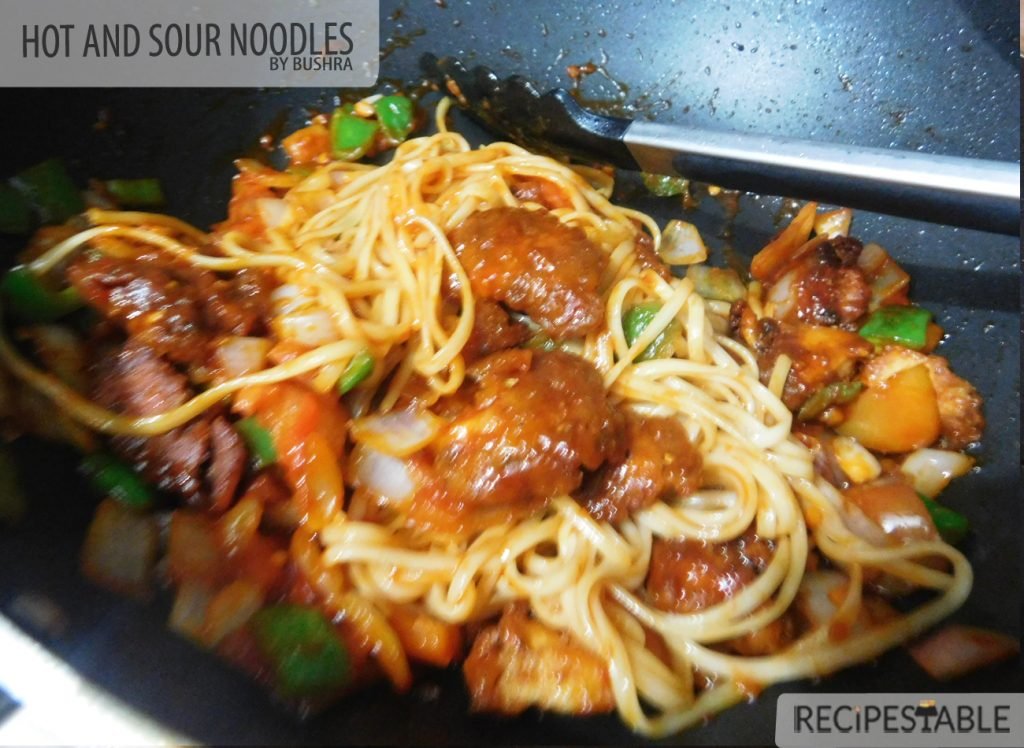
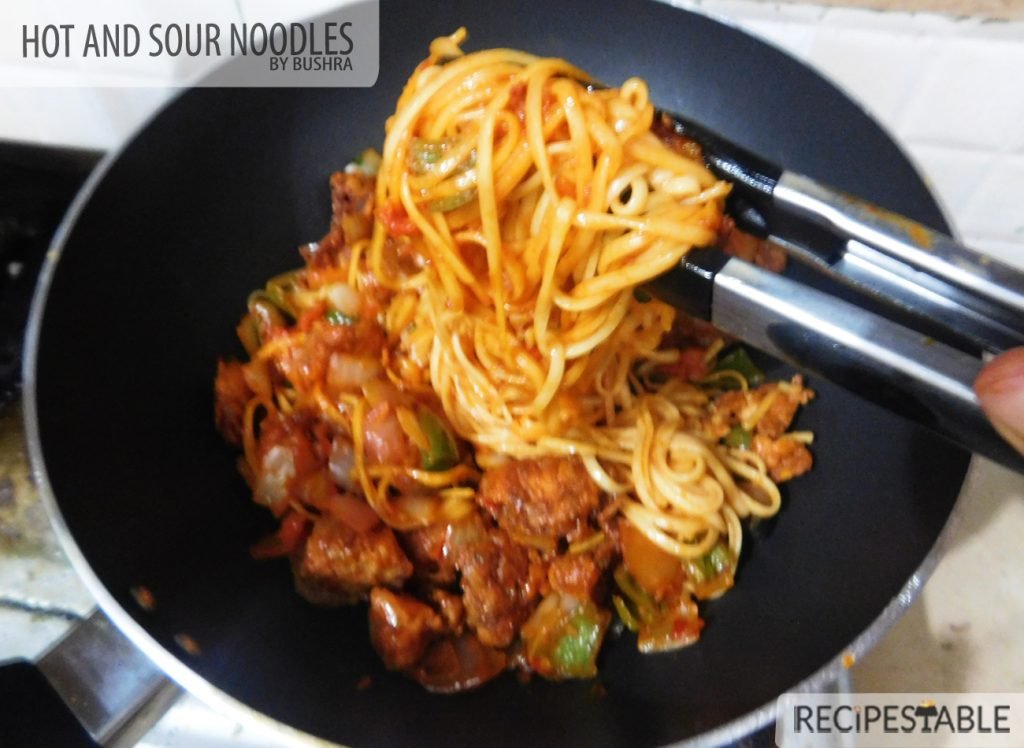
    This Hot and Sour Noodles Recipe makes a bright and healthy dinner for a small family. There are layers and layers of flavors in these easy noodles that are ready in 30 minutes. Soy sauce, hot pepper sauce, vinegar, ginger- garlic, red chili and tomato sauce coat the noodles beautifully. They’re hot and sour with a very subtle heat from the ginger and hot pepper sauce. Fried Chicken, Onion, Capsicum add texture and crunch. Olives and tomato add bright color.
    I love the hot, spicy, salty, savory, garlicky and the slippery noodles. It’s all about the combination of textures and flavors — there’s tangy sauces, crispy fried Chicken, zesty vegetables, salty Egg noodles and chili flakes for heat.

    A bowl of hot and sour slurping goodness. _ Just Like the Restaurants Make It!

    These noodle bowls are a lightning fast dinner that the whole family is sure to enjoy. They are surprisingly easy to make from scratch, and you don’t need to worry about the questionable sodium ingredients that are listed in the store bought version.

    What makes hot and sour Noodles HOT?

    The heat in this hot and sour noodles comes from red pepper flakes and hot pepper sauce. The noodles has to be on the hotter side. The sourness comes from adding vinegar right at the end. If you add the vinegar in the beginning or towards the middle, the vinegar will evaporate during cooking. Which is why we add the vinegar right at the end.

    These noodles will be your new go-to. Take it to work for lunch, take it to cookouts, make it for your family dinner. Trust me – you’ll knock their socks off with this one.

    Bismillah let’s get started. 

    Ingredients in Hot and Sour Noodles?

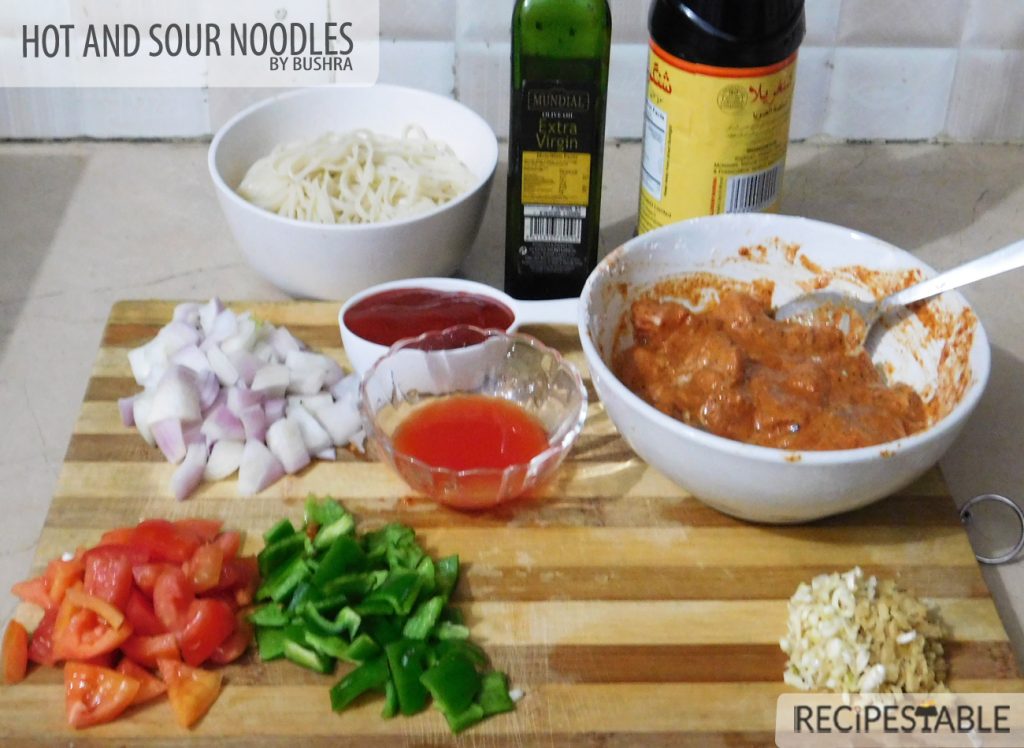
    This Hot and Sour Noodles recipe is quick, requires few ingredients and is great for those days when you don’t have a lot of time to cook. The list of ingredients is so simple – red chilli flakes, ginger, garlic, onion, capsicum, tomato, chicken, soy sauce, hot pepper sauce, vinegar and egg noodles of course. These are things that are probably already in your pantry so its a quick and easy dinner to make which is ready in under 30 minutes. Perfect for last minute dinners!

    How to make the Restaurant Style Hot and Sour Noodles (step by step instructions):

    However, in order to get the restaurant like taste and texture it needs to be cooked in a certain way and this step by step recipe of Hot and Sour noodles explains it with photos and detailed instructions. The tips and serving ideas given after directions will also help you avoid some common mistakes which can ruin the dish.

    Hot and Sour Noodles Recipe
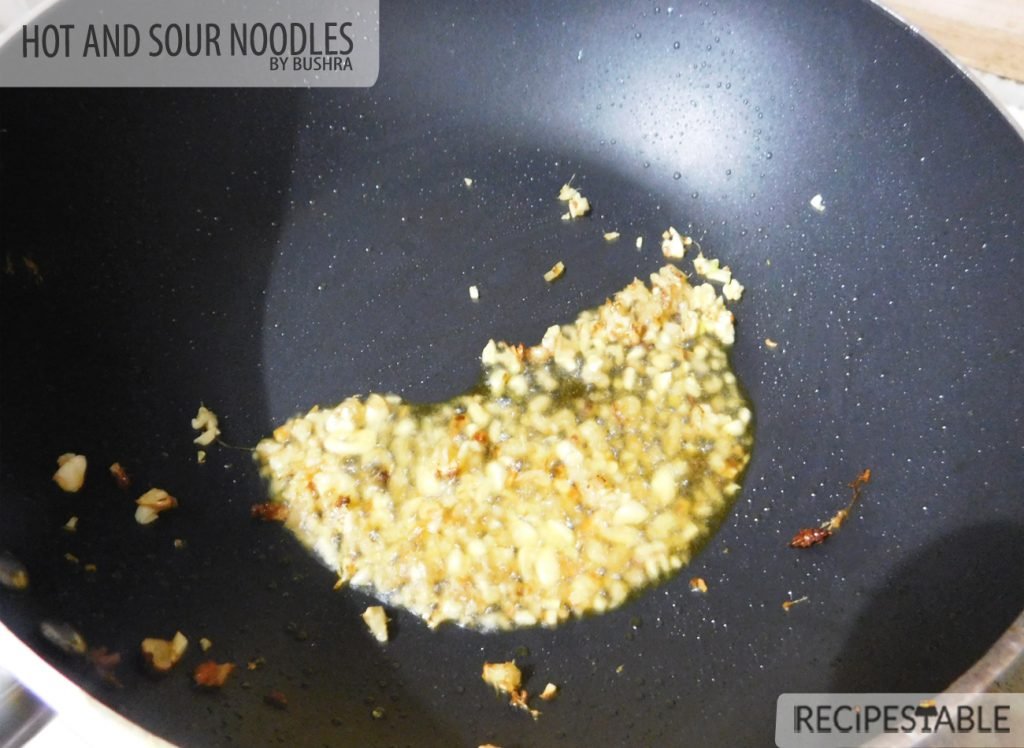
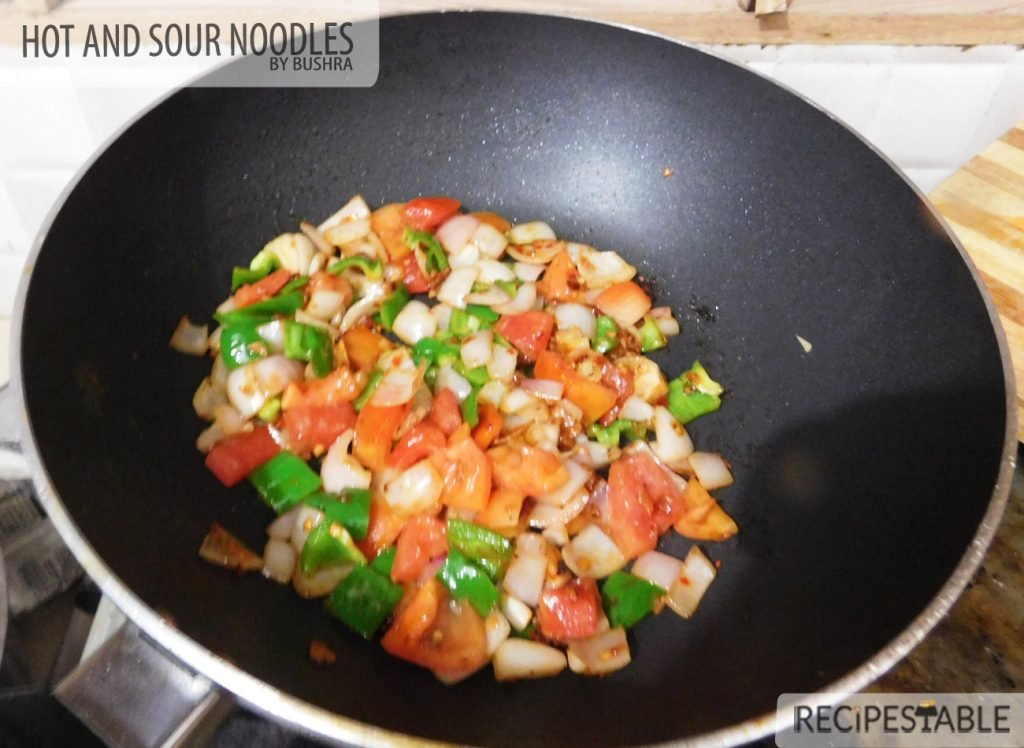
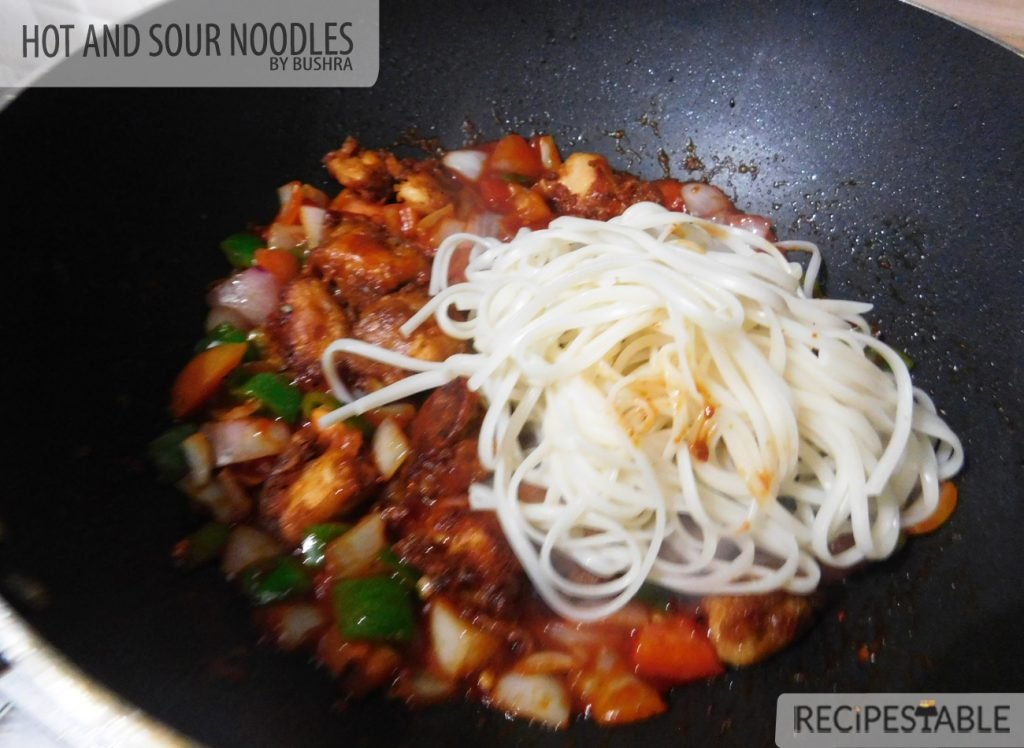
    1. Prepare the ingredients (this is the most time-consuming part of the recipe, but then it goes very quickly):
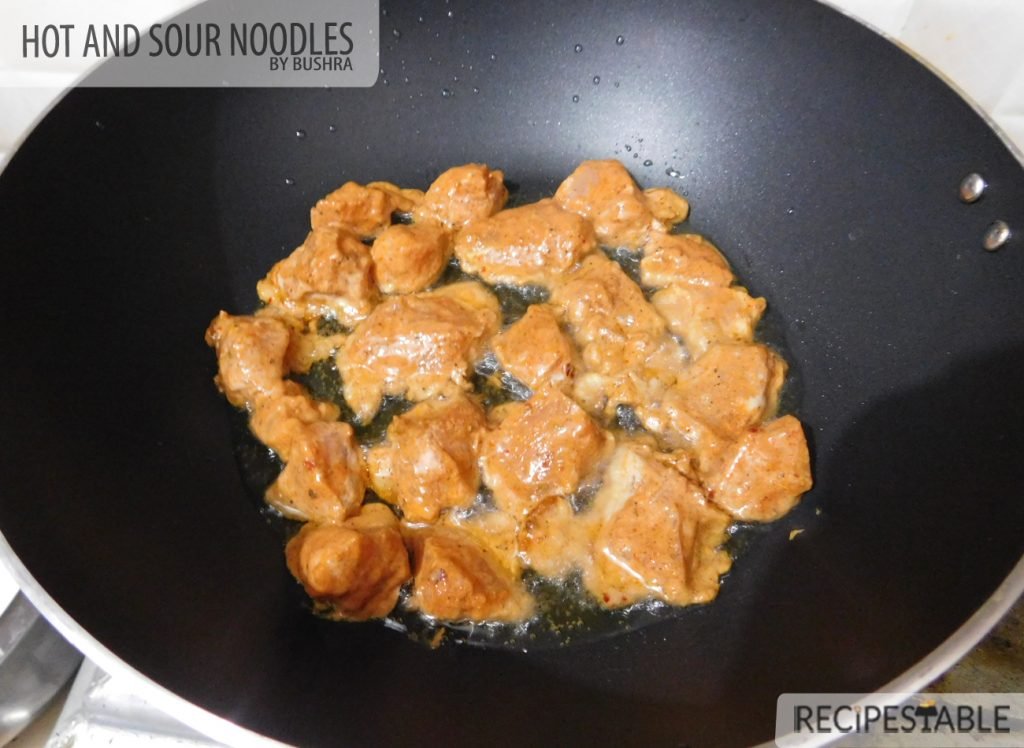
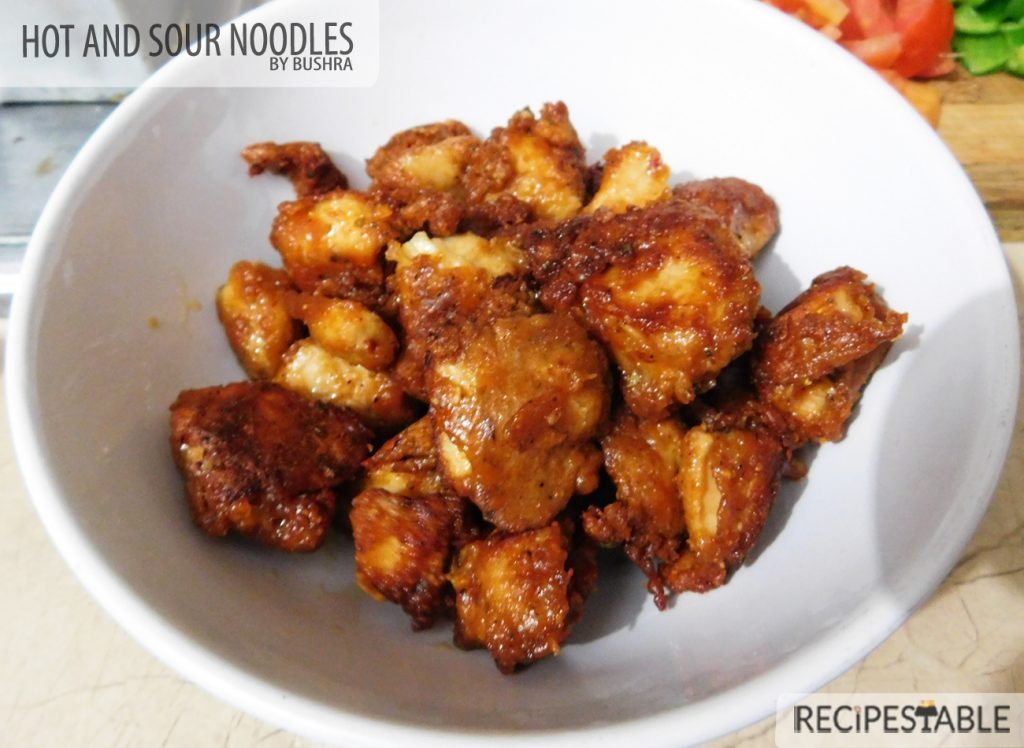
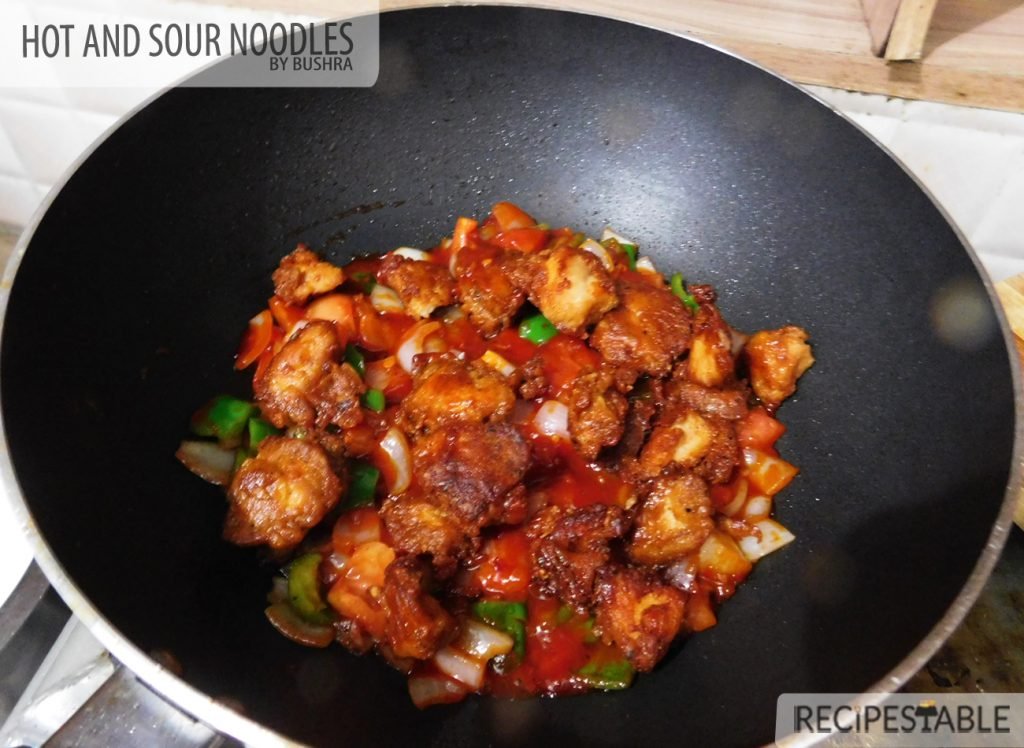
    Chicken: Cut chicken breast into 1-inch cubes, mix with ginger garlic paste, egg white, Cornflour, soy sauce, chili sauce, vinegar, red pepper and salt to taste.  You can cook right away or leave to marinate for 30 minutes to blend flavors.
    Vegetables: Chopped ginger and garlic and cut onion, capsicum, and Tomato in ¼ inch cubes and keep aside.
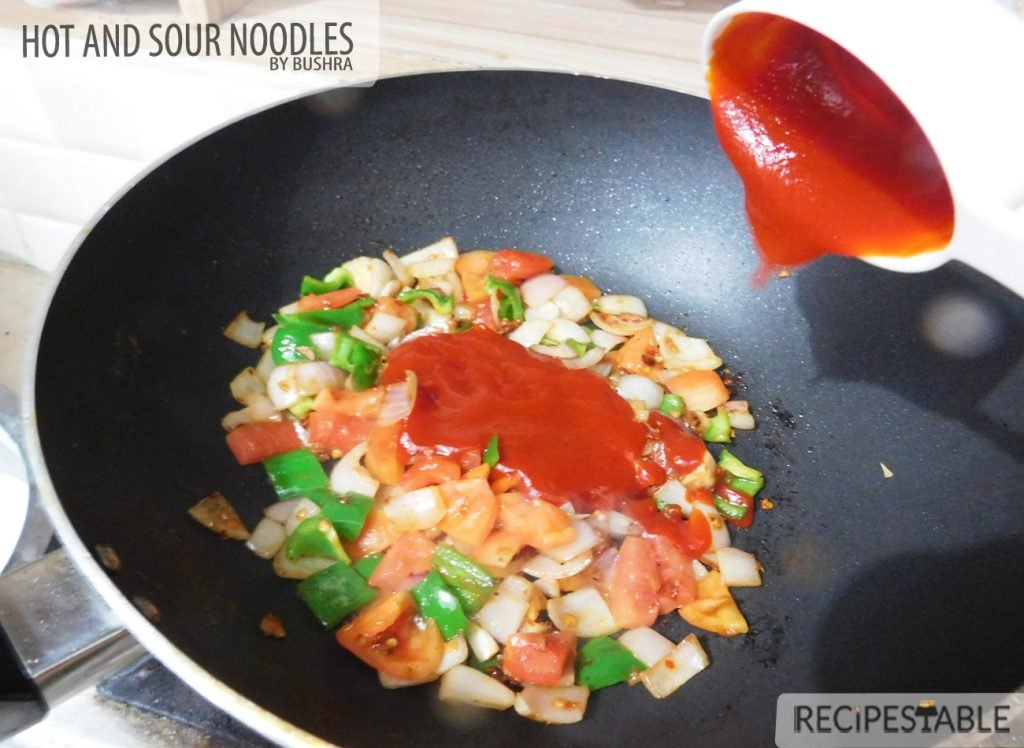
    Hot and Sour Sauce: In a small bowl, whisk all the sauce ingredients, 1/2 cup water, 1/2 cup tomato ketchup, 2 tablespoon hot pepper Sauce, 1 tablespoon soy sauce, 1 tablespoon Vinegar, salt and Pepper to taste, chili flakes. Set aside.
    Egg Noodles: Cook the egg noodles in boiling water, add a little salt, cook for 5-7 minutes, then strain.

    Check it out Hot and Sour Noodles Recipe and printable version here!!

    Other versions of this dish:

    Put your own spin on it. And lemme know how it turns out and do take a few seconds to rate it! I would love to see your recreations so tag me on instagram @recipestable or Facebook (Recipestable) or on Twitter so I can see how lovely yours turn out.
  • The Low-Carb Solution to Egg in a Hole Recipe

    The Low-Carb Solution to Egg in a Hole Recipe

    Can’t decide whether to make a grilled kabab or an egg in a hole? Make both!
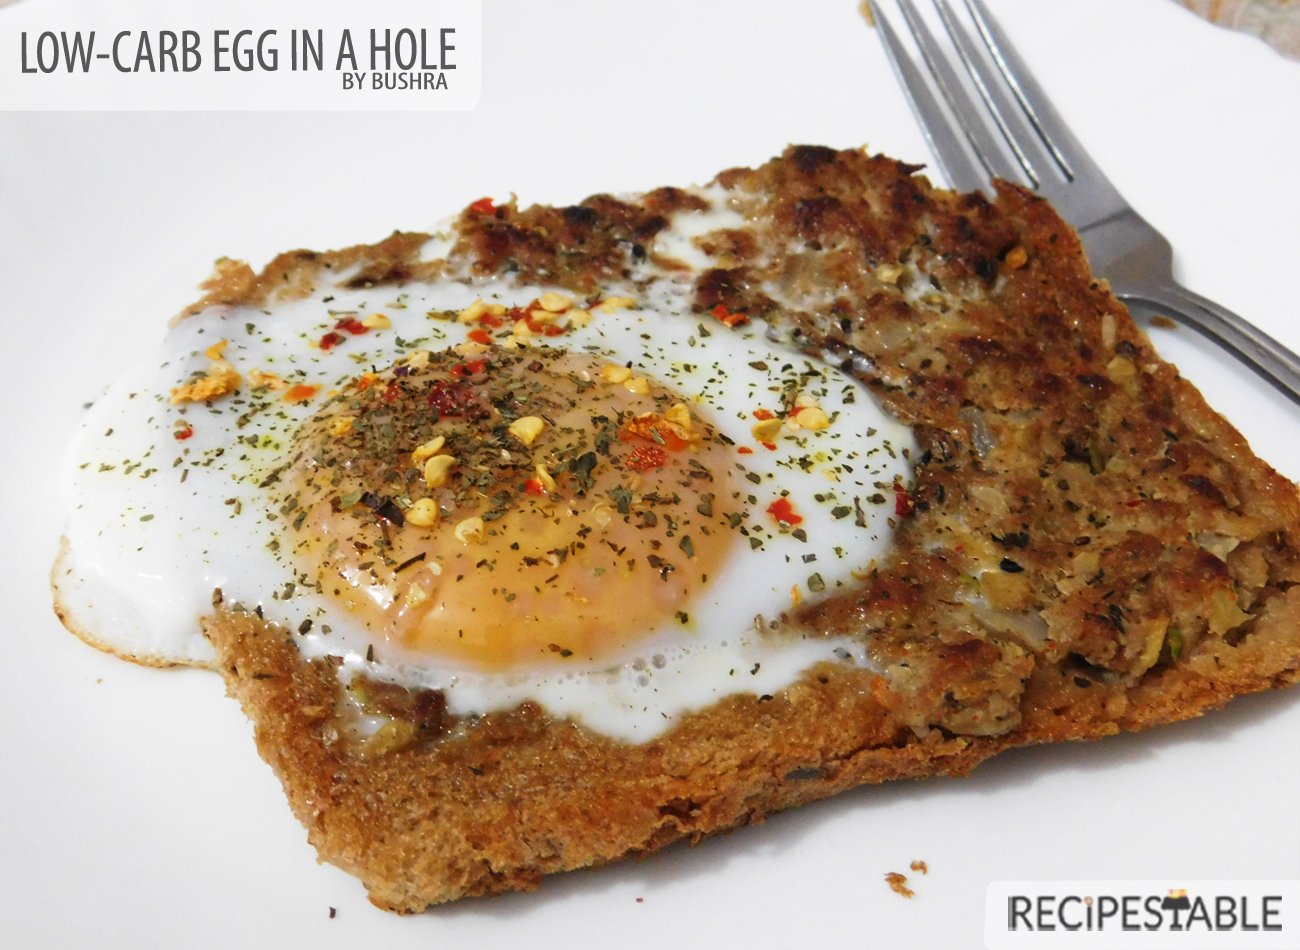
    Two of my favorite food groups—eggs and toast—unite in this take on the playful dish also known as egg in a hole, Egg in a Basket or Egg in a Boat or, more simply, egg in toast. I fancy it up by filling the bread center with mince crust and topping with basil or chili flakes. And It came out so delicious!

    Egg in-a-hole – Look at that perfect texture !!

    For this recipe, I used a normal mince kabab mixture for filling the bread , to keep it low carb. The outside was crunchy and crispy and inside was so juicy and tasted so good with the egg in the middle. A nice way to add some more protein to a sandwich, while also providing something of a sauce from the egg yolk (depending on how you cook your egg). It’s adds just a little oomph of flavor to the sandwich.

    Watch carefully as you cook the mince crust, and don’t raise the heat higher than medium: The goal is for the mince crust to brown and the egg to set simultaneously. Save the crust center for making breadcrumbs.

    Also how well the eggs must be cooked is a personal choice. Some like over easy, sunnyside up or completely cooked through. No matter how you make it, this will remain a favorite breakfast option passed on for many generations to come. When you make this cute breakfast-for-dinner recipe, you can vary it by using cheese, vegetables or sauteed Spinach in place of the mince filling.

    This Low-Carb Solution to Egg in a Hole Recipe can be an excellent addition to a healthy weight loss diet. They’re not only low-carb and low in calories but also high in protein and fiber that keep you feeling full.

    I’m really excited to share this recipe with you.
    So, Bismillah let’s get started and Check it out Low Carb Egg in a Hole Recipe and printable version here!!

    I have also posted Chocolate Date Bars recipe  and Vegetable Fried Brown Rice recipe which are another easiest & tastiest version of Healthy Eating. Do check it out as well.

    Put your own spin on it. And lemme know how it turns out. Post a photo on Facebook (Recipestable) or Instagram on Twitter so I can see how lovely yours turn out.

    Happy Healthy Eating!!
    Do you have another name for this classic breakfast? Please leave a comment below, and let me know!

  • Homemade Shami Kabab Paratha Rolls: Weeknight Dinner Fix

    Shami Kabab Paratha Rolls

    Start your Suhoor meal with my Shami Kabab Paratha Rolls Recipe with freshly made raita or a cup of Chai.

    Shami Kabab Paratha Rolls Recipe
    Photo: Shami Kabab Paratha Rolls 

    This Shami Kabab Paratha Rolls Recipe is one of those meals of which most of the components can be prepared in advance and then put together quickly to serve as and when needed. It is always a hit with people of all ages, and perfect for those lazy afternoons when you cannot be bothered to cook something from scratch but want a warm and filling snack to comfort you. I always have a batch of parathas and shami kababs in my freezer specifically for such instances.

    Shami Kabab Paratha Rolls Recipe
    Photo: Shami Kabab Paratha Rolls 

    Its an economical fast food meal that goes well as an appetizer or side dish. Here’s a perfect Shami Kabab Paratha Rolls that you can make these easily at home, no doubt that in half an hour, you can serve your family these delicious paratha rolls in a unique and imaginative way. Do try it!!

    Shami Kabab Paratha Rolls Recipe
    Photo: Shami Kabab Paratha Rolls 

    Check it out the Shami Kabab Paratha Rolls Recipe and printable version below!!

    Shami Kabab Paratha Rolls Recipe

    This Shami Kabab Paratha Rolls Recipe is one of those meals of which most of the components can be prepared in advance and then put together quickly to serve as and when needed. It is always a hit with people of all ages, and perfect for those lazy afternoons when you cannot be bothered to cook something from scratch but want a warm and filling snack to comfort you.
    Prep Time 10 minutes
    Cook Time 15 minutes
    Total Time 25 minutes
    Servings 2
    Author Bushrah | Recipestable

    Ingredients

    • 2 Whole Wheat Paratha you can use ready made Frozen Paratha
    • 4 Shami kababs
    • 1 egg
    • 1 onion thinly sliced
    • 1 to mato thinly sliced
    • 1/2 cup lettuce leaves torn
    • 2 tablespoon mayonnaise
    • 2 tablespoon chili garlic sauce
    • 2 teaspoon green chili sauce
    • few lemon wedges
    • oil for shallow frying

    Instructions

    Directions

    • Cook paratha’s on a hot griddle until crispy on both sides.
    • Keep warm and set aside.
    • Beat egg in a small bowl.
    • Dip shami kabab’s in egg then fry in hot oil for 2 minutes or until golden brown.
    • Remove from the oil and absorbent on kitchen paper.
    • Apply mayonnaise on paratha’s.
    • Put two shami kabab’s on each paratha.
    • Top with onion, tomato slices and lettuce leaves.
    • Drizzle chili garlic and green chili sauce over them.
    • Roll them tightly and secure with a wooden pick. Delicious Shami Kabab Paratha Rolls are ready to serve.

    Notes

    Serving Suggestions:
    Serve with French fries and Chili Garlic Sauce.

    I have also posted Hot and Spicy Kebab Paratha Roll which is another easiest & tastiest version of making dinner. Do check it out as well.


    Put your own spin on it. And lemme know how it turns out. Post a photo on Facebook (Recipestable) or  on Twitter so I can see how lovely yours turn out.


    Happy Cooking!!

    If you like this post, Please Subscribe to my blog and let me know your feedback by commenting below.. I have lots more recipes to share with you.

  • Lip Smacking Cheesy Chicken Cups Recipe

    Lip Smacking Cheesy Chicken Cups Recipe

    An EASY comfort food recipe with just few ingredients and ready in 30 minutes!! Lip Smacking Cheesy Chicken Cups with a cheesy filling are sure to be a family favorite. Great for breakfast, dinner, snacks, a party appetizer or anything in between!!

    Cheesy Chicken Cups Recipe
    Cheesy Chicken Cups

    Cheesy Chicken Cups

    I had some extra chicken cooked and was looking to use it in a super fast and easy recipe. Since I also had few slider buns in my fridge, this fit the bill perfectly. I love the idea of the Slider cups (I can’t wait to get creative and try other things with that concept) and the filling was ooey-gooey, warm and cheesy. This is a very quick and simple way to get that comfort food taste/feeling.

    Here is my first try. I was thrilled they turned out just right.  They look so Lip smacking and appetizing (thus the name Lip Smacking Cheesy Chicken Cups). These are just as beautiful as they are delicious. My taste buds are going crazy, and I cannot wait for the next course in this meal.
    For a change of pace from your average dinner, this Cheesy Chicken Cups fits the bill! Unusual as it may be, once you take a bit, you will be reminded of some of your favorite chicken recipes. This is cheesy, flavorful, and will be loved by the whole family. Try making it tonight!

    Cheesy Chicken Cups Recipe
    Cheesy Chicken Cups yes!  Please give me one moment. All righty – I’m good now. I had to take a break to stare at these little beauties

    Extra Cheesiness Alert

    Alright, lets move to the cheesiness of this recipe.  


    Cheesy chicken filling, extra cheese on top and pepper flakes all stuffed up in a crispy slider bun shell.  Slider Buns are great for so many appetizers.  I used regular sized muffin tins, so I used bun half per cup, overlapping the corners so that all the edges are covered.   This whole recipe is sure to leave you stuffed and satisfied!

    Cheesy Chicken Cups Recipe
    Cheesy Chicken Cups Recipe

    What I Love About The Cheesy Chicken Cups?

    What I love about these Cheesy Chicken Cups – they are SO SIMPLE.  Seriously, simple ingredients, and half an hour are all it takes to make these Lip Smacking Cheesy Chicken Cups!   They are very good and easy to make, filled with a delicious cheesy chicken filling that everyone will love. We normally have all these items on hand. Mini Slider Buns make great cups for these cheesy treats. You can also use any leftover chicken for this.

    Cheesy Chicken Cups Recipe
    Cheesy Chicken Cups Recipe

    If you serve these at your Iftar Party or next get together , you may want to make a few a double batch – your guests will love them too!

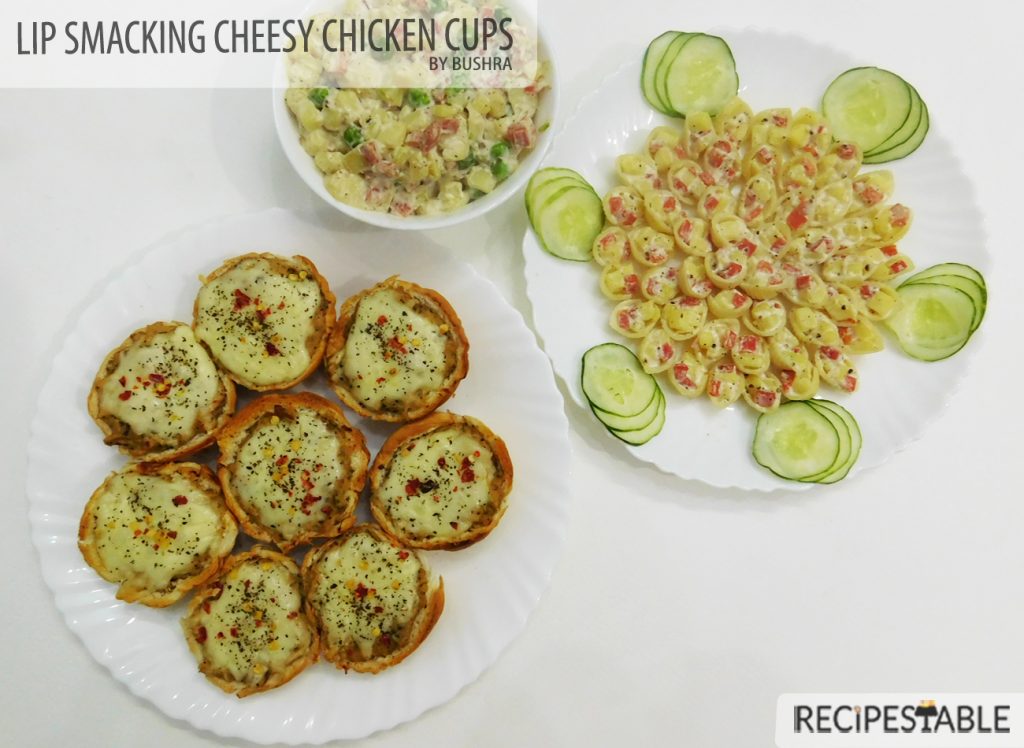
     Cheesy Chicken Cups with Pasta Salad
    Cheesy Chicken Cups with Pasta Salad that are hearty enough to serve for dinner.

    Bismillah let’s get started. 
    Check it out Hot and Sour Noodles Recipe and printable version here!!

    Lip Smacking Cheesy Chicken Cups Recipe

    Lip Smacking Cheesy Chicken Cups – baked to perfection in muffin tins! Great for holidays and lunch boxes – it’s portable and makes for easy serving!
    Prep Time 15 minutes
    Cook Time 15 minutes
    Servings 12
    Author Bushra Waheed

    Ingredients

    • 6 mini slider buns

    For Cheesy Chicken Filling:

    • 1 cup boiled chicken shreded
    • 1 small onion chopped
    • 1 tablespoon plain flour
    • 1 cup milk
    • 1/2 cup cheddar cheese
    • 2 tablespoon butter
    • 1 teaspoon black pepper freshly ground
    • 1 teaspoon dried basil
    • 1/2 teaspoon red chili flakes
    • salt to taste

    For Topping:

    • 1/2 cup grated cheese
    • red pepper flakes
    • dried or fresh basil

    Instructions

    • Preheat oven to 180 degrees C.
    • Lightly greased a muffin pan with non-stick cooking spray or butter.

    To Prepare the Chicken Filling:

    • Melt butter in a frying pan over medium heat.
    • Fry onion till soft and translucent. Now add the plain flour and stir well.
    • Stir in the milk and cook for 2-3 minutes or until sauce is thickened.
    • Season with salt, black pepper, red chili flakes.
    • Stir in the shredded chicken and keep stirring for few minutes or until well combined.
    • Add cheese and dried basil and give it a good stir.
    • Turn the heat off.

    To Assemble the Cheesy Chicken Cups:

    • Cut buns into halves and put each half into the prepared muffin pan.
    • Press the buns into the holes to form cups.
    • Spoon chicken filling evenly into cups.
    • Sprinkle remaining cheese over them.
    • Top with chili flakes and dried basil (optional).
    • Bake for 12 to 15 minutes or until cheese is melted and they turn golden brown.
    • Take it from the oven. Remove from the muffin pan.
    • Lip Smacking Cheesy Chicken Cups are ready to serve. ENJOY!!

    I have also posted Buffalo Chicken Cheese Balls Recipe and Mini Pizza Cups Recipe which are another easiest & tastiest version of Comfort Food. Do check it out as well.

    Put your own spin on it. And lemme know how it turns out. Post a photo on Facebook (Recipestable) or Instagram on Twitter so I can see how lovely yours turn out.

    Happy Cooking