Tag: restaurant style

  • Hot and Sour Noodles Recipe – Just Like the Restaurants Make It

    Hot and Sour Noodles Recipe – Just Like the Restaurants Make It

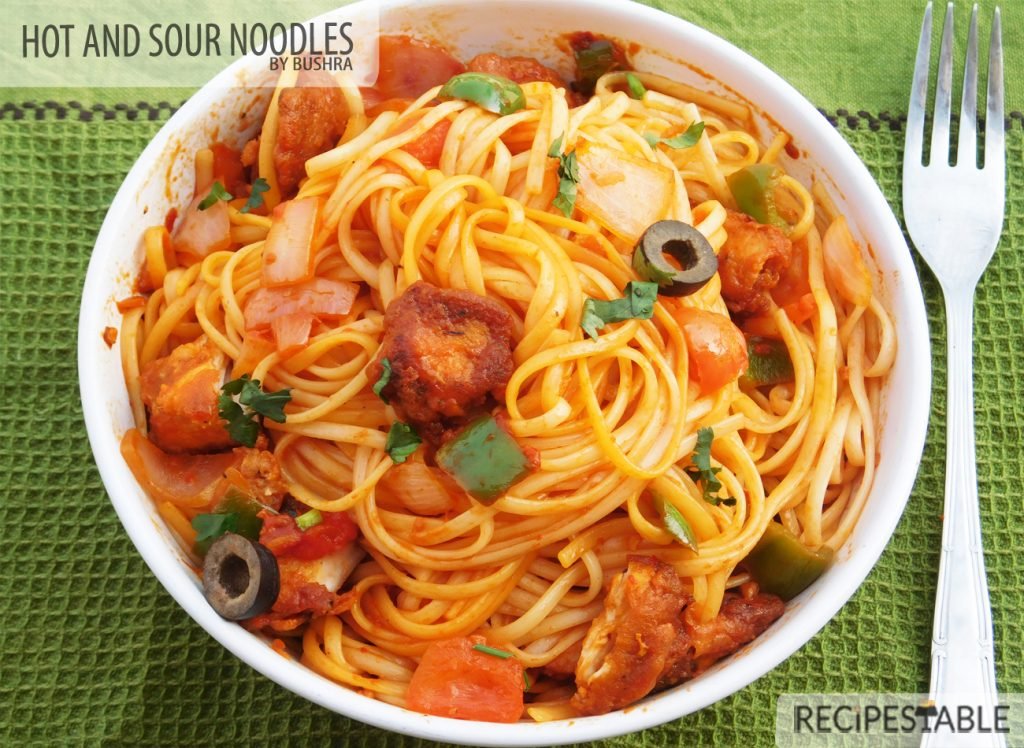
    Who needs takeout when homemade tastes better and you’re in control of the ingredients. Next time when you crave Chinese food, instead of take-out, make this quick, easy and Incredibly delicious hot and sour noodles. Perfect comfort food and a a hearty meal, full of veggies, egg noodles and fried chicken, that’s ready in under 30 minutes!

    Hot and Sour Noodles Recipe
    Hot and Sour Noodles Recipe – Just Like the Restaurants Make It

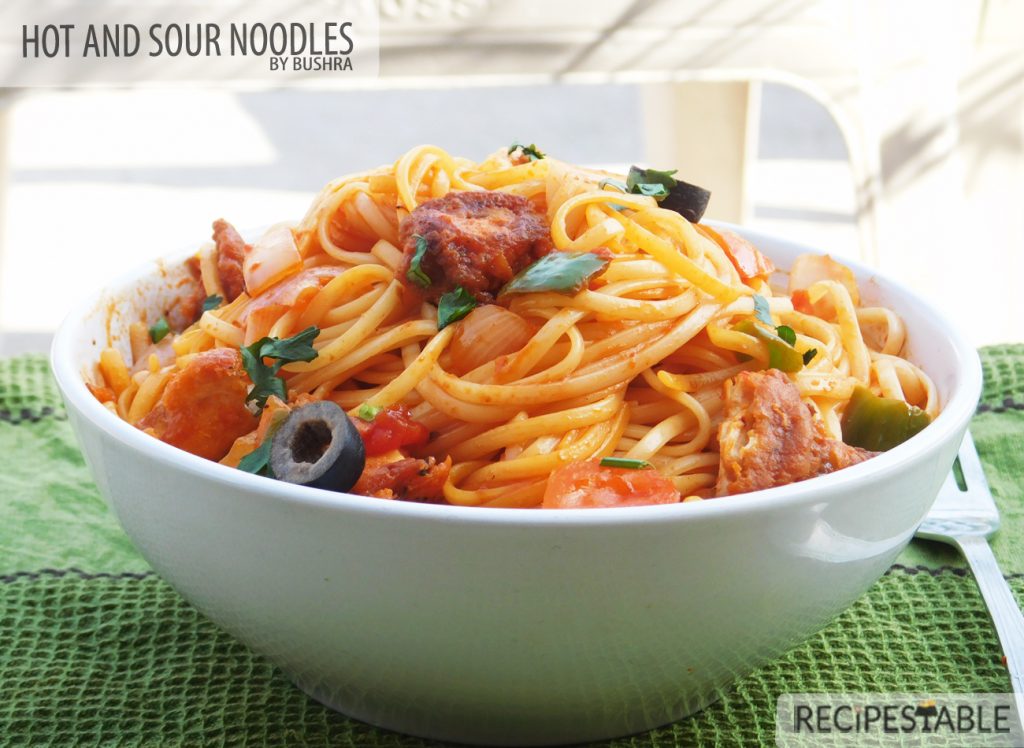
    This Hot and Sour Noodles Recipe makes a bright and healthy dinner for a small family. There are layers and layers of flavors in these easy noodles that are ready in 30 minutes. Soy sauce, hot pepper sauce, vinegar, ginger- garlic, red chili and tomato sauce coat the noodles beautifully. They’re hot and sour with a very subtle heat from the ginger and hot pepper sauce. Fried Chicken, Onion, Capsicum add texture and crunch. Olives and tomato add bright color.
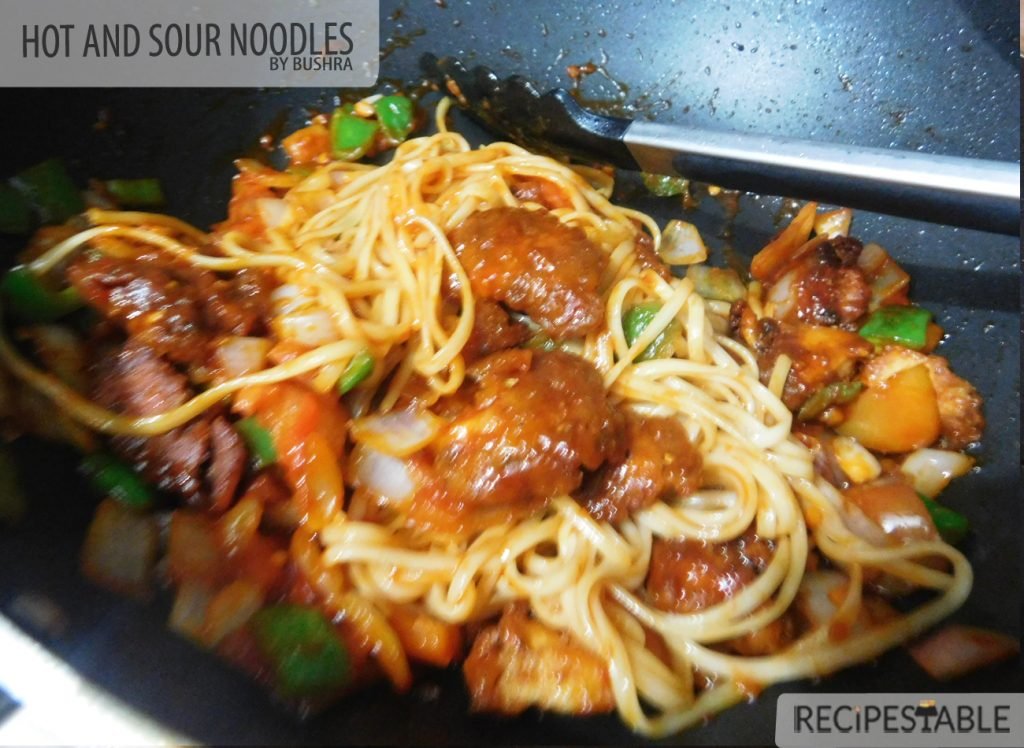
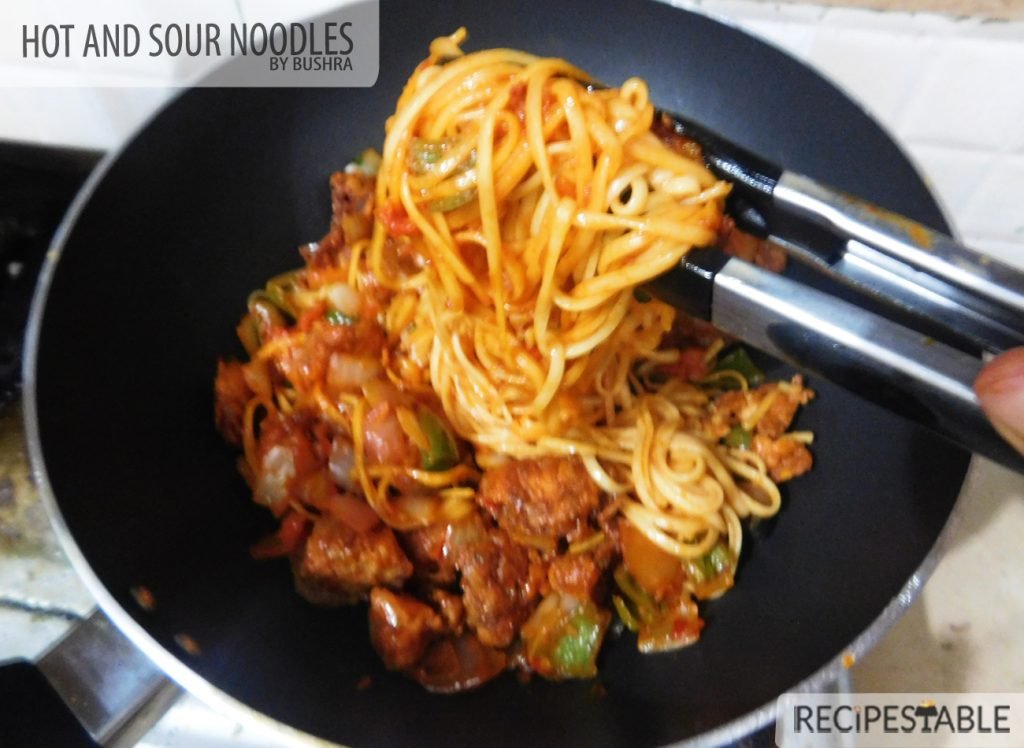
    I love the hot, spicy, salty, savory, garlicky and the slippery noodles. It’s all about the combination of textures and flavors — there’s tangy sauces, crispy fried Chicken, zesty vegetables, salty Egg noodles and chili flakes for heat.

    A bowl of hot and sour slurping goodness. _ Just Like the Restaurants Make It!

    These noodle bowls are a lightning fast dinner that the whole family is sure to enjoy. They are surprisingly easy to make from scratch, and you don’t need to worry about the questionable sodium ingredients that are listed in the store bought version.

    What makes hot and sour Noodles HOT?

    The heat in this hot and sour noodles comes from red pepper flakes and hot pepper sauce. The noodles has to be on the hotter side. The sourness comes from adding vinegar right at the end. If you add the vinegar in the beginning or towards the middle, the vinegar will evaporate during cooking. Which is why we add the vinegar right at the end.

    These noodles will be your new go-to. Take it to work for lunch, take it to cookouts, make it for your family dinner. Trust me – you’ll knock their socks off with this one.

    Bismillah let’s get started. 

    Ingredients in Hot and Sour Noodles?

    This Hot and Sour Noodles recipe is quick, requires few ingredients and is great for those days when you don’t have a lot of time to cook. The list of ingredients is so simple – red chilli flakes, ginger, garlic, onion, capsicum, tomato, chicken, soy sauce, hot pepper sauce, vinegar and egg noodles of course. These are things that are probably already in your pantry so its a quick and easy dinner to make which is ready in under 30 minutes. Perfect for last minute dinners!

    How to make the Restaurant Style Hot and Sour Noodles (step by step instructions):

    However, in order to get the restaurant like taste and texture it needs to be cooked in a certain way and this step by step recipe of Hot and Sour noodles explains it with photos and detailed instructions. The tips and serving ideas given after directions will also help you avoid some common mistakes which can ruin the dish.

    Hot and Sour Noodles Recipe
    1. Prepare the ingredients (this is the most time-consuming part of the recipe, but then it goes very quickly):
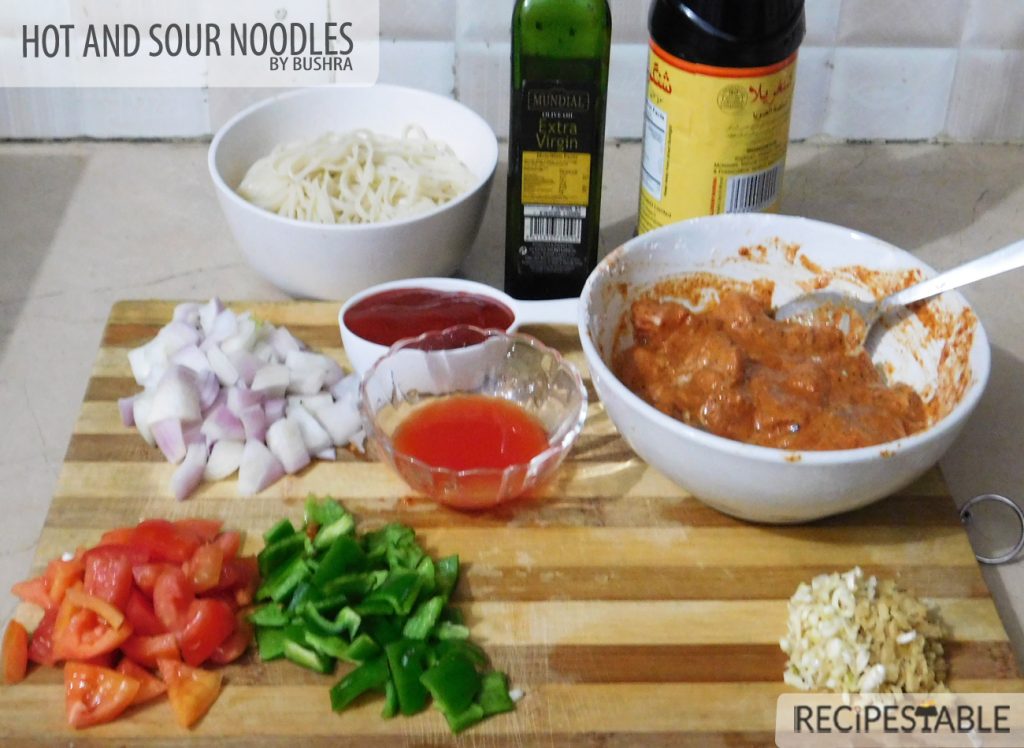
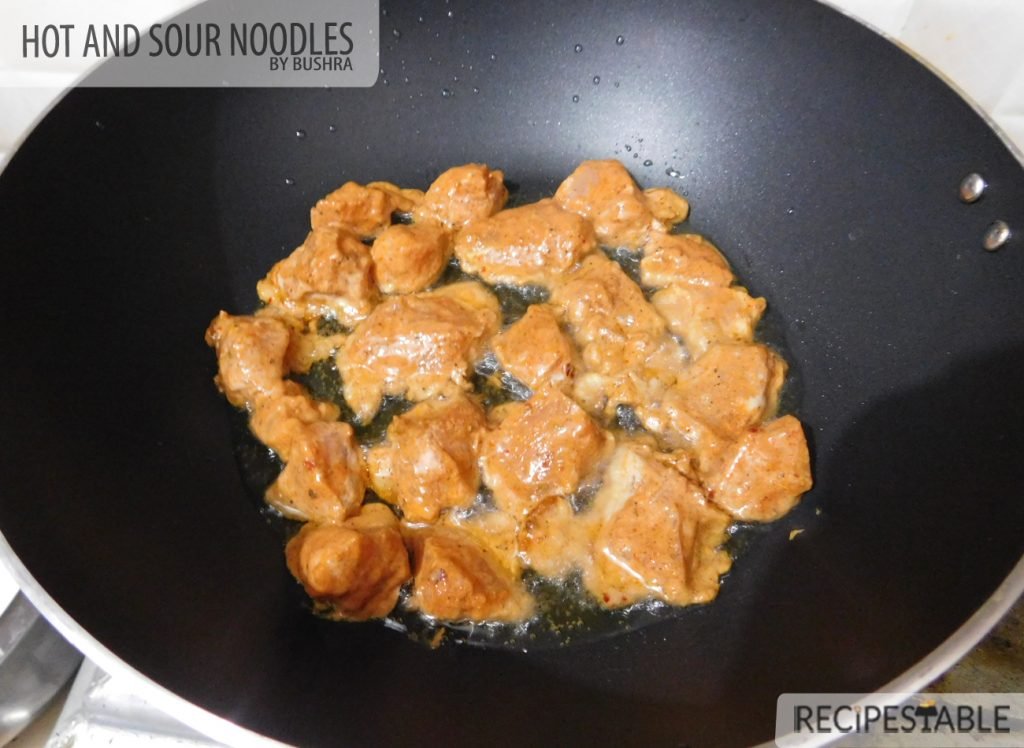
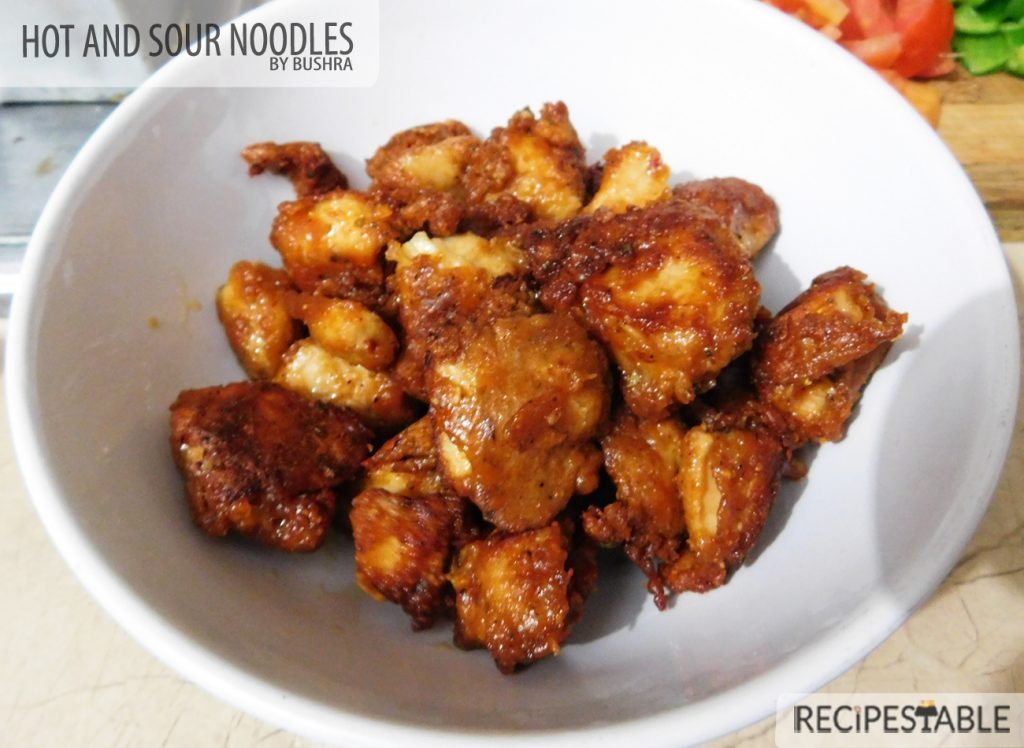
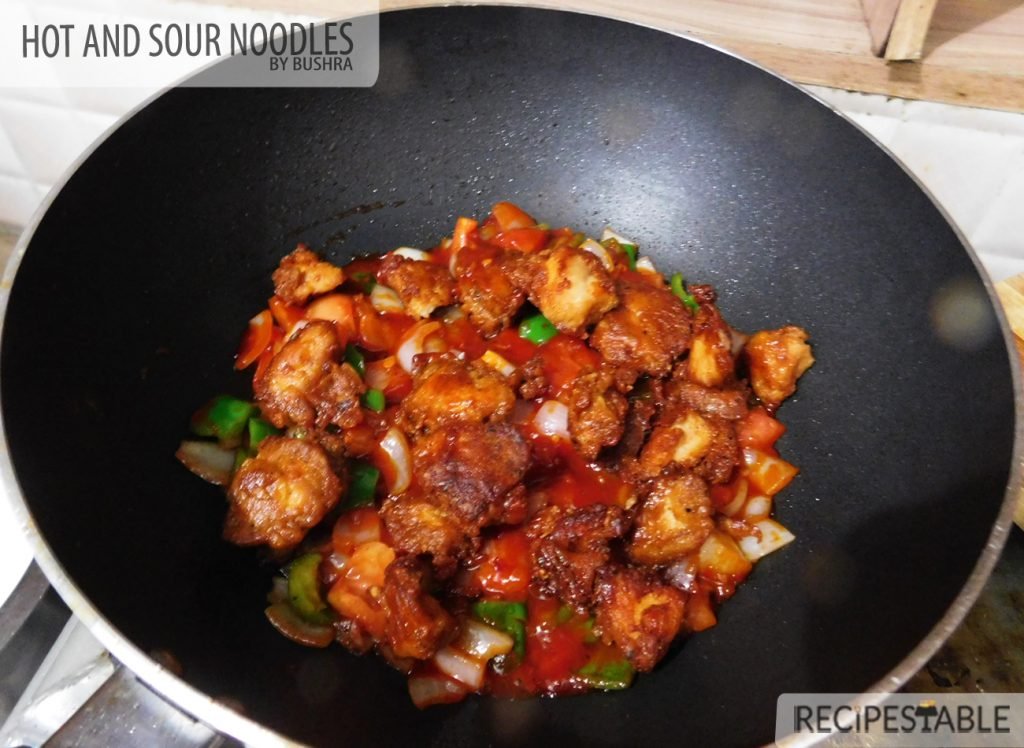
    Chicken: Cut chicken breast into 1-inch cubes, mix with ginger garlic paste, egg white, Cornflour, soy sauce, chili sauce, vinegar, red pepper and salt to taste.  You can cook right away or leave to marinate for 30 minutes to blend flavors.
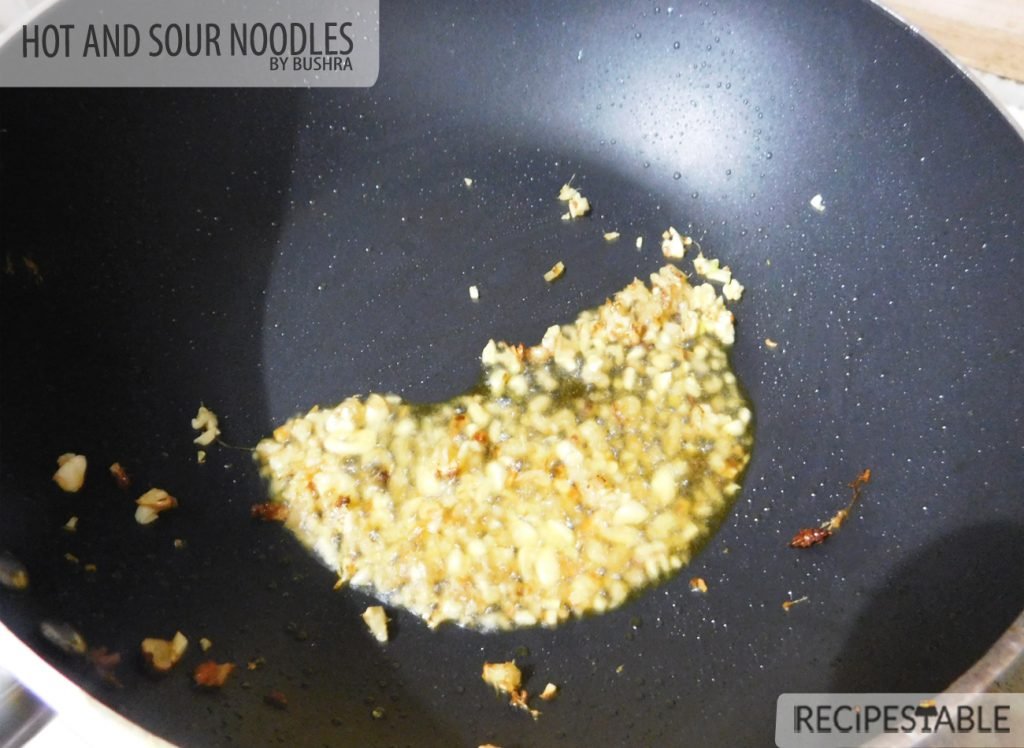
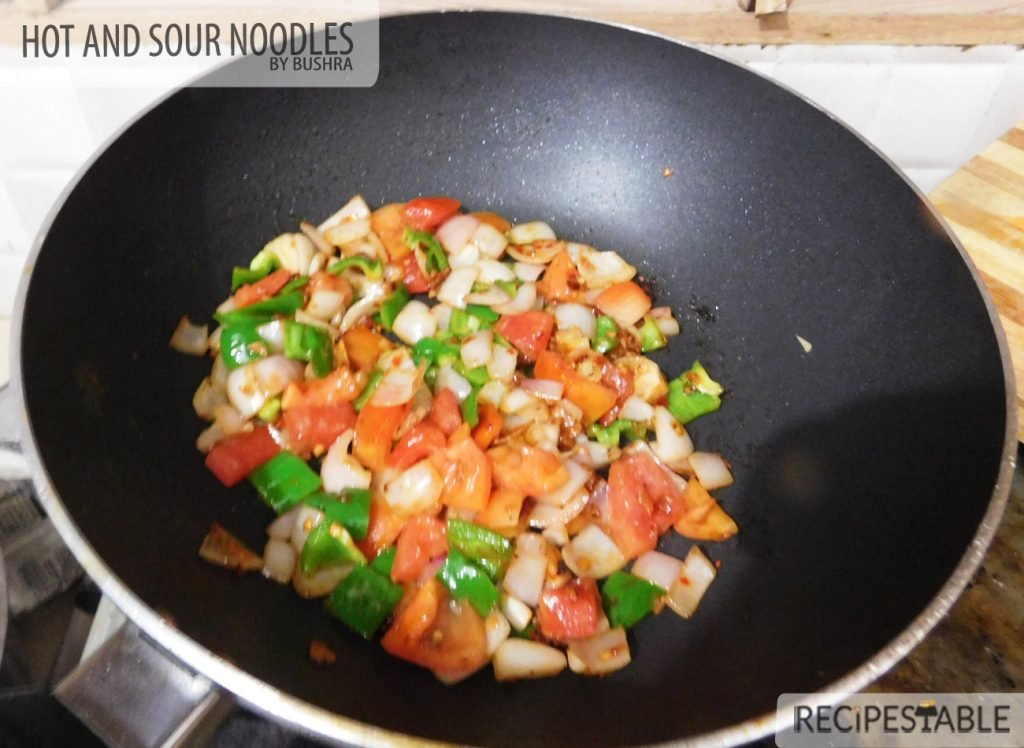
    Vegetables: Chopped ginger and garlic and cut onion, capsicum, and Tomato in ¼ inch cubes and keep aside.
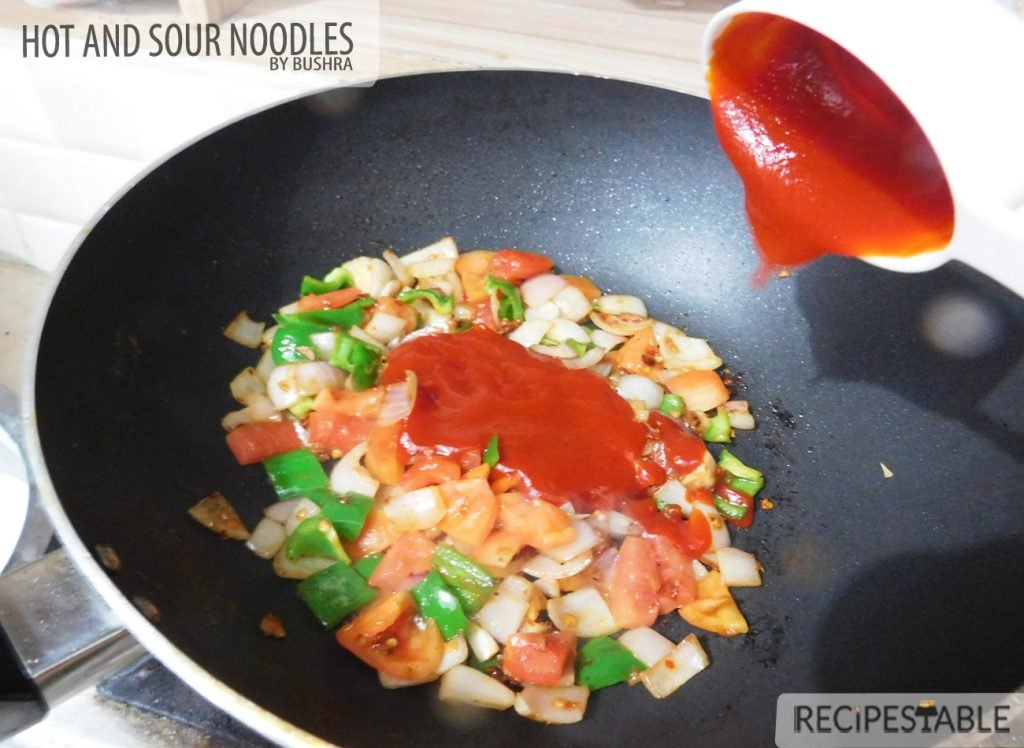
    Hot and Sour Sauce: In a small bowl, whisk all the sauce ingredients, 1/2 cup water, 1/2 cup tomato ketchup, 2 tablespoon hot pepper Sauce, 1 tablespoon soy sauce, 1 tablespoon Vinegar, salt and Pepper to taste, chili flakes. Set aside.
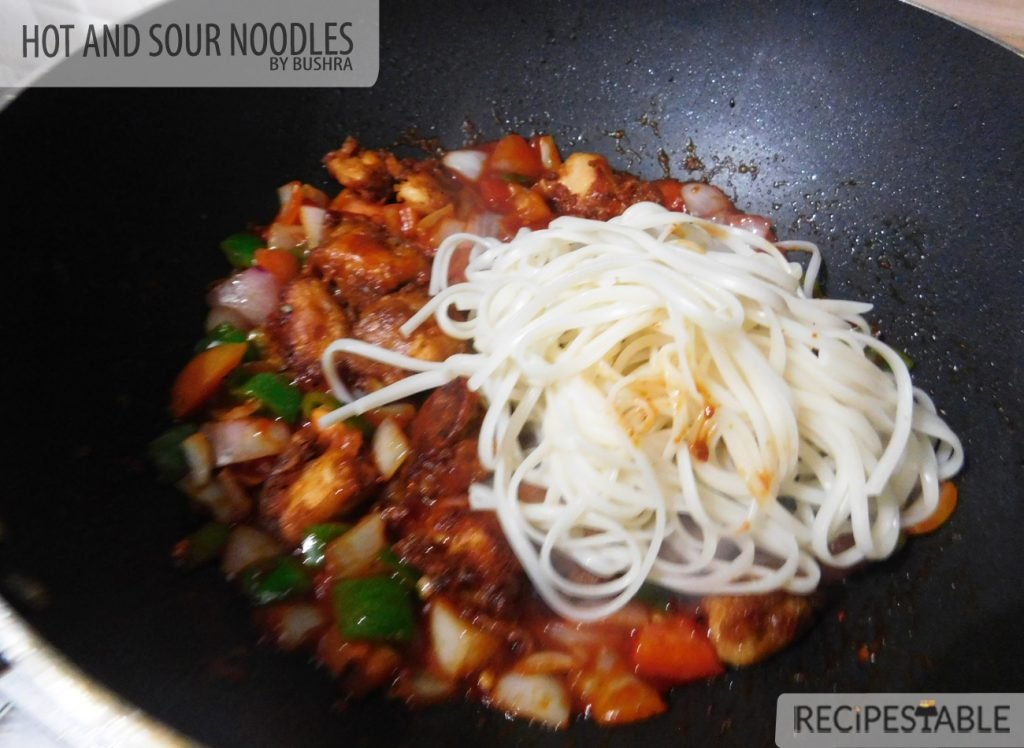
    Egg Noodles: Cook the egg noodles in boiling water, add a little salt, cook for 5-7 minutes, then strain.

    Check it out Hot and Sour Noodles Recipe and printable version here!!

    Restaurant Style Hot and Sour Noodles Recipe

    This Restaurant Style Hot and Sour Noodles Recipe makes a bright and healthy dinner for a small family. There are layers and layers of flavors in these easy noodles that are ready in 30 minutes.

    • 1/2 packet Egg Noodles (boiled)
    • 1 medium onion (cut into cubes)
    • 1 large tomato (de-seeded and cut into cubes)
    • 1 green bell pepper (shimla mirch, cut into cubes)
    • 4 tablespoon Olive oil
    • 1 teaspoon chopped ginger
    • 1 teaspoon chopped garlic

    Ingredients for Marination:

    • 250 gm boneless chicken (cut into cubes)
    • 1 teaspoon ginger garlic paste
    • 1 egg white
    • 2 tablespoon Cornflour
    • 1 tablespoon soy sauce
    • 1 tablespoon Chili Sauce
    • 1 tablespoon Vinegar
    • 1 teaspoon red pepper (crushed)
    • salt to taste

    Ingredients For Sauce:

    • 1/2 cup water
    • 1/2 cup tomato ketchup
    • 2 tablespoon hot pepper Sauce
    • 1 tablespoon soy sauce
    • 1 tablespoon Vinegar
    • salt and Pepper to taste
    • chili flakes (optional)
    • black olives (optional)
    1. Cut all vegetable into cubes and keey aside. Then cut the chicken into cubes and marinate with ginger garlic paste, egg white, Cornflour, soy sauce, chili sauce, vinegar, red pepper and salt. Mix well and keep aside.


    2. Bring a large pot of salted water to a boil. Cook egg noodles for 5-7 minutes, until they reach desired consistency. Drain the noodles. Rinse in a bowl of cold water and drain again. Keep aside.

    3. Heat 4 tbsp olive oil in wok or large frying pan over a medium to high heat.


    4. Fry marinated chicken pieces for 8-10 minutes or until cook from inside and golden brown from outside.


    5. Remove from the oil and keep aside.

    6. Now saute chopped ginger garlic in the remaining oil for 30 seconds or until aromatic.


    7. Add half cup of water, hot pepper sauce, soy sauce, and chili flakes. Let it simmer for 2 minutes or until all water dries up.


    8. Add the onion and keep stirring on high flame. Season with salt and pepper.


    9. Add capsicum and stir fry together for 1 minute then add tomato and turn the heat on high.


    10. Add the tomato ketchup and vinegar, continue to stir fry for 1 minute.


    11. Adjust the seasoning to taste and add fried chicken.


    12. Toss in the noodles,breaking up the clumps as you drop them in and continue to stir fry for 30 seconds.

    13. Pour in 2 tablespoons of water and let it steam up through the ingredients ,helping to cook the veg and to warm the noodles through.

    14. Remove the pan from the heat.Sprinkle some chili flakes over it and top up with olives.


    15. Serve up straight away to appreciate the kick. ENJOY!!


    1. To make non-sticky noodles, do not overcook them in step-2. Cook them until they are cooked but not mushy. Do not forget to pour cold water over noodles after cooking to remove excess starch.
    2. This is my absolute favorite ingredients combination, but feel free to use any vegetables or protein that you have on hand. Instead of chicken, you can use firm tofu to make it vegetarian. You can also use prawns or thinly sliced beef.
    3. As for the vegetables, don’t omit the crispy onion and capsicum. For variation, add baby corns, red and yellow capsicum, mushrooms or any other vegetables of your choice.
    4. You can use either green chilli sauce or hot pepper sauce sauce per your preference. Hot Pepper sauce sauce will help you get the typical restaurant color.
    5. Adjust quantity of hot sauce and soy sauce per your taste. Do not add more soy sauce as it tastes bitter and it will change the taste of noodles.
    6. All vegetables and noodles must be tossed over over high-flame to get restaurant like taste and texture.
    7. This dish is not very good after reheating because the noodles absorb the sauce and become mushy and the whole dish is just a little dry. If you want to make it ahead, store the sauce separately and combine only before serving.

    Other versions of this dish:

    Put your own spin on it. And lemme know how it turns out and do take a few seconds to rate it! I would love to see your recreations so tag me on instagram @recipestable or Facebook (Recipestable) or on Twitter so I can see how lovely yours turn out.

  • Restaurant Style Tawa Fish Recipe

    Restaurant Style Tawa Fish Recipe

    This Restaurant Style Tawa Fish is a thing of beauty, with its crispy golden crust and spicy, juicy flesh inside. It’s a super quick and can be ready in less than 20 minutes and tastes just like the restaurant’s you would think it’s  take-out. Recreate your favorite Tawa Fish cheaper and better at home!

    Restaurant Style Tawa Fish

    One of the things I find so much fun about food blogging as a living is putting myself up to the challenge of recreating restaurant favorites at home. Although often involving a series of trial and error, it’s very rewarding to come up with a homemade version that’s pretty close to, if not better, than the original.

    Restaurant Style Tawa Fish

    The way I cook this Tawa Fish is a little unorthodox – but it’s a highly effective, no fail method! A blast of heat in a griddle pan and a basting of mustard oil and fish own juices does wonders for plain fish.

    This Restaurant Style Tawa Fish is made with a basic combination of rice flour and desi seasonings. Don’t be fooled by the simplicity of this dish. The fish fries up crispy and delicious. The cooking time is so short that the smell — which, if your fish is fresh and not funky, should not be overpowering — will dissipate quickly. And in the meantime, you have an easy dinner of spicy fish with a toothsome crust, anointed with rice flour and spices, mustard oil , perfumed with fresh Lemon wedges, paired with apricot chutney and naan.

    Restaurant Style Tawa Fish

    Rohu and Catla (Thela) Fish are two excellent choices for Tawa Fish, but baam, cod, or any other mild white fish should work fine. You can use any fish but my preference is rohu, skin on or off, as long as it is not too thick. Be careful not to overcook thin fillets.
    If the fish starts browning too fast, reduce the heat and add a splash of mustard oil to prevent scorching, or squeeze in the juice of half a lemon.

    How to cook Perfect Tawa Fish every time!

    1. Use a heavy duty Griddle (Tawa) – it DOES NOT need to be a non stick griddle or pan! Contrary to popular belief, it’s not just about using a non stick pan. A thin, cheap non stick pan will cause the fish to be in closer and harsher contact with the stove, causing the fish to brown unevenly in the few minutes it’s on the stove. Some crispy patches, some not so crispy ones.
    Use a heavy duty Griddle (Tawa), like a cast iron pan or a good quality, heavy non stick frying pan. I love my Griddle Pan, it heats better, and more evenly, which really helps to get an even, golden, crispy crust.

    2. Heat the pan first before adding the oil – I have NEVER had problems with fish sticking to the pan since I adopted this technique. It’s just an easy way to ensure the oil is hot enough but not too hot (a common mistake people make).
    To do this, just heat a dry pan, and as soon as you see small wisps of smoke, add oil, swirl to coat base, then immediately add the fish.

    3. If it sticks a bit, do not move until it naturally releases – Most fish fillets will initially stick to the pan as they start to cook (unless you’re using so much oil you’re basically shallow frying them). But it naturally releases once the surface is cooked and golden.
    So give it a nudge, and if it doesn’t want to move, then it means that it’s not ready. So just leave it and try again in another 15 seconds or so!

    4. Pat fish dry – Dry fish = crispier surface. Especially important for thawed frozen fish.

    5. Keep Basting with a little oil and its own juices –  it will gives nice juicy flavor.

    Packed generously with a crunchy coating but there is so much more to it than what meets the eye! The flavor beneath the crunchy golden layer is delicious because of the magical spice that hits you with the first bite!! This is one fish that everyone is sure to love. Using this Restaurant Style Tawa Fish recipe, you’ll get perfectly flavored tawa fish.

    Restaurant Style Tawa Fish Recipe
    Restaurant Style Tawa Fish

    That’s one last picture before you go. So that you can get a close, hard look at this Restaurant Style Tawa Fish and get tempted. Oh so so tempted.

    Restaurant Style Tawa Fish
    Restaurant Style Tawa Fish Recipe

    Sauces or Chutney For Tawa Fish

    With well seasoned crispy golden texture outside and spicy juicy flesh inside, I don’t need anything more than a squeeze of fresh lemon. But I am a sauce person, so I never turn down a sauce even for fish! Here are my few favorite Sauces for Tawa Fish:

    • Apricot Chutney (Khubani Ki Chutney) for Tawa Fish – this is an absolute ripper. Totally restaurant worthy, few ingredients, the secret is to soak apricots before preparing the chutney.
    • Mint Tamarind Chutney for fish – a shop stopper kind of chutney with its tangy Minty flavor – made with fresh mint leaves and tamarind pulp.
    • Imli ki Chutney – traditionally thought of for fried fish but equally good with the Tawa Fish.
    • Data Chutney / Khajoor ki Chutney – This smooth chutney, which balances the tartness of vinegar with the sweetness of dates, is a delicious accompaniment to the Tawa Fish & Naan.
    • Brown Chutney – for Fish Mellow down the spice of fish by adding a little brown chutney.
    • Lemon Chutney  for Fish. Lip-smacking chutney to add more zesty flavor to Tawa Fish. It’s finger licking good!

    This Restaurant Style Tawa Fish recipe is ‘sea’riously worth trying , it’s cheaper to make at home and tastes so much better!

    Restaurant Style Tawa Fish Recipe

    A blast of heat in a griddle pan (tawa) and a basting of mustard oil does wonders for plain fish fillets. Give this Restaurant Style Tawa Fish Recipe a try, it’s cheaper to make at home and tastes so much better!

    • 1-1/2 kg Fish Fillets
    • 4 tbsp Lime Juice ((Khatti))
    • 2 tbsp Lemon Juice ((limo))
    • 1 tbsp ginger paste ((adrak paste))
    • 2 tbsp garlic paste ((lehsan paste))
    • 2 tbsp crushed red chili ((Kutti Lal Mirch))
    • 1 tbsp coriander powder ((sukha Dhainya))
    • 1 tbsp cumin seeds ((crushed zeera))
    • 1 tbsp all spice powder (( garam masala))
    • 1/2 teaspoon turmeric powder ((optional))
    • 1/2 teaspoon carom seeds (( ajwain))
    • salt to taste
    • 2 tbsp plain flour
    • 1 tbsp rice flour
    • 1 tbsp water
    • oil for shallow frying
    • chaat masala (for sprinkling)

    For Garnishing:

    • Lemon Slices
    1. Cut off the fish head off directly behind the gills, if desired.
    2. Now rinse he fish of, inside and out, in cool water then cut fish into halves, lengthwise.

    3. Pat fillets dry with a paper towel.

    4. Sprinkle lime juice and lemon juice over the fish.
    5. Put salt and ginger-garlic paste on the fish.
    6. In a small bowl, mix together the rice flour, plain flour, red chili, coriander powder, cumin powder, all spice powder, turmeric powder, carom seeds (ajwain) with 1 tablespoon water and make a smooth paste.

    7. Dab this paste onto fish and refrigerate for 6 hours or preferably overnight. Remove from the fridge and strain excess water.

    8. Heat a large griddle (tawa) or cast-iron pan over high heat.

    9. Remove from the fridge and strain excess water.
    10. Heat a large griddle over medium heat.
    11. When the pan is hot, add the mustard oil ( you can use any cooking oil).

    12. Put the fish on the griddle, skin side down (if applicable), laying them down away from your body.

    13. If fish fillets have skin, press down gently with a spatula for about 20 seconds to prevent curling.

    14. Lower heat to medium and let sizzle until fish is crispy, golden and caramelized around edges, about 5-7 minutes.

    15. Carefully flip fillets and add some mustard oil to the griddle.

    16. Tilt the griddle slightly to let the mustard oil pool at one end.

    17. Use a spoon to baste the fish with the mustard oil.

    18. Continue basting until golden all over and cooked through, 2-3 minutes more, depending on the thickness of your fish.

    19. Take it out in a serving platter when crispy and golden brown from outside and cooked from inside.

    20. Sprinkle chaat masala and lemon juice over it.

    21. Garnish with Lemon slices.

    22. Your Restaurant Style Tawa Fish is ready to eat. ENJOY!!

    Serve hot with naan, Laccha onion, apricot chutney and lemon wedges to add more taste.

    If I may, ahem, say so myself, I’ve had quite a few successes with copycatting recipes. Here are a few of my favorites if you’d like to check them out:

    English Style Fish & Chips Recipe
    Fish Tikka Boti Recipe
    Tangy Pan Fried Fish Recipe
    Fish Steak Recipe
    Crumb Fried Fish Recipe
    Sweet and Sour Fish Recipe


    In the mood for more Pakistani food? Forget takeout and make your very own “combo plate” with Restaurant Style Lahori Mutton Karahi, Mutton Nihari Spicy Mutton Pulao , Angara Qeema.

    Put your own spin on it. And lemme know how it turns out and do take a few seconds to rate it! I would love to see your recreations so tag me on instagram @recipestable or Facebook (Recipestable) or on Twitter so I can see how lovely yours turn out.

  • Flavorful Chinese Restaurant-Style Recipes You Can Make at Home

    Flavorful Chinese Restaurant-Style Recipes You Can Make at Home

    Chinese food in Pakistan isn’t quite the same as the real thing; it’s more of a cultural offshoot developed to cater to Pakistani tastes. But the general cultural nuances remain — if perhaps in a more deep-fried form. Whether or not this cuisine can really be called “Chinese” is a subject for debate, but at least we can all agree on calling it “delicious.” You don’t need to order take-out or head to your favorite Chinese restaurant every time you get a yen for Fried Rice or Chinese Soup or Sweet and Sour Chicken.
    Below are a few staples of foods found on Chinese menus across the country. Soon enough, you’ll be replicating your favorite dishes right in your own kitchen!

    Chinese Restaurant-Style Recipes You Can Make at Home

     1. Chicken Chow Mein  – The top selling side dish, just a few ingredients and ten minutes until you’re enjoying this delicious Chow Mein.

    Chicken Chow Mein Recipe
    Photo: Chicken Chow Mein Recipe

     2. Hot and Sour Soup  –  This Hot and Sour Soup recipe rivals the very best you’ve had at your favorite Chinese restaurant. Thoroughly authentic, thoroughly delicious. Although it’s a nice soothing winter soup that will warm you up immediately, I really enjoy eating it throughout the year.

    Easy Hot and Sour Soup Recipe
    Photo: Easy Hot and Sour Soup Recipe

    3. Spring Rolls – Who doesn’t love a hot, fried Chicken spring rolls? Light, airy and crispy Chicken spring rolls. A Must TRY Recipe!!

    Chicken Spring Rolls Recipe
    Spring Rolls Recipe

    4. Egg Flower Soup – Traditional Chinese Egg Flower Soup, Also known as Egg Drop Soup recipe with a secret ingredient that makes it Divine. Sesame oil adds a lovely aroma to this soup. This is the popular dish in chinese restaurants in which lightly beaten eggs are streamed into the broth at the very end.

    Egg Flower Soup Recipe
    Photo: Egg Flower Soup Recipe

    5. Chicken Manchurian with Egg Fried Rice –  Do I need to say more? No, but I will. It’s one of the famous chinese recipe, batter fried chicken pieces are just one of the delicious things you can make manchurian in. The king of all Chinese recipes, this copycat has been viewed over a half a million times in less than a year. This dish is a must try!

    Chicken Manchurian
    Photo: Chicken Manchurian

    6. Chinese Dry Beef Chili –  A simple and quick Chinese Dry Beef Chilli Recipe that is going to give you the taste of authentic Chinese food. Super hot and fragrant Chinese dry beef chilli. Give it a try!!

    Chinese Dry Beef Chilli Recipe
    Photo: Chinese Dry Beef Chilli Recipe

    7. Chicken Shashlik Sticks –  This popular dish is a staple at Chinese restaurant buffets.
    Delicious, tender, juicy Chicken Shashlik Sticks the whole family loves in less than 40 minutes! These Shashlik Sticks are EASY to make and so versatile.

    Chicken Shashlik Sticks recipe
    Photo: Chicken Shashlik Sticks

     8. Kung pao Beef – Named after a court official or “Kung Pao,” Kung Pao Beef is a flavorful chinese dish made with diced beef, peanuts and chili peppers.

    Kung Pao Beef recipe
    Photo: Kung Pao Beef recipe

    9. Mongolian Beef   This Mongolian Beef recipe rivals your favorite Chinese restaurant version. This delicious stir fry whipped up in minutes, crispy, sweet and full of garlic and ginger flavors you love from your favorite Chinese restaurant.
    Recipe Link here:

    Mongolian beef recipe
    photo: Mongolian beef recipe

    10. Fried Wonton
    Crispy, crunchy, and delicious appetizer? Check, check, check. These fried wontons are the perfect party food. Make some and watch them disappear – fast! They’re easy and fun to put together and can also be made vegetarian so everyone can enjoy them.

    Fried Wonton Recipe
    Photo: Fried Wonton Recipe

    11. Beef and Broccoli  – One of the original favorites! Didn’t think I would forget this one, did you? How do restaurant chefs get the beef so tender in this dish? They “velvet” the meat in hot oil before combining it with broccoli in an oyster-flavored sauce.

    Beef and Broccoli recipe
    Photo: Beef and Broccoli recipe

    12. Sweet and Sour Chicken  – My new favorite (shh…don’t tell  Chicken Manchurian I am totally cheating on it!) The sauce is the star of the show in this dish. Most versions use pineapple juice and combine it with vinegar, sugar, ketchup or tomato paste and pineapple chunks, green bell pepper and pineapple chunks. The warmed sauce is poured over chicken cubes that have been coated with batter and deep-fried.

    Sweet and Sour Chicken with Noodles
    Photo: Sweet and Sour Chicken with Noodles

    13. Chinese Almond Chicken – Almond Chicken is another winner to add to that list. Almond chicken is one of the most popular Chinese recipes here in the Pakistan. Much like its close cousin Cashew Chicken, silky smooth, juicy and tender chicken cubes are stir-fried in the savory Chinese brown sauce, with vegetables such as sugar snap peas (or snow peas), carrots, with lots of almonds.

    Chinese Almond Chicken
    Chinese Almond Chicken

    14.Szechuan Chicken – Juicy and Flavorful stir fry chicken cooked in chile paste make this Szechuan Chicken vibrant, healthy & deliciously spicy! And it only takes 25 Minutes to make from start to finish. Szechuan Chicken has just the right amount of heat, due the chile paste and fresh ginger ingredients, that spicy and mellow lovers alike will.

    Szechuan Chicken
    Szechuan Chicken

    15. Chinese Plum Sauce – Not going to lie I dip most entree items in this at least a little. 😉

    Chinese Plum Sauce Recipe
    Chinese Plum Sauce Recipe

    Am I missing a dish you love? Let me know! If you made it all the way through this list you must love Restaurant-Style Copycat Recipes!

  • Karahi Butter Chicken Recipe (Makhni Karahi)

    Karahi Butter Chicken Recipe (Makhni Karahi)

    Assalam-o-Alaikum, how are you? Yep, it’s been almost a month since we met. First things first…I had my mid-term exams, so I was lil busy with studying and the other stuff in my life.
    However this gap between us wasn’t planned. I was hoping to catch up with you in between, but it didn’t work out.

    My celebration “yay, exam is over!”

    Finally exams are over I’m finally free to do whatever I want (blogging, eating yummy food, spending time with my plants)😌
    Anyways, the first thing I wanted to do was to just pop in here & say a quick hi to you. I hope you roll into the weekend in a joyous mood! May your day be as fantastic as you are!

    Karahi Butter Chicken (Makhni Karahi)

    To release some exams stress, I made this butter karahi by twisting my Father’s recipe…delicious goodness. Can’t wait to share it with you. He used to make the best food. He was an expert on how to make a really good Butter Chicken. Saying that, I’m not too sure how He would feel about this Karahi Butter Chicken version that I’m currently loving.

    Karahi Butter Chicken (Makhni Karahi)
    Karahi Butter Chicken (Makhni Karahi)

    Name me one thing that doesn’t taste better with a few dollops of cream, a knob or so of butter, a splash of milk, lashings of ghee.

    I’ll bet you’re having a hard time thinking up something. It’s a truth of the culinary world that these things all enhance the eating experience of many foods, sweet and savory foods alike and curries are no exception to this.

    Karahi Butter Chicken (Makhni Karahi)
    Karahi Butter Chicken (Makhni Karahi)

    Take this Karahi Butter Chicken ( Makhni Karahi), for example. I’ve taken the traditional Chicken Karahi dish and made it the way we all love, with the very flavours we all adore and then finished it up with a hearty amount of butter. What does this do? This fills every bite with the very same flavours we desire, along with a moreish, rich bite to it. Every bite tastes like a buttery dream, I tell you. This creamy and velvety gravy will melt in your mouth. 

    Karahi Butter Chicken (Makhni Karahi)
    Karahi Butter Chicken (Makhni Karahi)


    Bismillah, let’s begin!

    Check it out the Karahi Butter Chicken (Makhni Karahi) recipe and printable version here!!

    Karahi Butter Chicken (Makhni Karahi)

    This creamy and velvety Karahi Butter will melt in your mouth. So Delicious!!

    • Ingredients;
    • 2-1/2 lb skinless chicken (cut in small pieces)
    • 1 small onion (finely chopped)
    • 2 medium size tomatoes (chopped)
    • 2 tablespoon grated gignger
    • 1 tablespoon lemon juice
    • 1 cup garlic water (grind 1 garlic blub with 1 cup of water)
    • 5 green chilies finely chopped
    • 1 cup plain yogurt
    • 1/2 cup unsalted butter
    • 1/2 cup fresh cream
    • 1/4 cup cooking oil
    • 4 tablespoon ground cashews (optional)
    • 1 tablespoon cumin seeds roasted & crushed
    • 1 tablespoon coriander seeds roasted & crushed
    • 2 teaspoon salt or according to taste
    • 2 teaspoon crushed red chilies
    • 1 teaspoon dried fenugreek leaves (optional)
    • 1 teaspoon garam masala
    • 1/2 teaspoon freshly ground black peppers

    For Garnishing

    • 2 tablespoon chopped coriander leaves
    • few green chilies
    • lemon slices
    1. Heat 4 tablespoon oil in a deep wok(karahi) over medium heat.
    2. Add onions and cook until the onions are translucent and soft but have not started to brown.
    3. Add grated ginger and cook for 1 minute.
    4. Add chicken. Stir and cook for 5 minutes or until chicken start to change color.
    5. Now add tomato, lemon juice and garlic water.
    6. Add roasted coriander, cumin, salt and red chilli powder while stirring.
    7. Keep it covered for 10-15 minutes or until all water dries up.
    8. Remove the lid. Increase the flame.
    9. Add yogurt and cook it on a higher flame for 5 minutes.
    10. Add grounded cashews, fenugreek leaves, green chilies, and black pepper.
    11. Cook and stir well.
    12. Add fresh cream and cook until sauce is thickened and oil comes on top.
    13. Now add fresh coriander and ginger slices.
    14. Sprinkle garam masala over it.
    15. Add a knob of butter and stir well.
    16. Delicious Karahi Butter Chicken (Makhni Karahi) is ready to serve. Enjoy! YUM YUM!!

    Serving Suggestions:
    Serve with hot naan and Mint Raita.

     Recipe Note’s

    My final words before I give you the recipe – my Father was an expert at Karahi’s and he always told me what with chicken Karahis, you must work fast. Have all the ingredients chopped up beforehand if you can, and cook the entire thing on high heat. Stirring constantly is imperative, otherwise you risk burning the curry or having it stick to the pan. Skimp on half the oil or butter if  you must, but I wouldn’t recommend it as a Karahi dish isn’t truly a Karahi dish without its butter or oil.


    I have also posted Restaurant Style Lahori Mutton Karahi and Kebab Karahi which are another easiest & tastiest version of making Karahi at home. Do check it out as well.  It’s finger lickin’ good. You’ll be coming back for more. 


    Put your own spin on it. And lemme know how it turns out. Post a photo on Facebook (Recipestable) or  on Twitter so I can see how lovely yours turn out.


    Happy Karahi Making!!

    If you like this post, Please Subscribe to my blog and let me know your feedback by commenting below.. I have lots more recipes to share with you.

  • Restaurant Style Lahori Mutton Karahi Recipe

    Restaurant Style Lahori Mutton Karahi Recipe

    Isn’t the Title Interesting?Look down at the Picture just scrumptious and believe me the recipe is so simple.

    Restaurant Style Lahori Mutton Karahi Recipe
    Photo: Restaurant Style Lahori Mutton Karahi

    Restaurant Style Lahori Mutton Karahi

    Today, I come up with a new recipe: “Restaurant Style Lahori Mutton Karahi “. It is one of most popular Pakistani dish that you will come across almost every Pakistani restaurant menu anywhere in the world.

    Lahore is famous for its culturally enriched food items.. impossible to be on diet there 😛 lol. People here in Lahore are known as food lover, which is why many new restaurants are constantly opening.

    As all of you know, I always tempted to try popular dishes at home, and perfecting it as possible as I could. One among them was this “Restaurant Style Lahori Mutton Karahi”.

    Restaurant Style Lahori Mutton Karahi Recipe
    Photo: Restaurant Style Lahori Mutton Karahi

    Mutton Karahi is a specialty of Lahori food, this dish is made by stir-frying small cubes of lamb or mutton with tomatoes, green chilies, ginger, and garlic in a karahi, the wok-like pan that gives the dish its name.I made it with a less fat. But taste was so good and excellent. Meat was so tender, juicy, deeply marinated in the masala (gravy) and uniformly cooked.

    Photo: Restaurant Style Lahori Mutton Karahi recipe
    Photo: Restaurant Style Lahori Mutton Karahi

    Very simple and lip smacking dish for anyone who love to have spicy treat occasionally. Its so simple that if you have ingredients in hand then Ready get set go.

    Restaurant Style Lahori Mutton Karahi
    Photo: Restaurant Style Lahori Mutton Karahi

    It pairs the best with butter naan, or simply plain naan and may be served along with rice, tandoor roti and even homemade chapati’s along with zeera or mint raita and onion rings.

    Let the meat eating begin!

    Check it out the Restaurant Style Lahori Mutton Karahi recipe and printable version below!!

    Restaurant Style Lahori Mutton Karahi

    I always tempted to try popular dishes at home, and perfecting it as possible as I could. One among them was this “Restaurant Style Lahori Mutton Karahi”.It is one of most popular Pakistani dish that you will come across almost every Pakistani restaurant menu anywhere in the world.

    • 1-1/2 kg lamb or mutton
    • 1/2 cup pure butter
    • 1/2 cup plain yogurt
    • 3 to matoes (cut into four pieces)
    • 3 onions (thinly sliced)
    • 4 green chilies (chopped)
    • 2 tablespoon ginger garlic paste
    • 1/2 cup garlic water (mix 1 tsp garlic paste with 1 tsp lemon juice in 1/2 cup of water)
    • 1-1/2 teaspoon red chili pepper (crushed)
    • 1/2 teaspoon turmeric powder
    • 1 teaspoon dried fenugreek leaves (optional)
    • 2 tablespoon cumin seeds (roasted & crushed)
    • 2 tablespoon coriander seeds (roasted & crushed)
    • 1/4 teaspoon black pepper
    • 1-1/2 teaspoon salt or to taste

    For Garnishing

    • 1/2 teaspoon garam masala powder (for sprinkling)
    • fresh coriander leaves (chopped)
    • ginger (cut in julienne)
    • lemon (thinly sliced)
    • tomato (thinly sliced)

    For Serving

    • naan or butter naan

    Method

    1. Melt butter in a deep wok or pan over medium heat.
    2. Fry onions for 3-4 minutes or until transculent.
    3. Add ginger garlic paste and meat. Cook for 5-8 minutes or until meat change its color.
    4. Mix well and don’t add any water.
    5. Meat cooked in its own juice
    6. Cover with lid and cook for 45 minutes on medium heat.
    7. Now add tomatoes, cover it again and cook for another 10 minutes.
    8. Add all spices excpet black pepper, mix well.
    9. Cook on high heat for 4-5 minutes then add yogurt, green chilies and black pepper.
    10. Cook for another 15 minutes or until oil comes on top.
    11. Now add garlic water and cook for 10 more minutes or until meat is tender and gravy is thickened.
    12. Sprinkle garam masala over it.
    13. Garnish with coriander leaves, green chilies, lemon slices, and ginger.
    14. Restaurant Style Lahori Mutton Karahi is ready to serve. ENJOY!!

    Serving Suggestions:
    Serve with butter naan along with raita and ring onions.

    I have also posted Chicken Karahi and Kebab Karahi which are another easiest & tastiest version of making karahi. Do check it out as well.


    Put your own spin on it. And lemme know how it turns out. Post a photo on Facebook (Recipestable) or  on Twitter so I can see how lovely yours turn out.


    Happy Cooking!!

    If you like this Restaurant Style Lahori Mutton Karahi, Please Subscribe to my blog. I have lots more recipes to share with you. And If you make it then let me know your feedback by commenting below.

  • Make Restaurant-Style Boneless Chilli Chicken (It’s Easier Than You Think!)

    Boneless Chilli Chicken

    Boneless chicken are marinated in soya sauce, egg, cornflour, chili sauce and pepper, then deep fried and then seasoned again in sauces.

    It tastes hot, sweet and sour. A very simple dish to cook, but has lot of unhealthy stuff in the restaurant style dry chilli chicken, like ajinomotto, food color and lot of oil since they are deep fried.

    To make this Boneless chilli chicken, I have not used ajinimotto (chinese salt), no food color, yet tastes good. The quintessential Chinese chicken can now be savoured in the comfort of your homes with these few simple steps.Give it a try!!

    Boneless Chilli Chicken Recipe
    Photo: Boneless Chilli Chicken Recipe

    Check it out the Boneless Chilli Chicken Recipe here!!

    Boneless Chilli Chicken Recipe

    • 500 gm boneless chicken (cut into cubes)
    • 2 egg (lightly beaten)
    • 1/2 cup corn flour
    • 1 teaspoon garlic paste
    • 1 teaspoon ginger paste
    • 1 teaspoon pepper
    • salt to taste
    • Oil for deep frying

    For Sauce

    • 1 onions (thinly sliced)
    • 2 green chillies (thinly sliced)
    • 2 tablespoon vinegar
    • 1 tablespoon soy sauce
    • 1 tablespoon chilli sauce
    • 1/2 teaspoon red chili flakes
    • a pinch of salt or to taste

    For Garnishing

    • green chillies (slit)
    • ginger slices
    • green onion (thinly sliced)

    Method

    1. Place chicken in a large bowl.
    2. Add egg, cornflour, garlic and ginger paste, pepper and salt. Mix well to coat evenly.
    3. Cover and marinate for 30 minutes ot blend flavors.
    4. Heat oil in a deep pan oevr medium heat.
    5. Deep-fry the chicken pieces over high heat to begin with and then lower the heat till chicken is cooked through.
    6. Remove from the oil and drain on absorbent paper.
    7. Heat 2 tablespoon oil in a wok or pan.
    8. Add onions and stir-fry over high heat for 4-5 minutes or until they are translucent.
    9. Add the green chillies and stir a few times.
    10. Then add salt, soy sauce, vinegar, and chilli sauce.
    11. Add fried chicken.
    12. Stir to coat evenly. Cook for 2 minutes or until sauce is thickened.
    13. Dish it out. Garnished with the green chillies and green onion. Delicious Boneless Chilli Chicken is ready to serve. ENJOY!!

    Serving Suggestions:
    Serve with Steamed Rice or Fried Rice

    I have also posted Desi Chili Chicken Recipe  which is another easiest & tastiest version of making Chili Chicken. Do check it out as well.


    Put your own spin on it. And lemme know how it turns out. Post a photo on Facebook (Recipestable) or  on Twitter so I can see how lovely yours turn out.


    Happy Cooking!!

    If you like this post, Please Subscribe to my blog and let me know your feedback by commenting below.. I have lots more recipes to share with you.


  • Authentic Dhaba-Style Chicken Karahi Recipe!

    Dhaba Chicken Karahi

    This version of Chicken Karahi is mostly made at roadside shacks (dhaba) in Pakistan and it is truly yummy. Its unique and really tasty. Make this dish when you are short of curry while having guests at your place. Quick Budget recipe. Try this Dhaba Chicken Karahi Recipe and don’t forget to share your experience with us!!

    Dhaba Chicken Karahi recipe
    Photo: Dhaba Chicken Karahi recipe

    Check it out the Dhaba Chicken Karahi recipe and printable version here!!

    Dhaba Chicken Karahi recipe

    • 1-1/2 kg chicken
    • 1 kg tomatoes (chopped)
    • 1 cup oil or ghee
    • 1 inch piece of ginger (thinly sliced)
    • 4 green chilies (thinly sliced)
    • 5 tablespoon ginger garlic water
    • 1 tablespoon lemon juice
    • 1 tablespoon crushed red chillies
    • 1 teaspoon cumin powder
    • 1 teaspoon coriander powder
    • 1 teaspoon black pepper (crushed)
    • salt to taste

    Method

    1. Take a pan and put oil, fry chicken in this oil until turns a reddish colour.
    2. Take a wok and put chopped tomatoes with little bit of water and cook until tomato cooks well.
    3. When tomatoes are done, put fried chicken along crushed red chillies, salt and ginger garlic water (take a bowl and put roughly chopped ginger garlic and water, and use this water) and fry well.
    4. Now add green chillies, ginger, black pepper, cumin seeds and coriander seeds and oil (which we used to fry chicken) and fry well.
    5. Then add lemon juice and cook for 5 minutes on very low heat. Dhaba Chicken Karahi is ready to serve.

    Serving Suggestions:
    Serve with naan, salad and chutney.

    I have also posted Karahi Butter Chicken (Makhani Karahi) recipe which is another easiest & tastiest version of making Karahi at home. Do check it out as well.  It’s finger lickin’ good. You’ll be coming back for more. 


    Put your own spin on it. And lemme know how it turns out. Post a photo on Facebook (Recipestable) or  on Twitter so I can see how lovely yours turn out.


    Happy Cooking!!